


Third-party validation, seed-to-shelf traceability and forging powerful partnerships is how companies are defining a regenerative future.
- Lorem Ipsum, Dolor Sit Amet
Montes sunt pede lectus! Quidem wisi? Animi pulvinar parturient? Perferendis? Recusandae torquent, vel habitasse veniam! Lectus aute dicta ea condimentum.
- Lorem Ipsum, Dolor Sit Amet
Tellus facere quaerat recusandae corrupti? Etiam, officia tempus, morbi ipsum, nisi totam. Lacus voluptates, error malesuada porttitor commodo minim voluptatum, fugit!
Top 10 Emerging Natural
Product Trends Survey

Scroll down
The hotspot "on view - cycle next number (0% to 19%)", located above the large numbers on the canvas, has an On View Cycle – Next interaction. This interaction triggers the slideshow to continuously cycle through the text layers in the group "0% to 19%" at a .01 sec rate. Once it cycles through all the text layers, the last layer in the group is an additional hotspot "on view - stop cycle" which has two interactions applied to it. The first interaction shows the last text layer, "19%". The second interaction hides the "on view - cycle next number (0% to 19%)" hotspot to prevent it from cycling through the group again.
To replace an image, select the png or jpeg on the canvas or in the layers panel and click the "Replace image" button, which is next to the image thumbnail in the design panel. Any applied animations, interactions, image edits, or object states to the original image will carry over to the new one.
Tip: Try to make the new image a similar size and dimension to the image being replaced.
Object states give you the ability to assign various “states” to an element on the canvas. You can also apply object states to images that have been masked to create some really unique effects. In this example the image has a default state and a hover state. In the hover state, the image increases in size. The image is masked to the rounded square shape. Thus, when the user hovers over the image it looks like the image is zooming in as the image is constrained to the masked rounded square shape.
Remove the background of images by simply right clicking on an image and selecting “Remove Background.” In a matter of seconds, the foreground will be detected, and everything else behind it will disappear automatically, leaving behind an image with a completely transparent background.
Masking assets in the studio allows you to transform images and GIFs into virtually any shape you want. To mask an image, place a shape over the image on the canvas. This can be a standard shape (circle, square, triangle) from the Ceros shape tool, or a custom shape you’ve created using the path tool. You can also use PNG images and SVG Icons as masking objects as well. Then, select both the masking shape and original asset by holding down shift and clicking on both objects on the canvas or in your layers panel. With both objects selected, right click and select “Create Mask” from the right click menu. Your original asset will be cropped into the masking shape that you’ve applied.
Create an engaging and interactive landing page to display features using object states, masks, and blending modes.
Template - Professional Services Landing Page
1280px x 2050px

The "On Click- Cycle Next/Previous" interaction triggers the carousel to cycle to the next asset or group of assets in a designated folder or group.


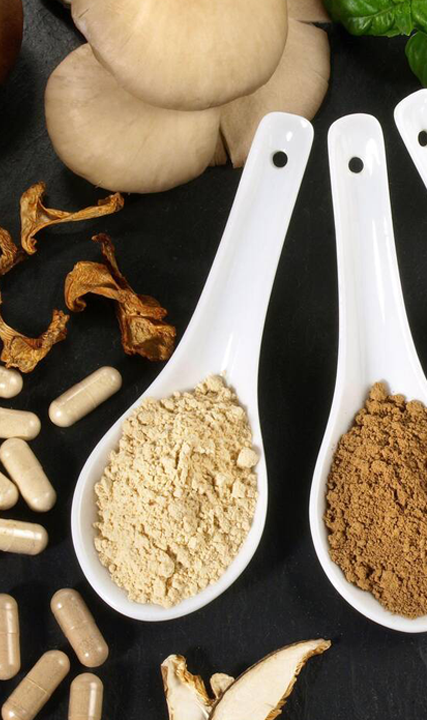

We’ve identified these 10 natural products trends and want to hear from you:
Which do you believe will
have the greatest impact in 2023?