Welcome to Cloud Audit Suite Confidently manage and complete audits faster with intuitive workflows that guide you through every step of the process. Our proven methodology helps ensure your audits comply with UK quality standards. Thomson Reuters partners with Mercia to offer additional industry titles and a familiar process so you don't have to learn a new way to audit. By relying on cloud-based technology, you can securely work from anywhere and access audit data online that updates stakeholders in real time.
The Cloud Audit Suite Process
1 Intro and setup 2 Guided Assurance 3 Engagement Manager 4 Confirmation 5 Get a one-on-one demonstration
Tour menu
1 Intro and setup 2 Guided audit process: Thomson Reuters Mercia 3 Engagement manager 4 Get a one-on-one demonstration
Request a demo
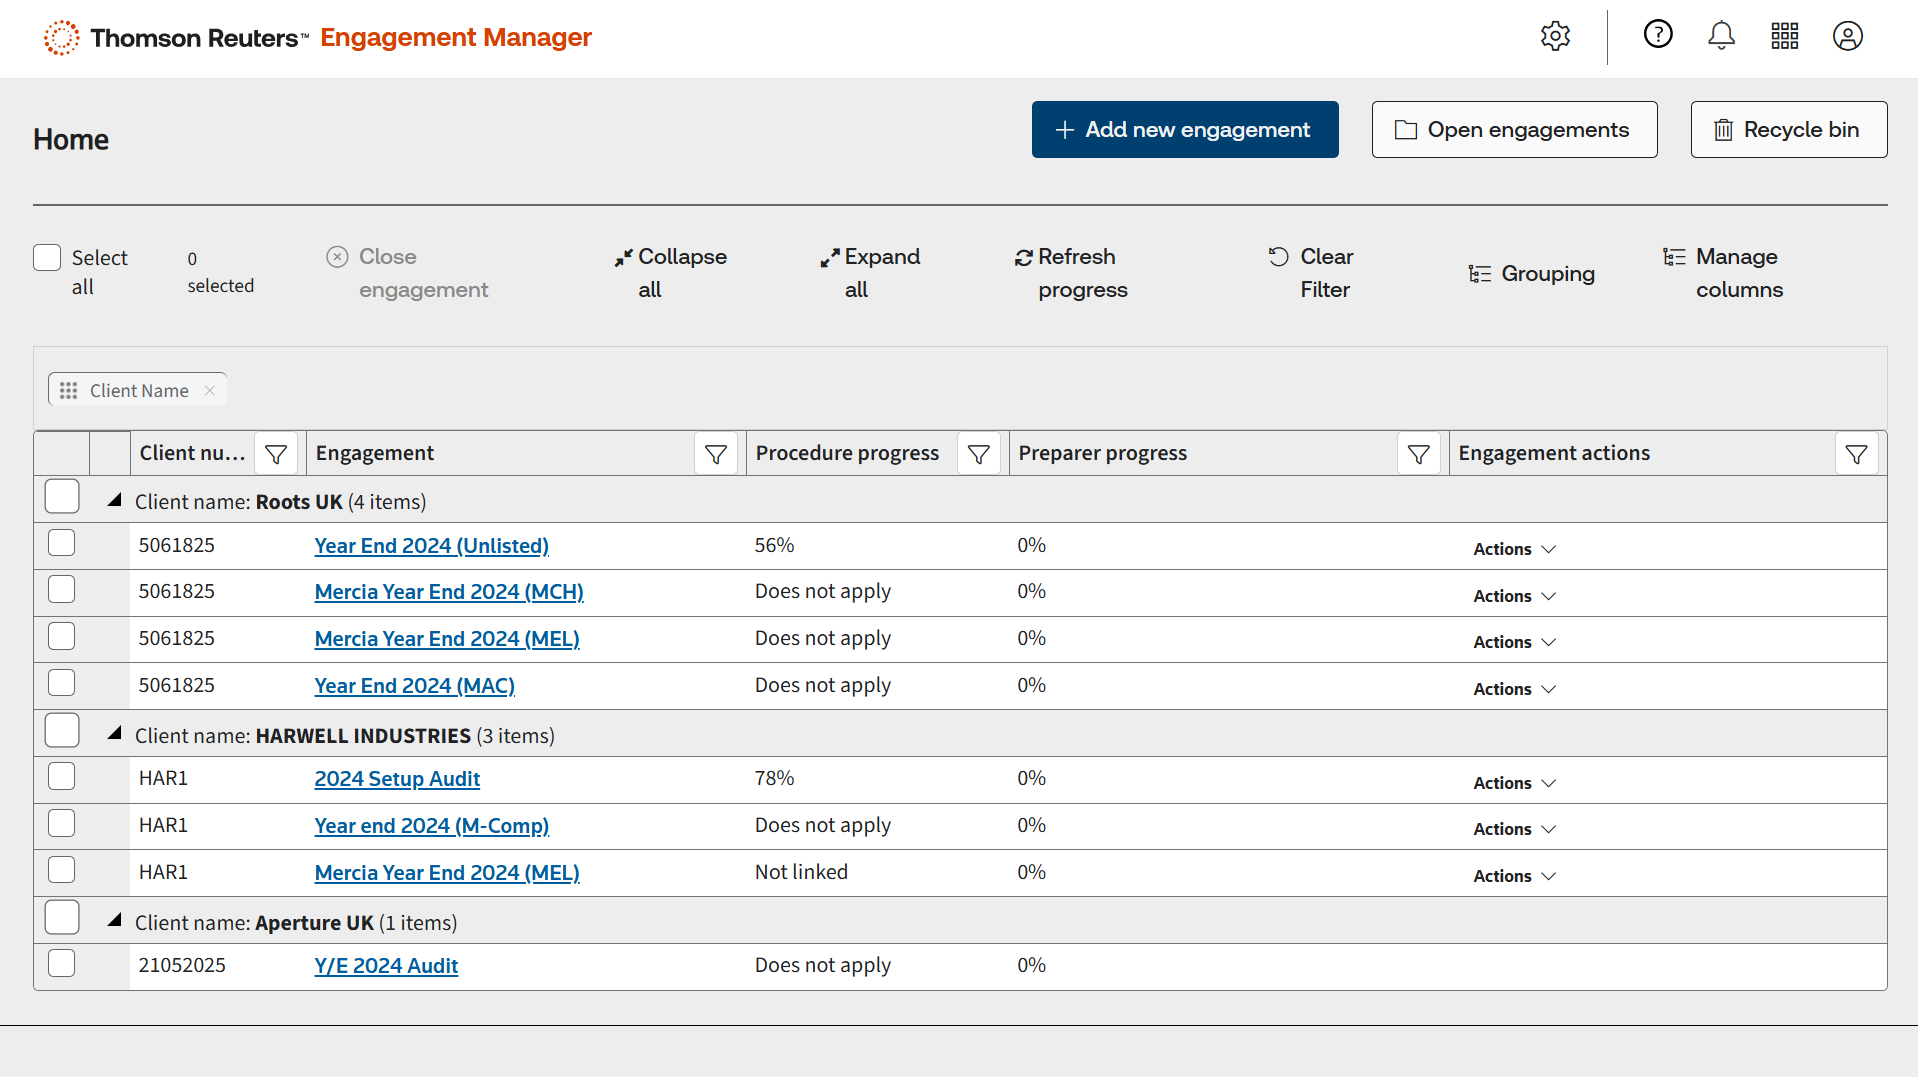
Intro and setup:
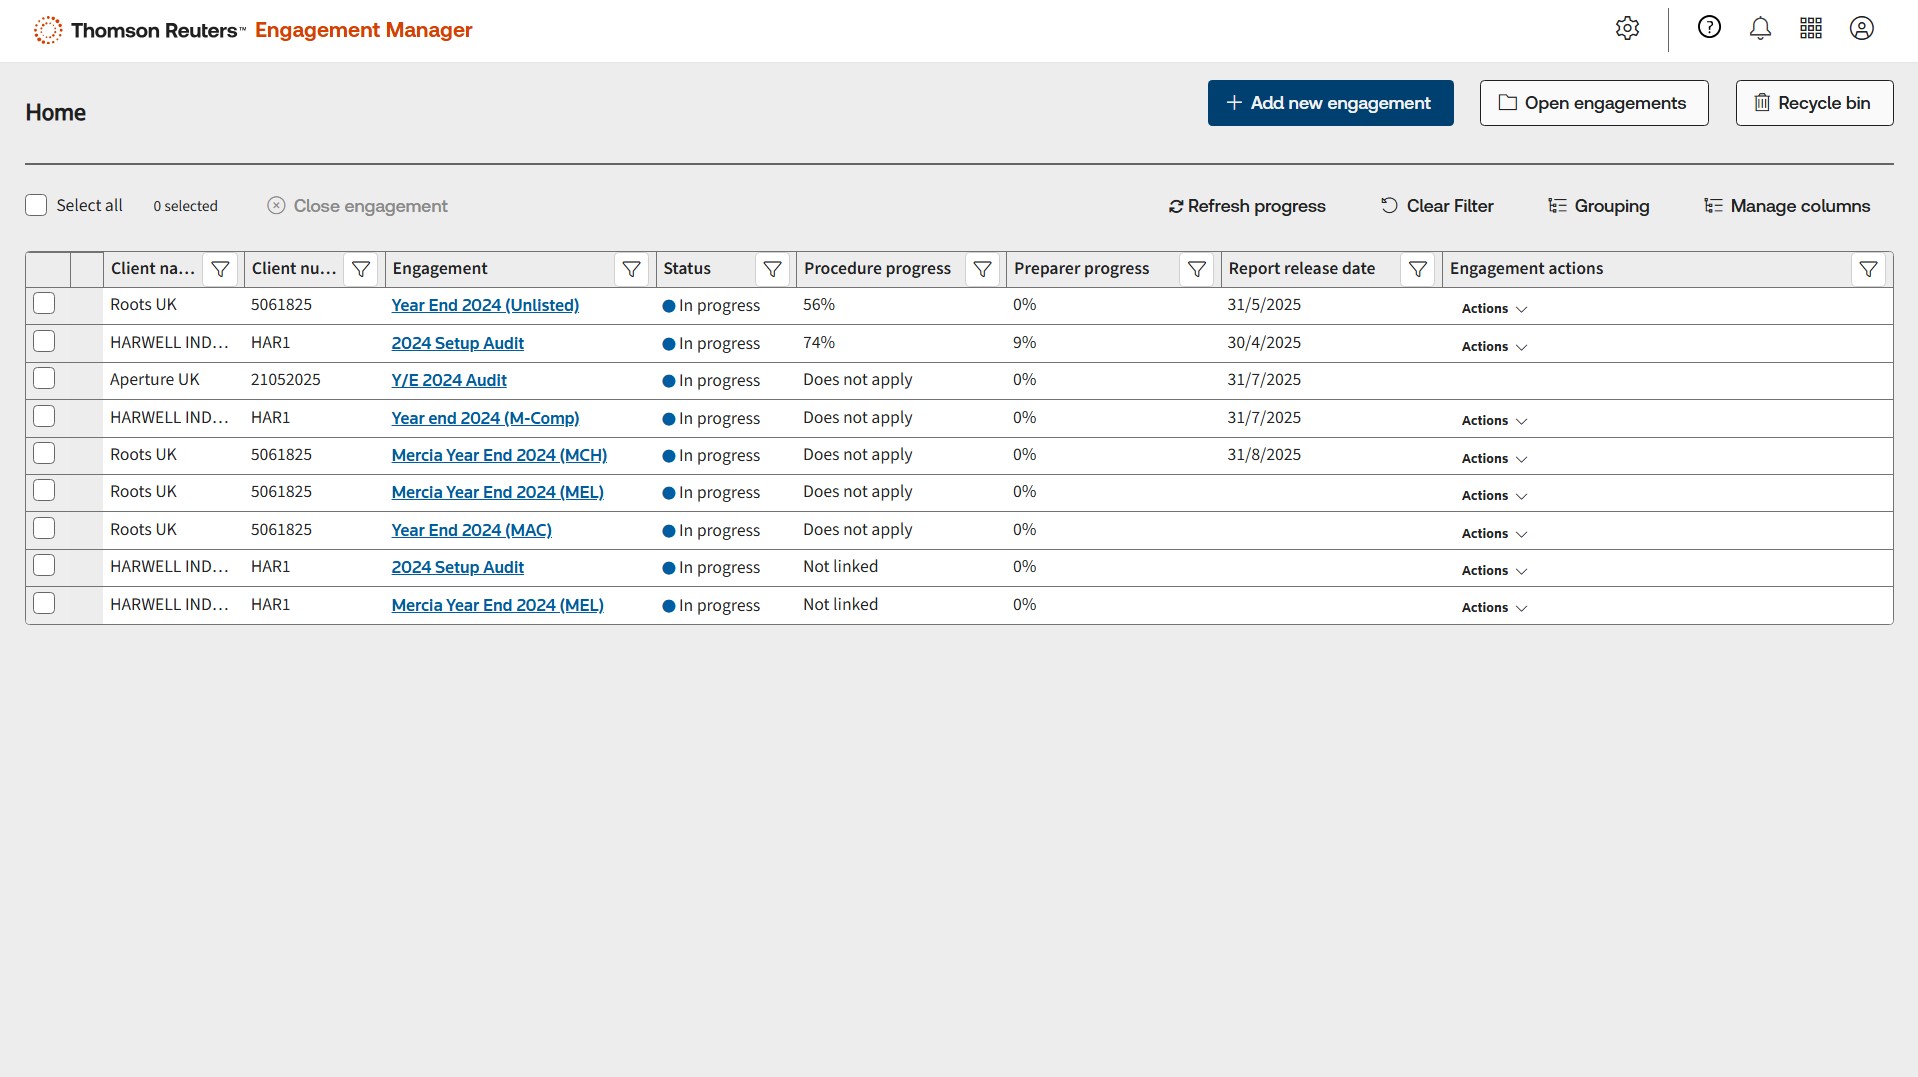
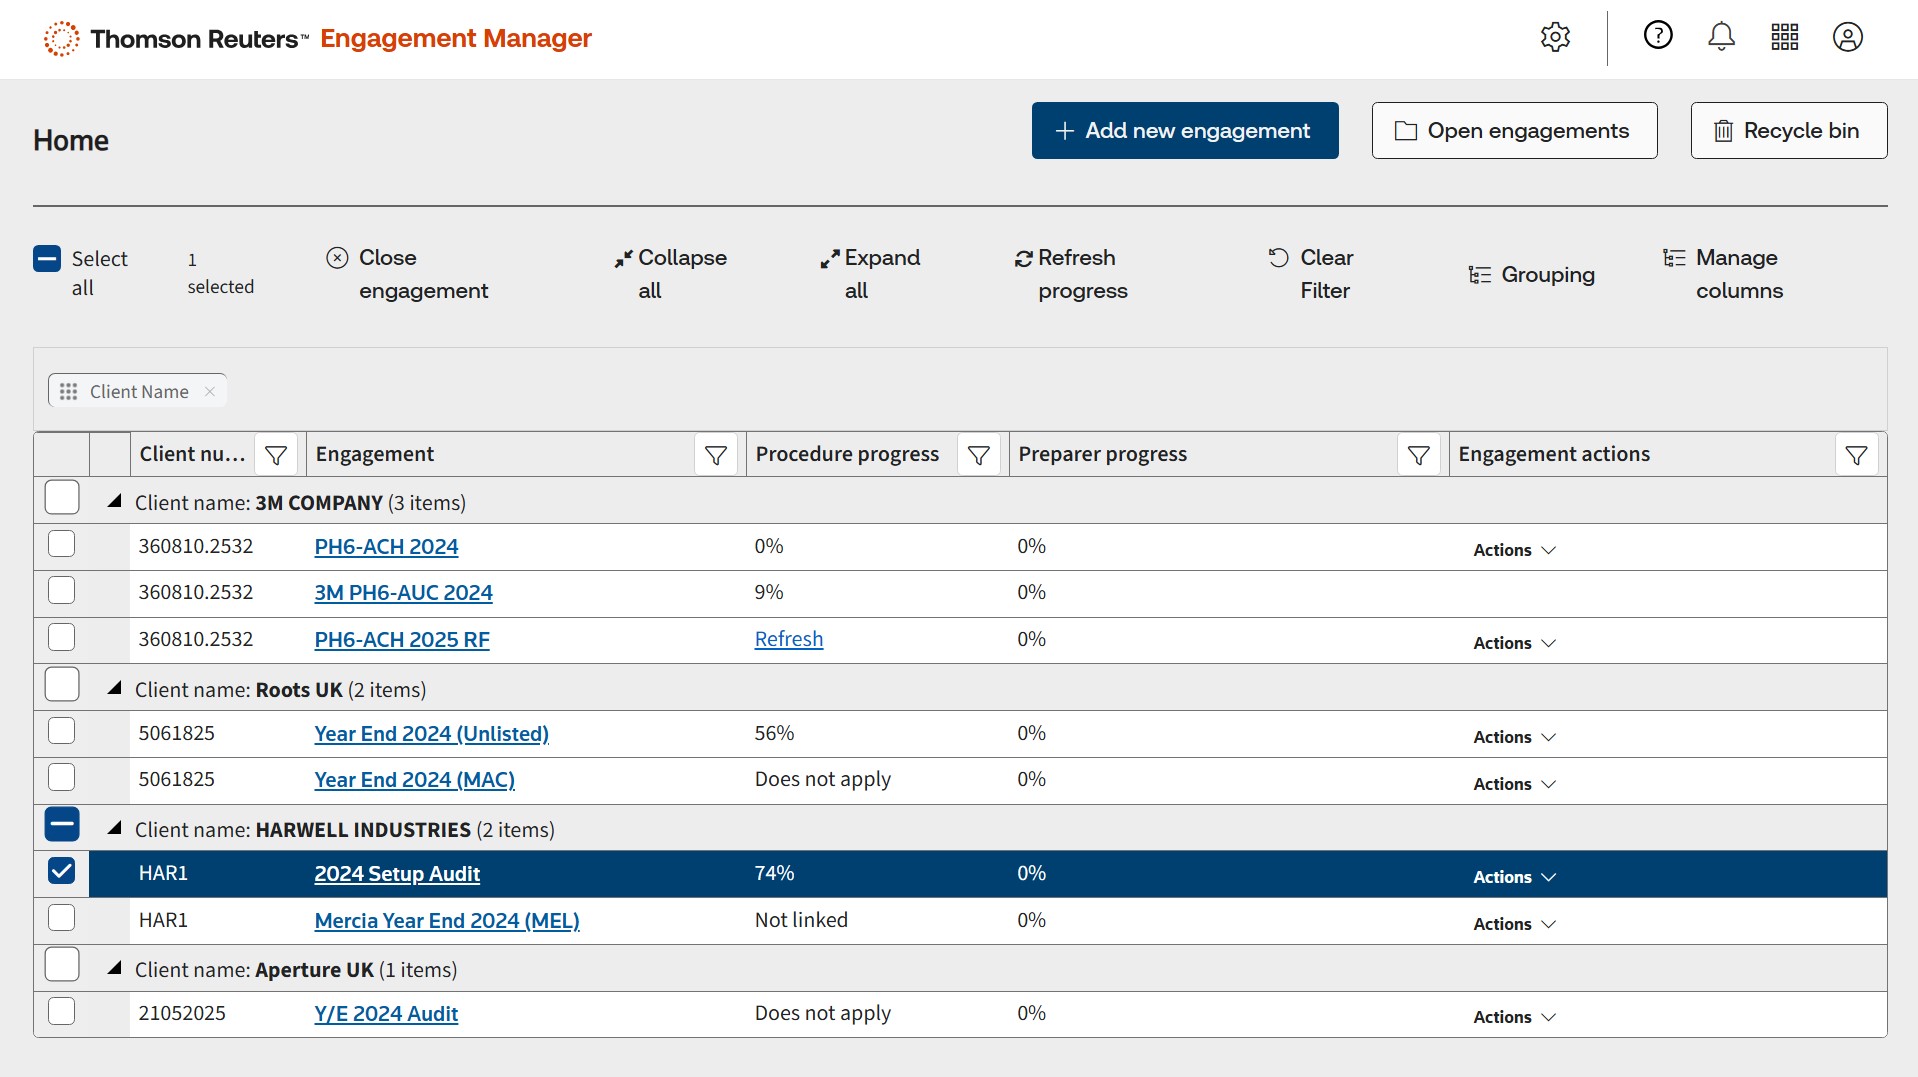
Easily track the status of your audits from the Home screen.
Check progress on your engagements at a glance with Status, Procedure progress, and Preparer progress columns.
On the dashboard you can open an existing engagement...
...or add a new engagement
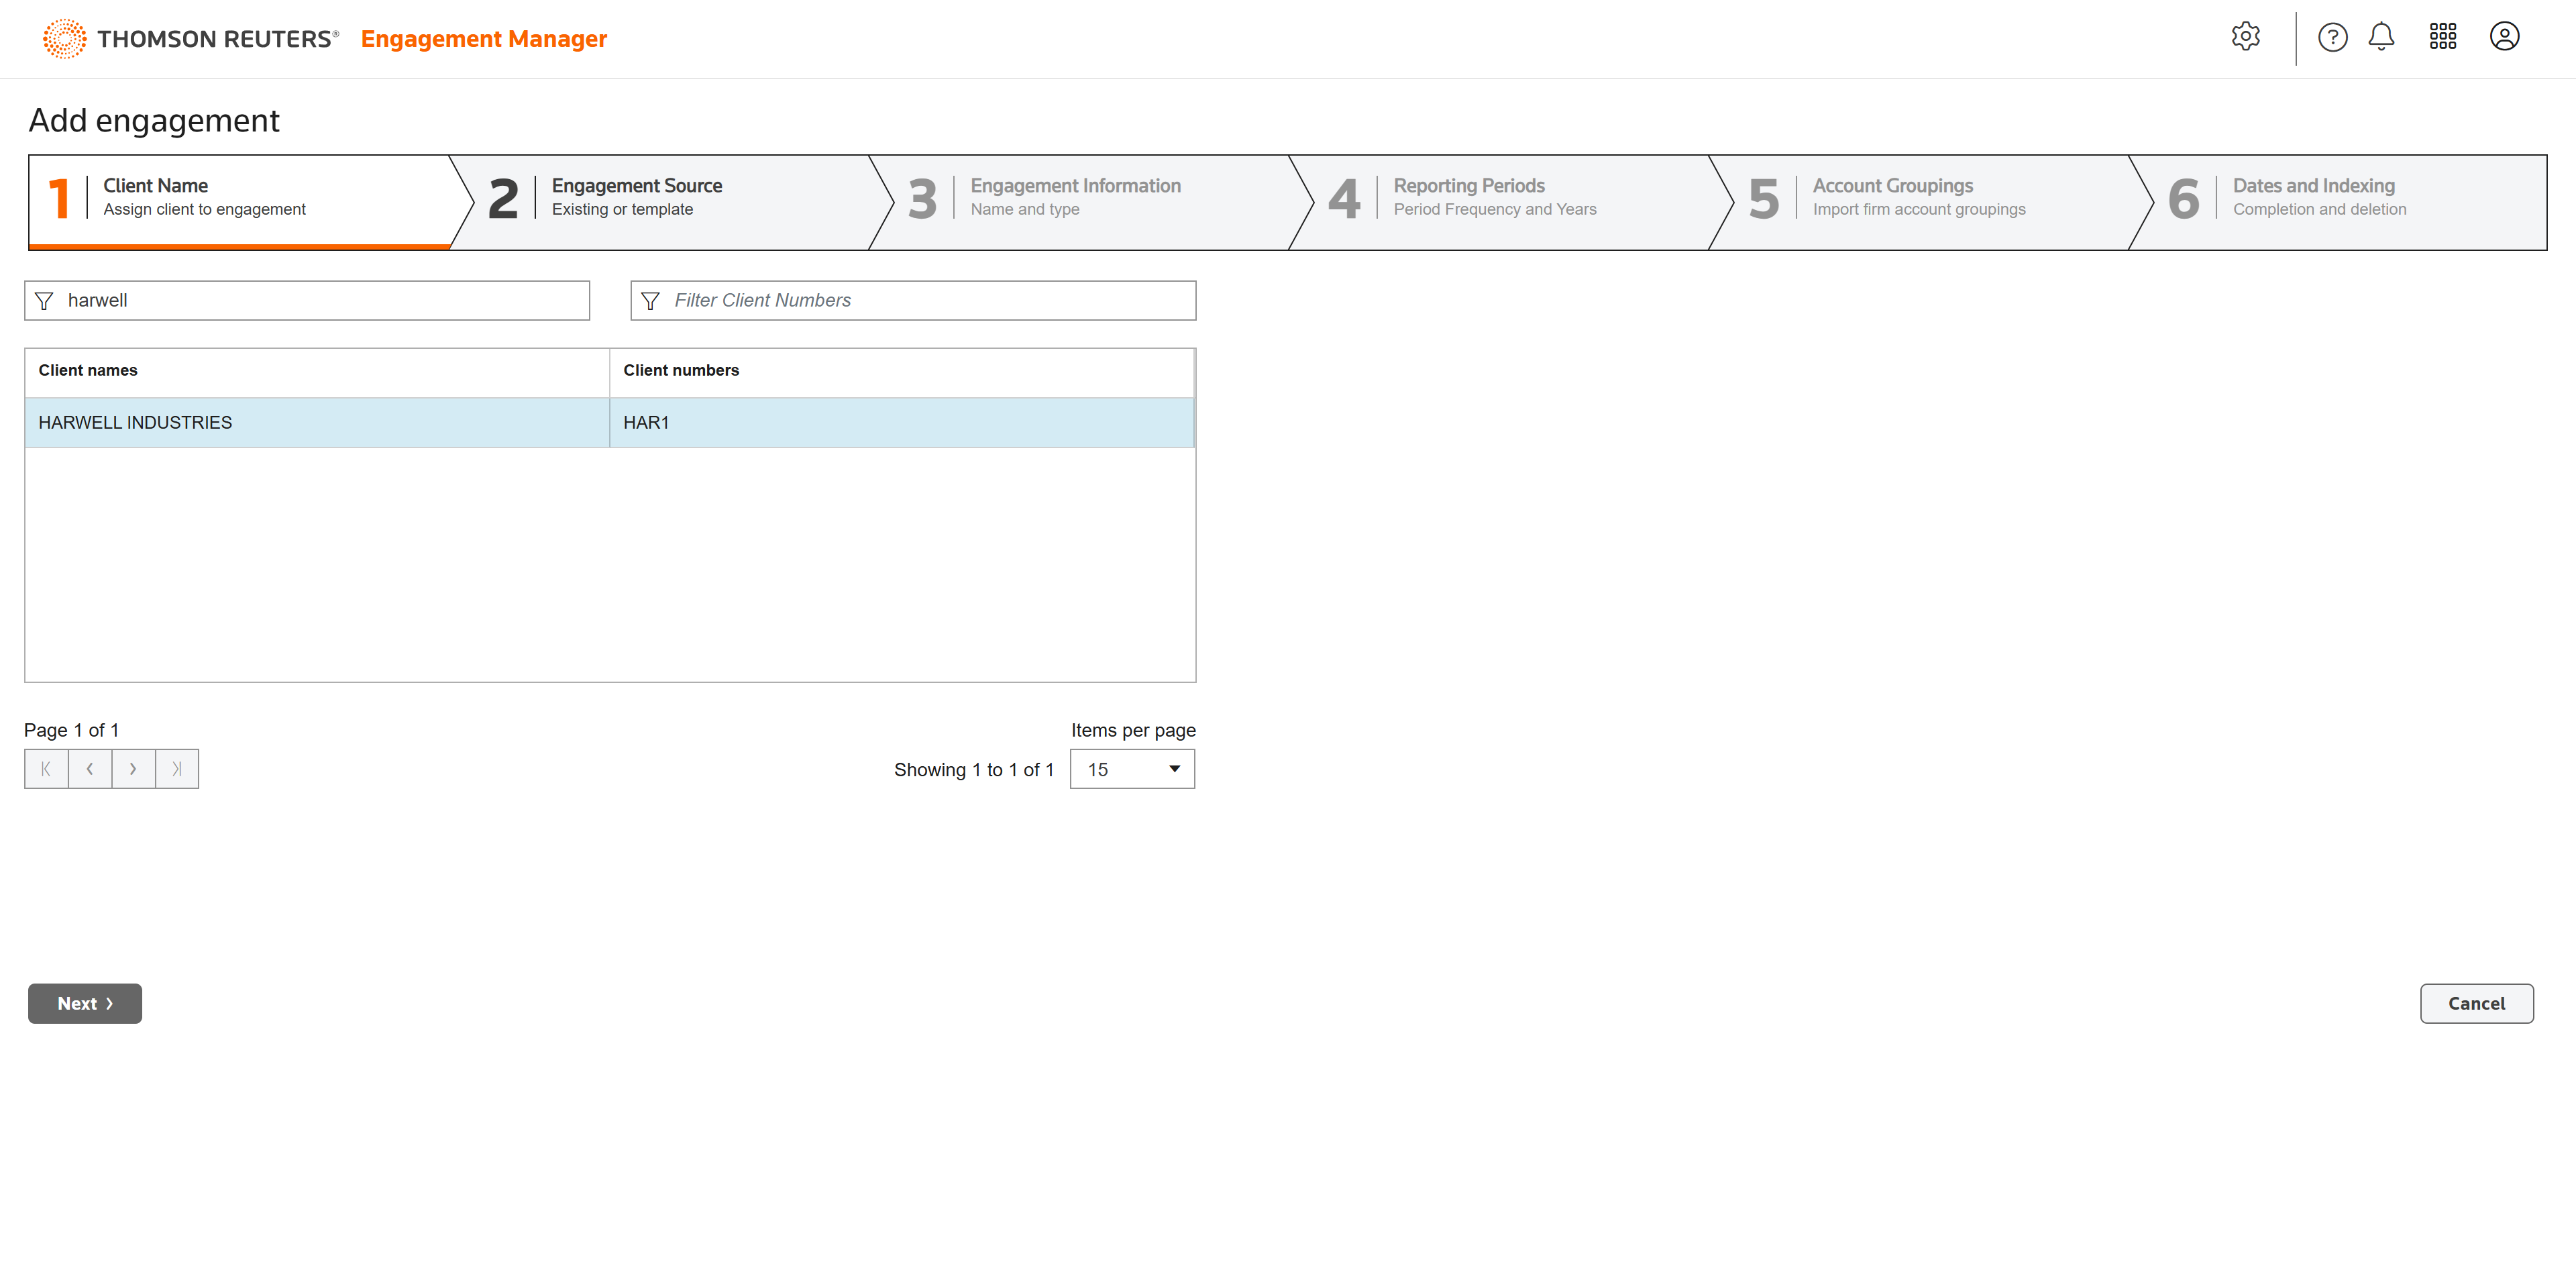
When adding a new engagement, a wizard will walk you through the process. In step 1, assign a client to the engagement.
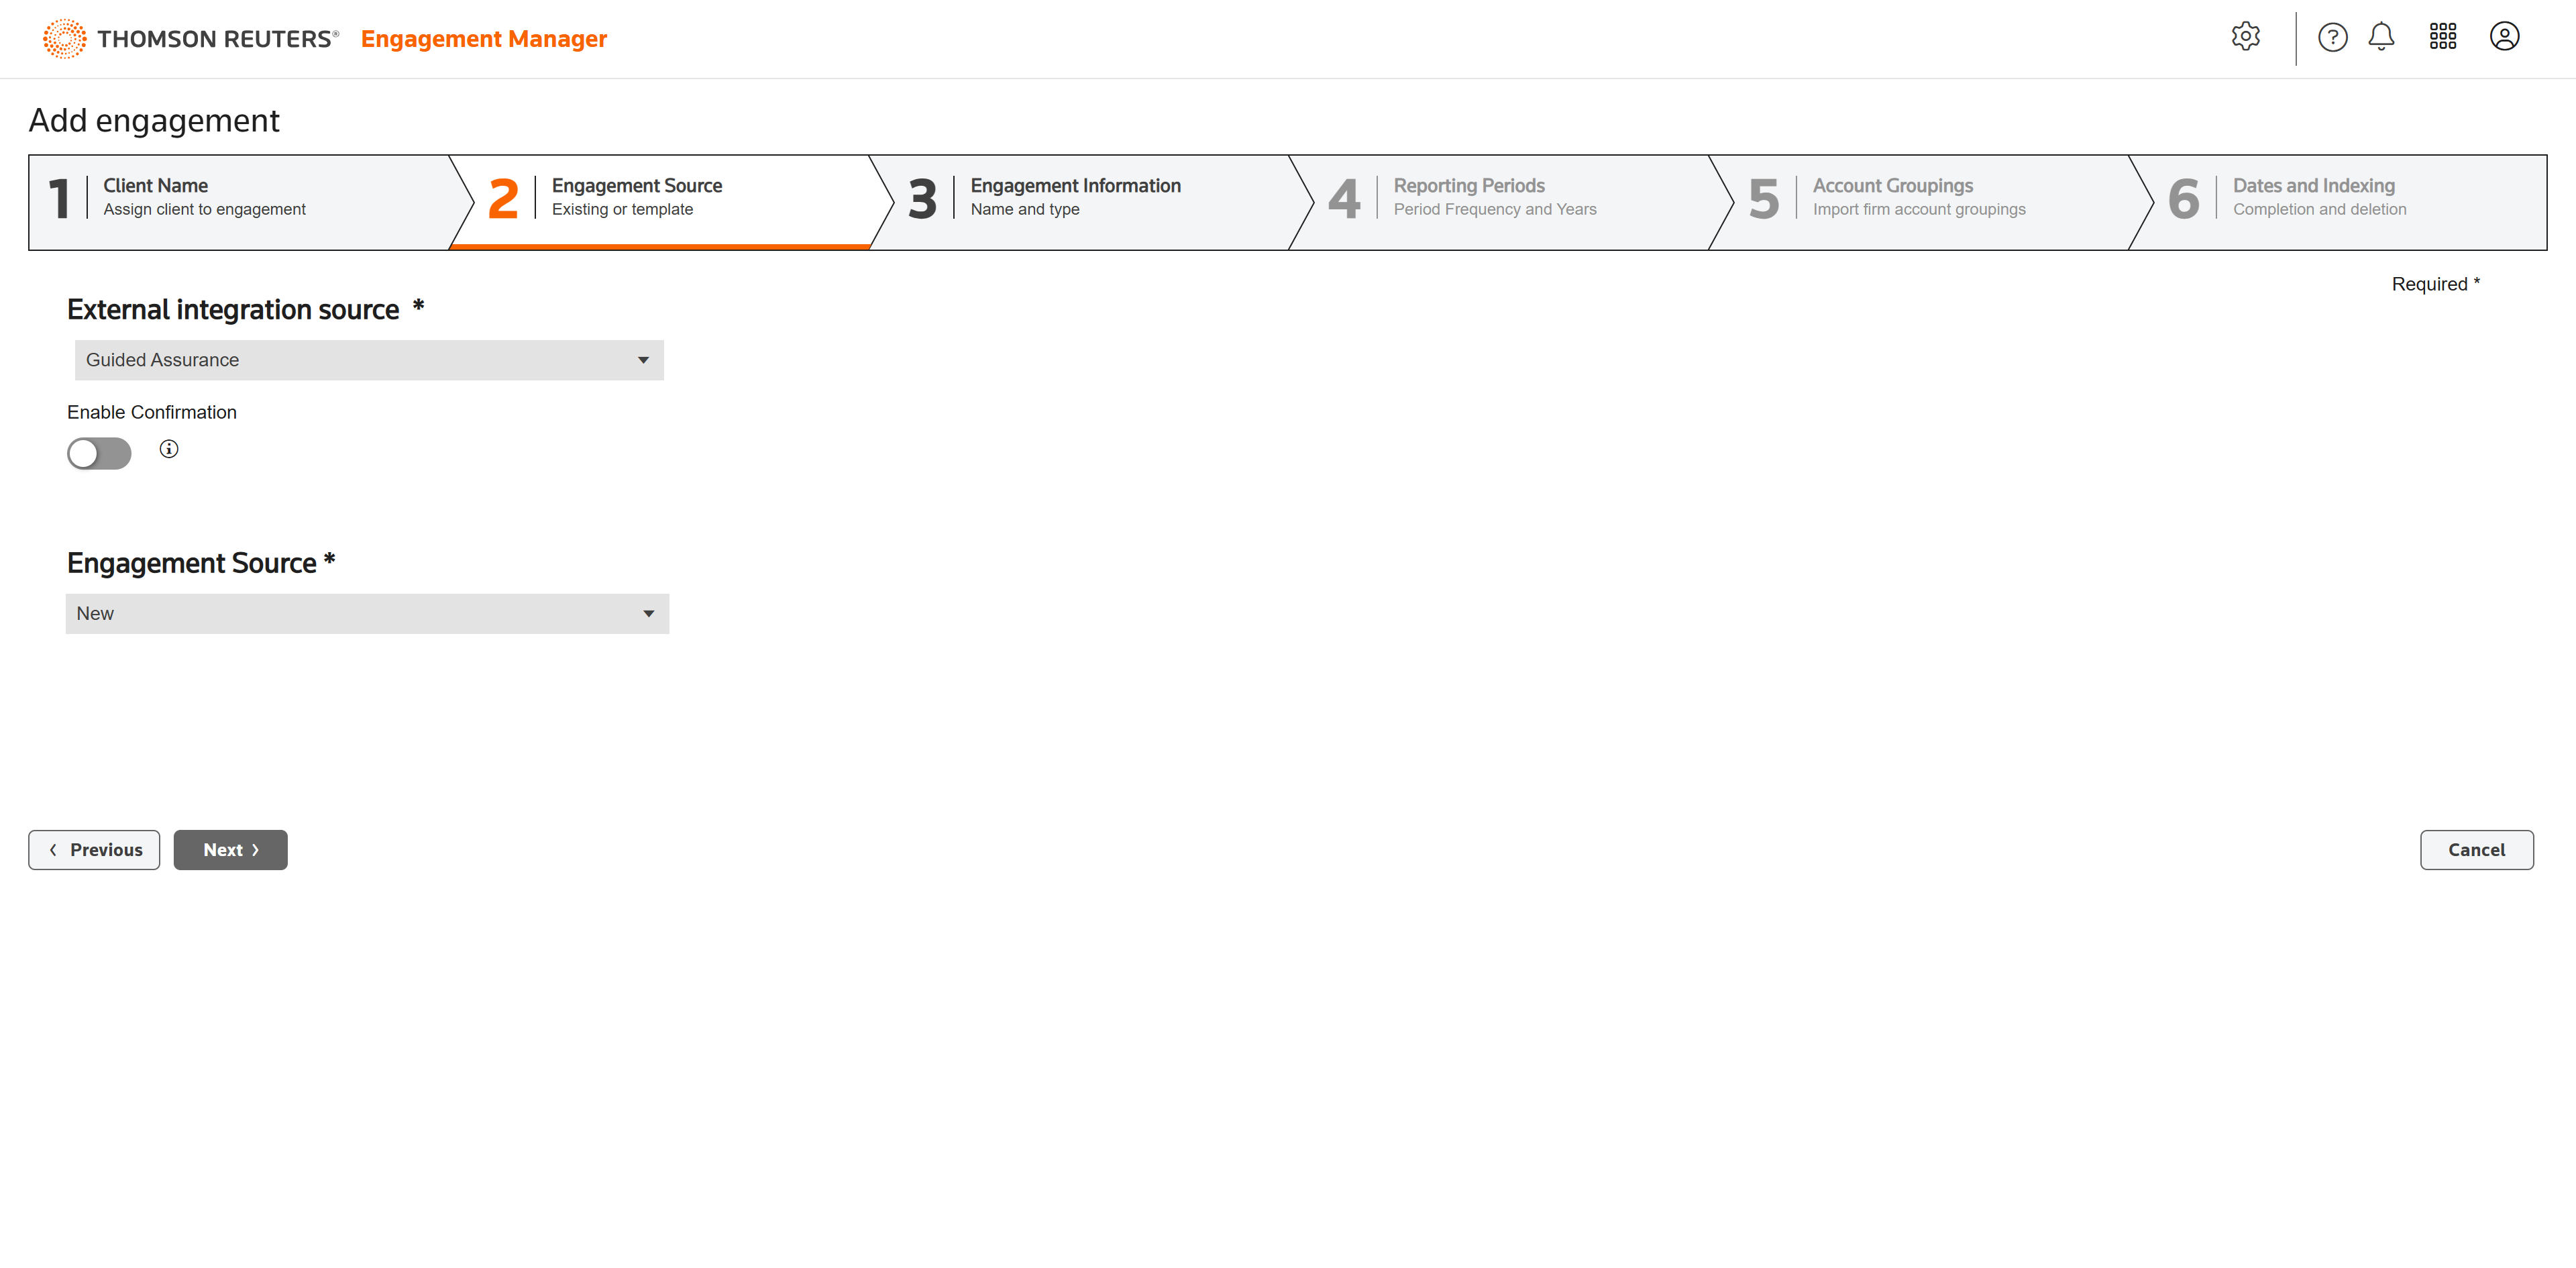
In step 2, add an engagement source.
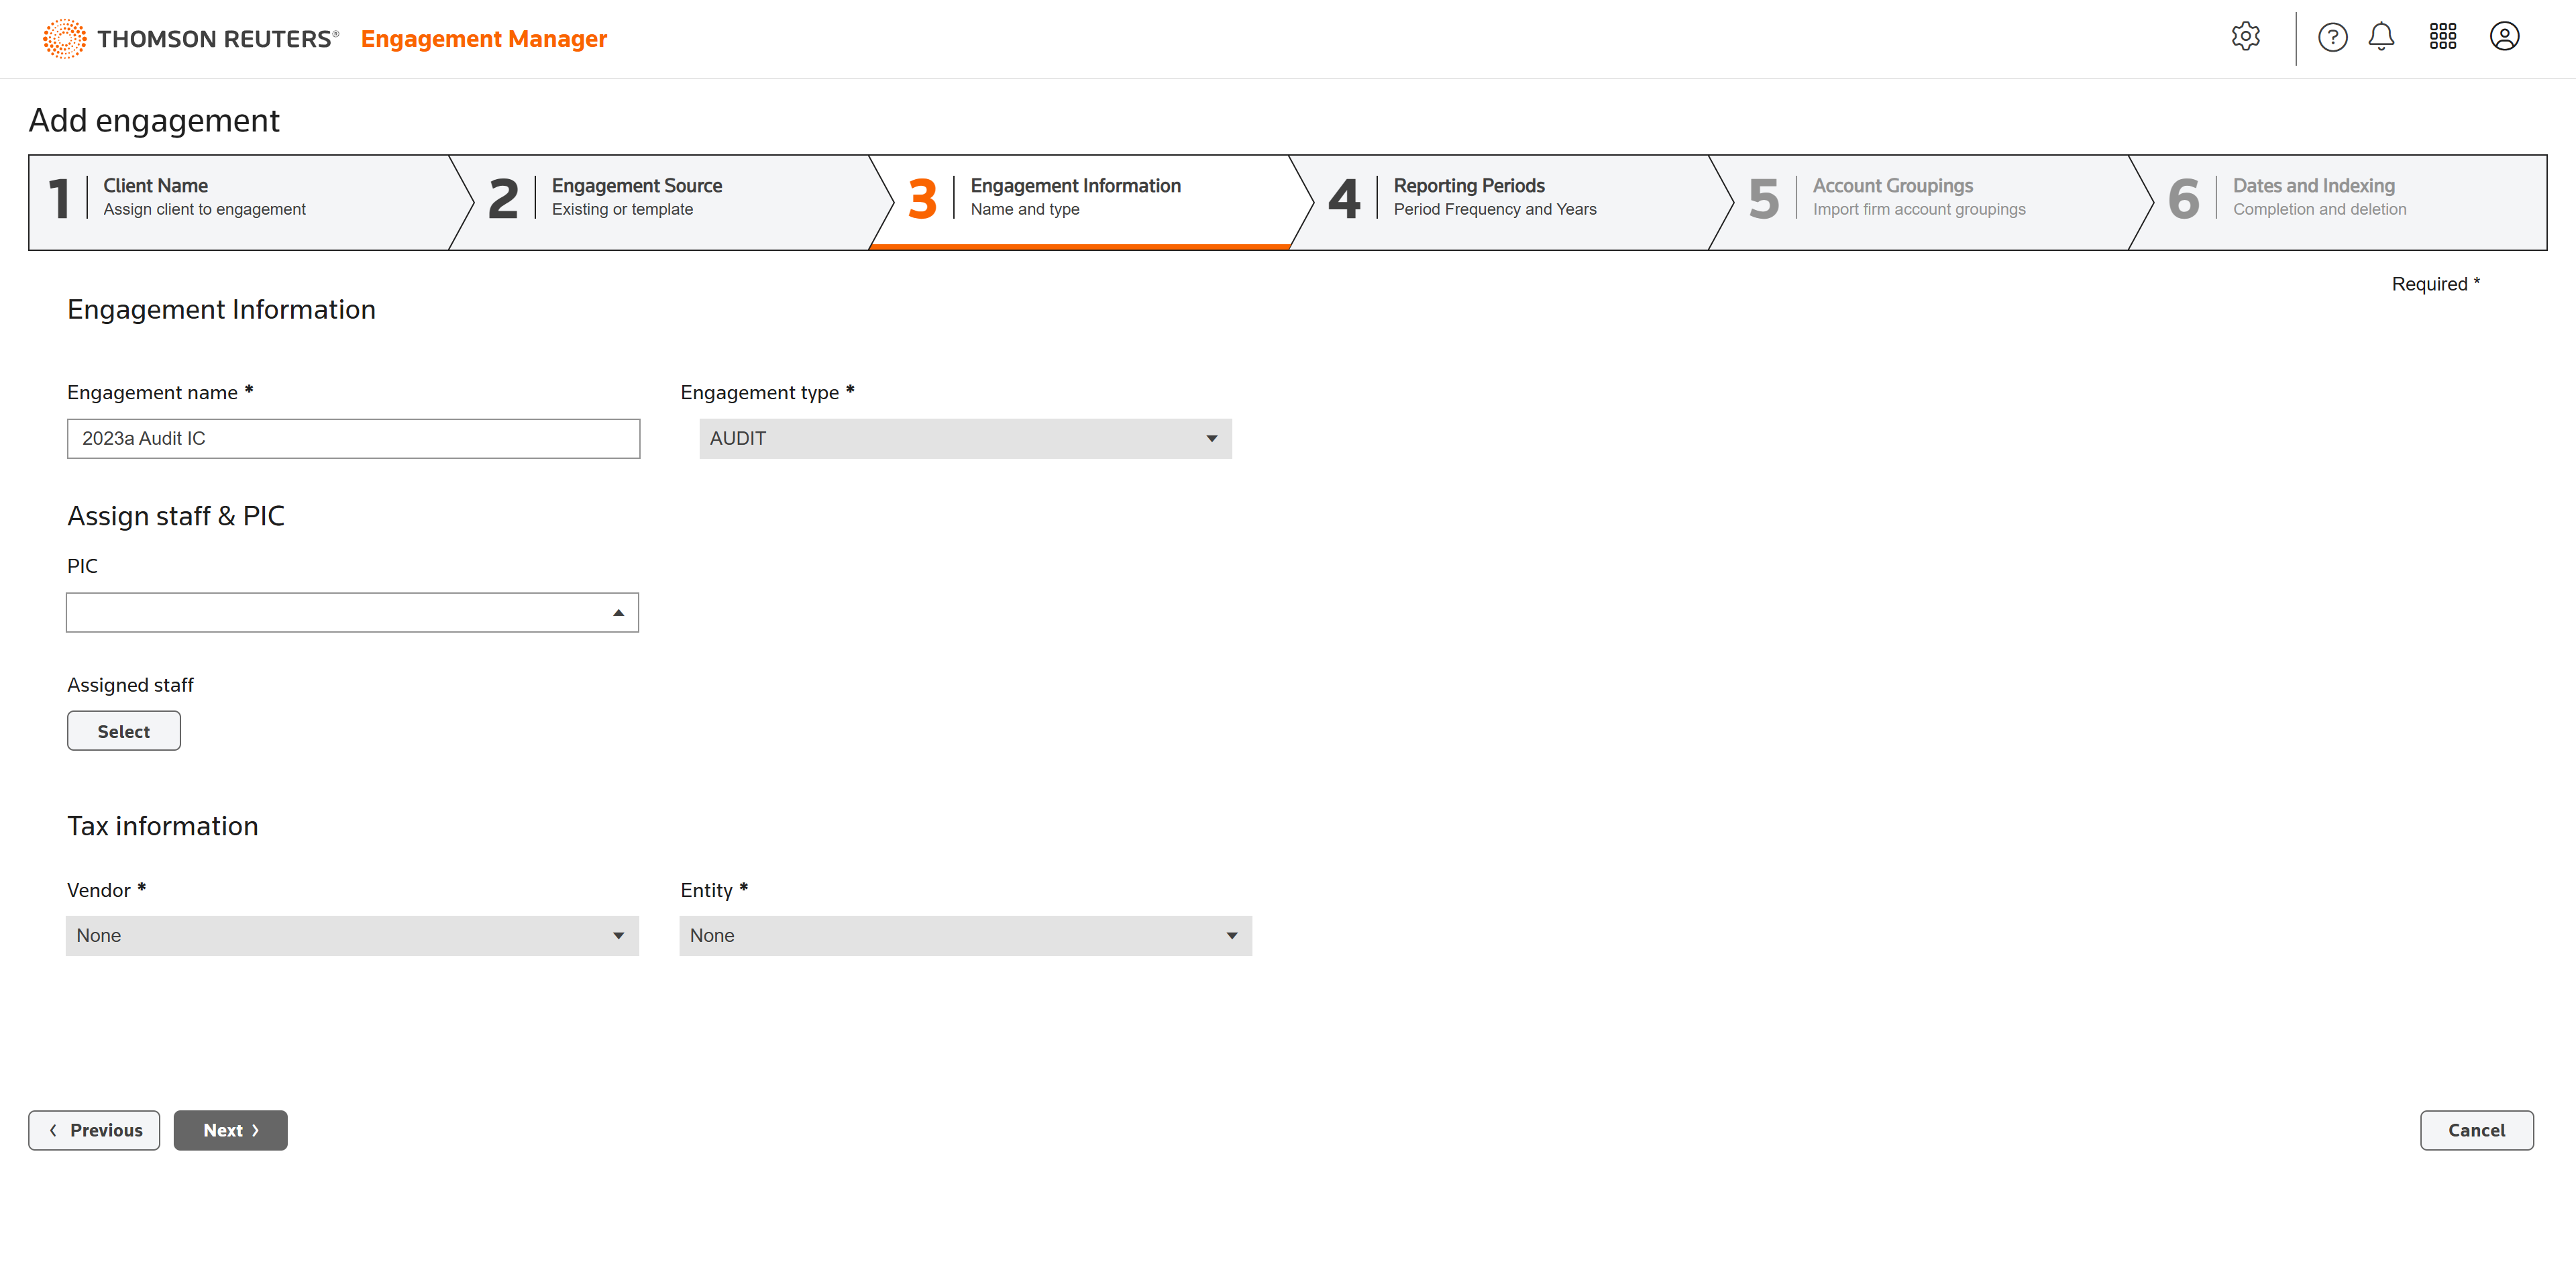
In step 3, fill in the engagement information.
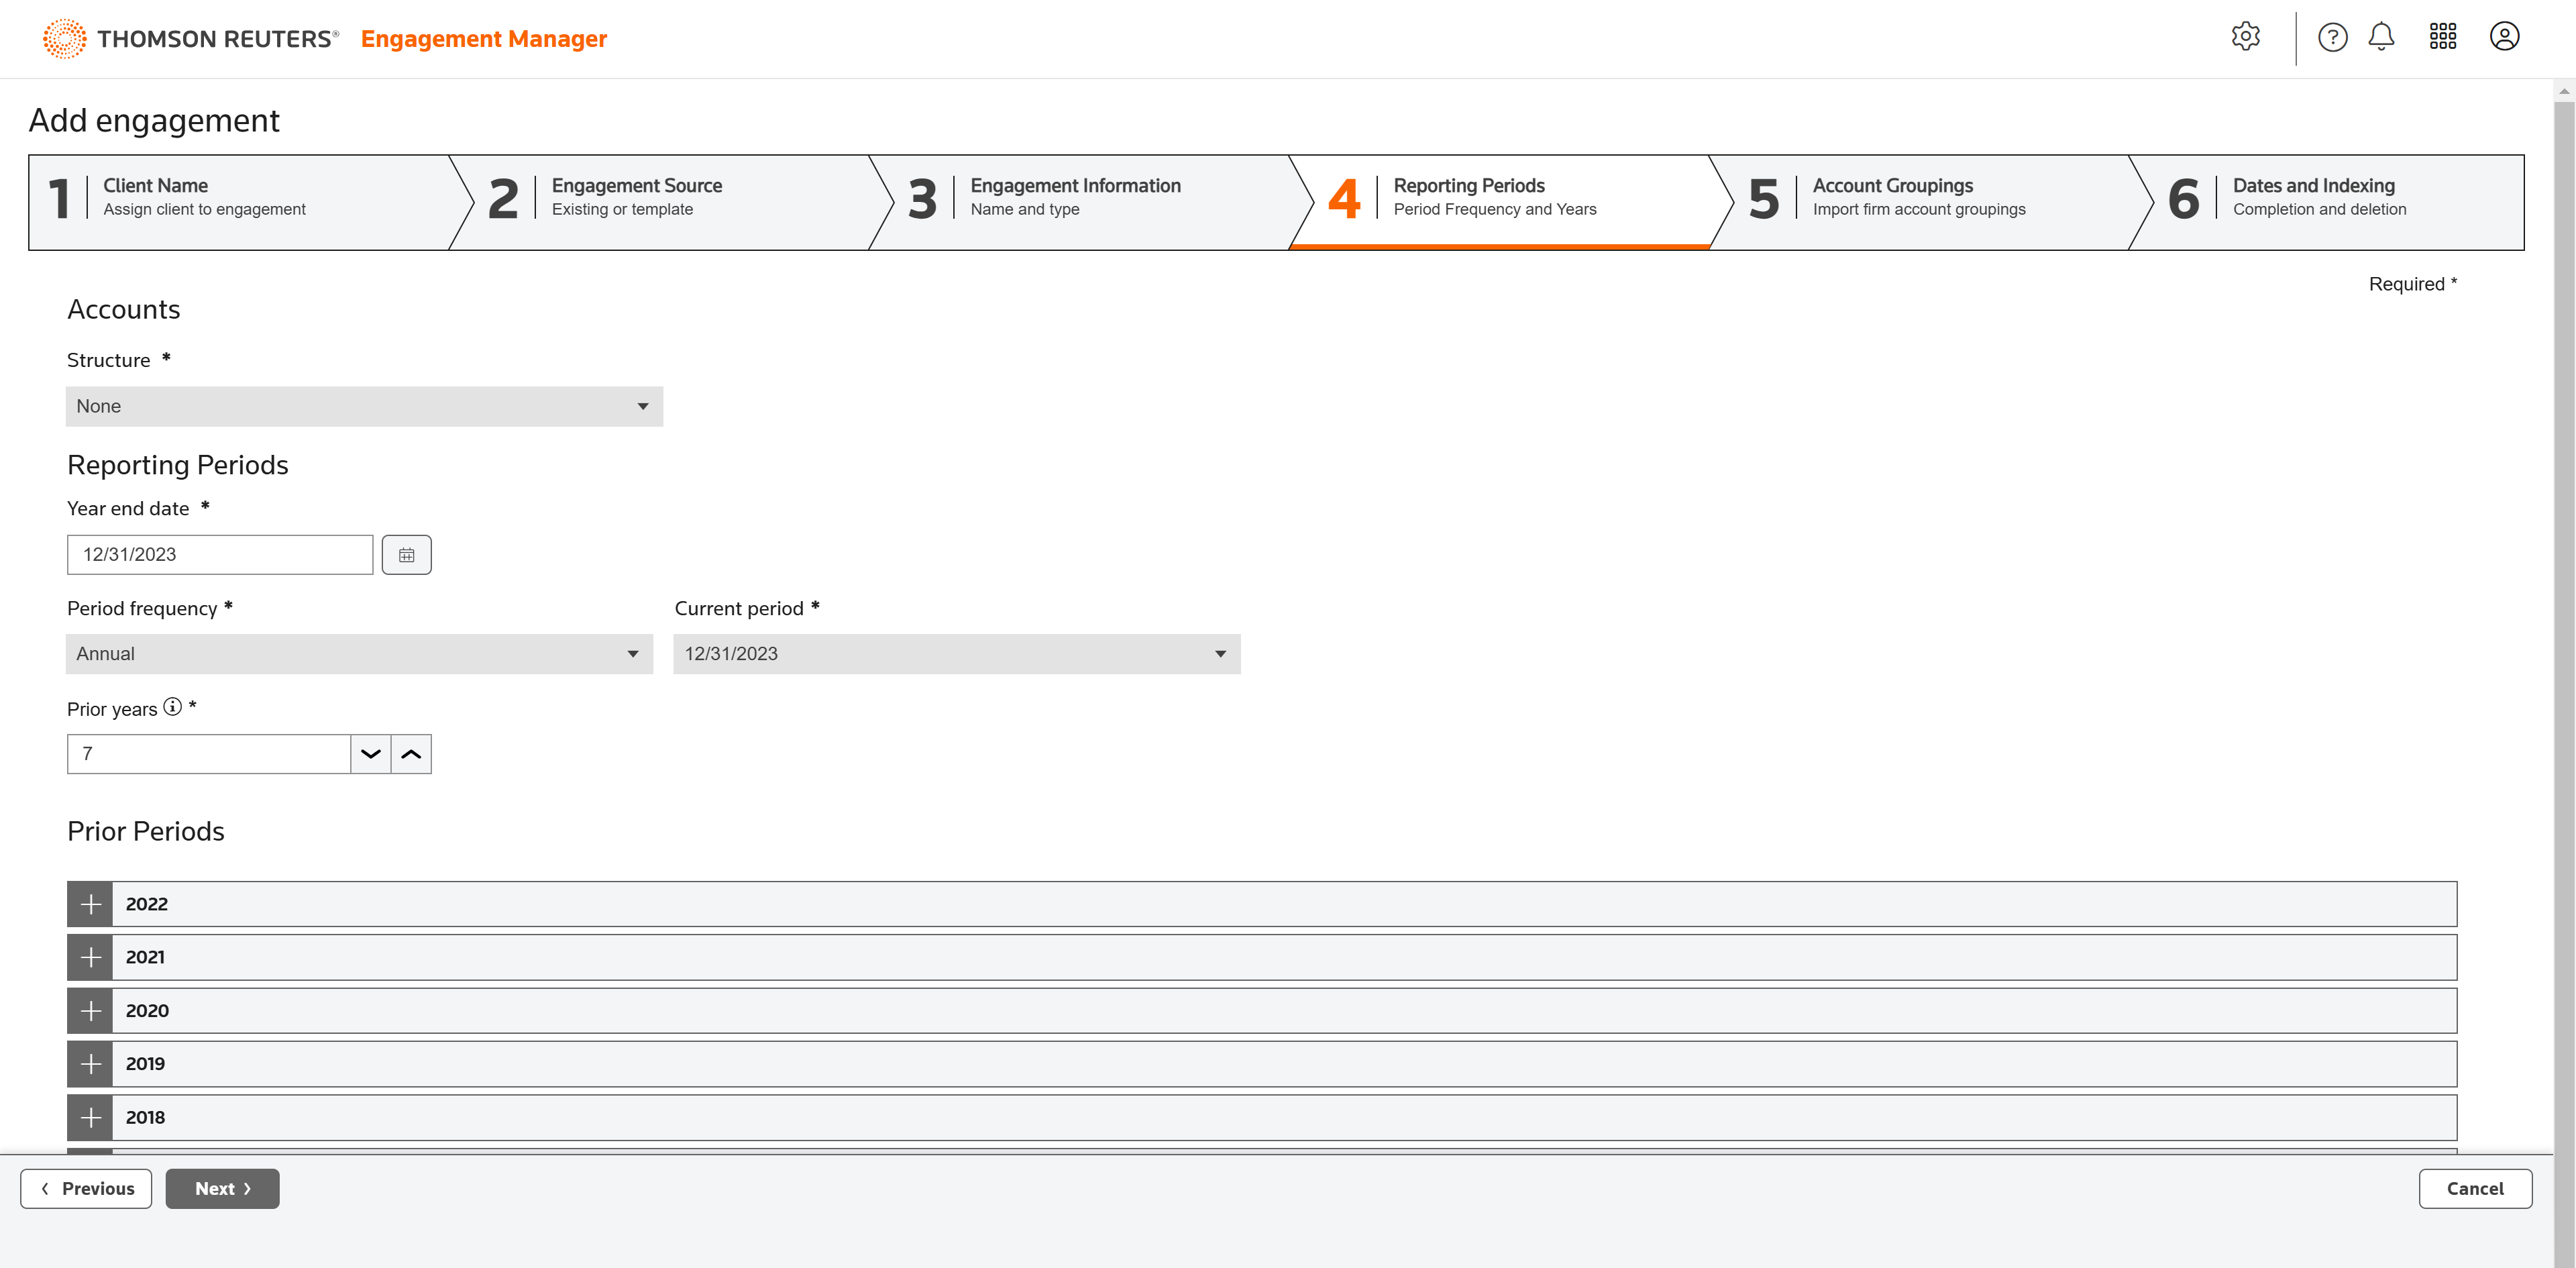
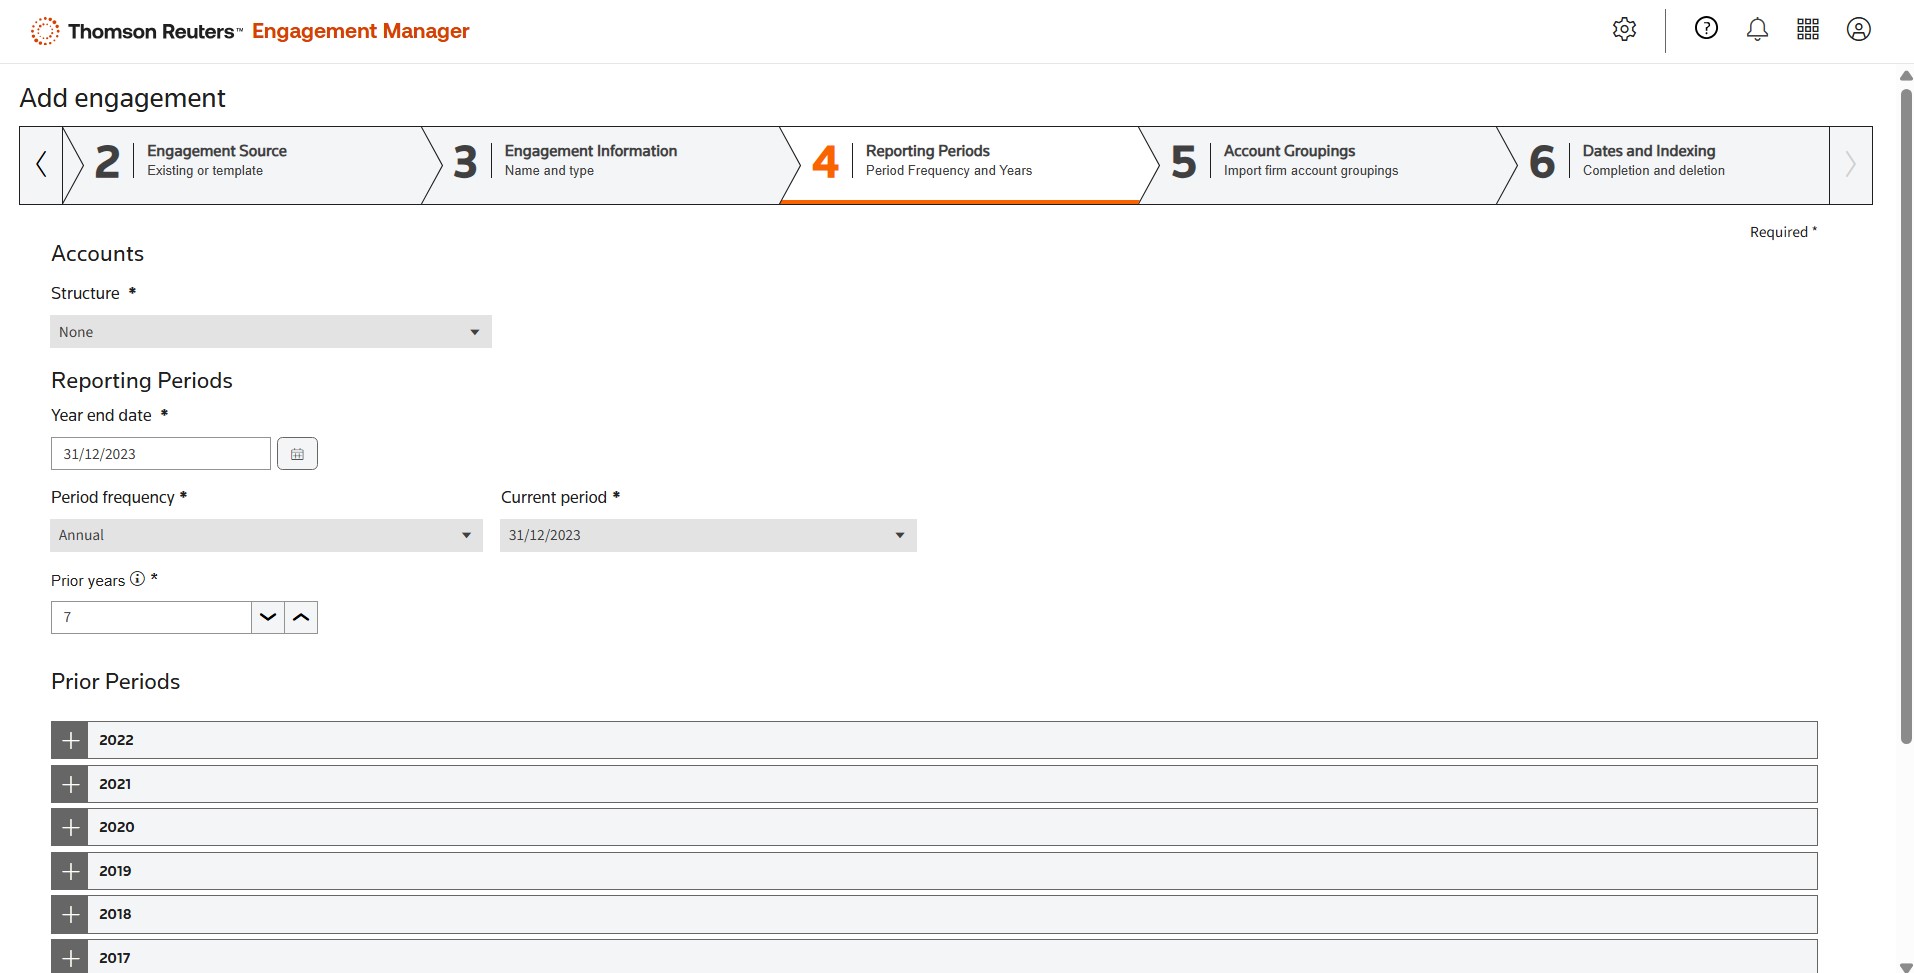
In step 4, define the reporting periods.
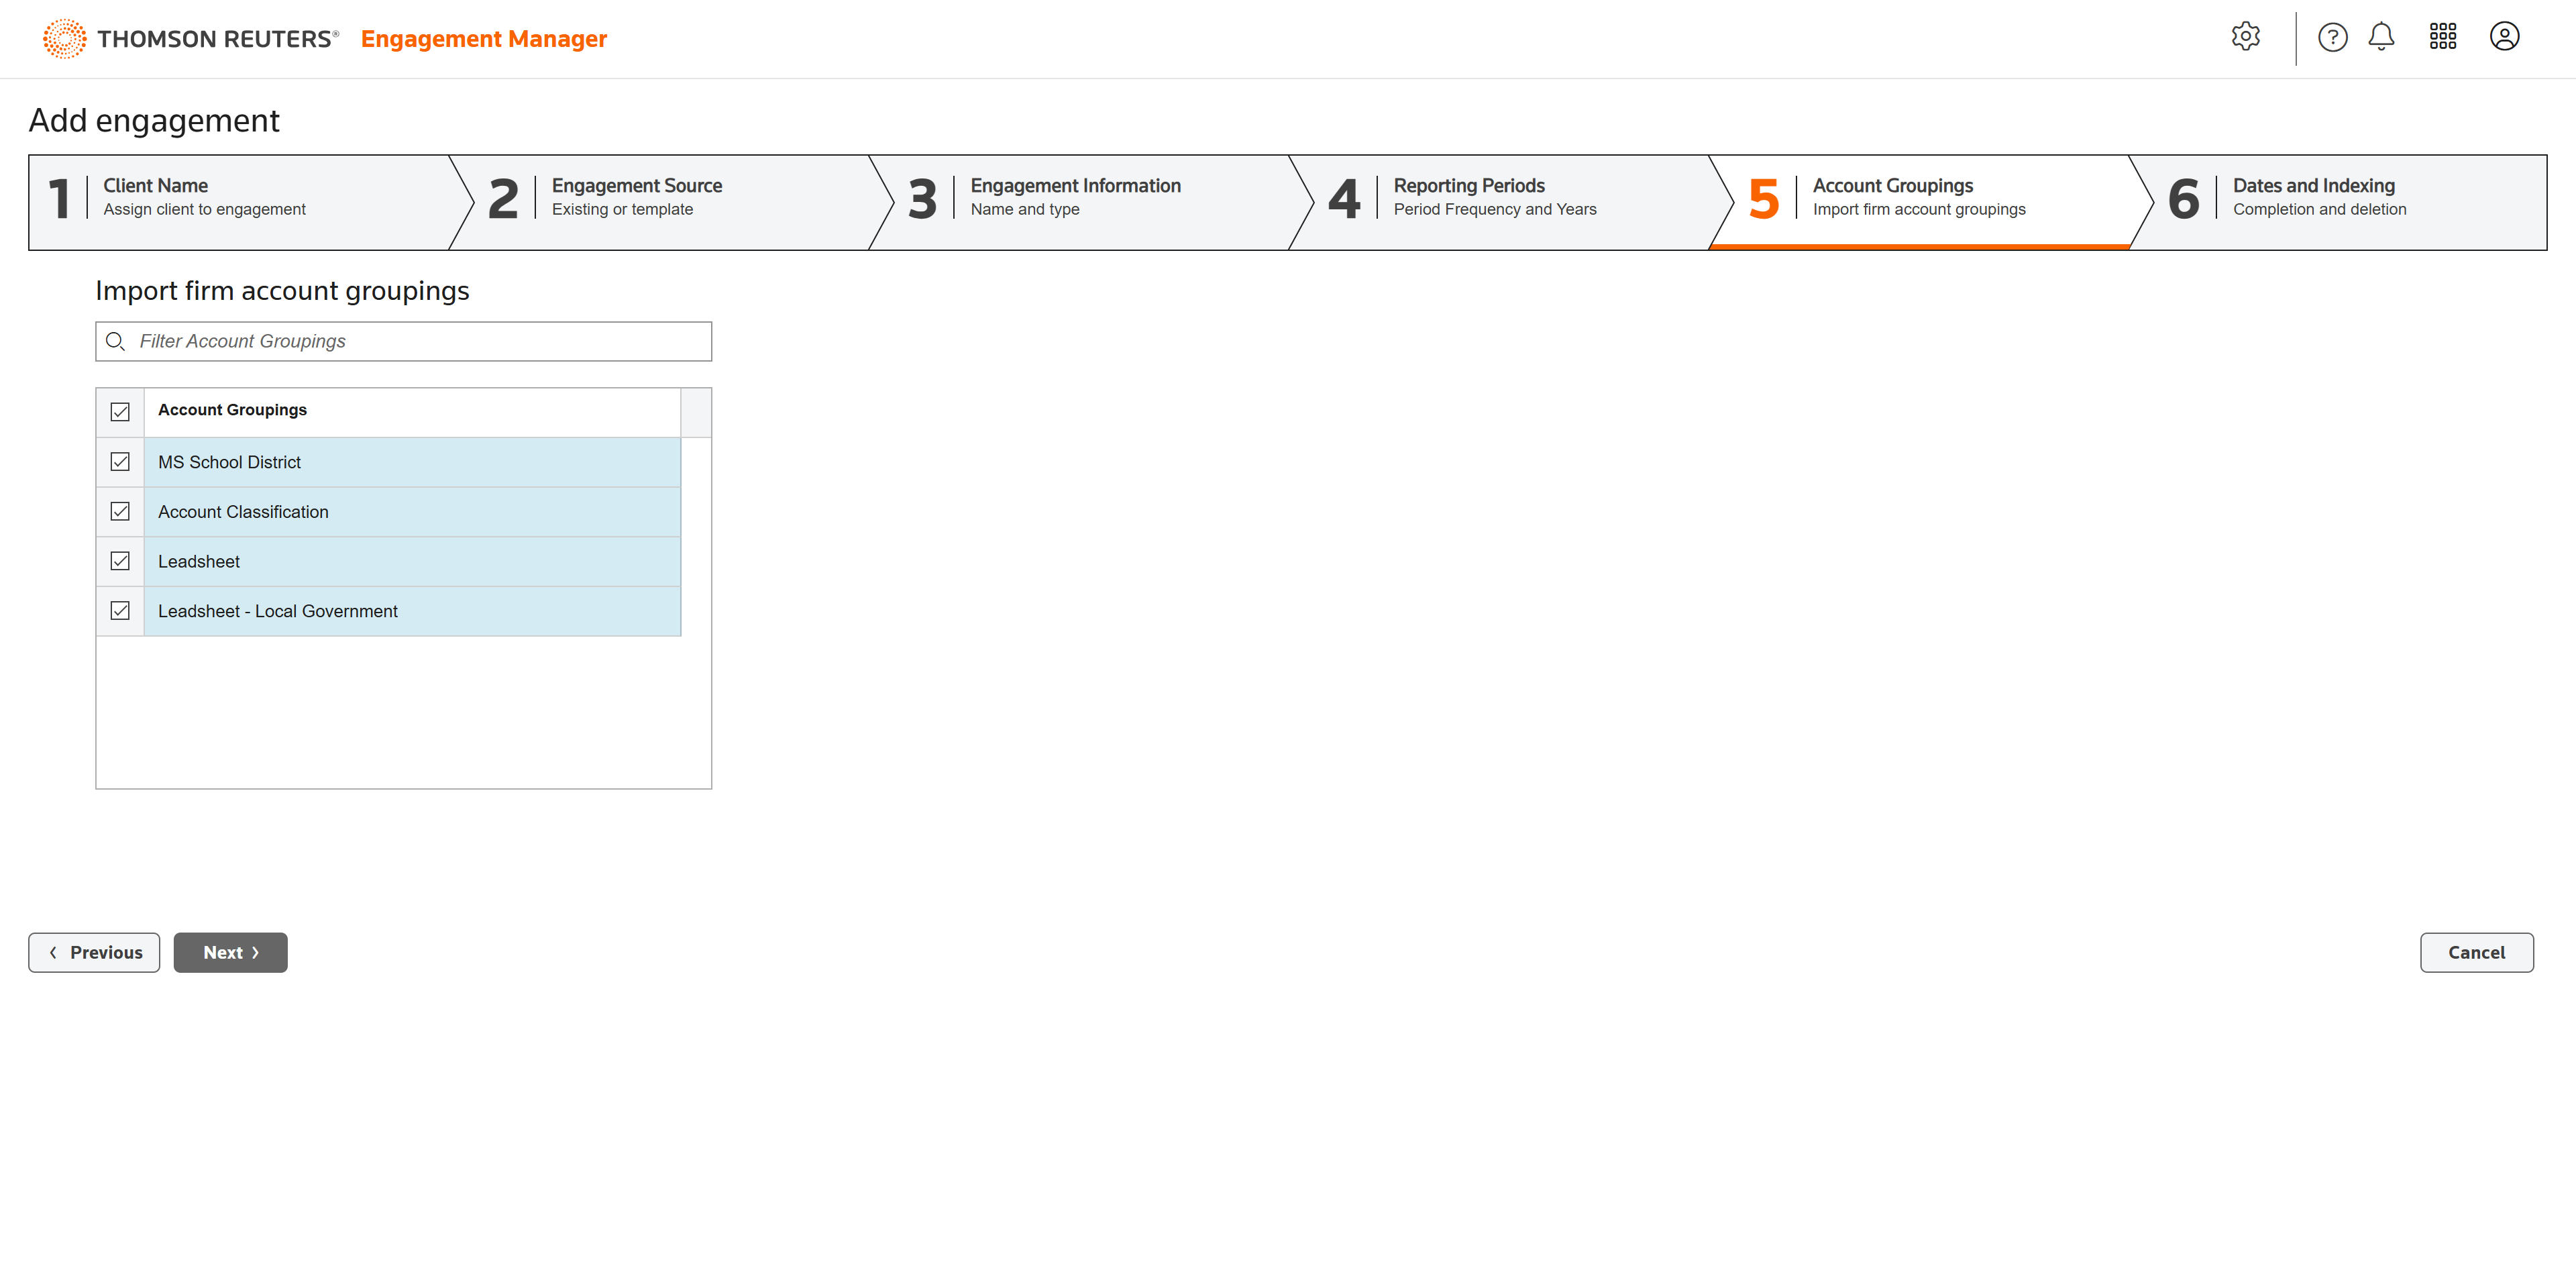
In step 5, import firm account groupings. This enables the automated population of the trial balance and leadsheets.
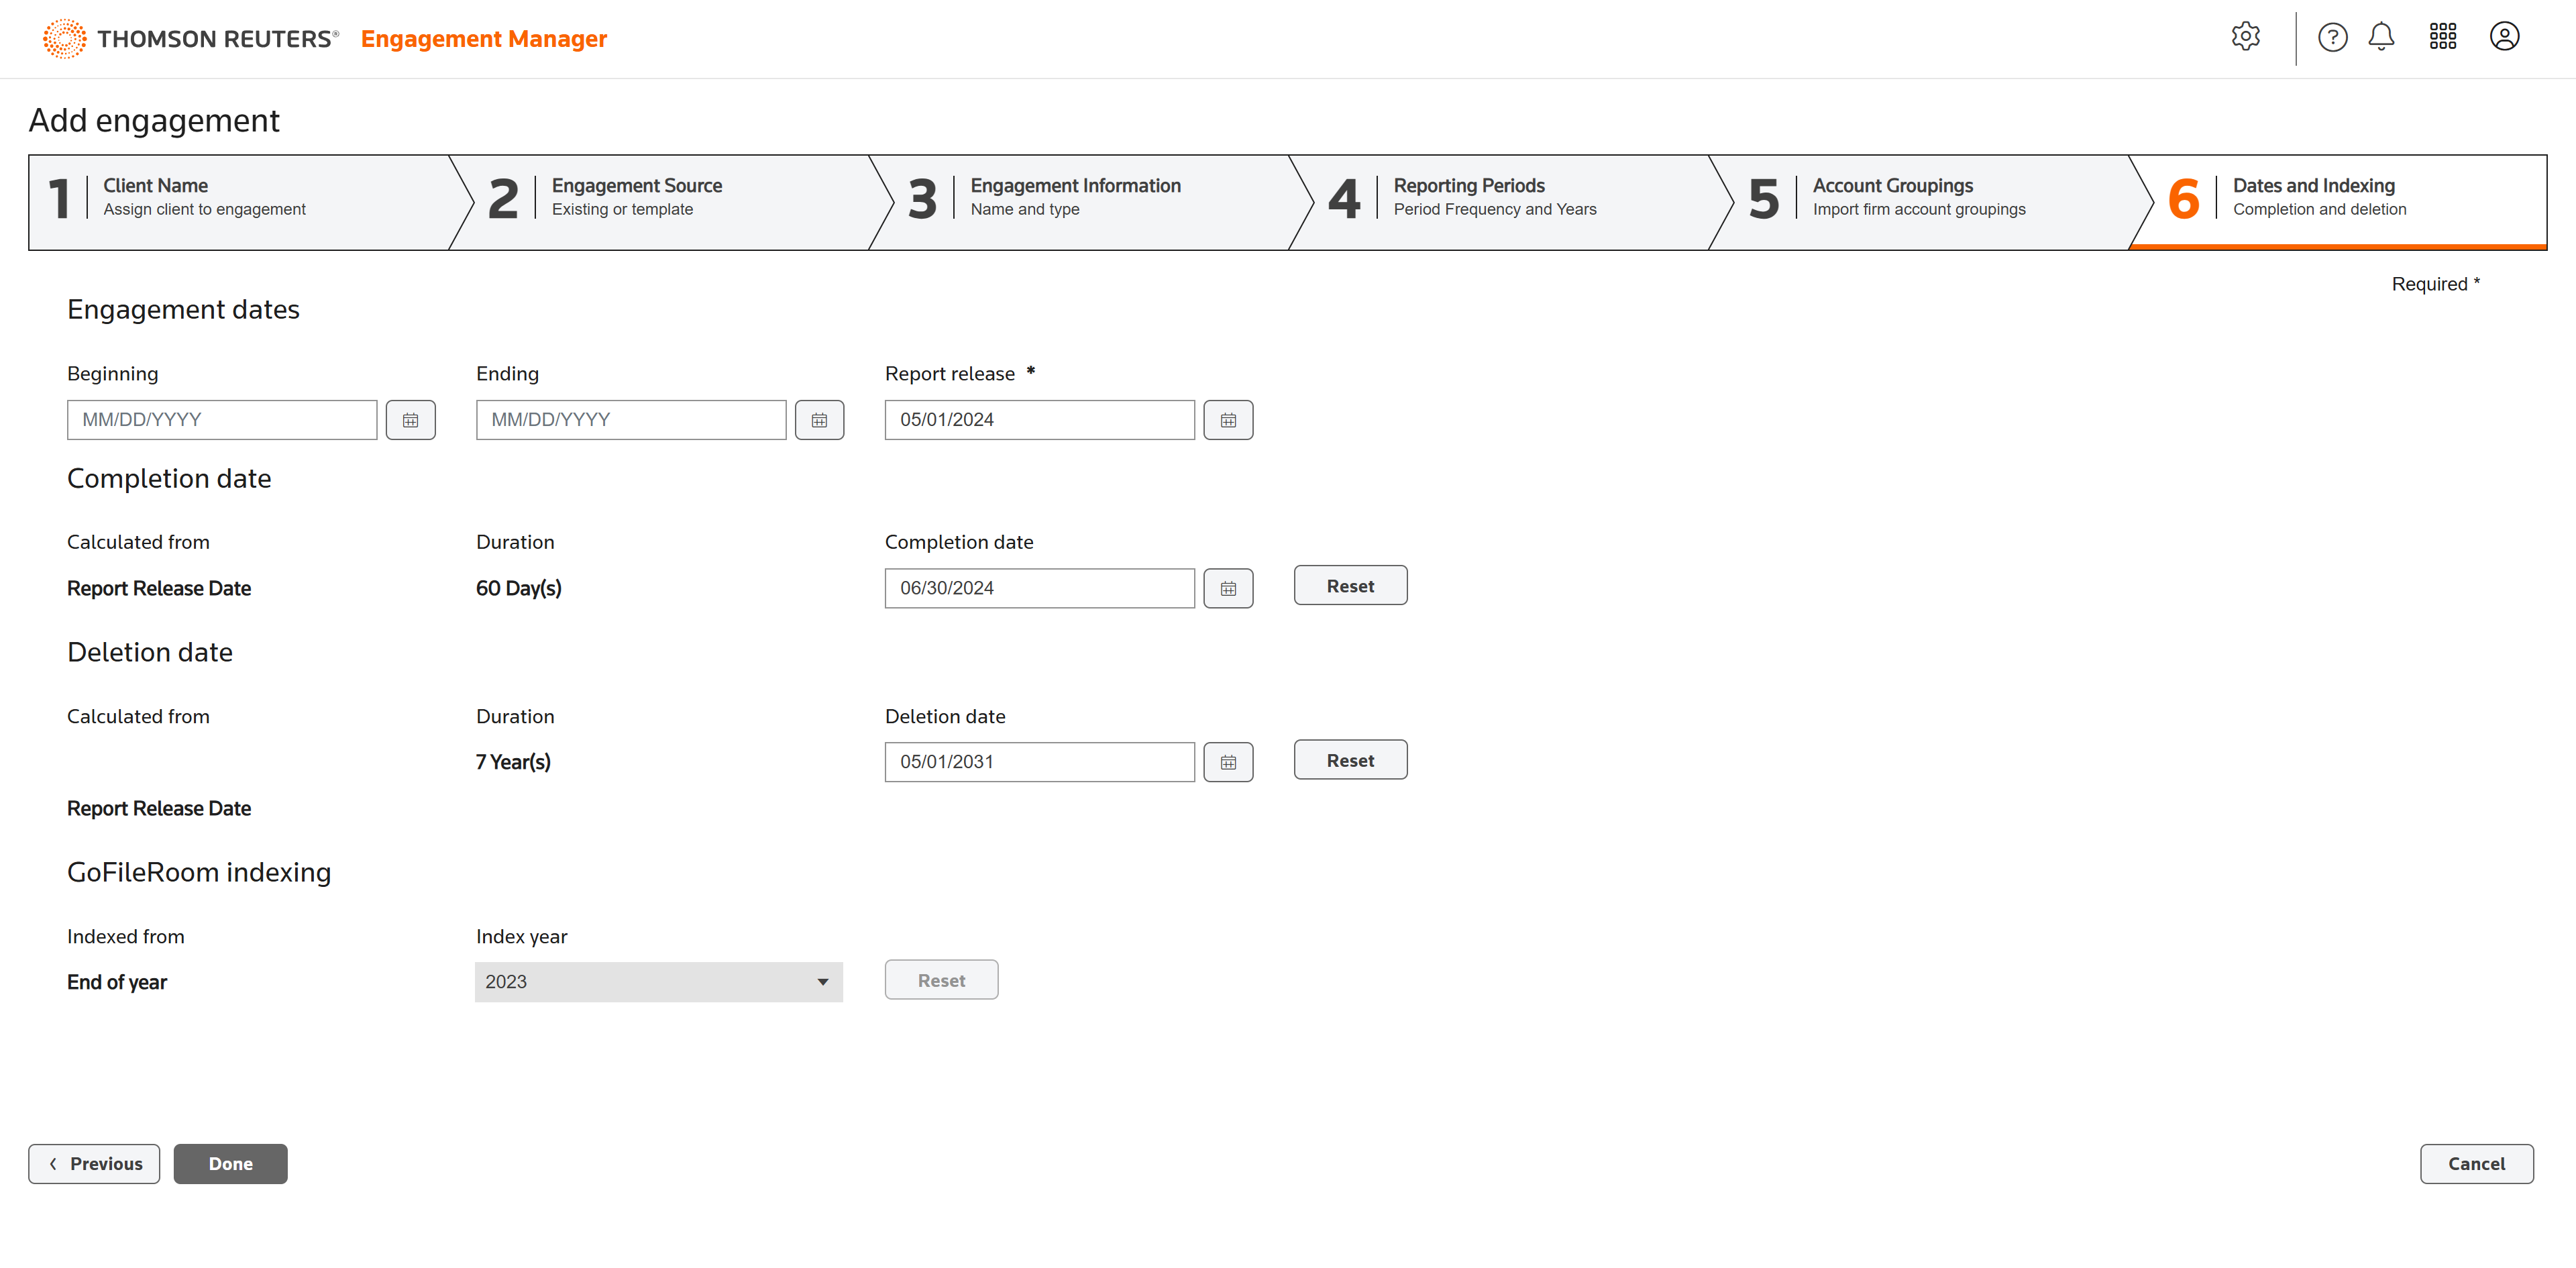
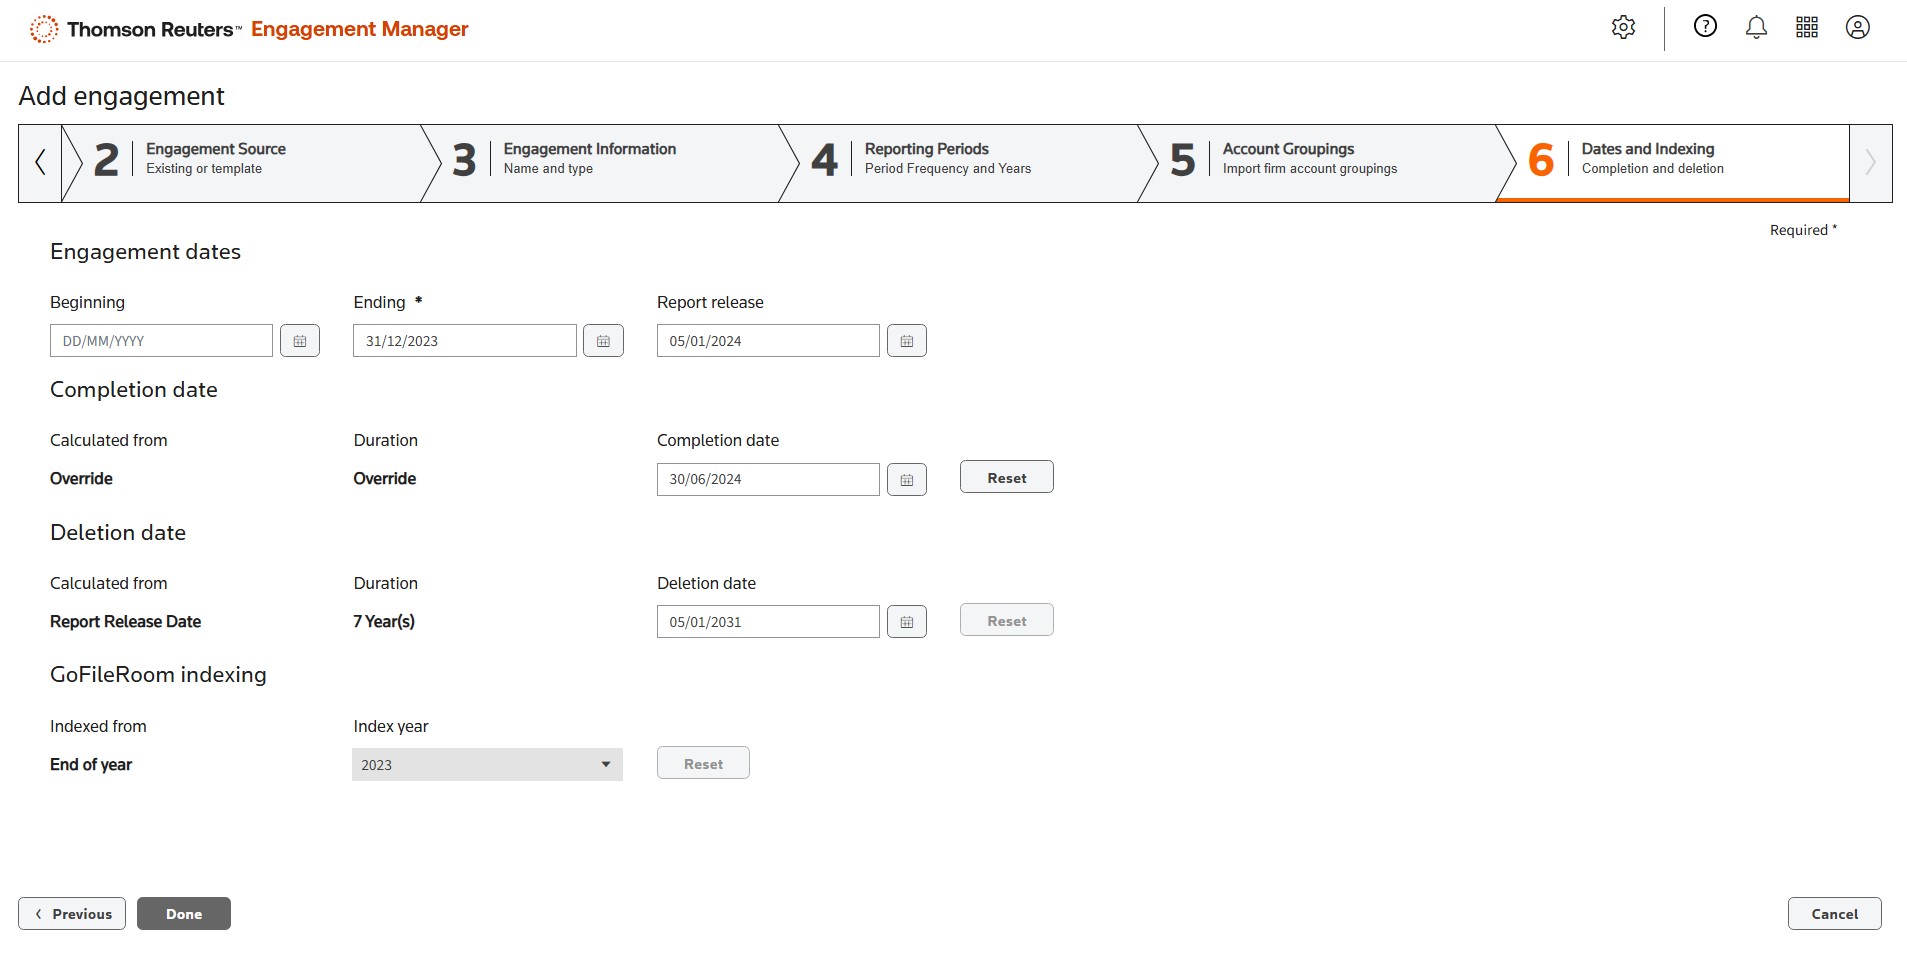
In step 6, define the engagement dates. This completes the process of adding an engagement.
Guided audit process Manage various types of audit engagements with tailorable templates and detailed assistance when it's needed. With guided, start-to-finish audit preparation, compilation, and review tools, you can gain confidence in the process, increase efficiency, and deliver more value-add audits.
Guided audit process:
Guided Assurance Guided Assurance offers guided, start-to-finish audit preparation, compilation, and review tools. Access the leading PPC audit methodology, risk identification, and process automation, as well as customizable Disclosure Checklists and Single Audit. Bring together the gold standard in audit methodology with the engagement manager of your choice. Guided Assurance offers a PPC file format to gain the benefits of our cloud-based methodology with automatic updates and the flexibility to work from any engagement manager.
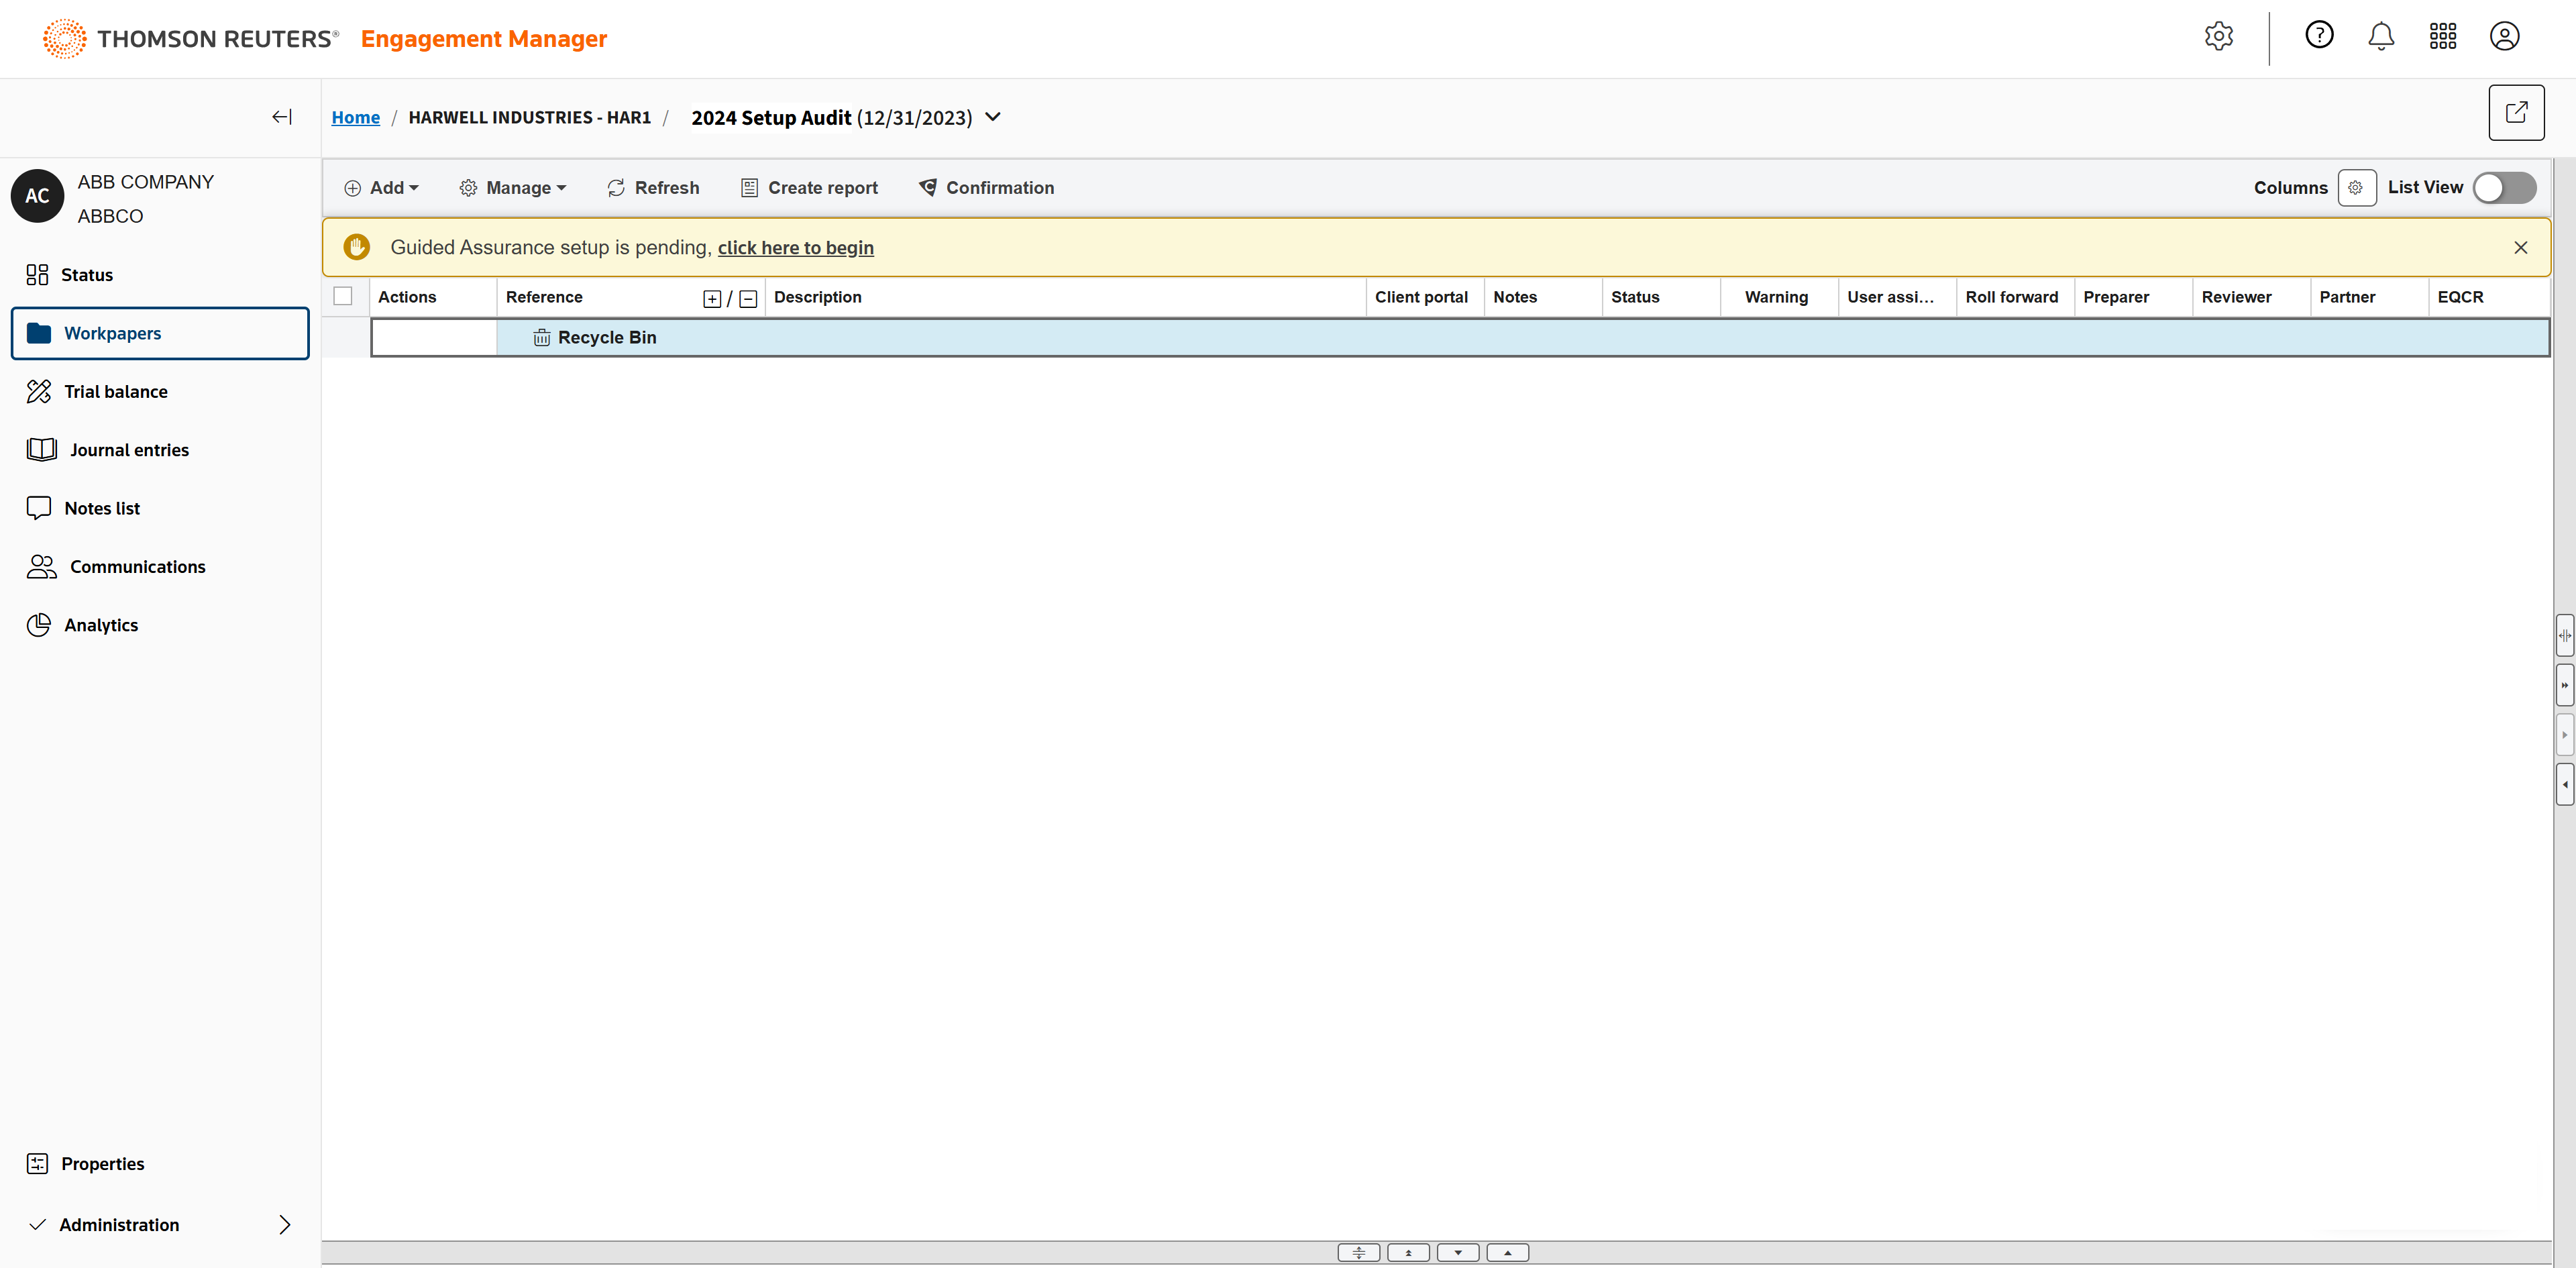
After adding an engagement, the setup is pending. Click the notification to begin the setup.
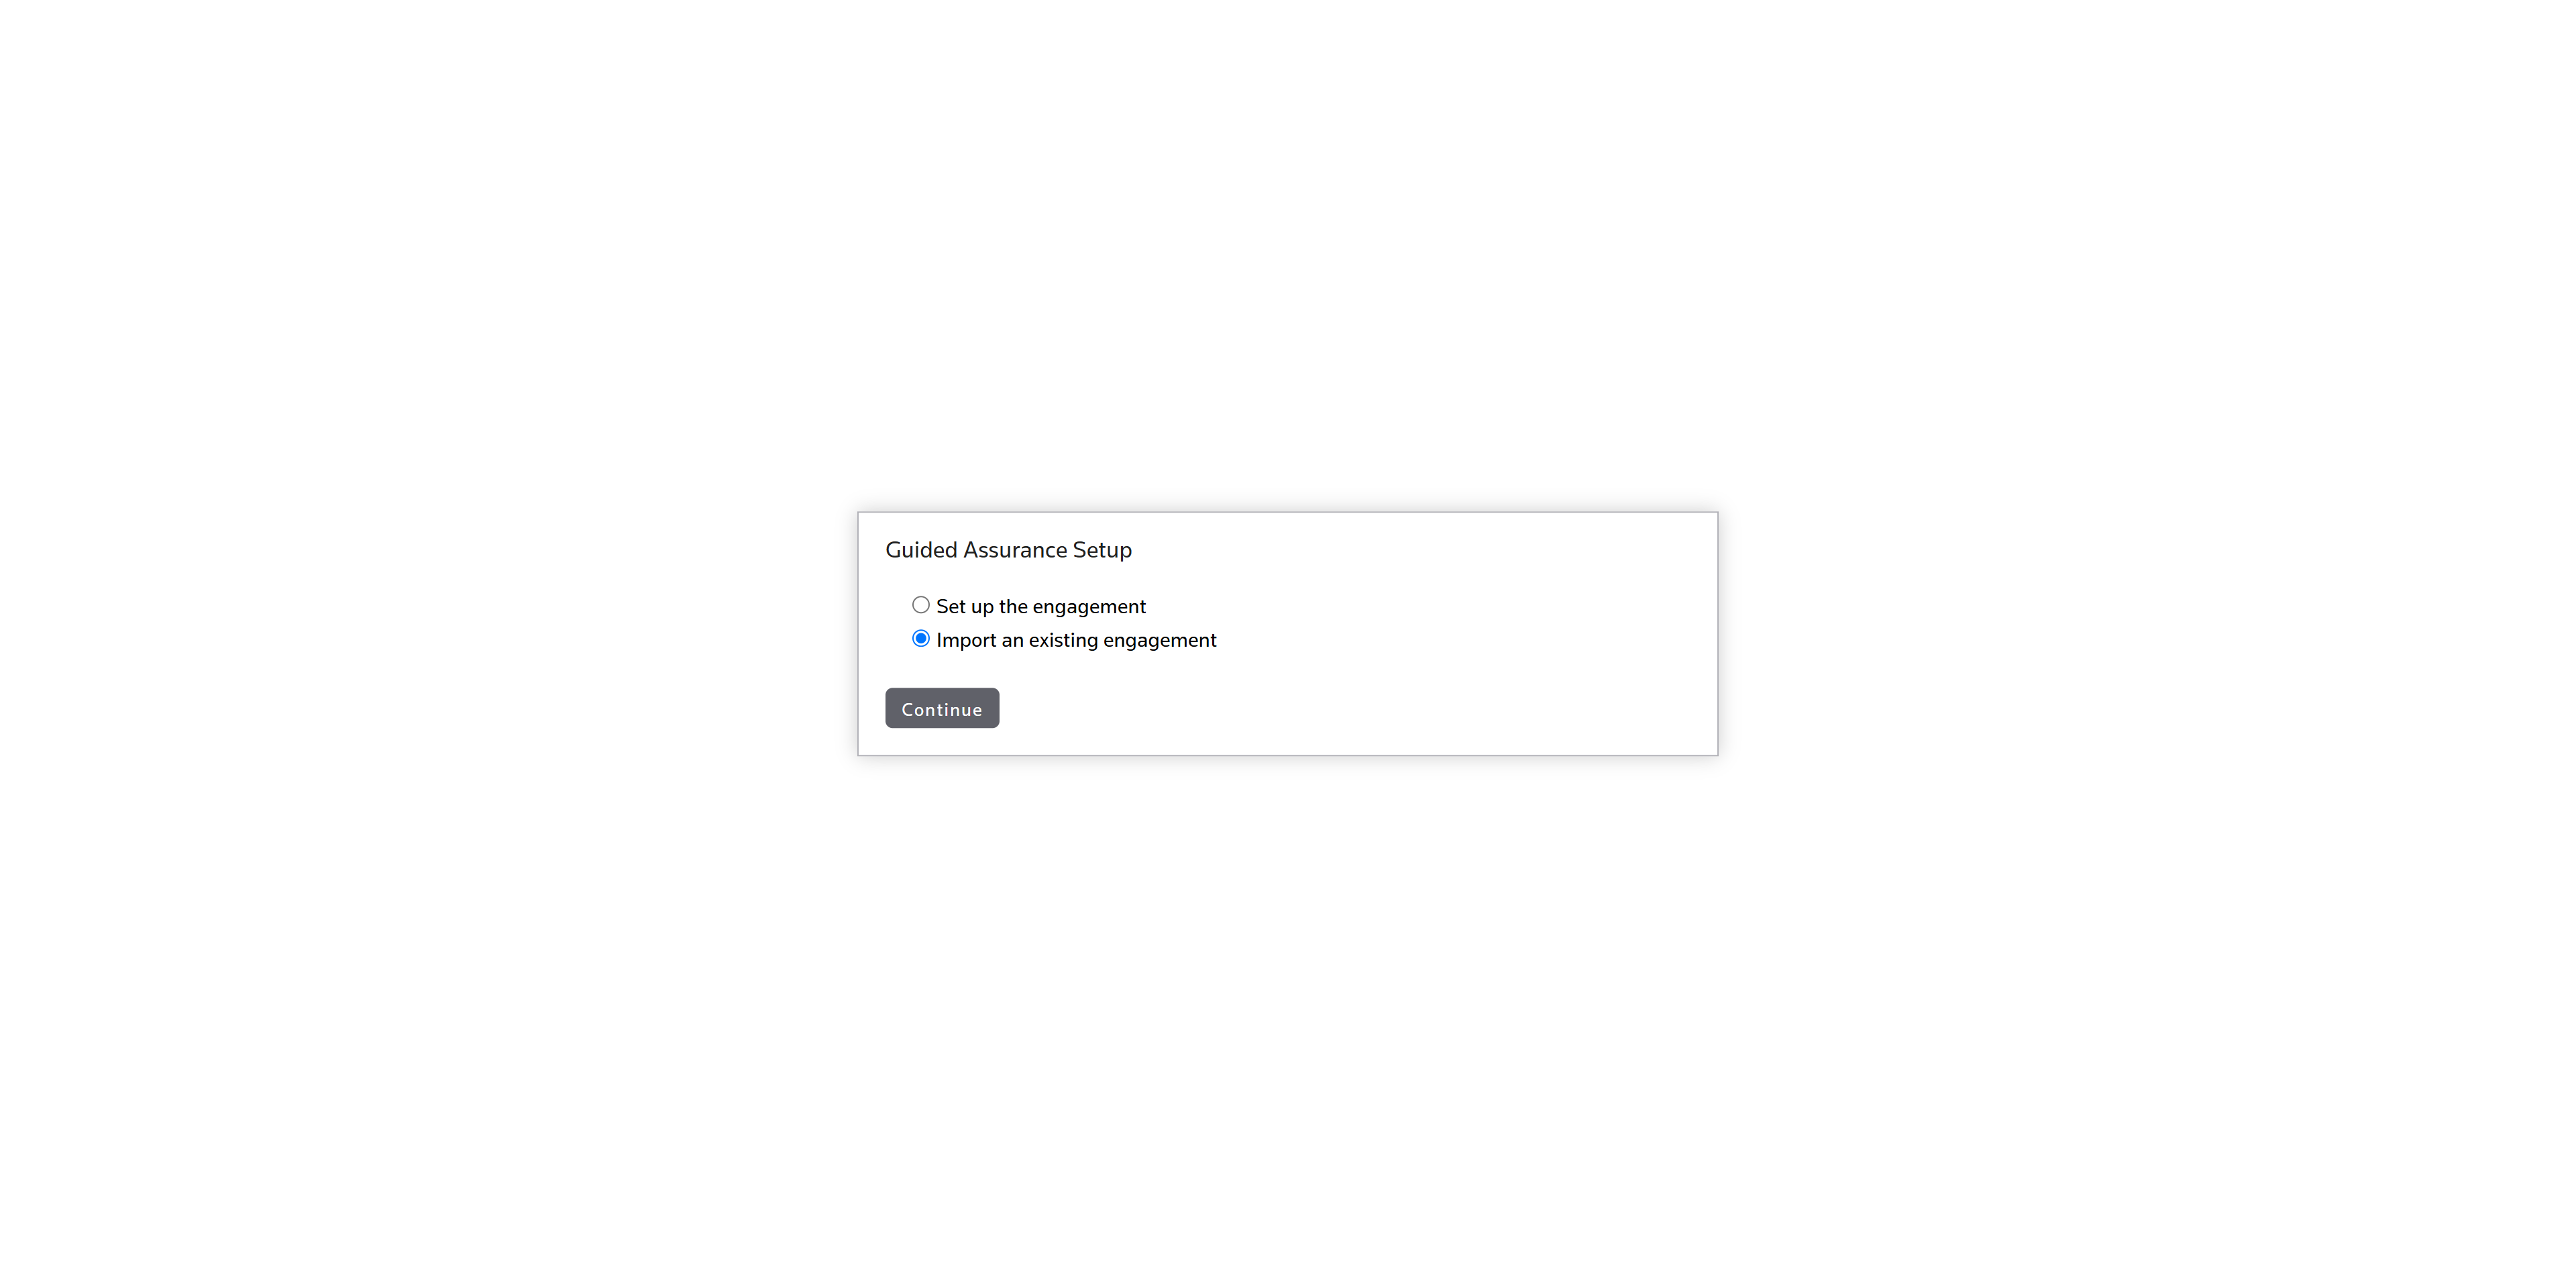
If you have already started or completed engagements, you can import them. This import will convert your content to an online version.
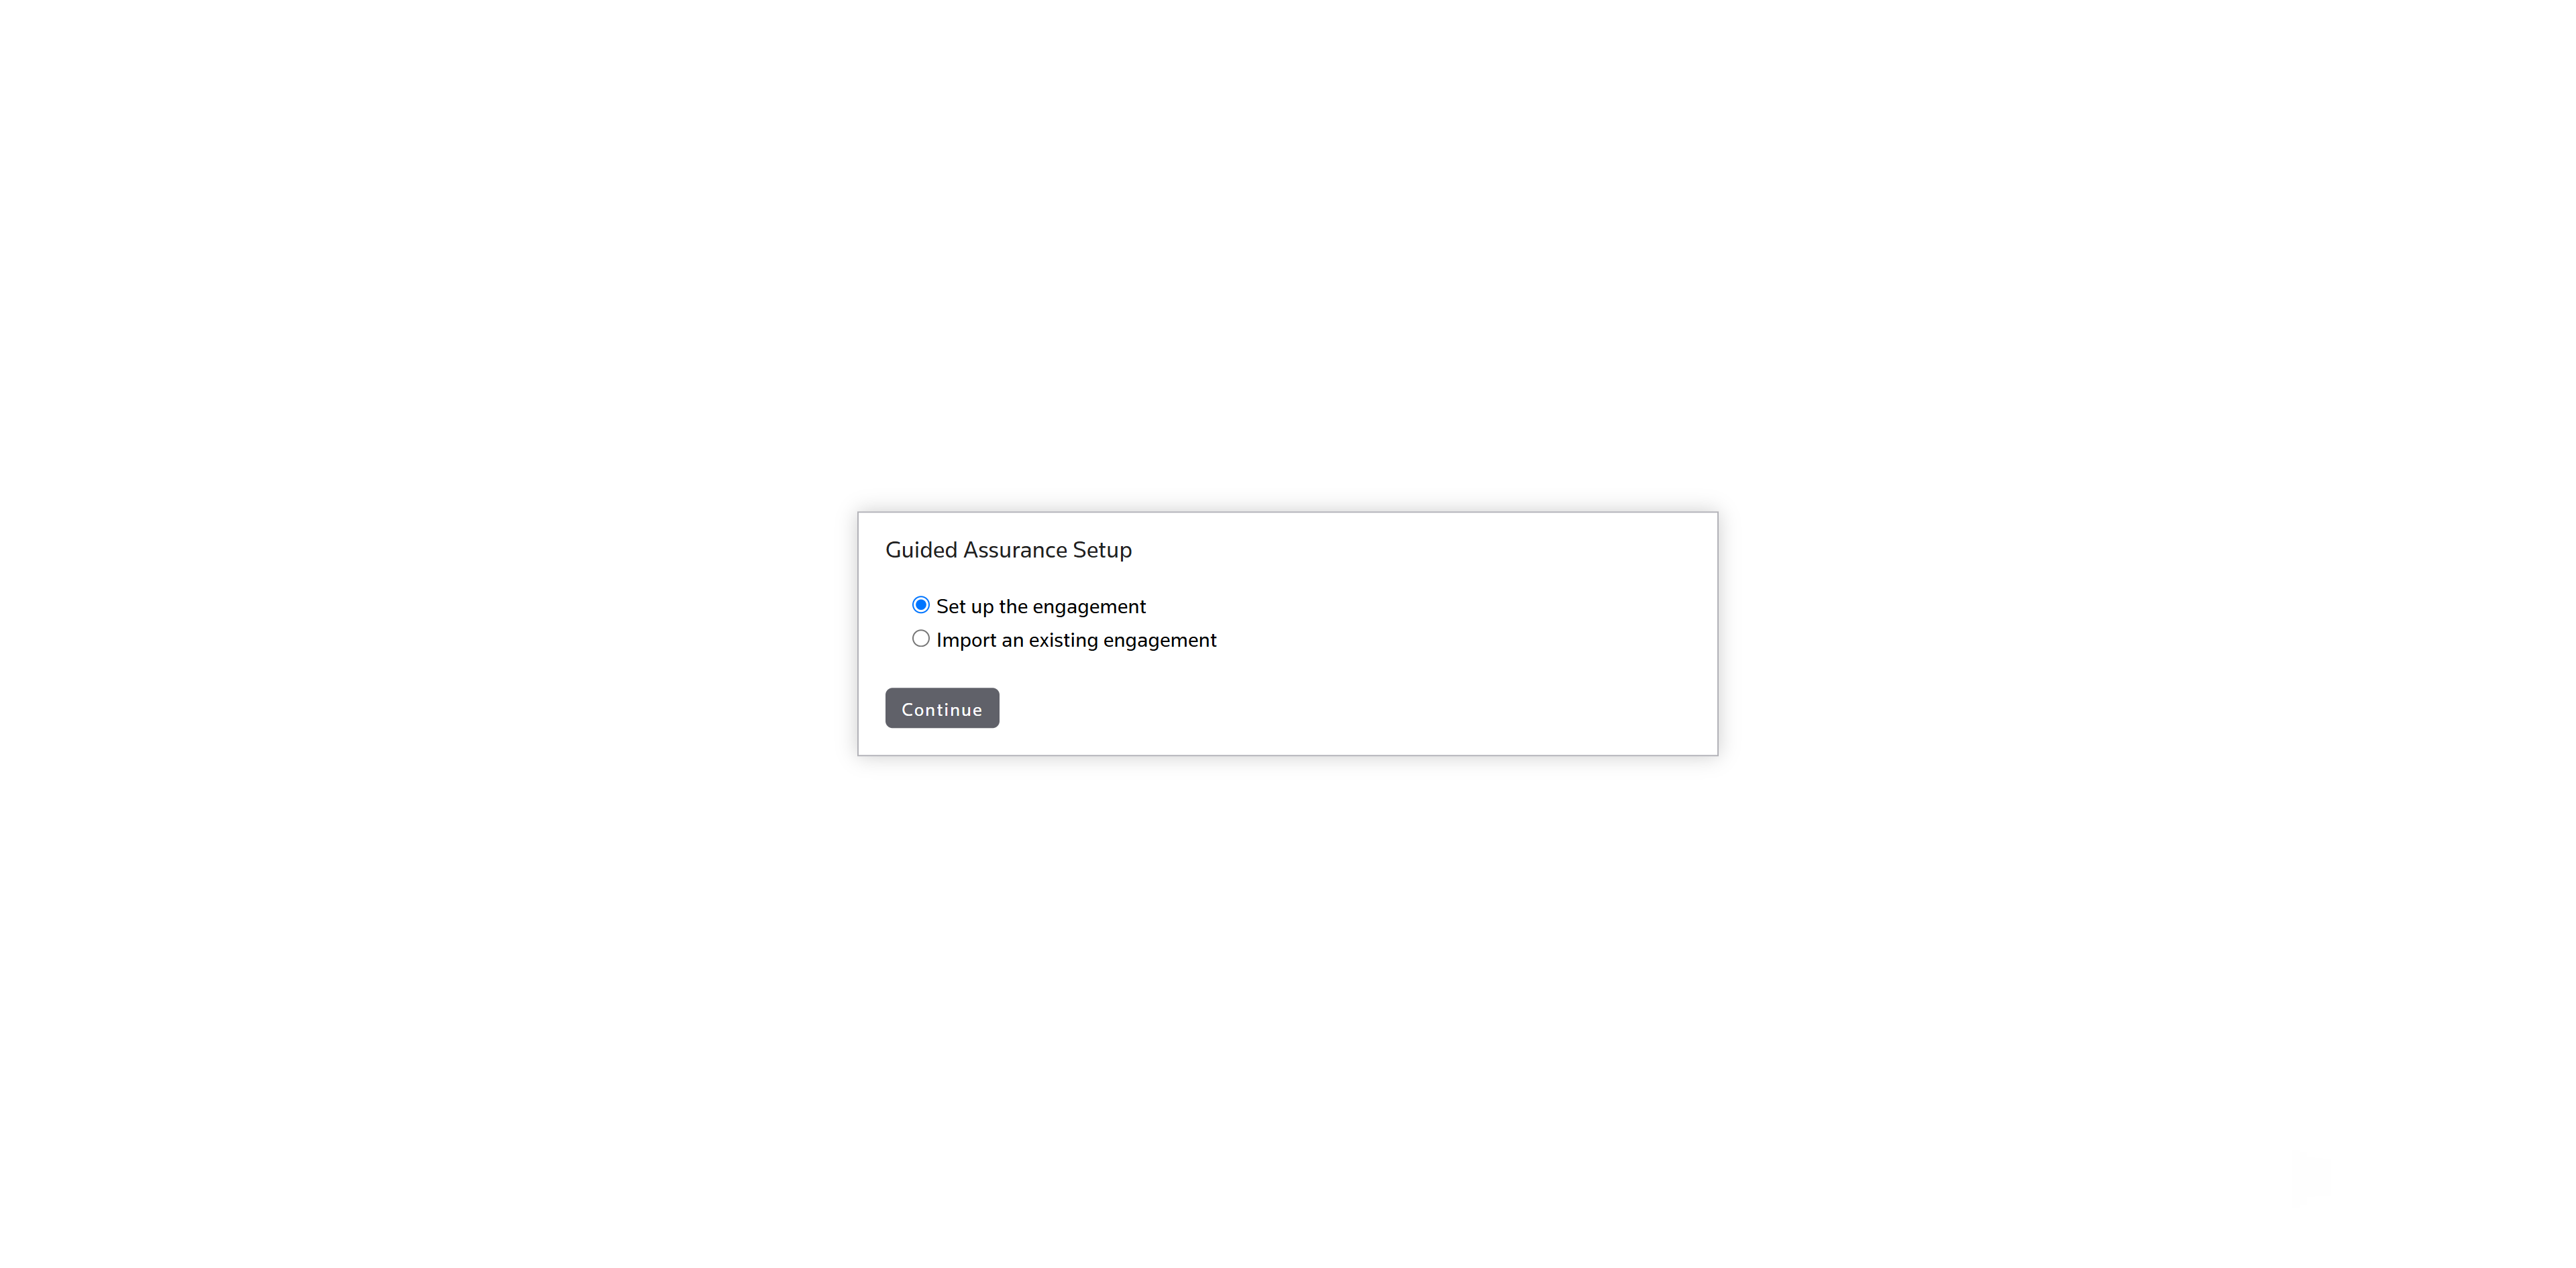
To set up a new engagement, select set up the engagement and click Continue.
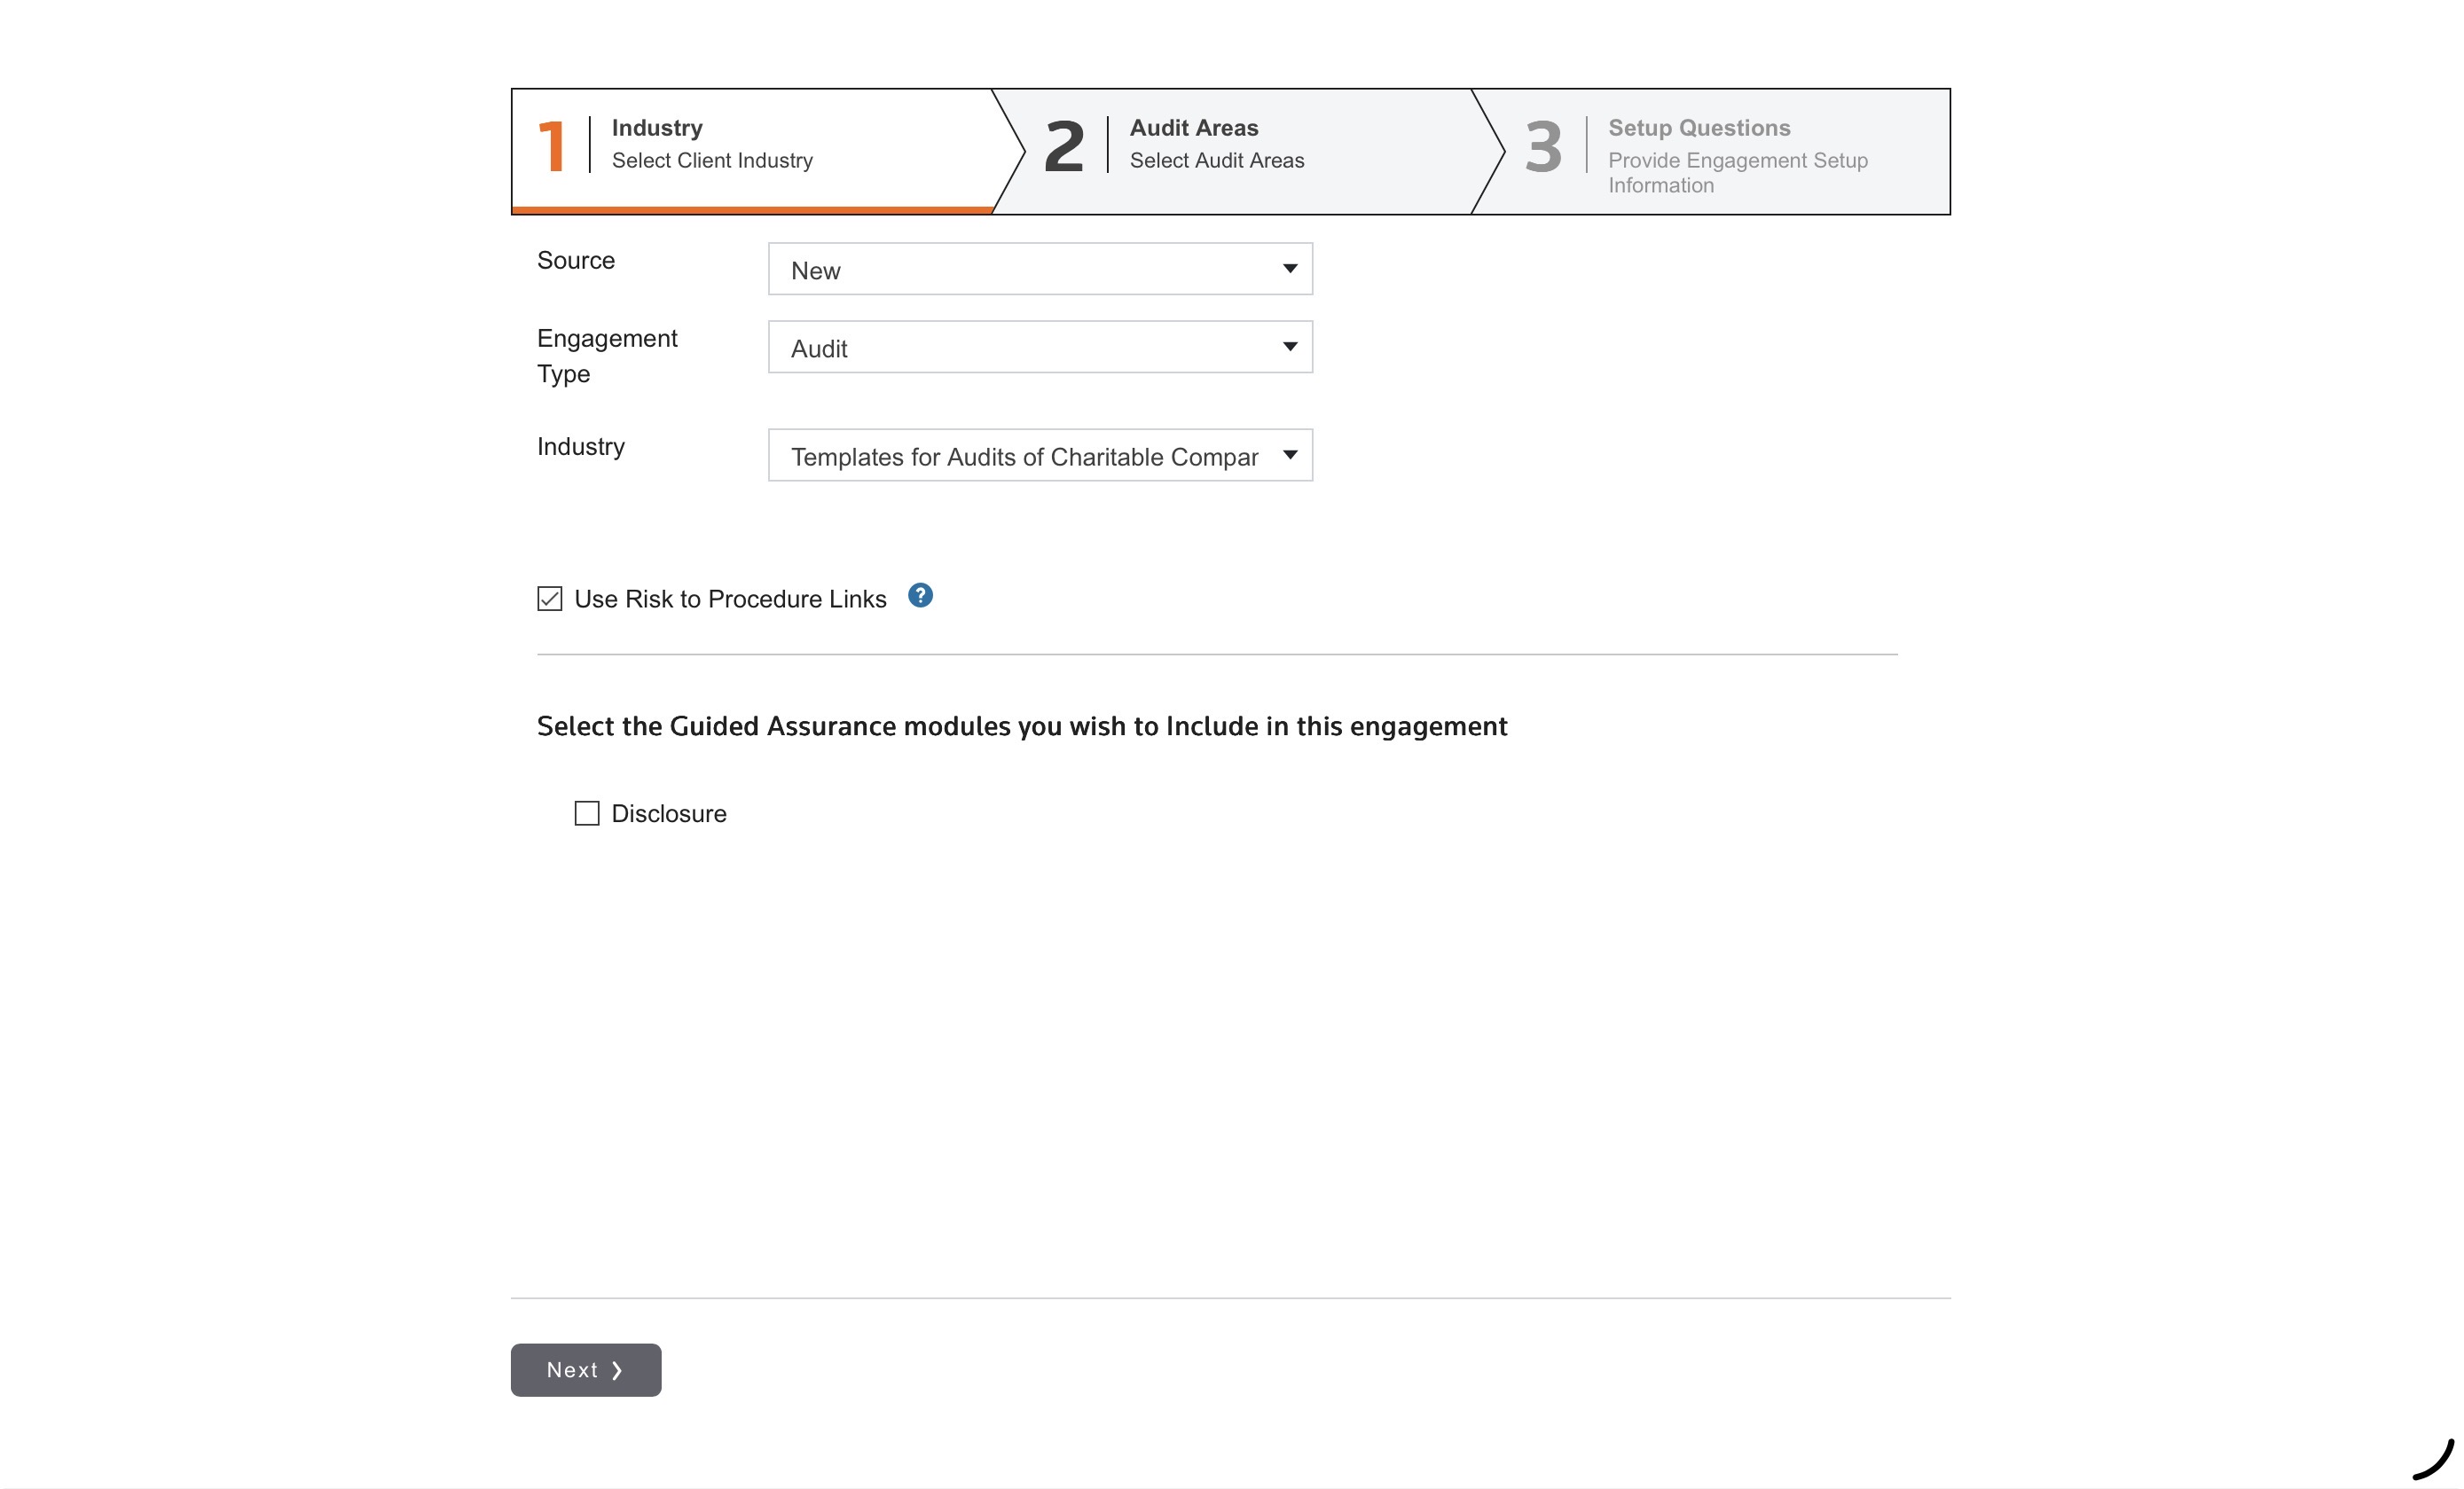
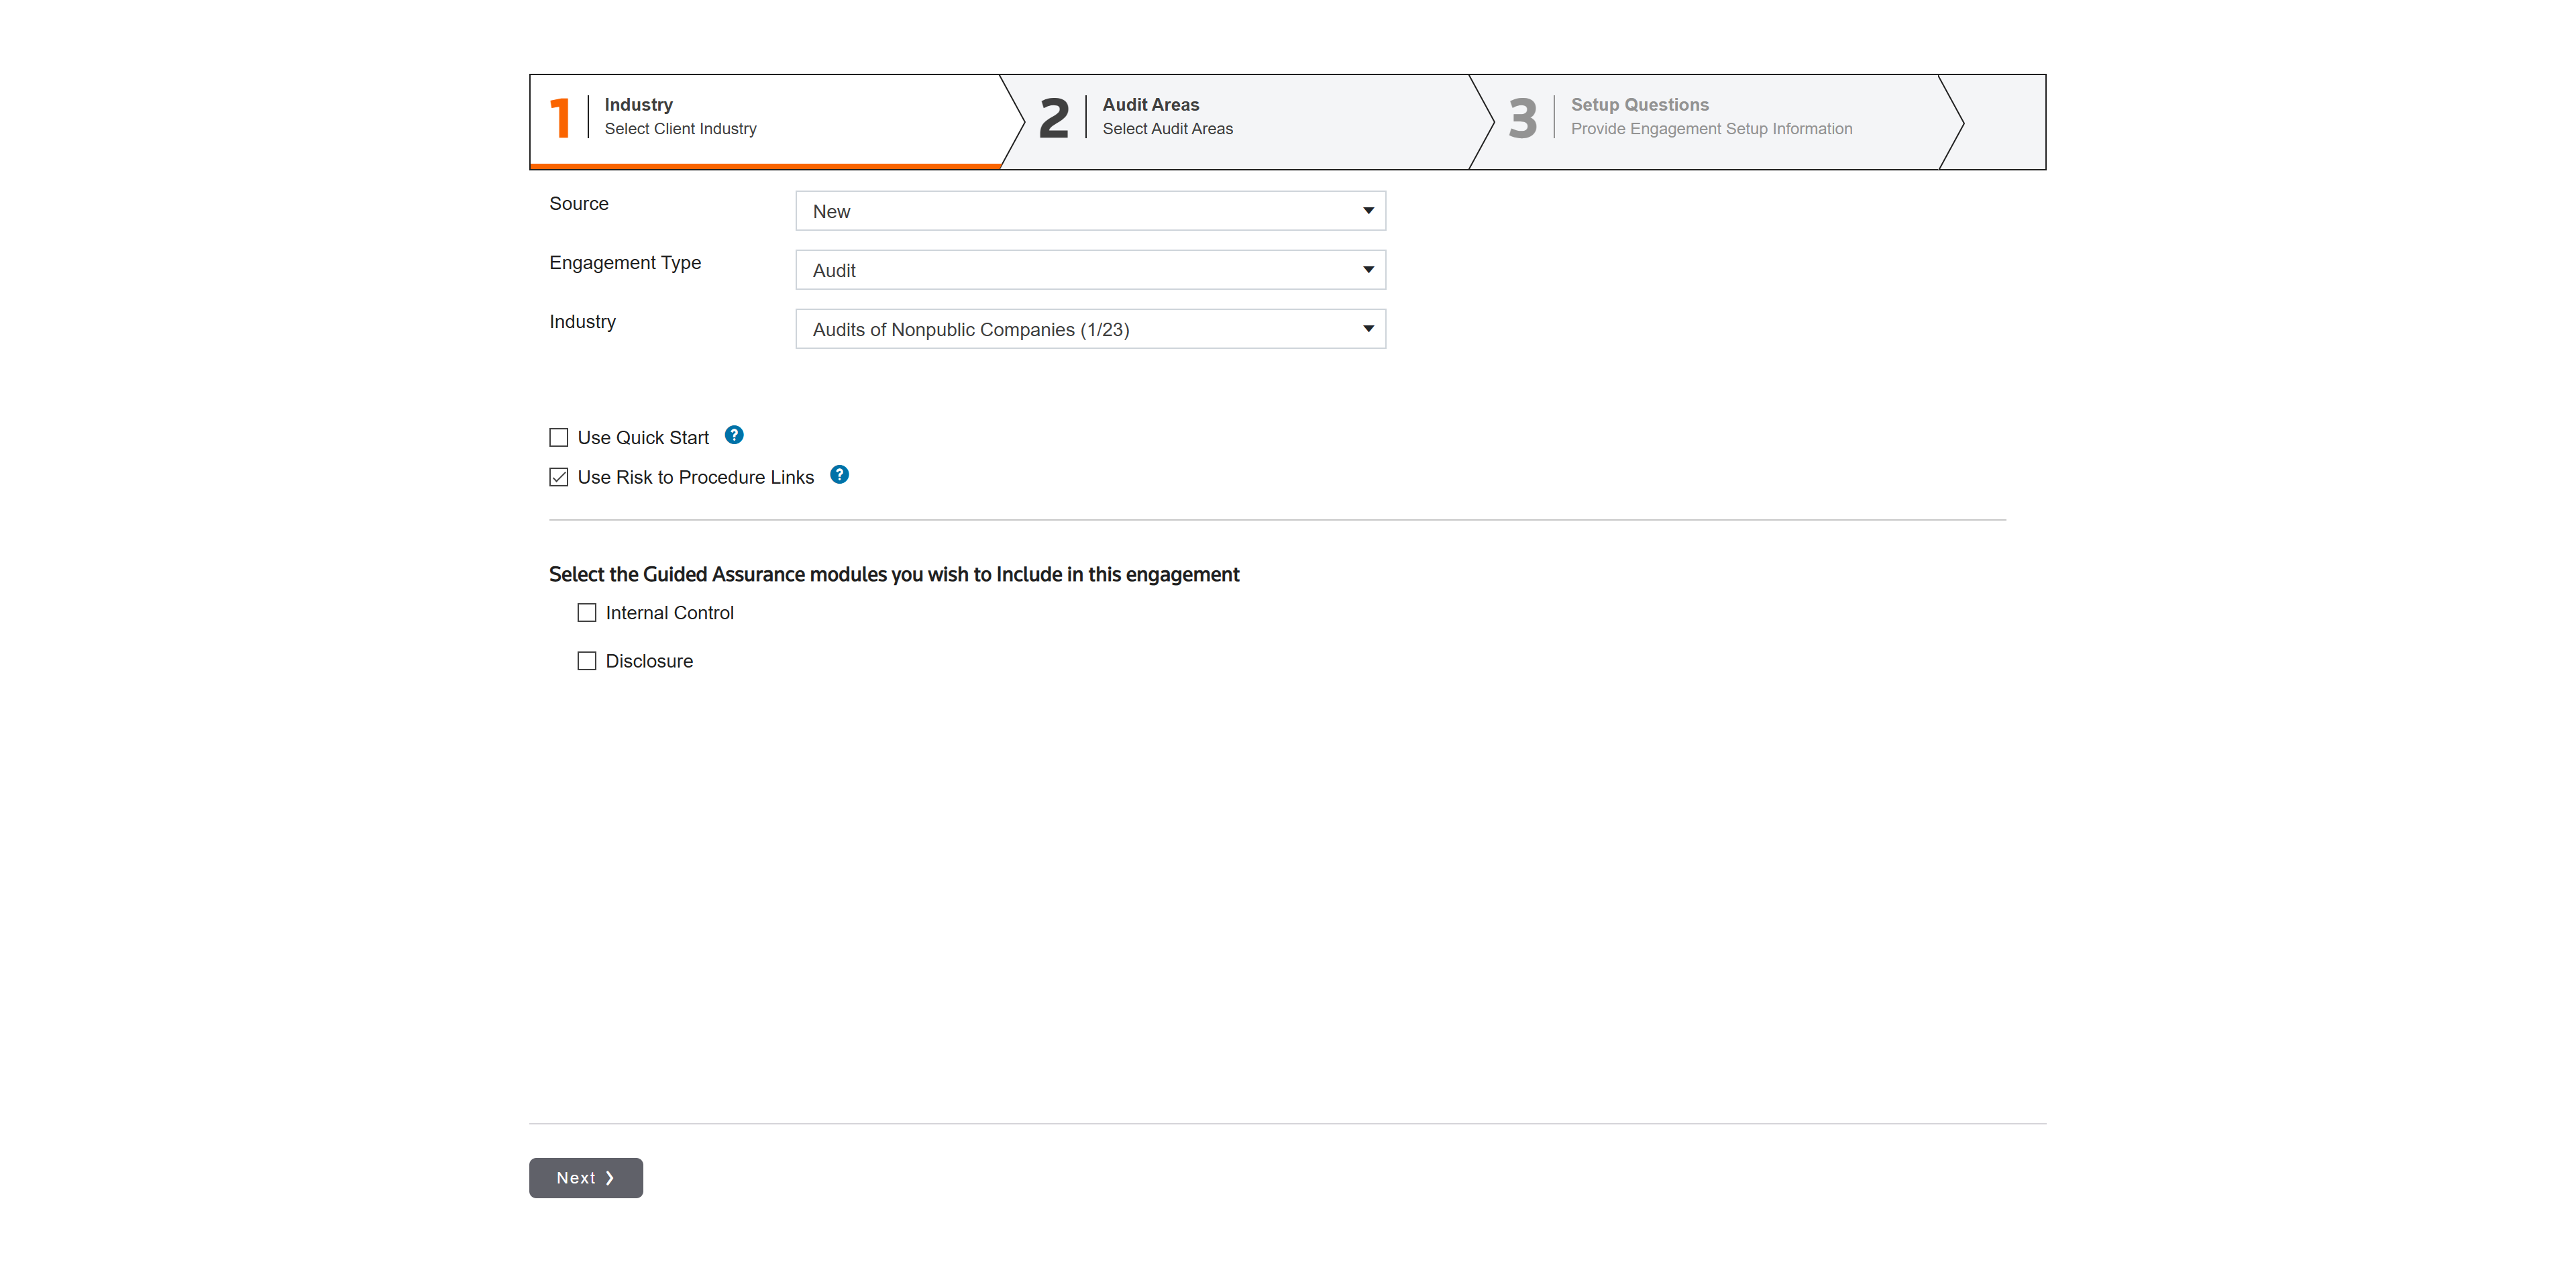
In step 1, select New as the source, Audit as the Engagement Type, and Audits of Charitable Companies as the Industry.
Click to use Risk to Procedure Links.
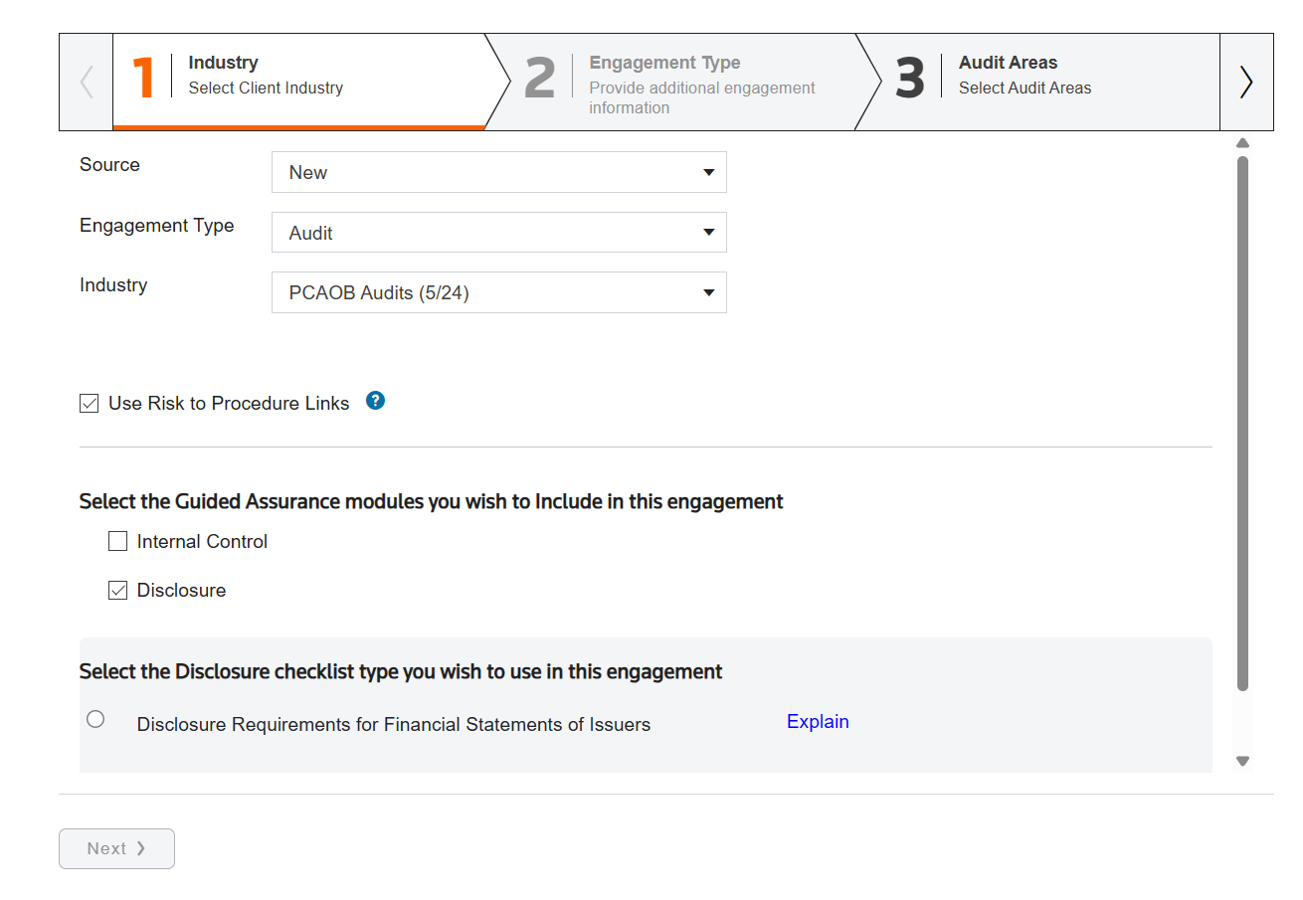
You can include Internal Control and Disclosure modules. Click Disclosure.
And select which checklist type you want to use in this engagement.
Guided Assurance Guided Assurance offers guided, start-to-finish audit preparation, compilation, and review tools. Access the leading PPC audit methodology, risk identification, and process automation, as well as customizable Disclosure Checklists and Single Audit.
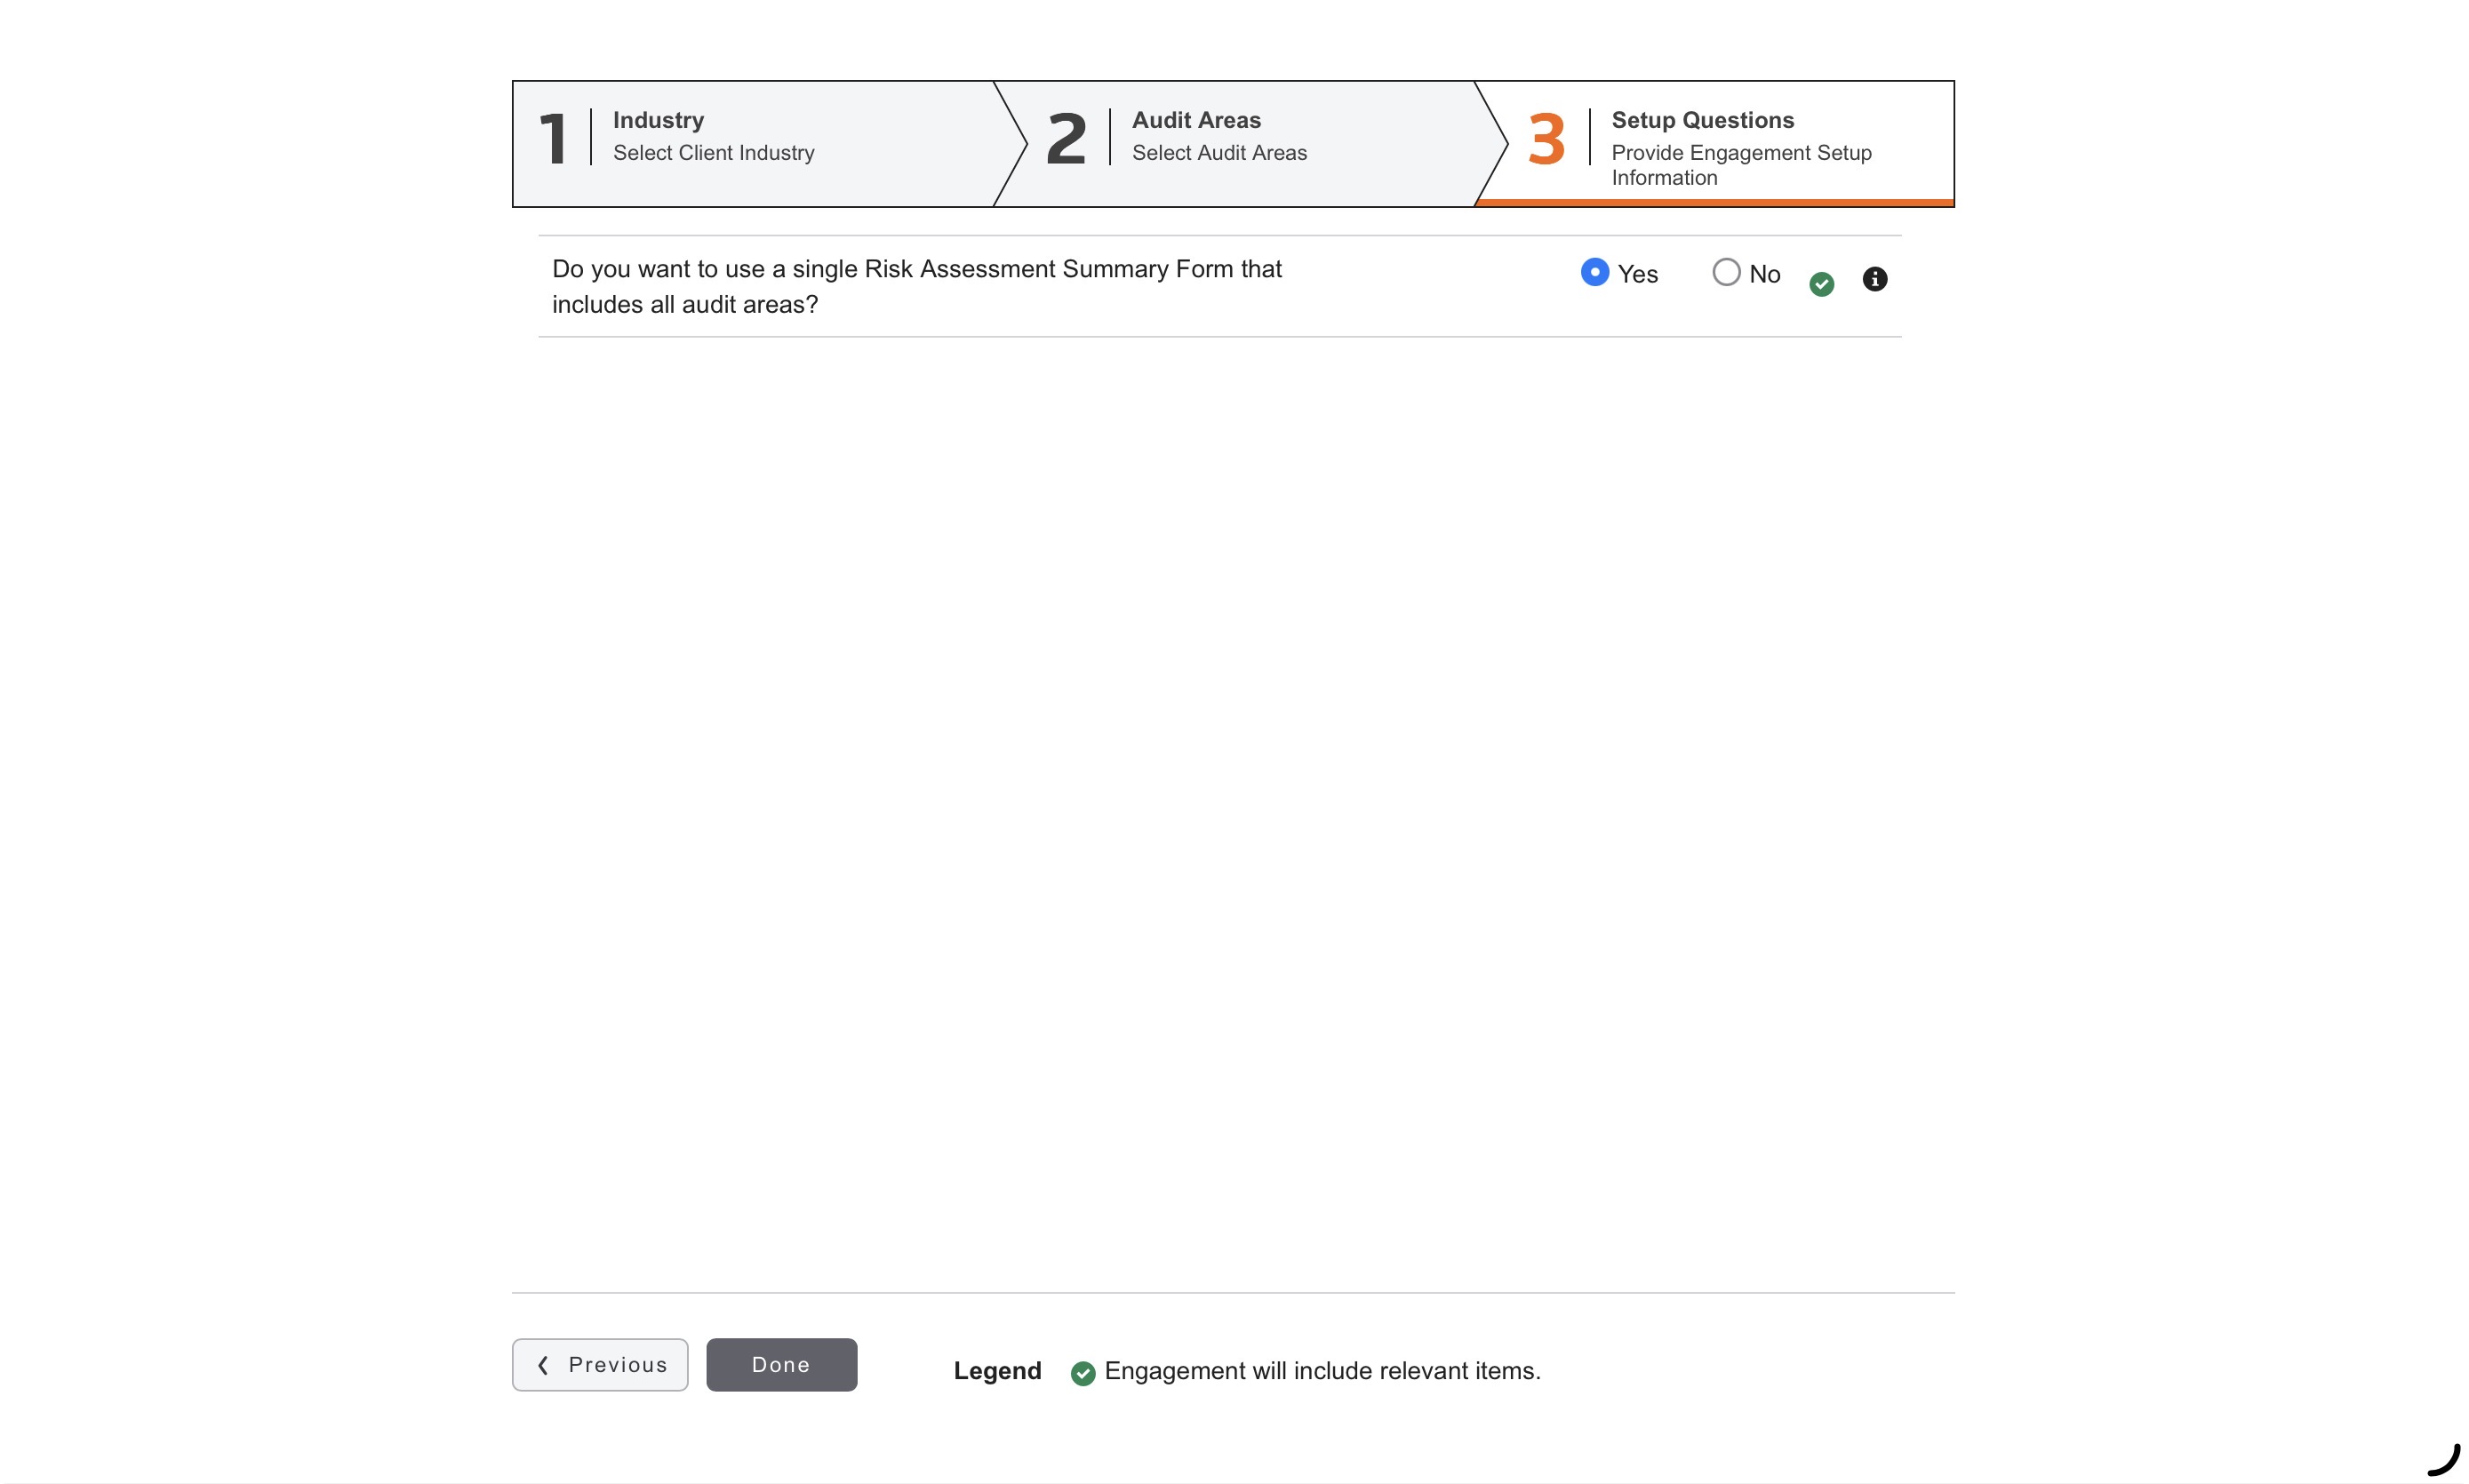
In step 3, complete the setup questions. These questions enable Cloud Audit Suite to pull only the documents you need for this audit, preventing your staff from over auditing and saving your firm time and money.
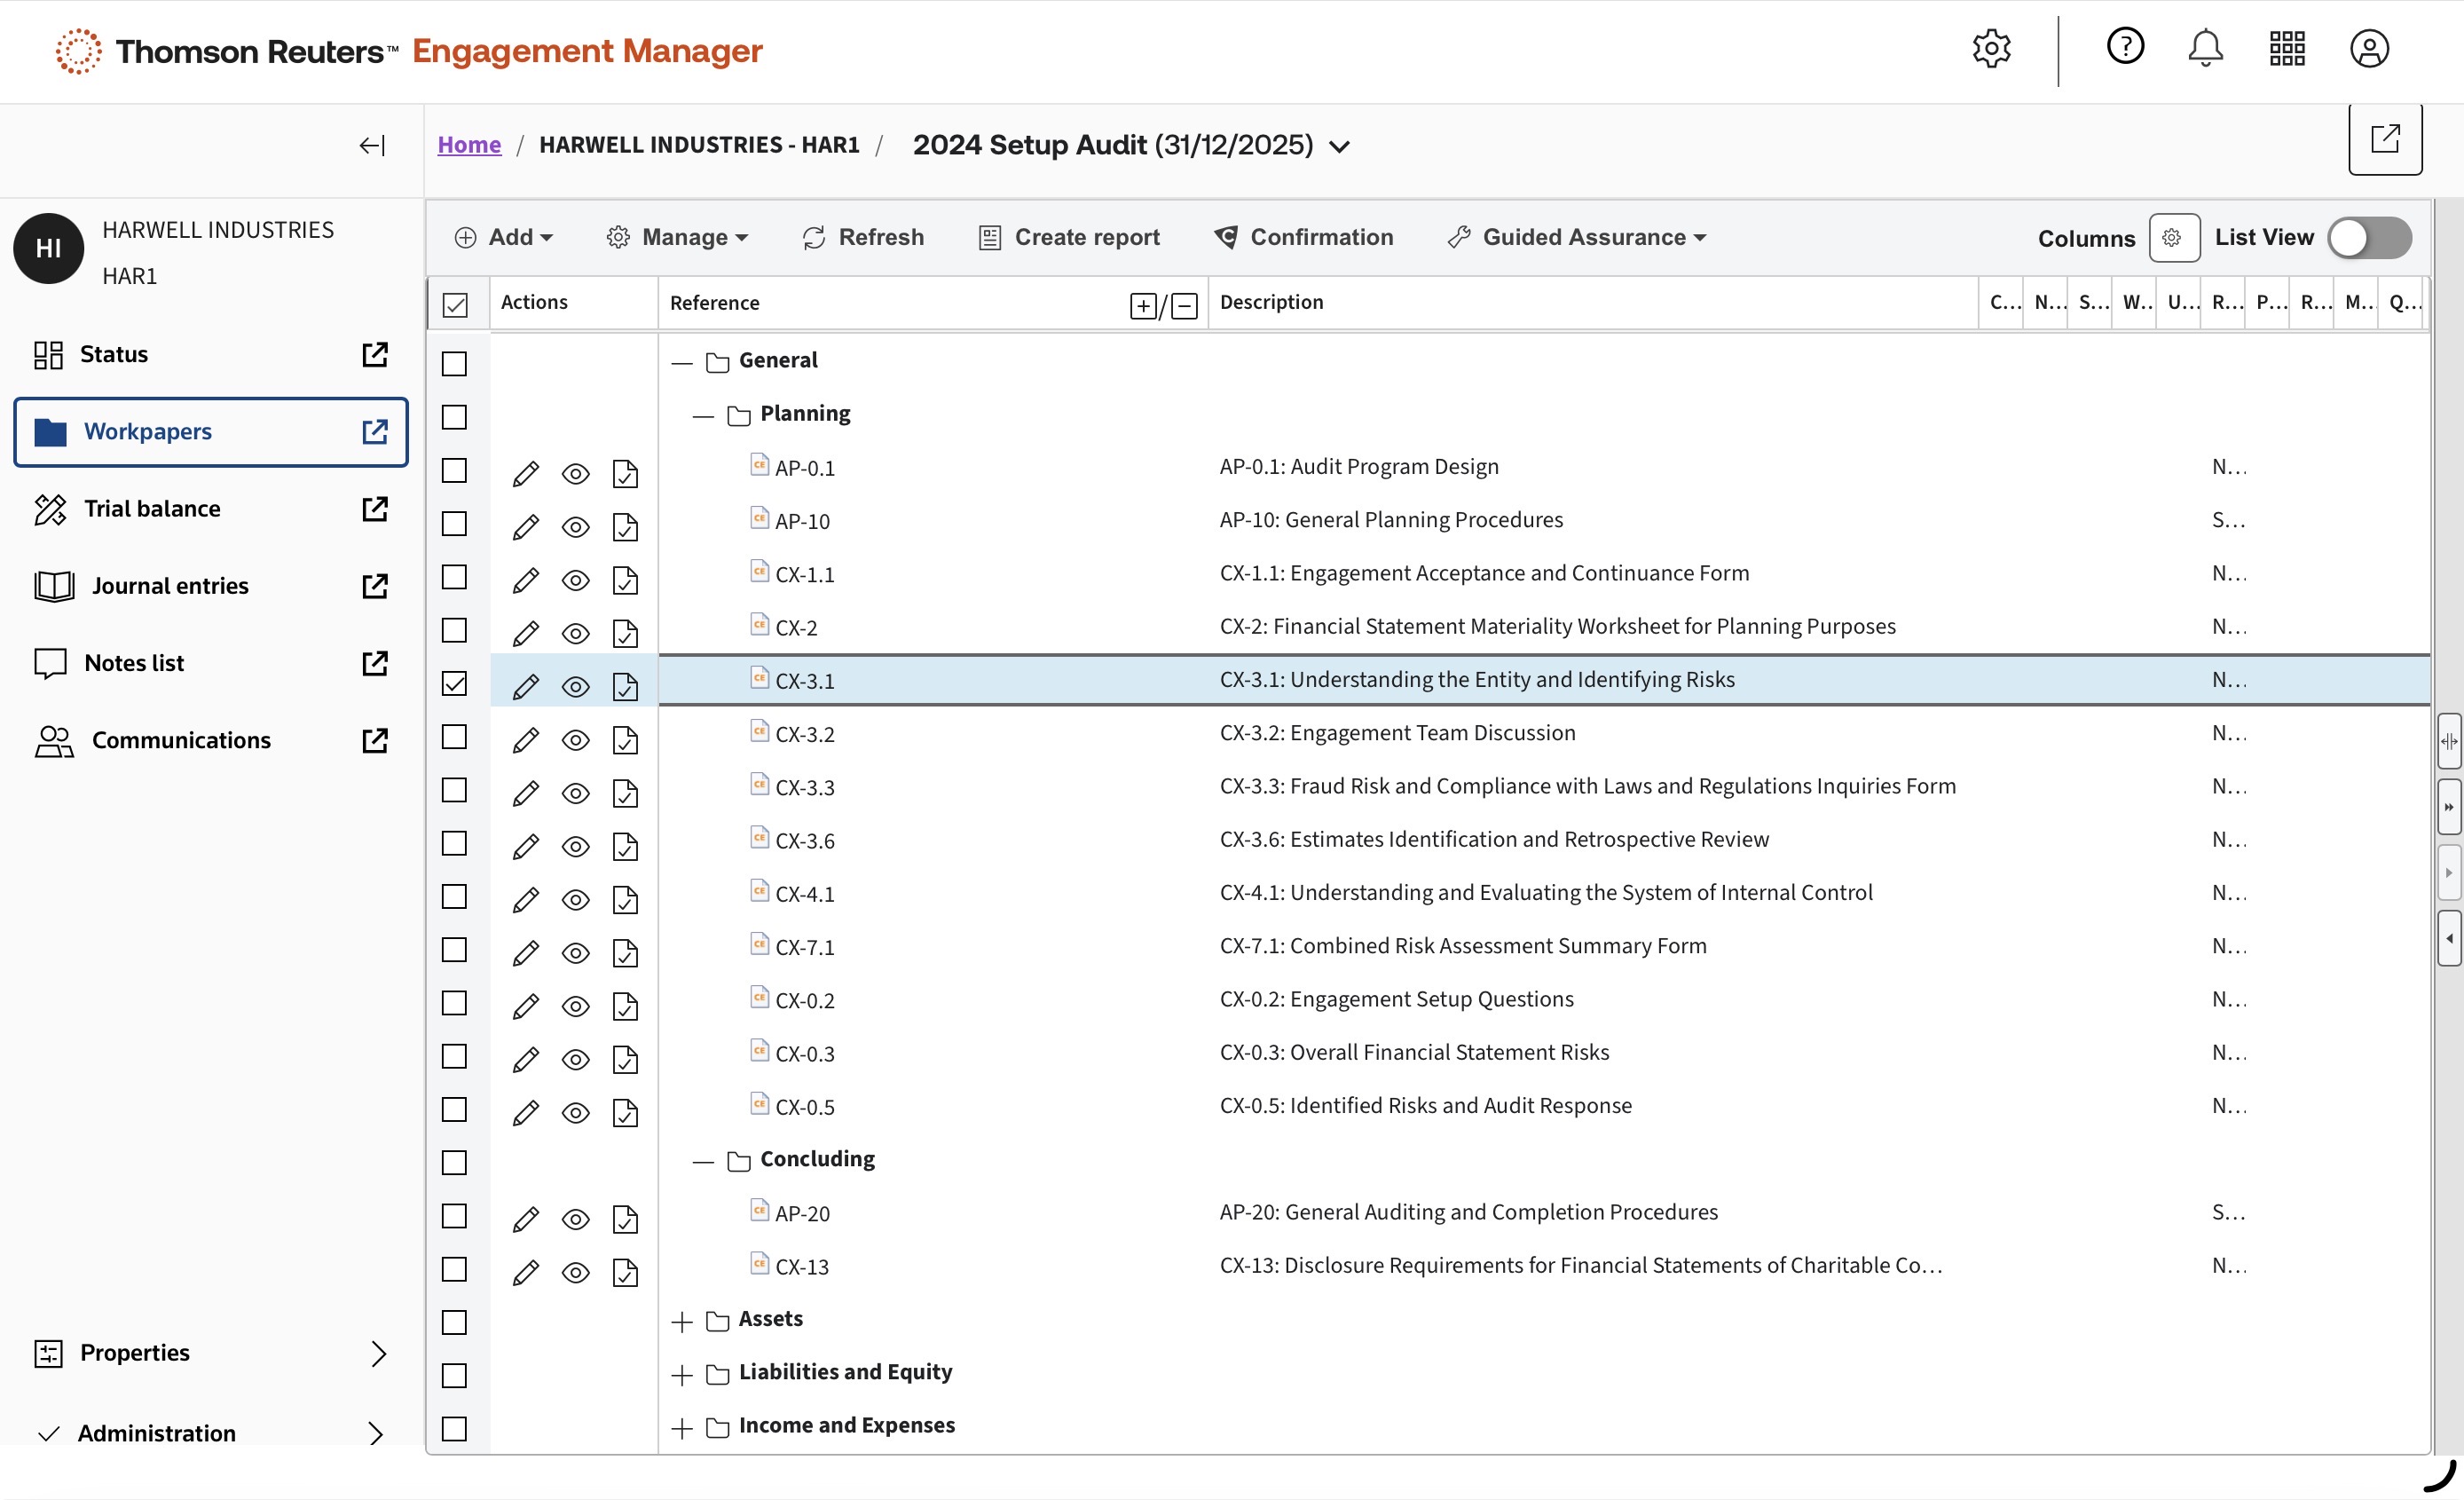
Once you've completed the setup, all the documents you need will be automatically populated.
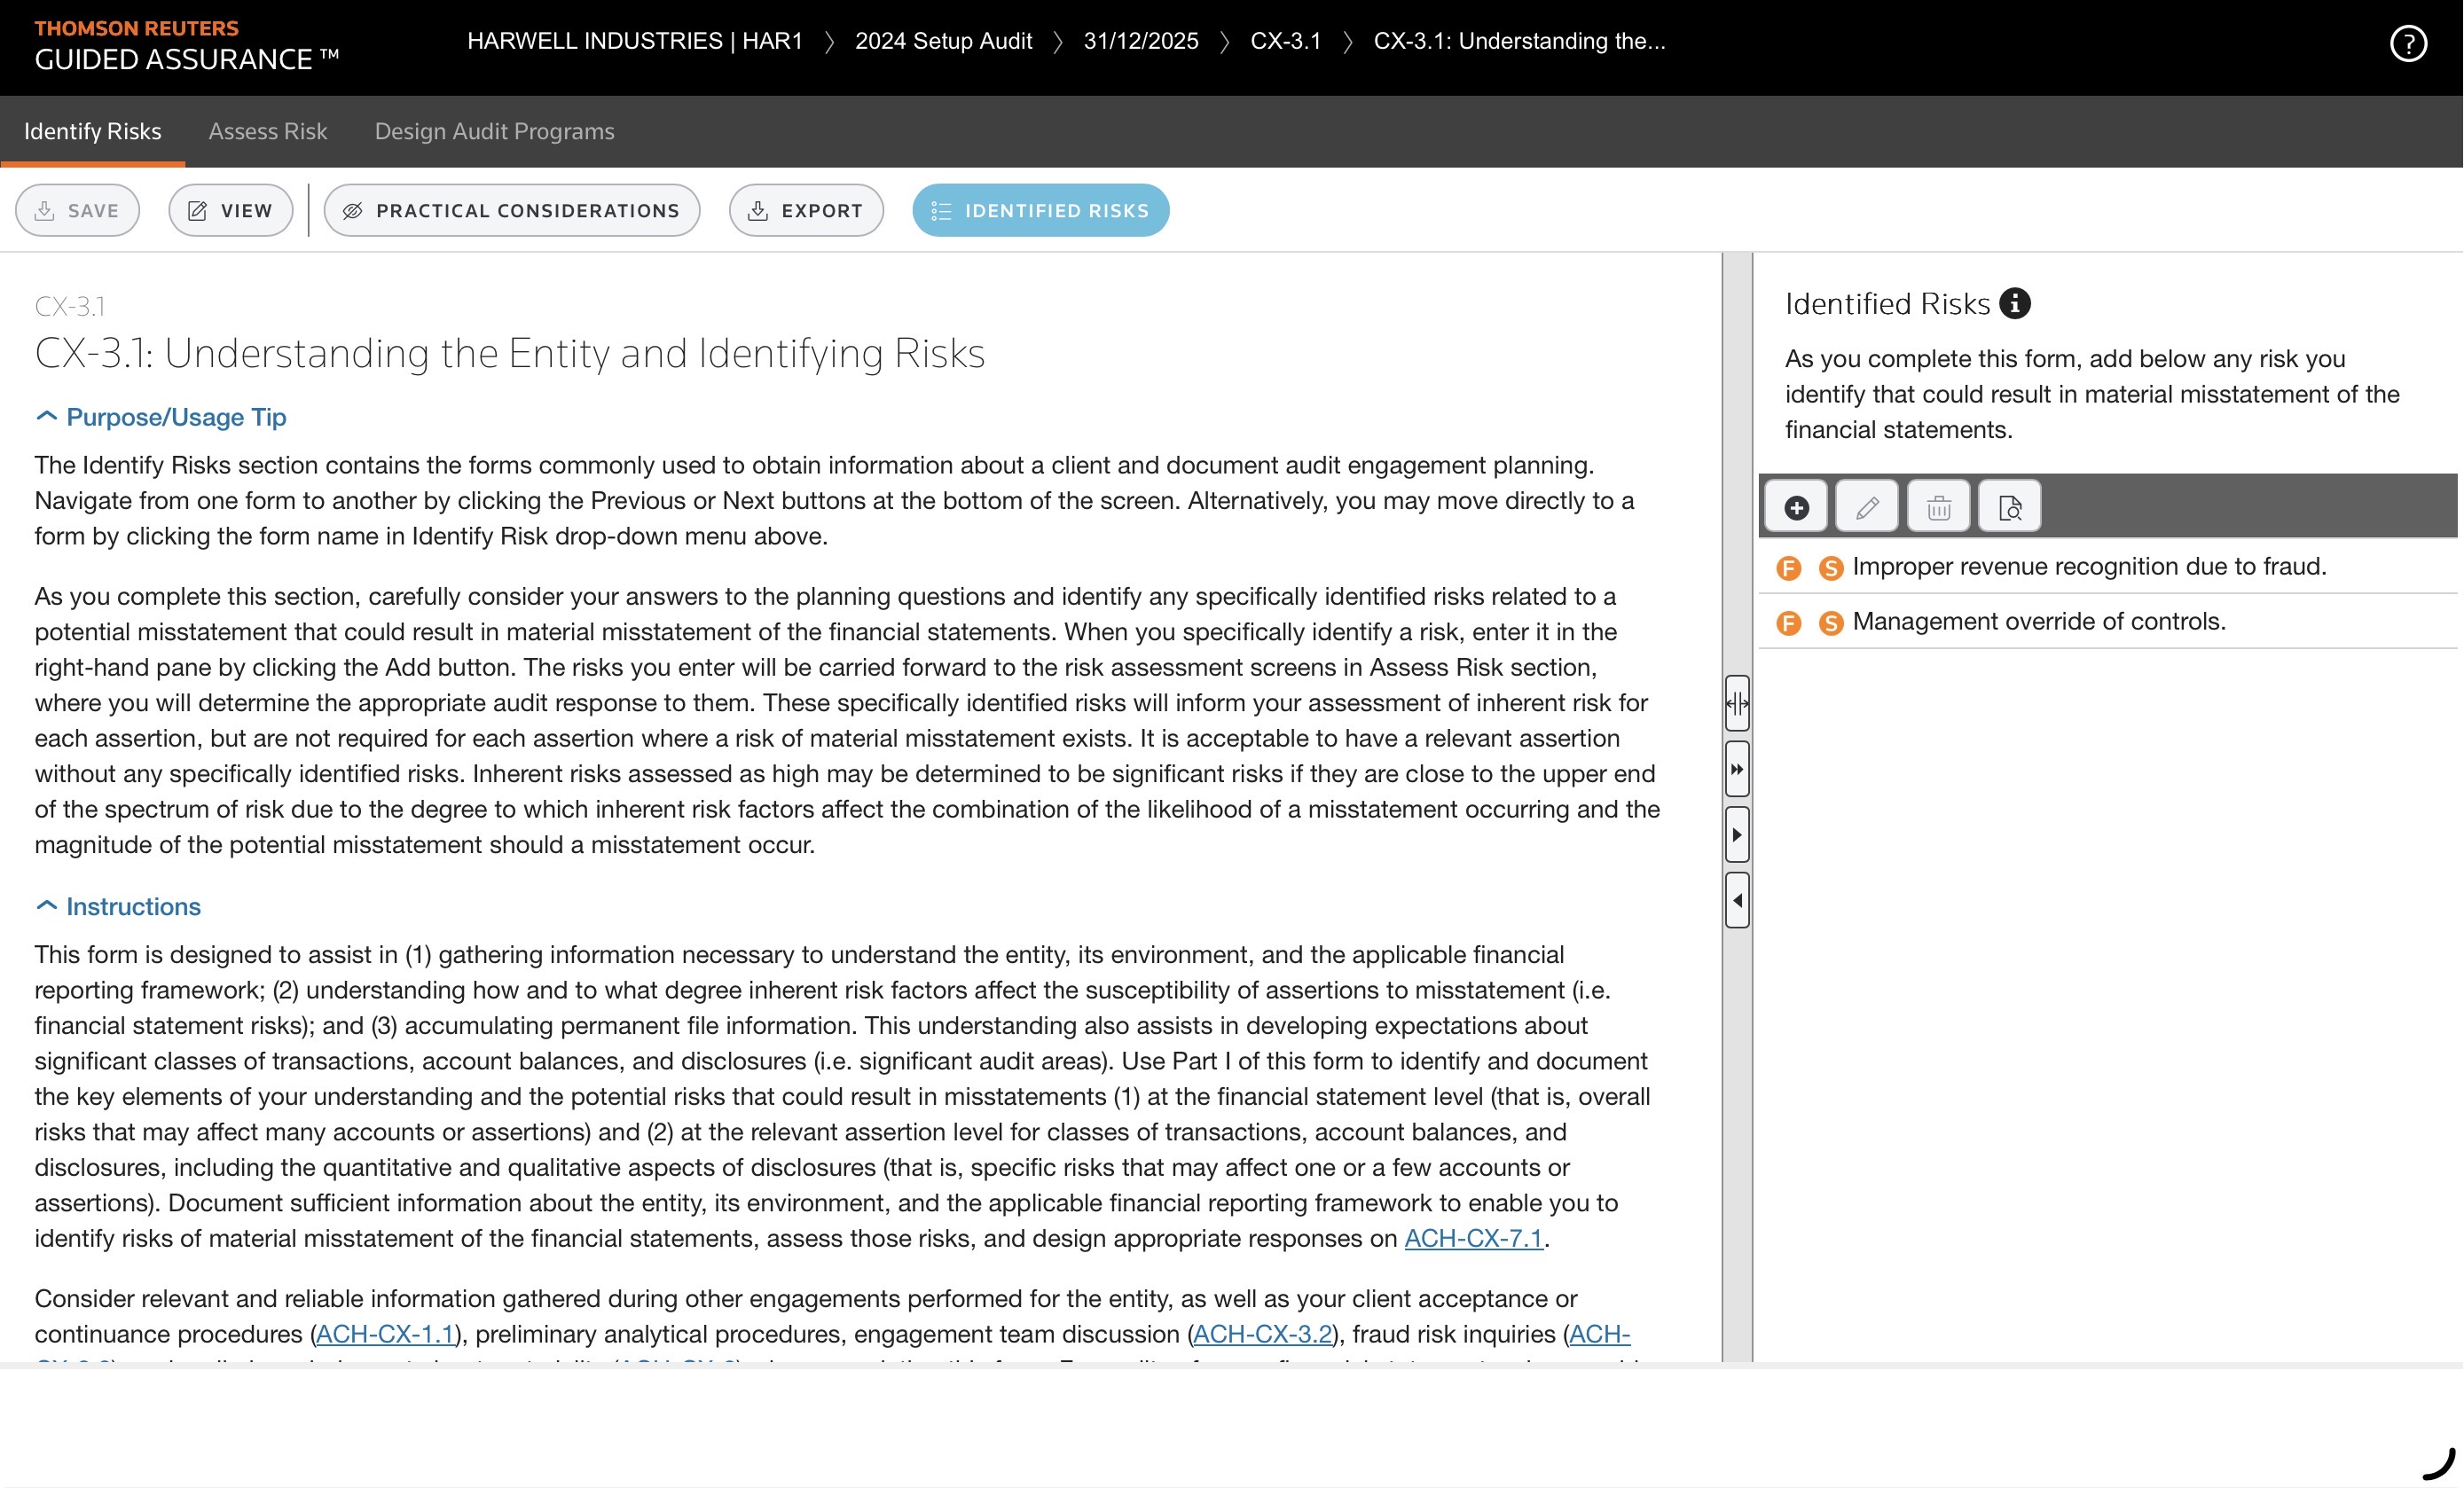
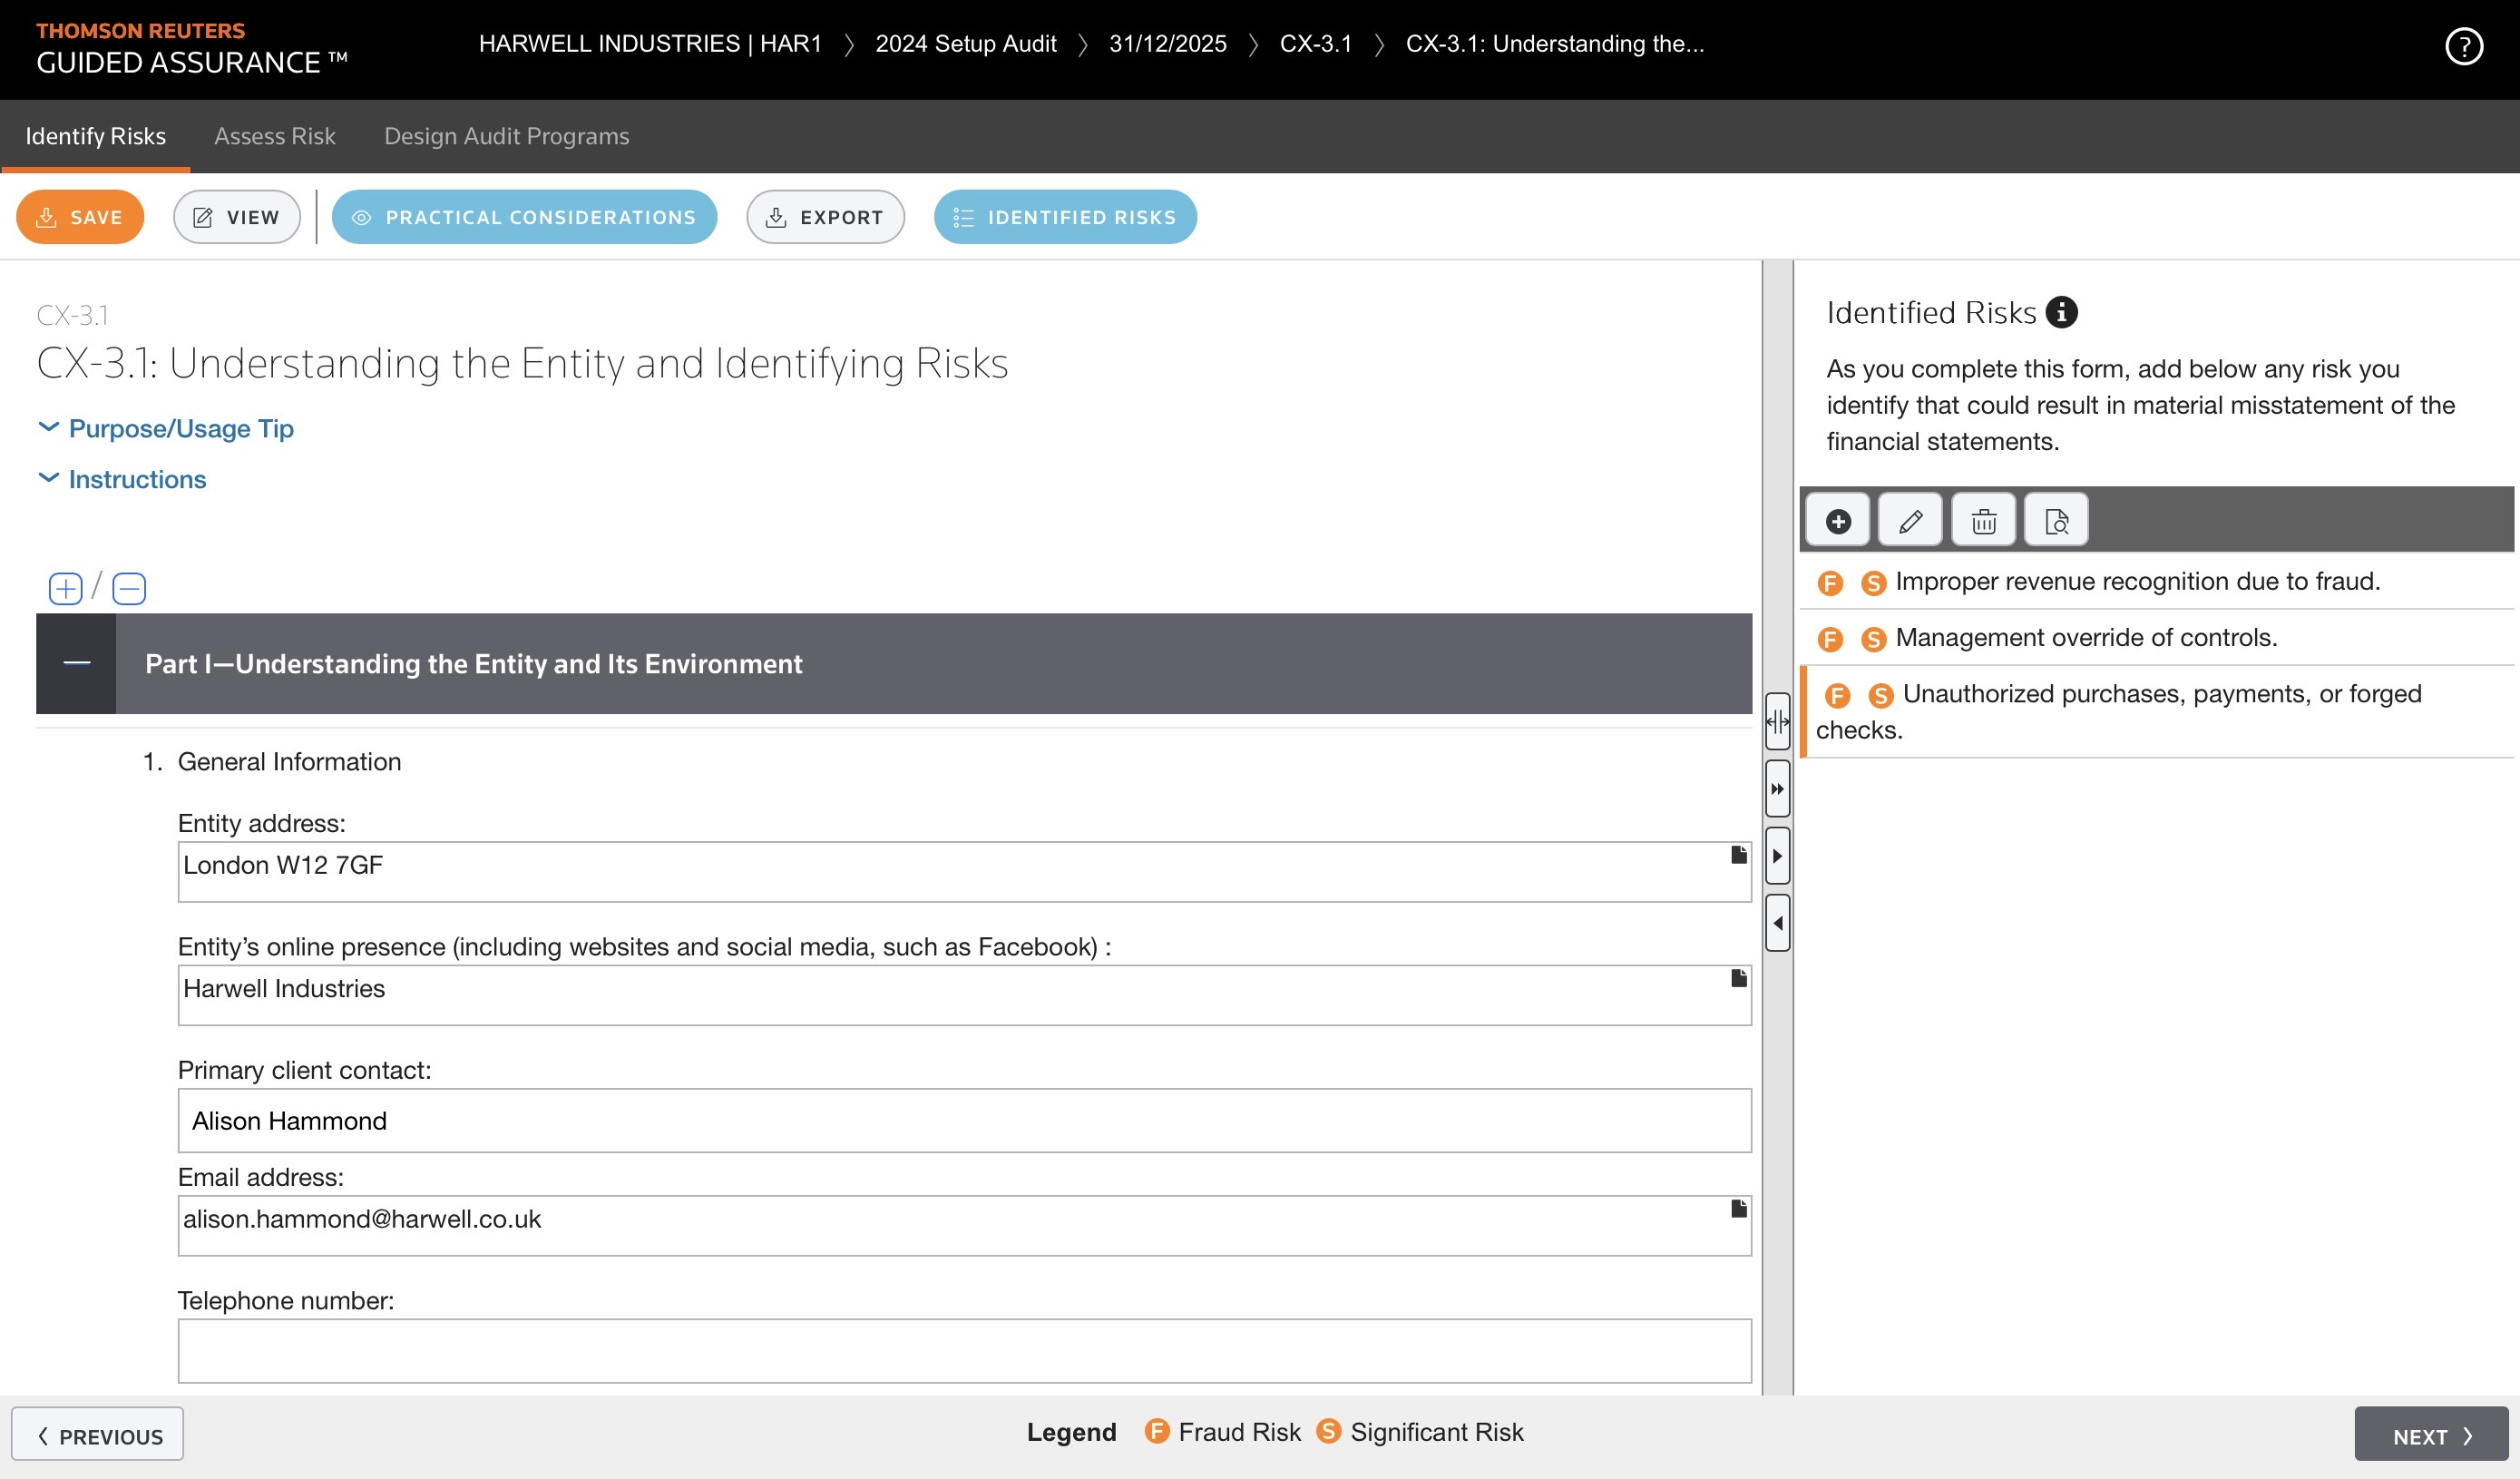
Click the edit icon to open the CX-3.1: Understanding the Entity and Identifying Risks.
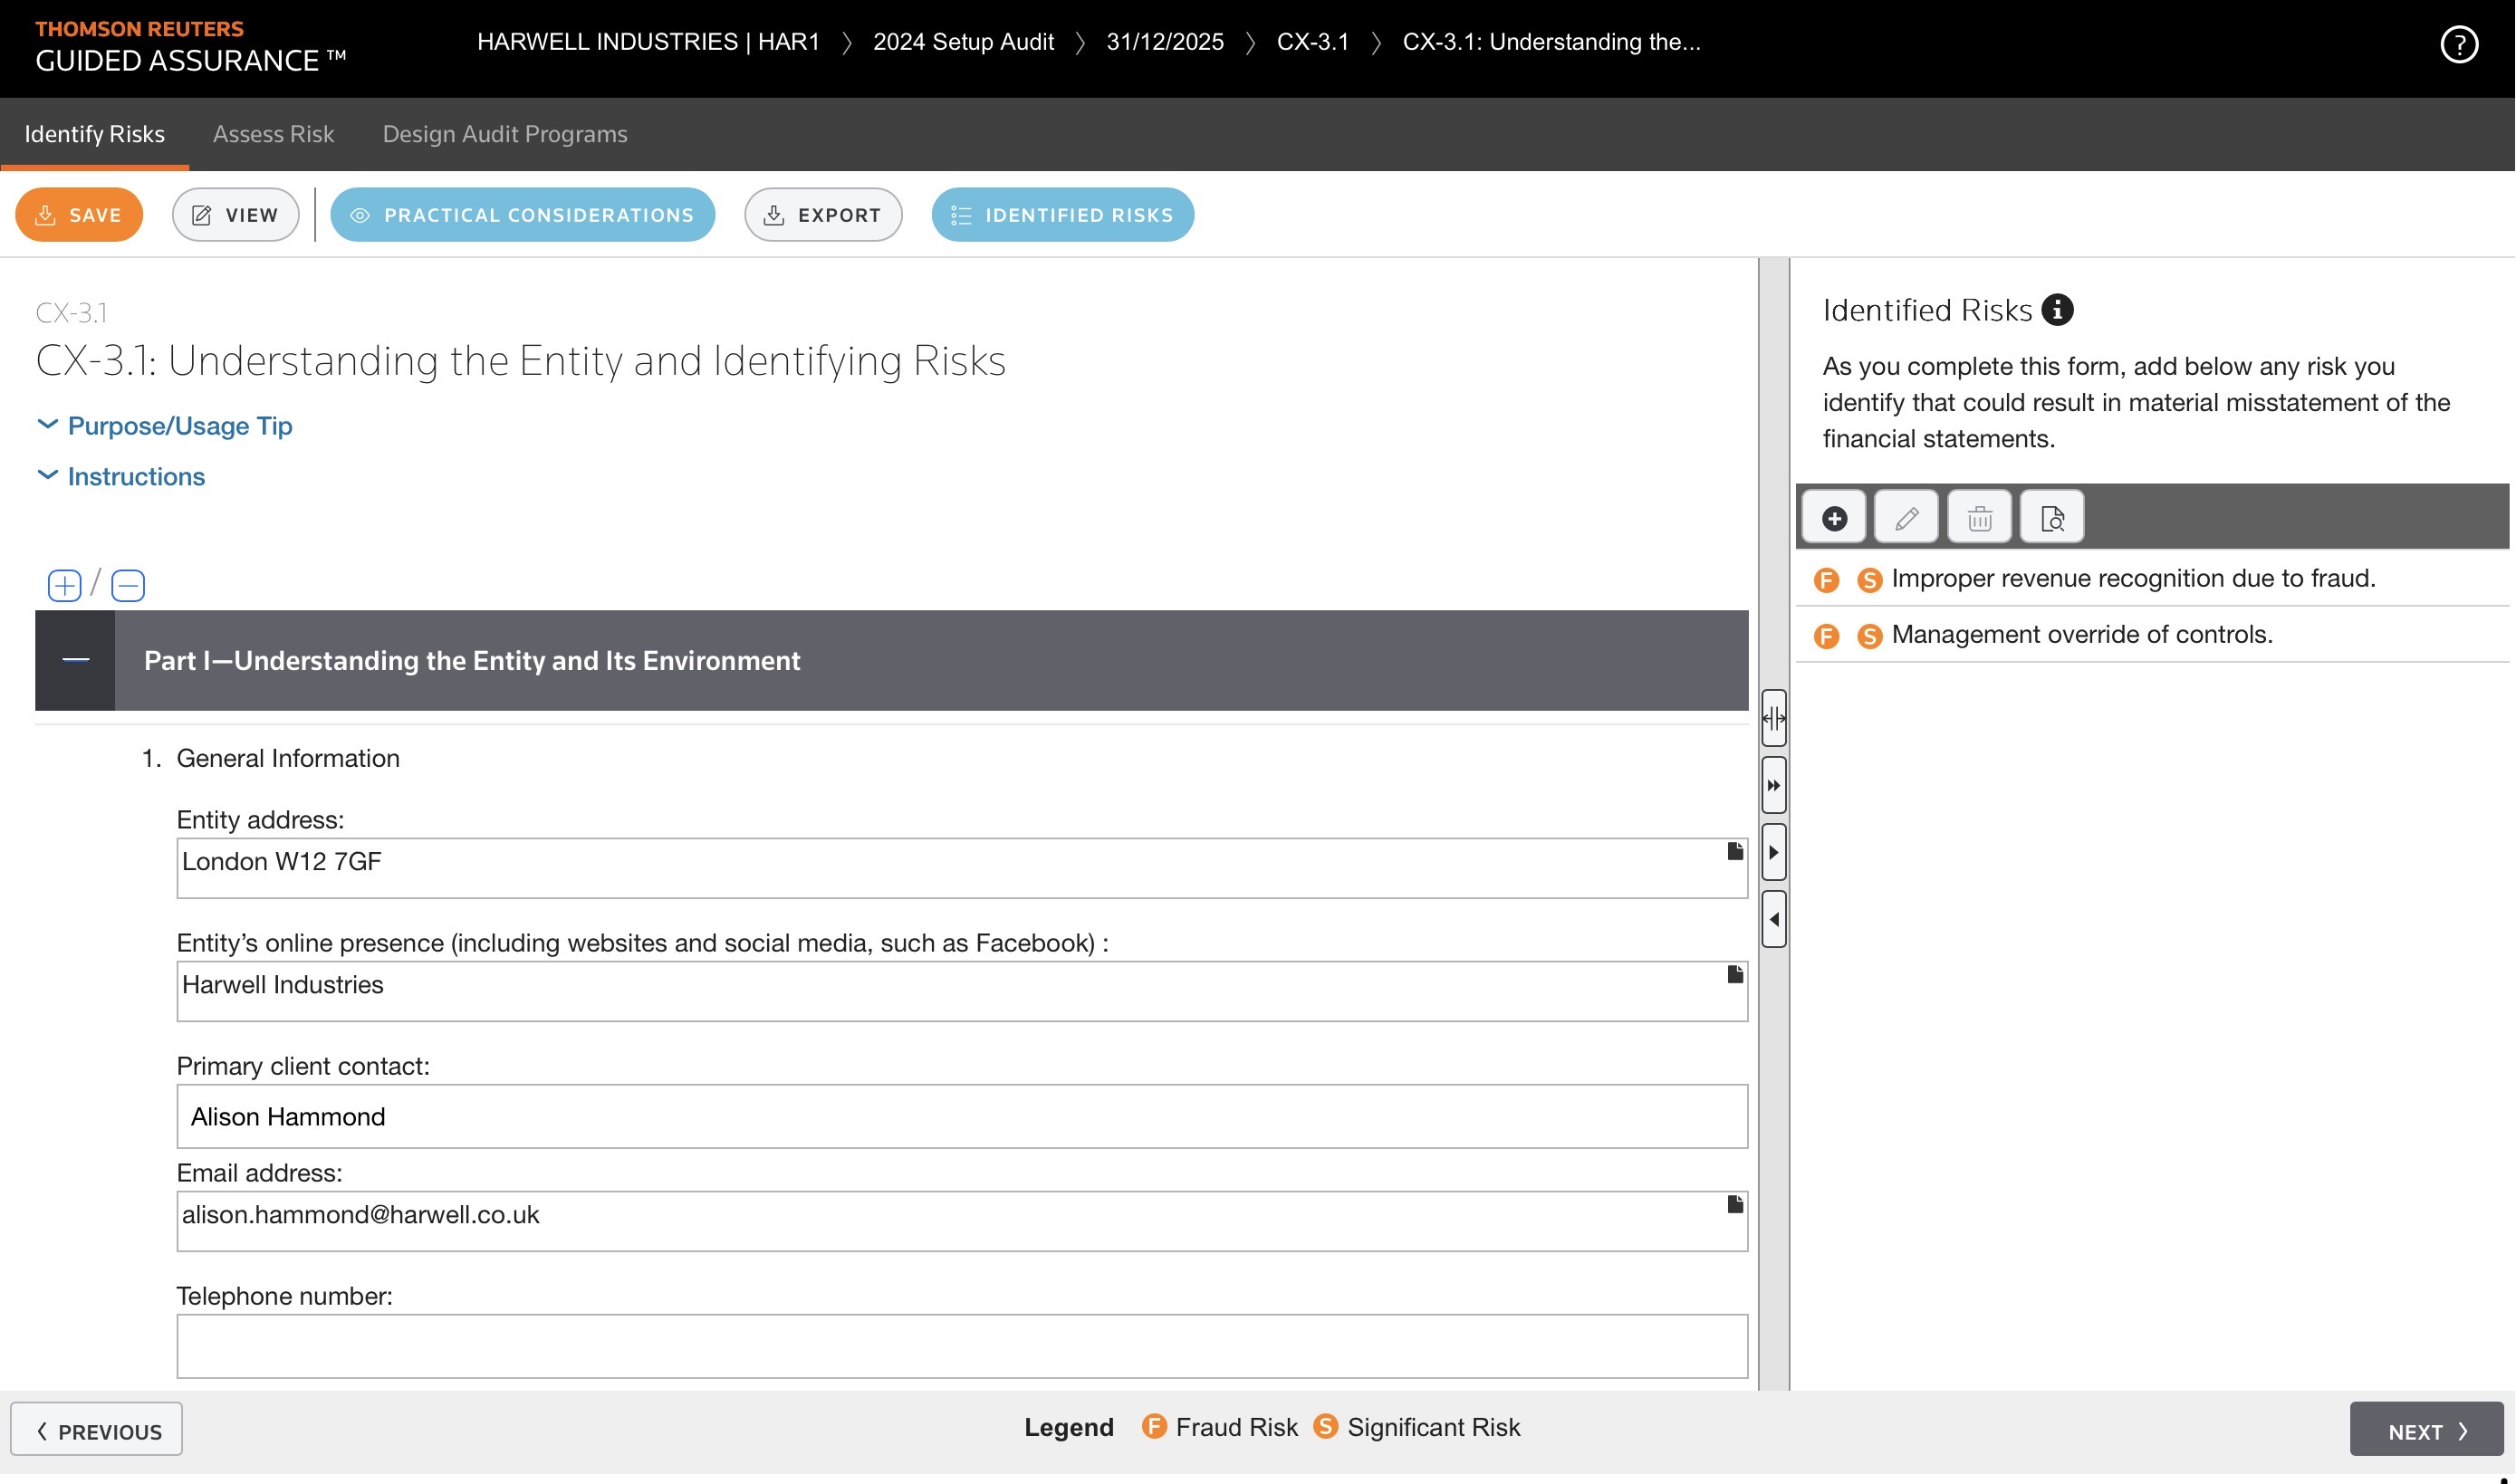
With our proven methodology, you can Identify Risks, and Design Audit Programs.
These documents contain Purpose/Usage Tips and Instructions.
The information they contain will roll forward from year to year.
You can collaborate with your staff in real time from any location.
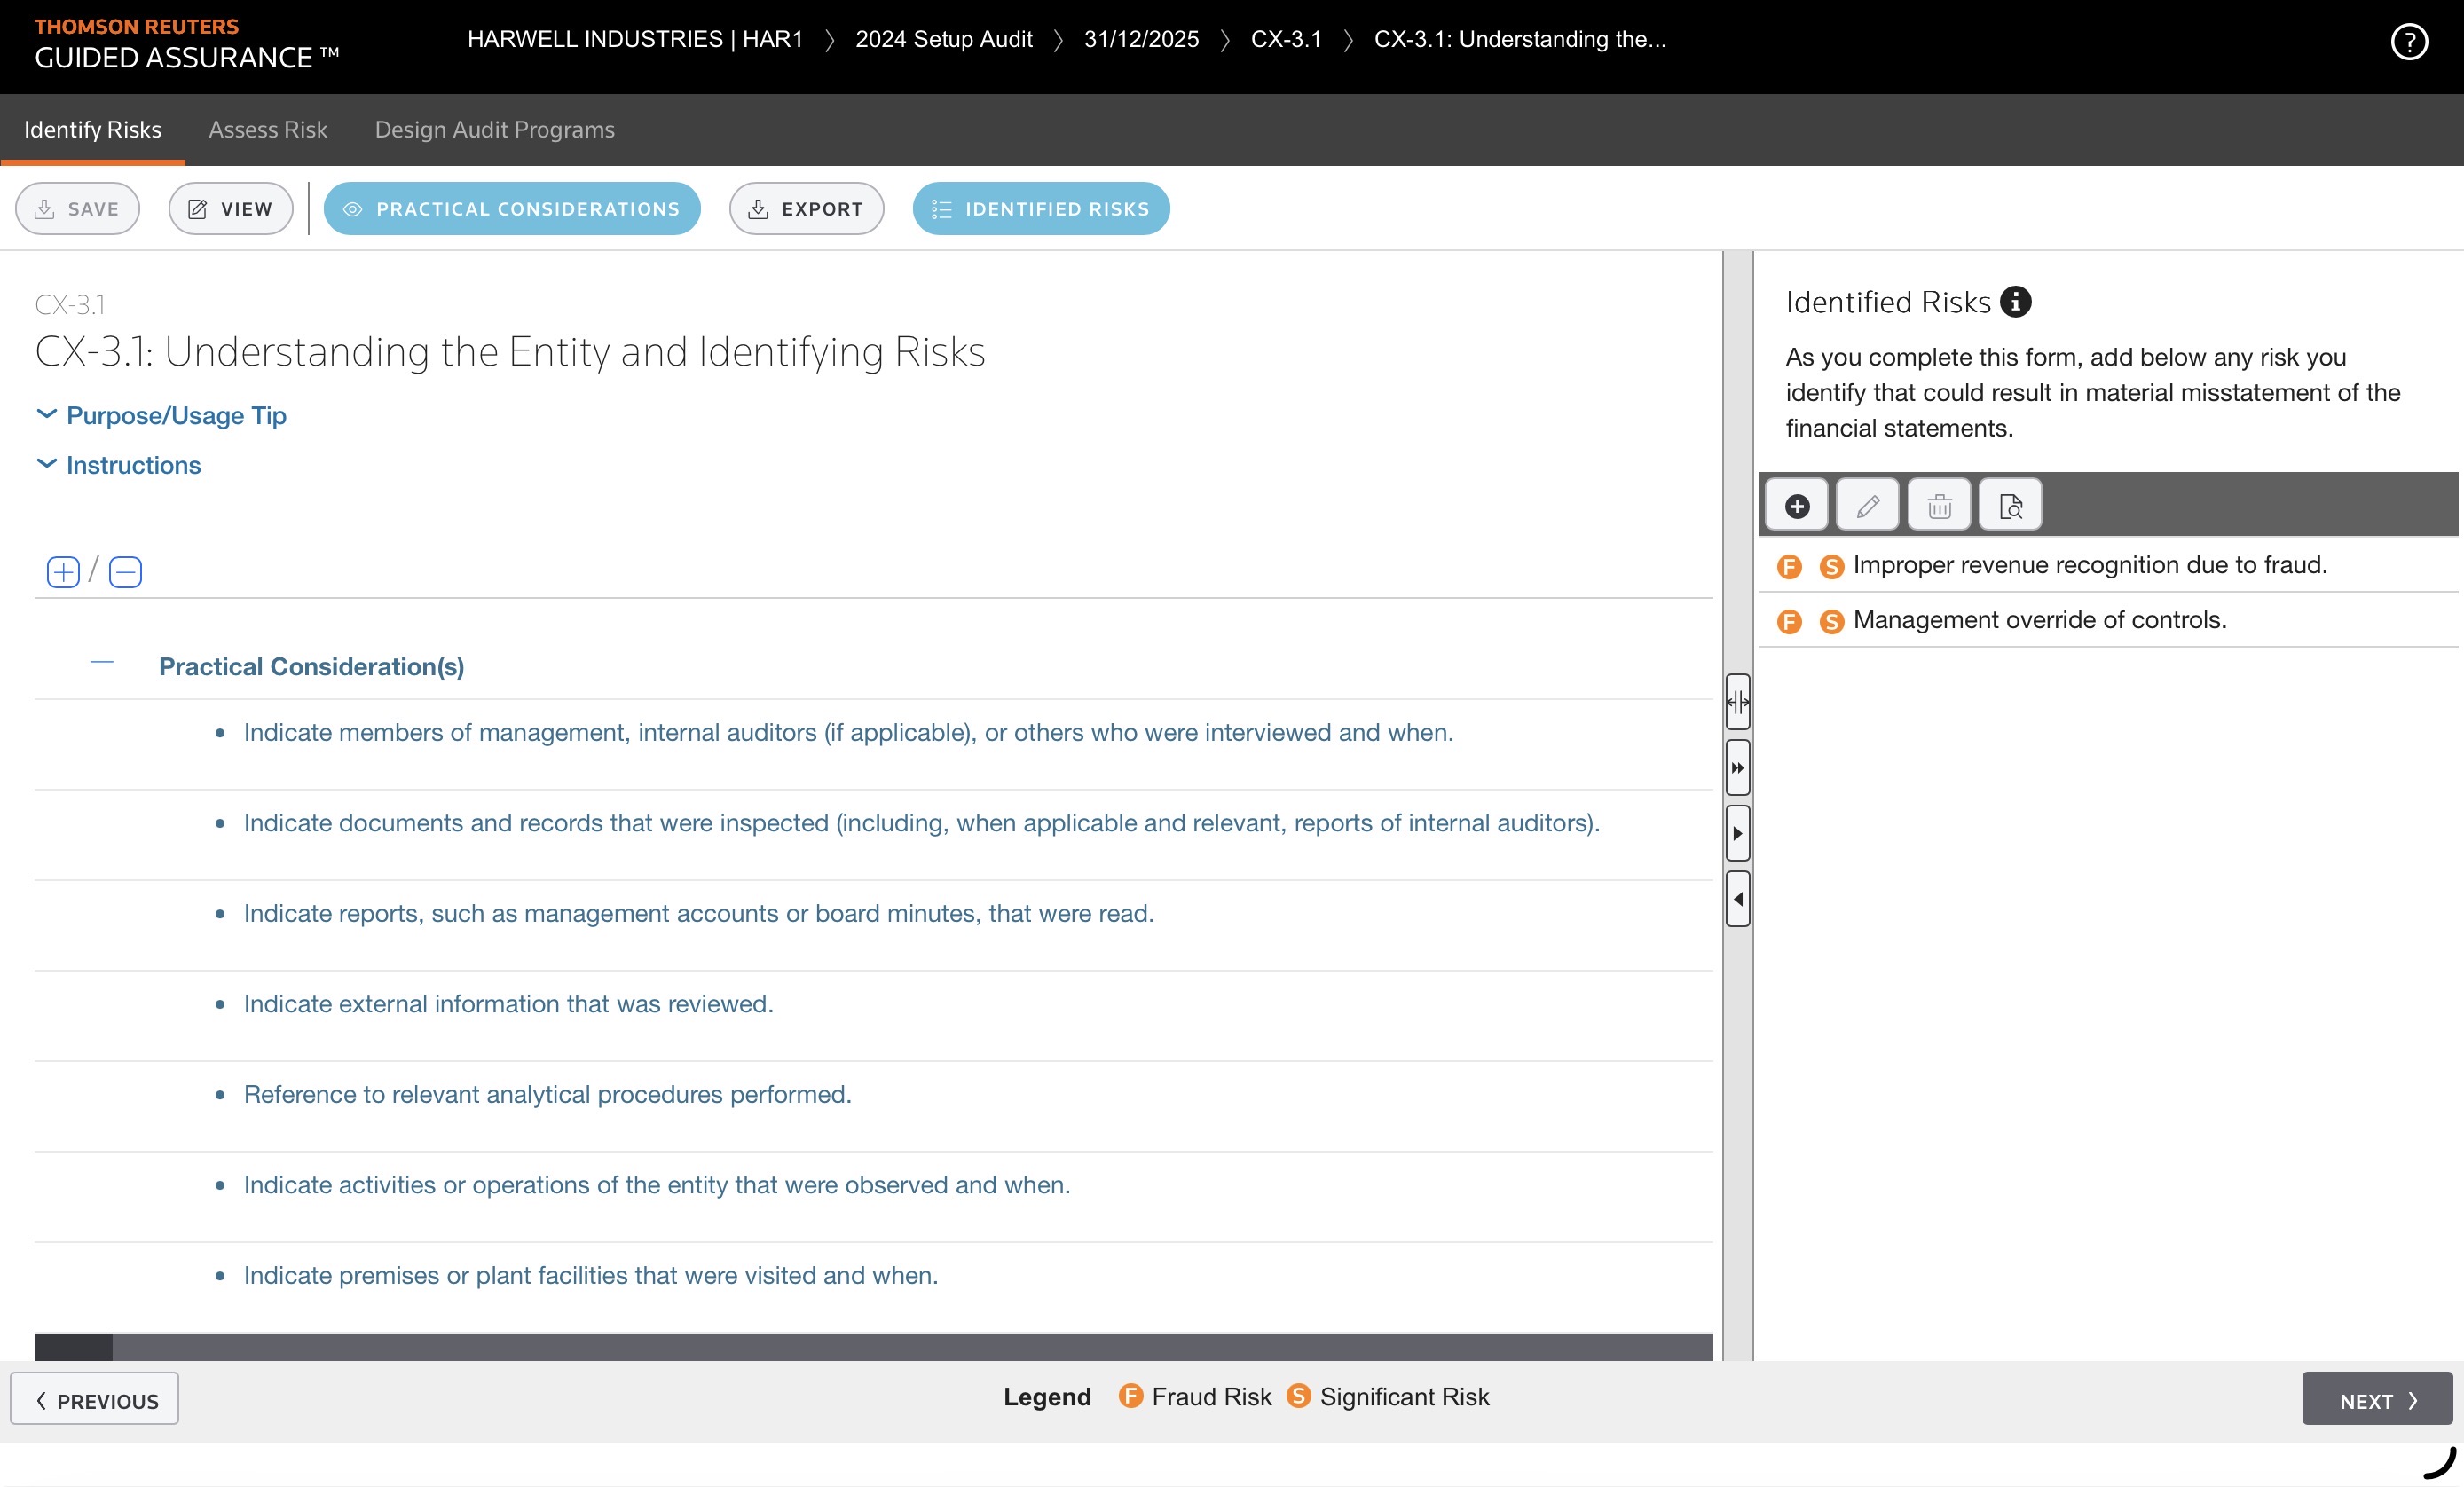
You can display Practical Considerations which will appear inline inside the document.
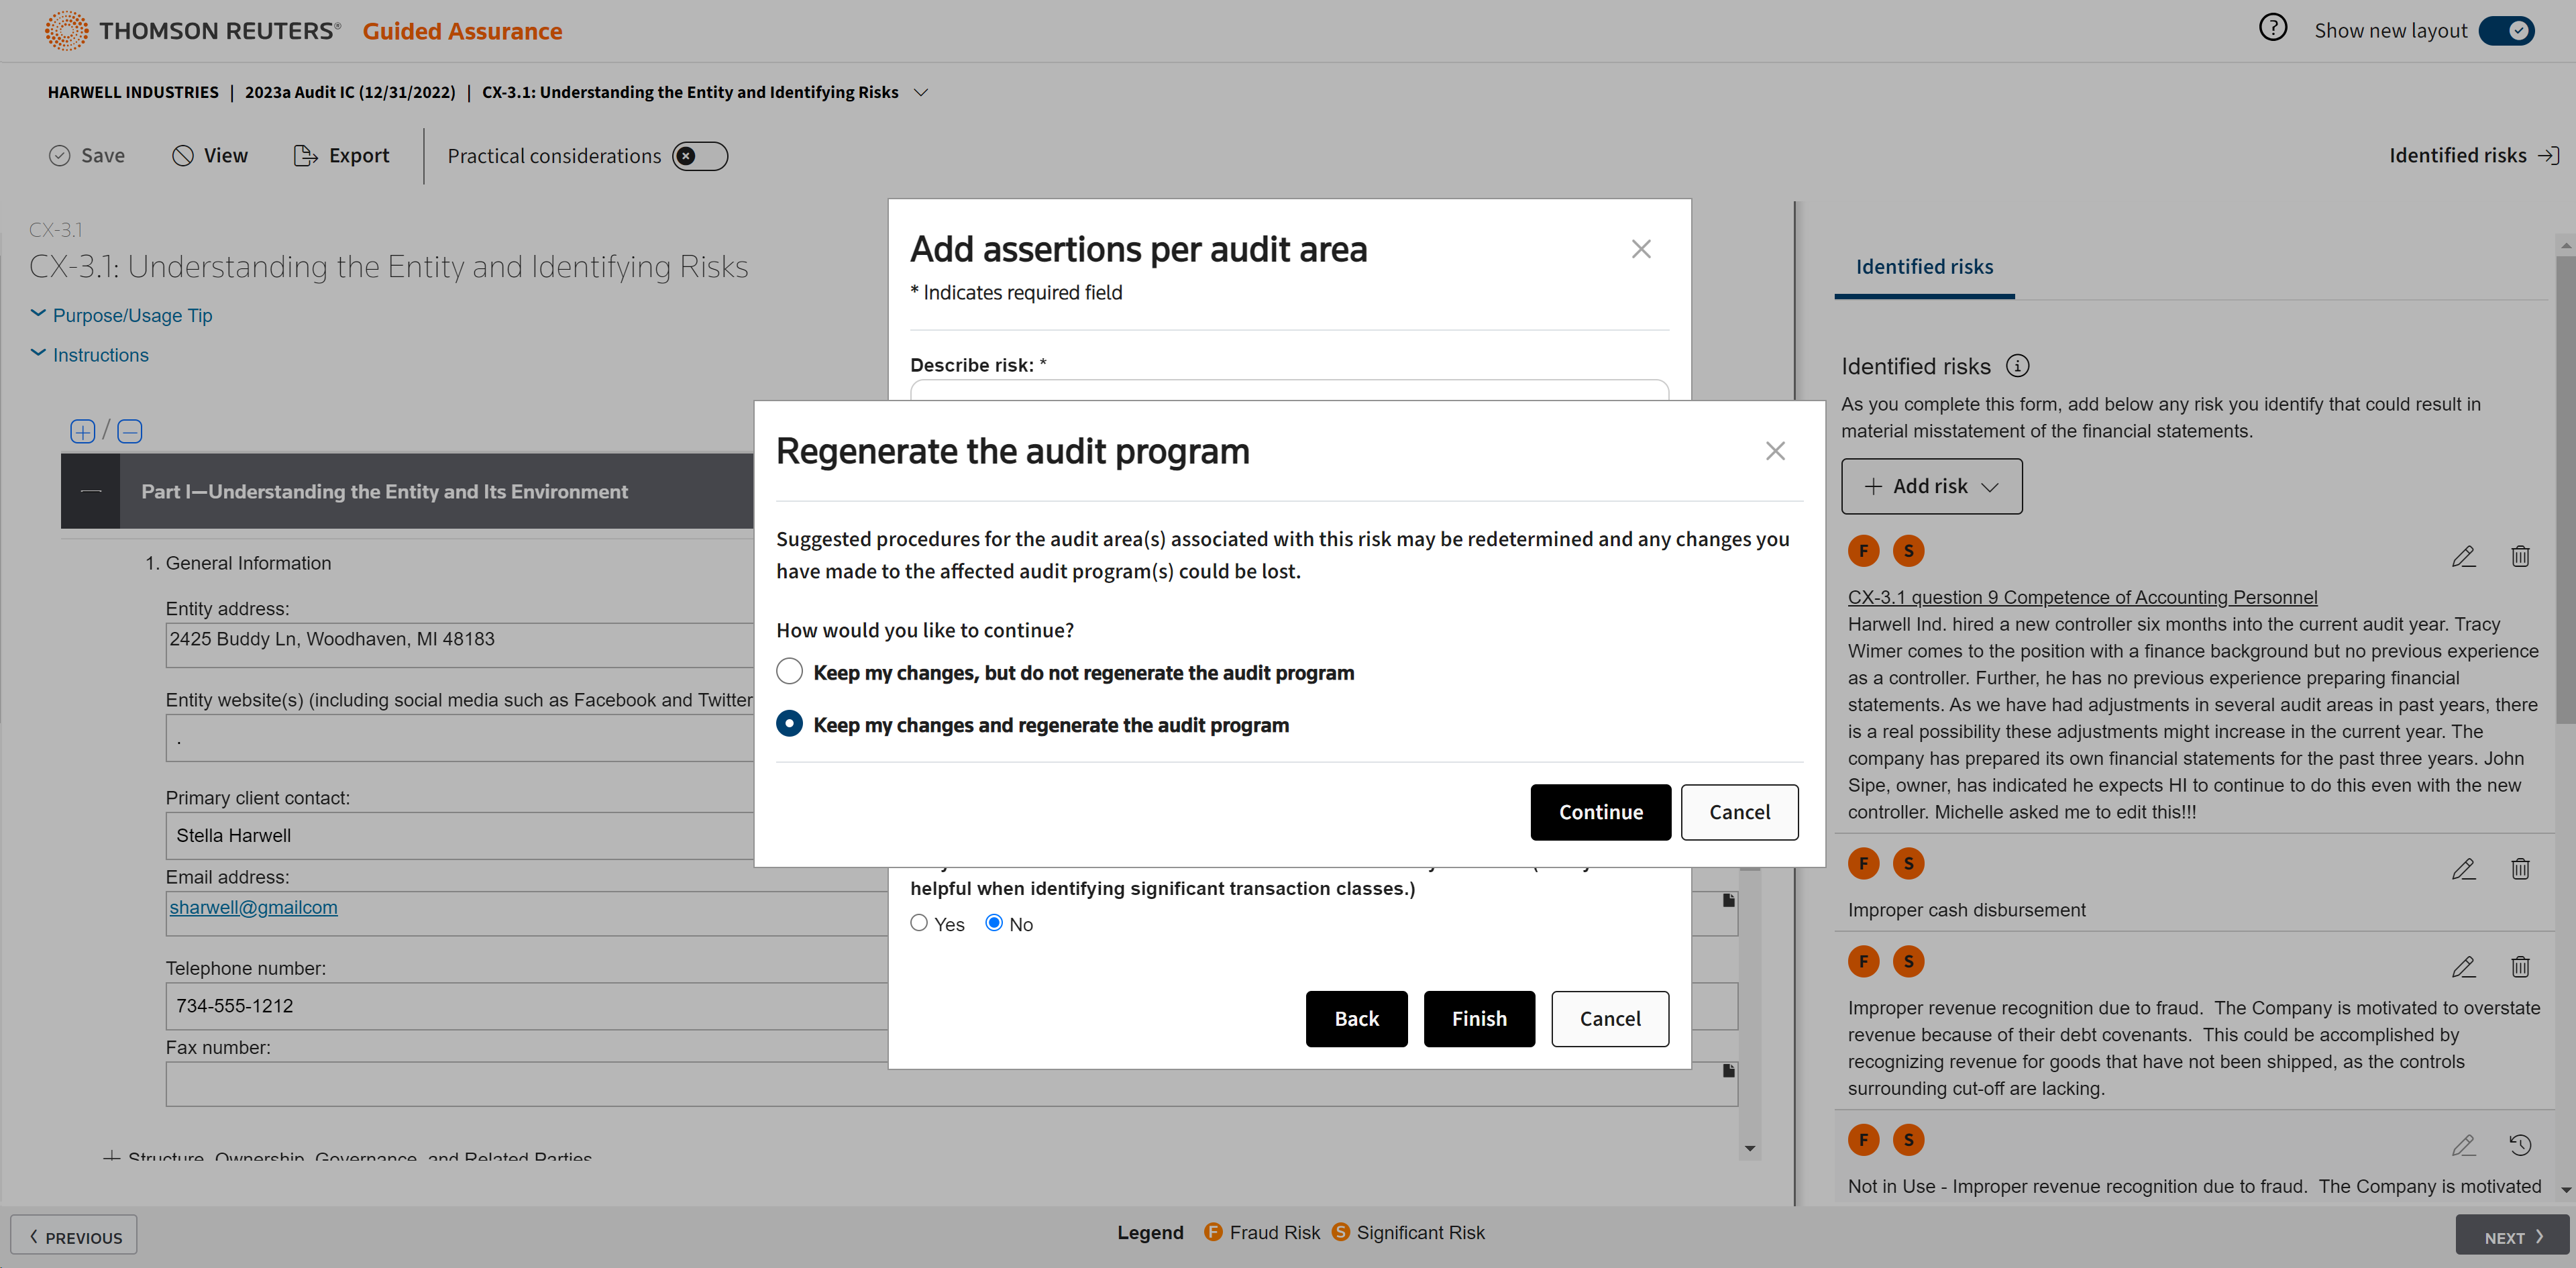
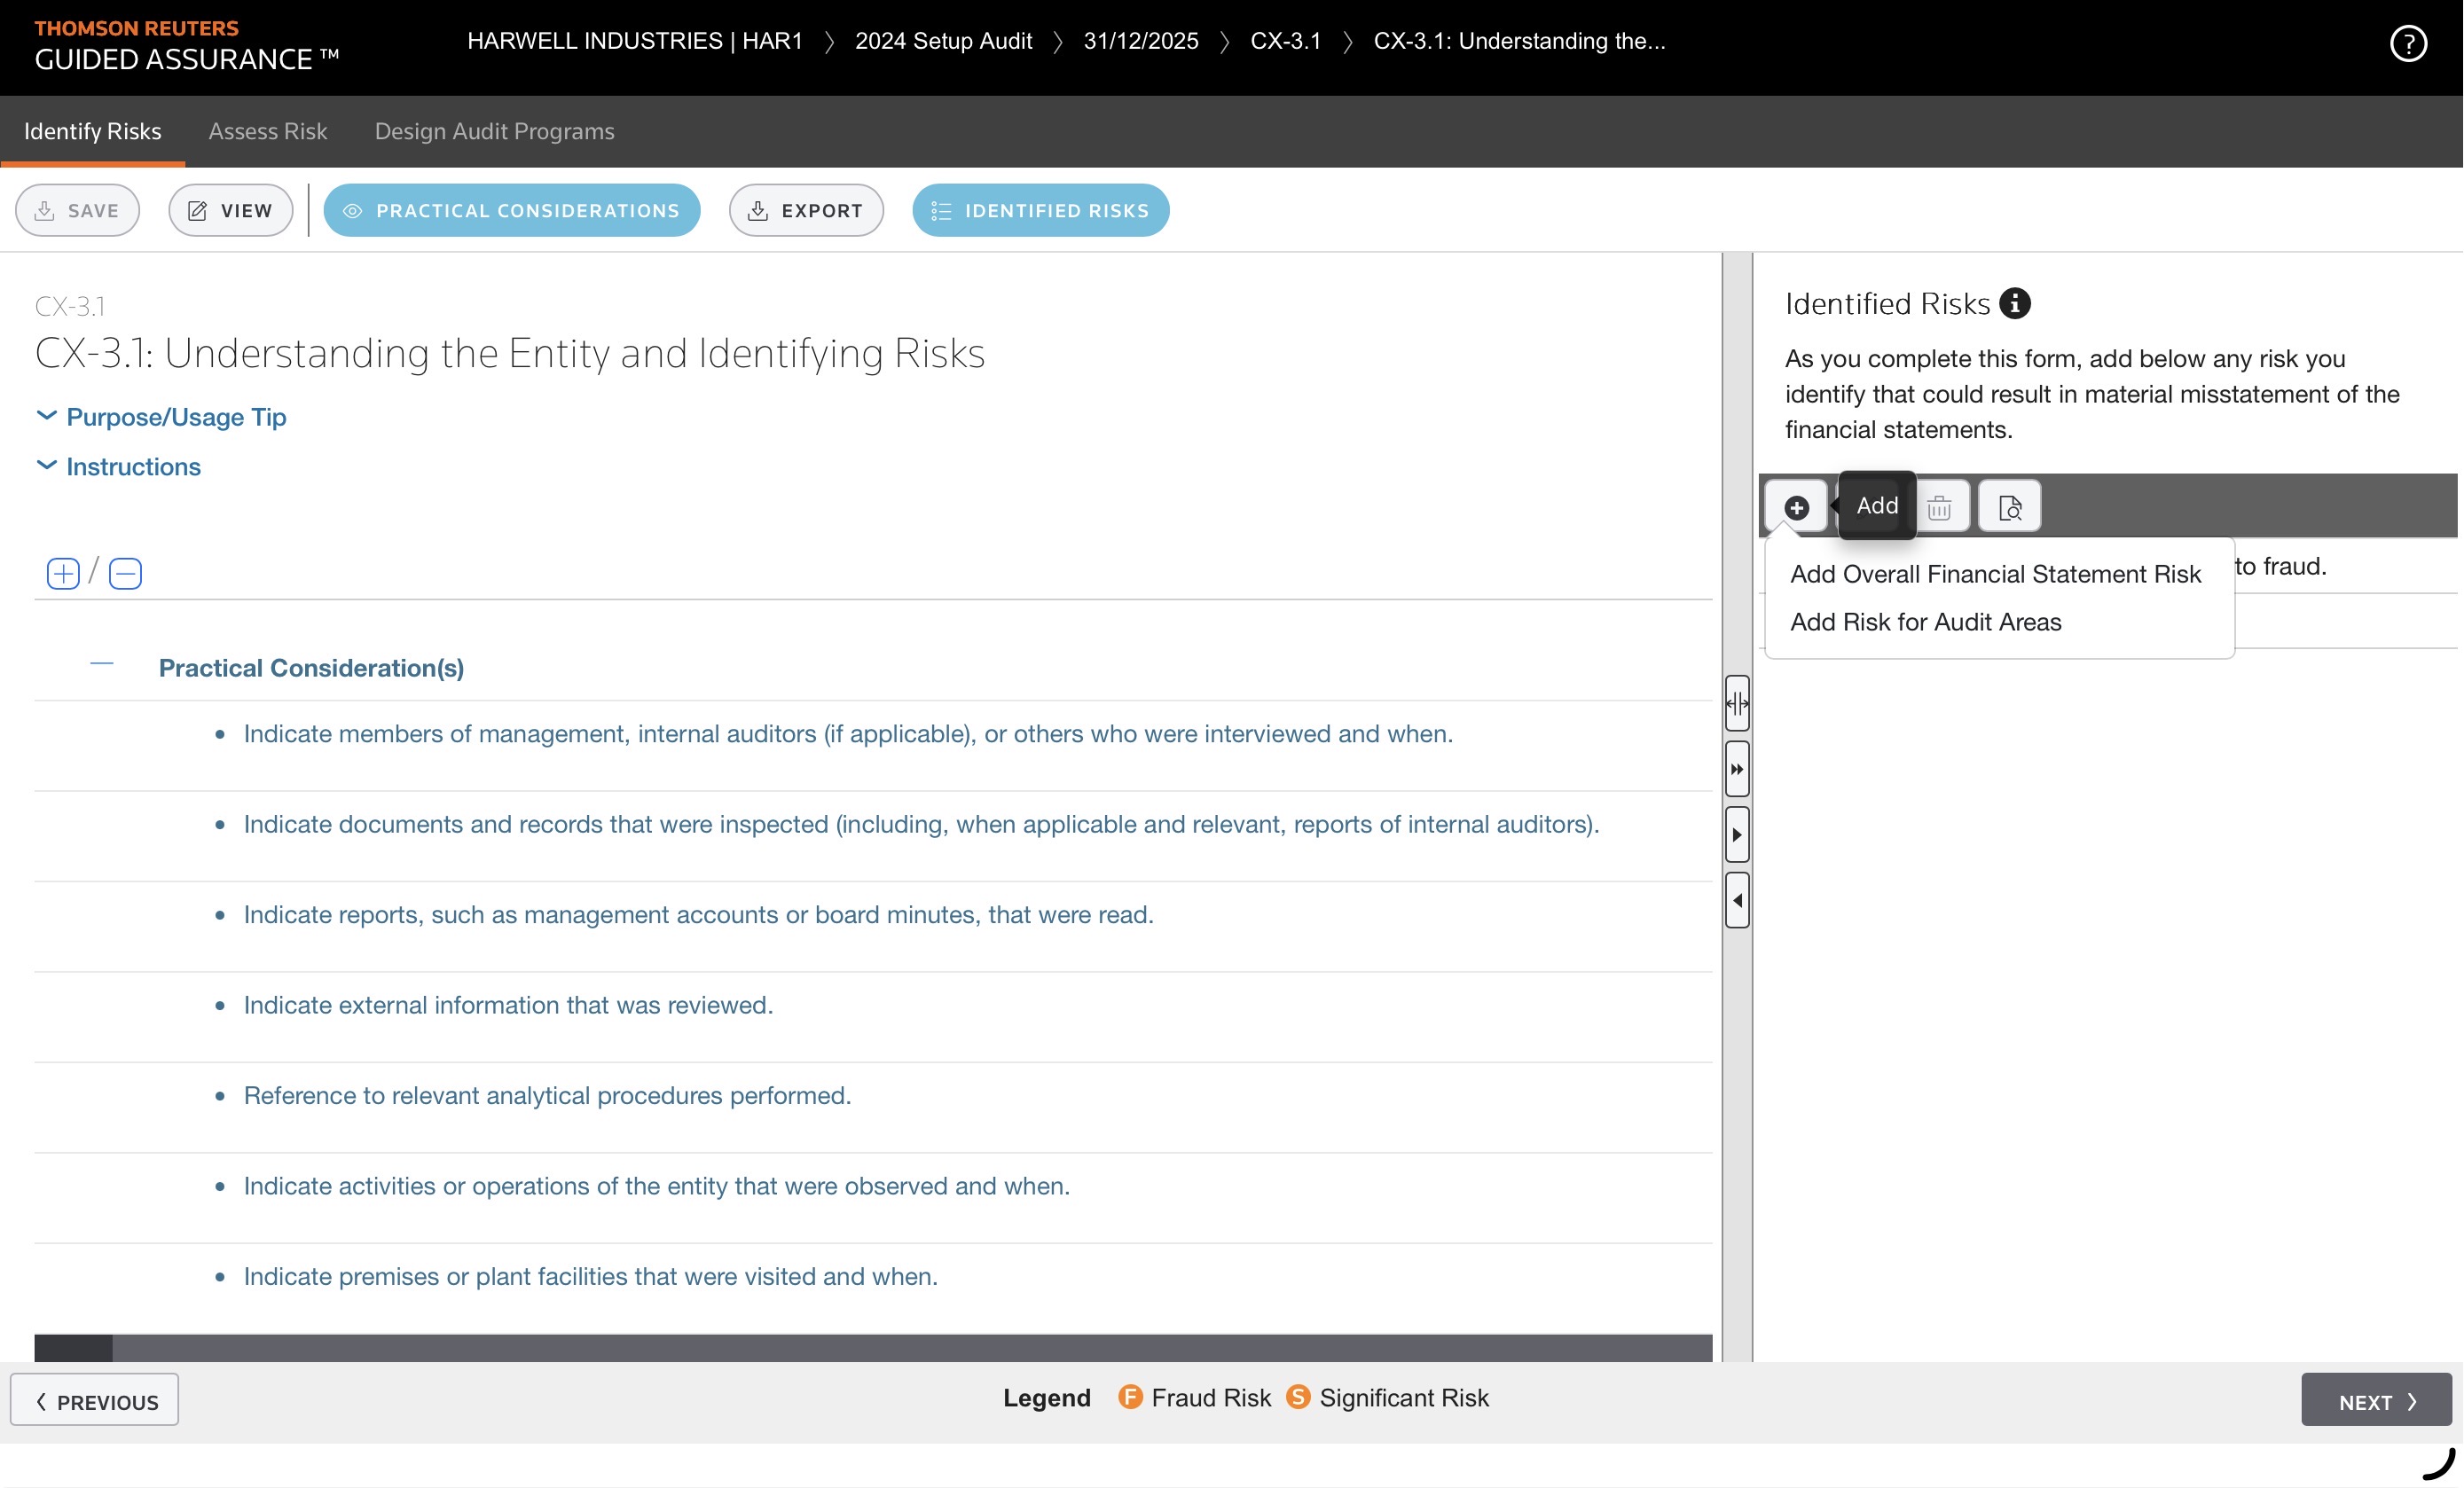
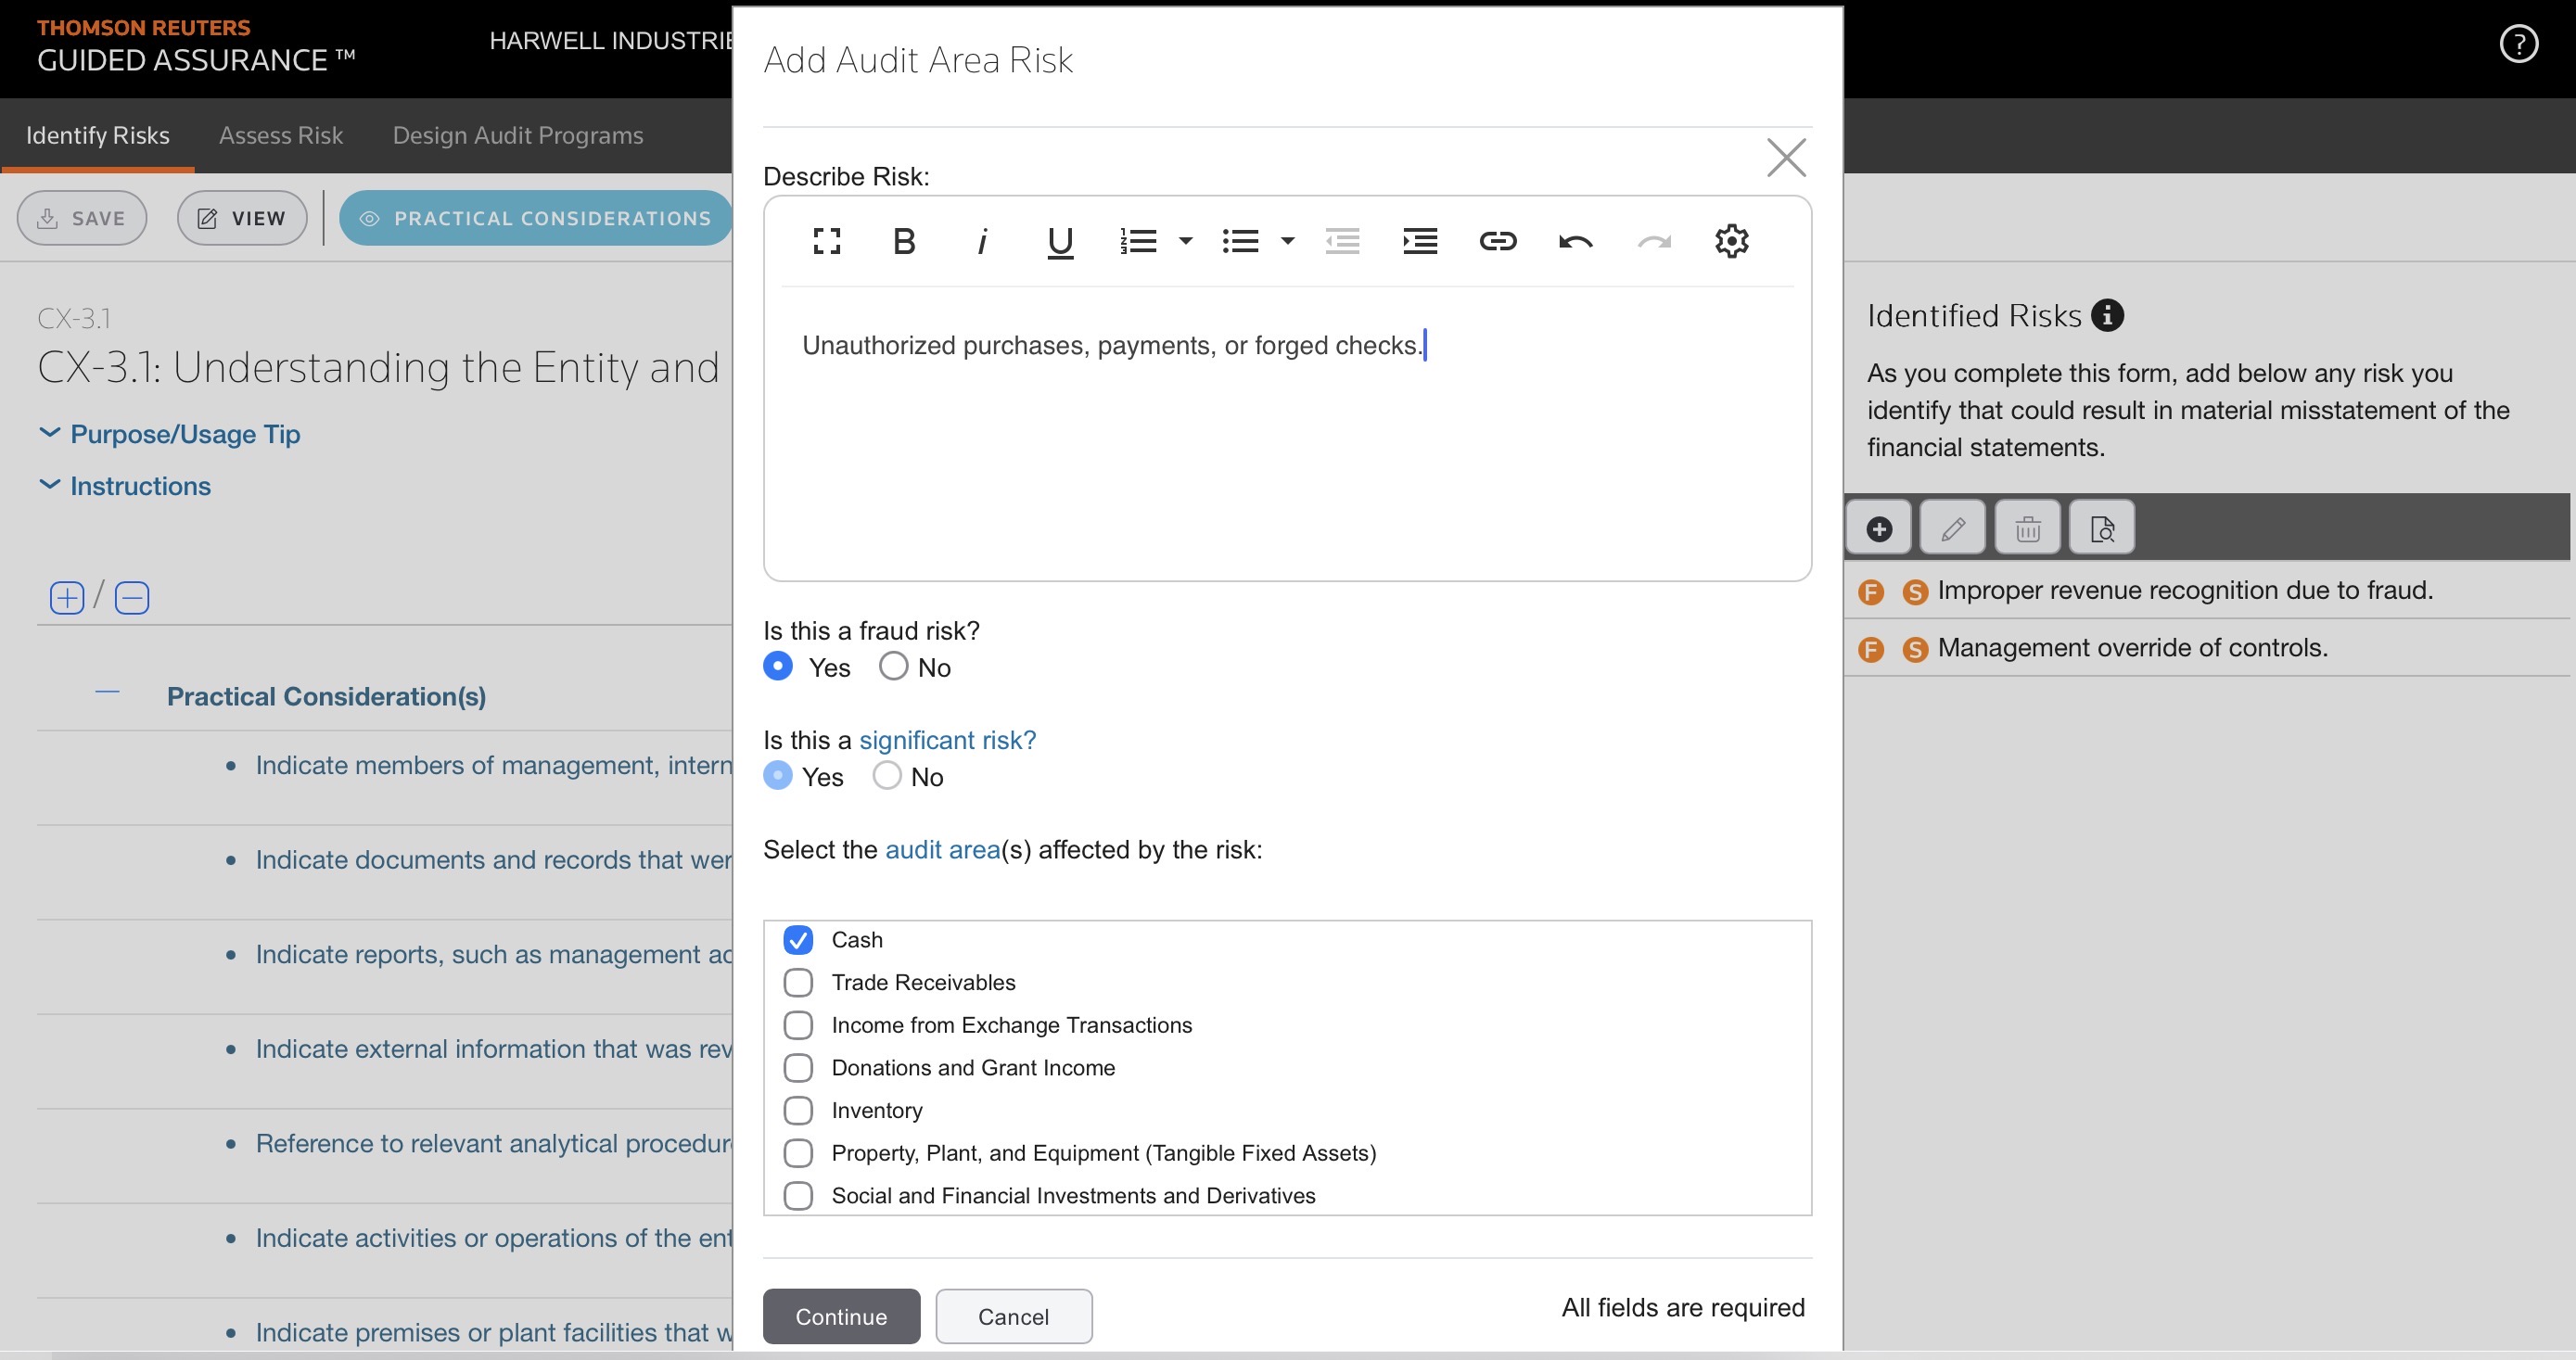
Click to see Risks Identified in Similar Engagements.
Edit the risk's description, identify whether it's a fraud risk, and select the audit areas affected.
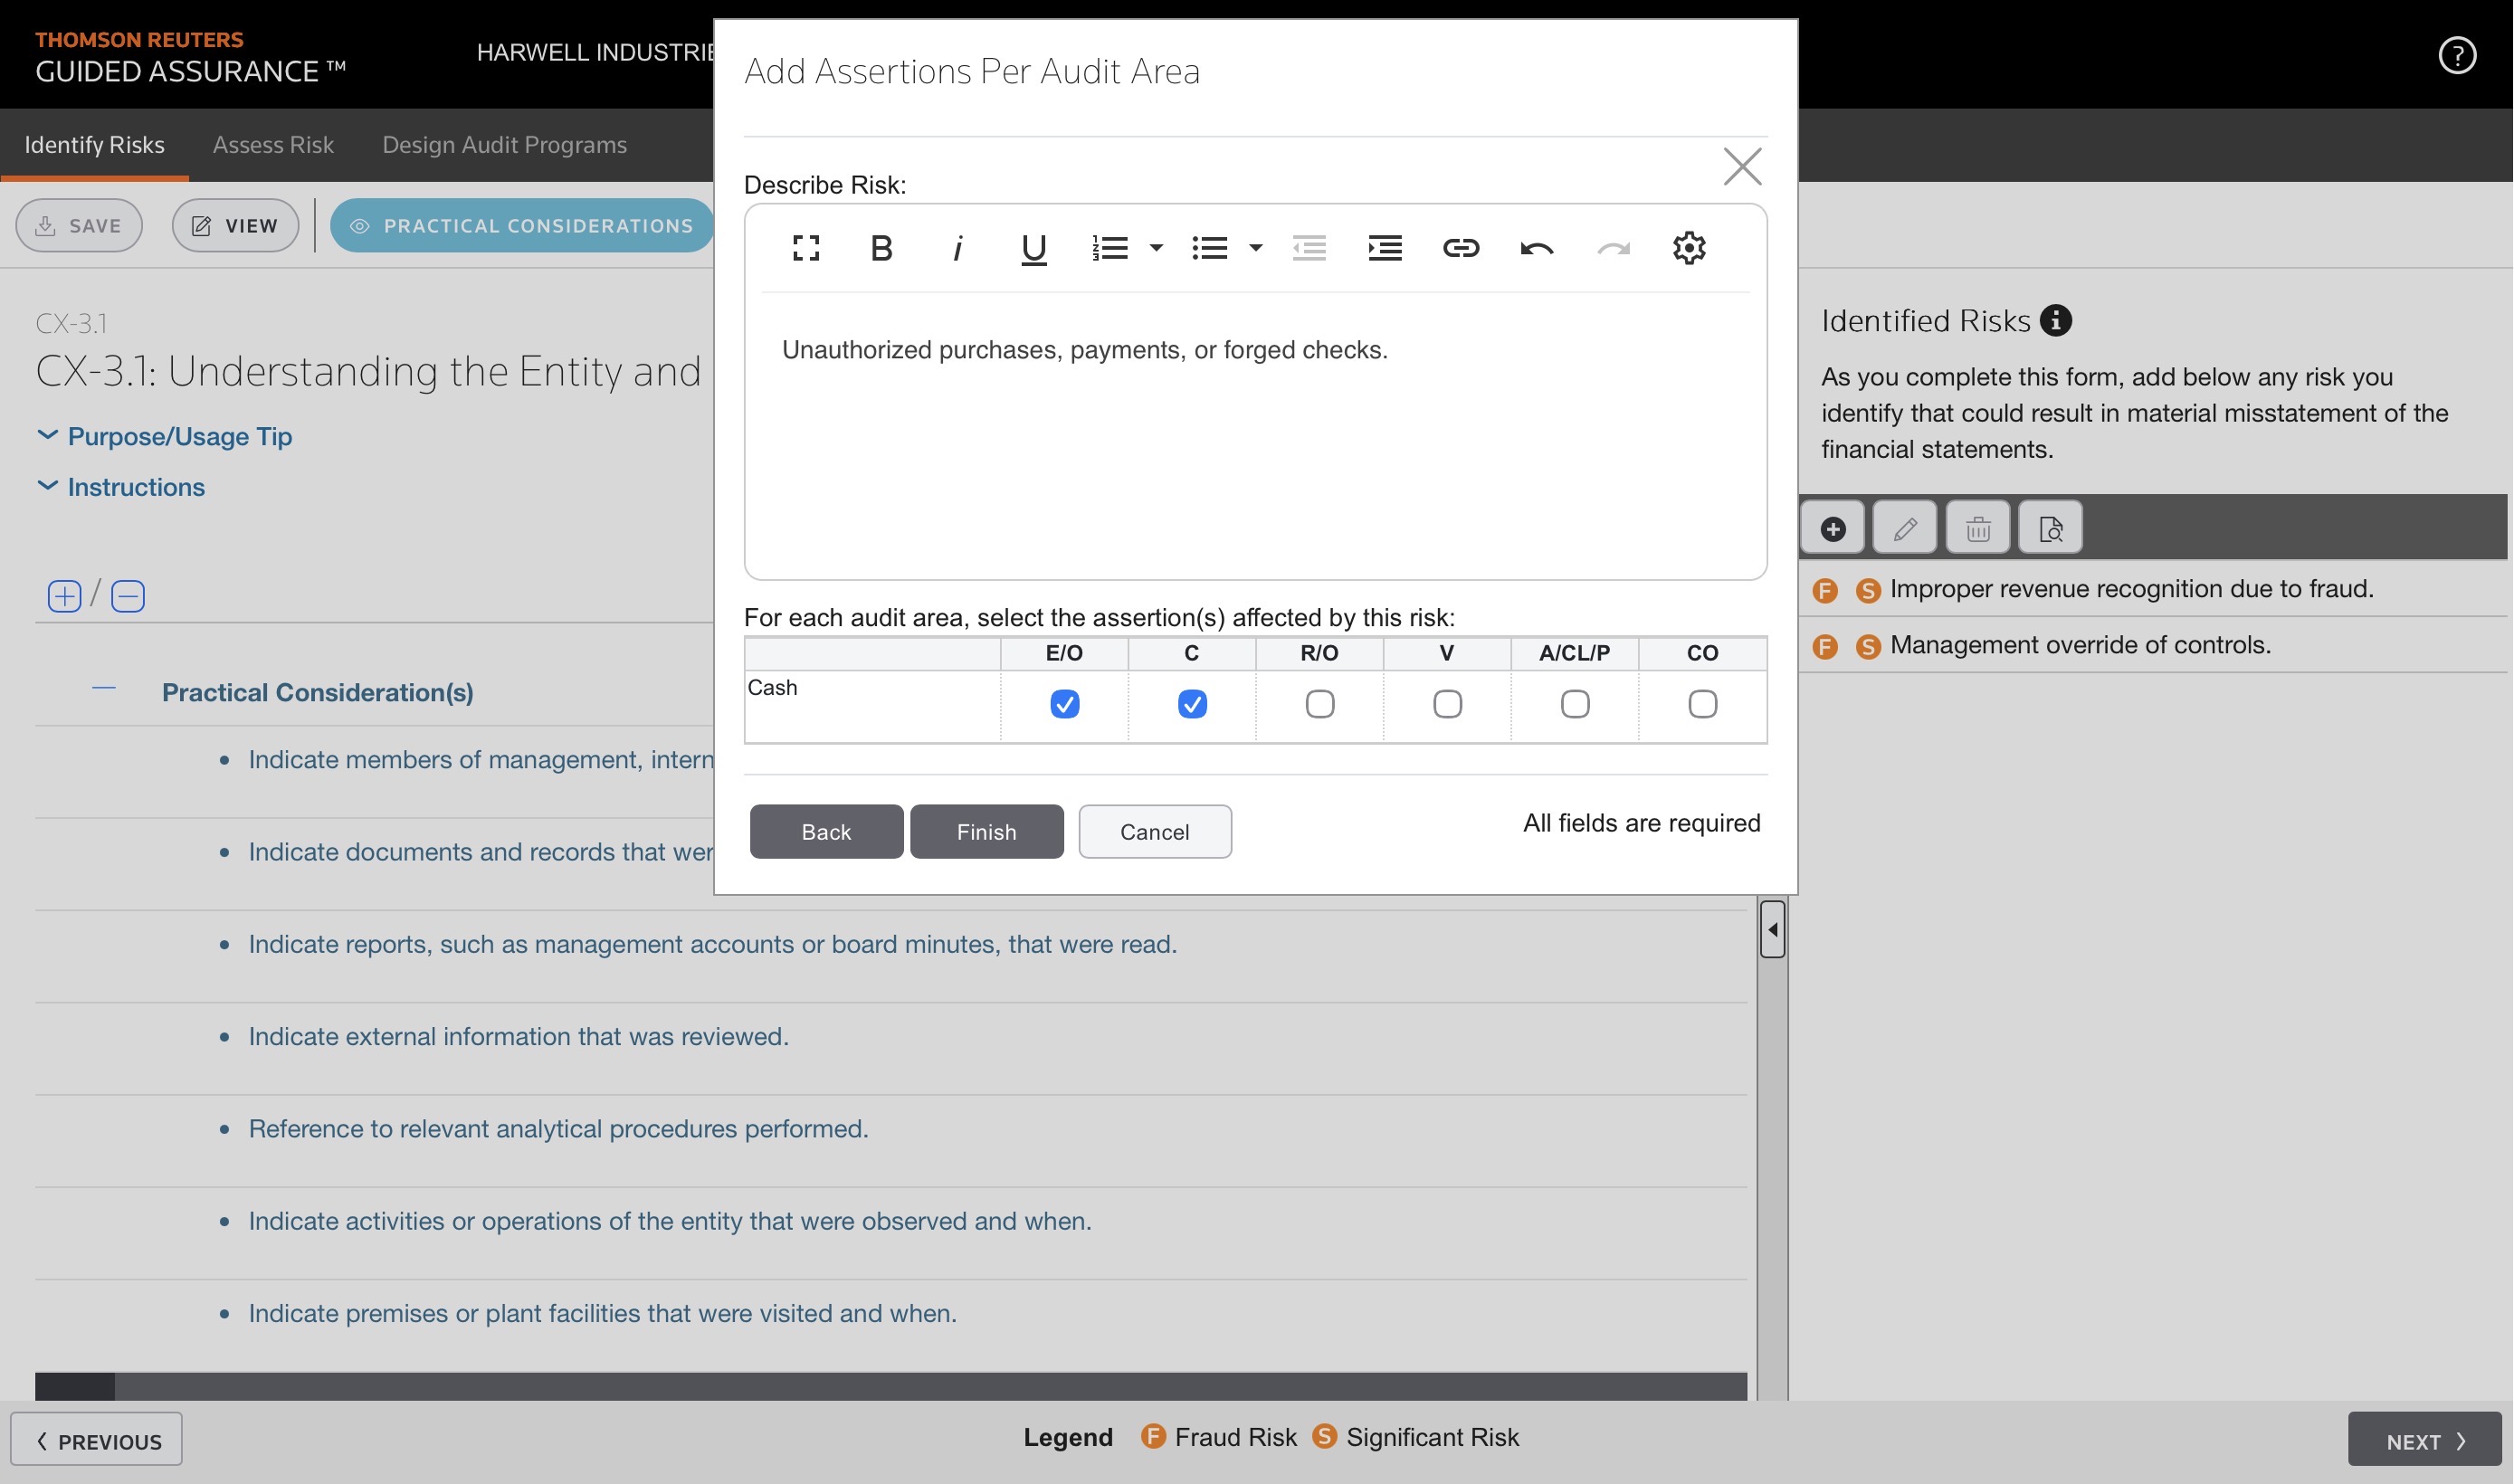
You will select the assertions affected by the risk and whether you want to indicate the transaction classes affected.
The risk will be added to the program list.
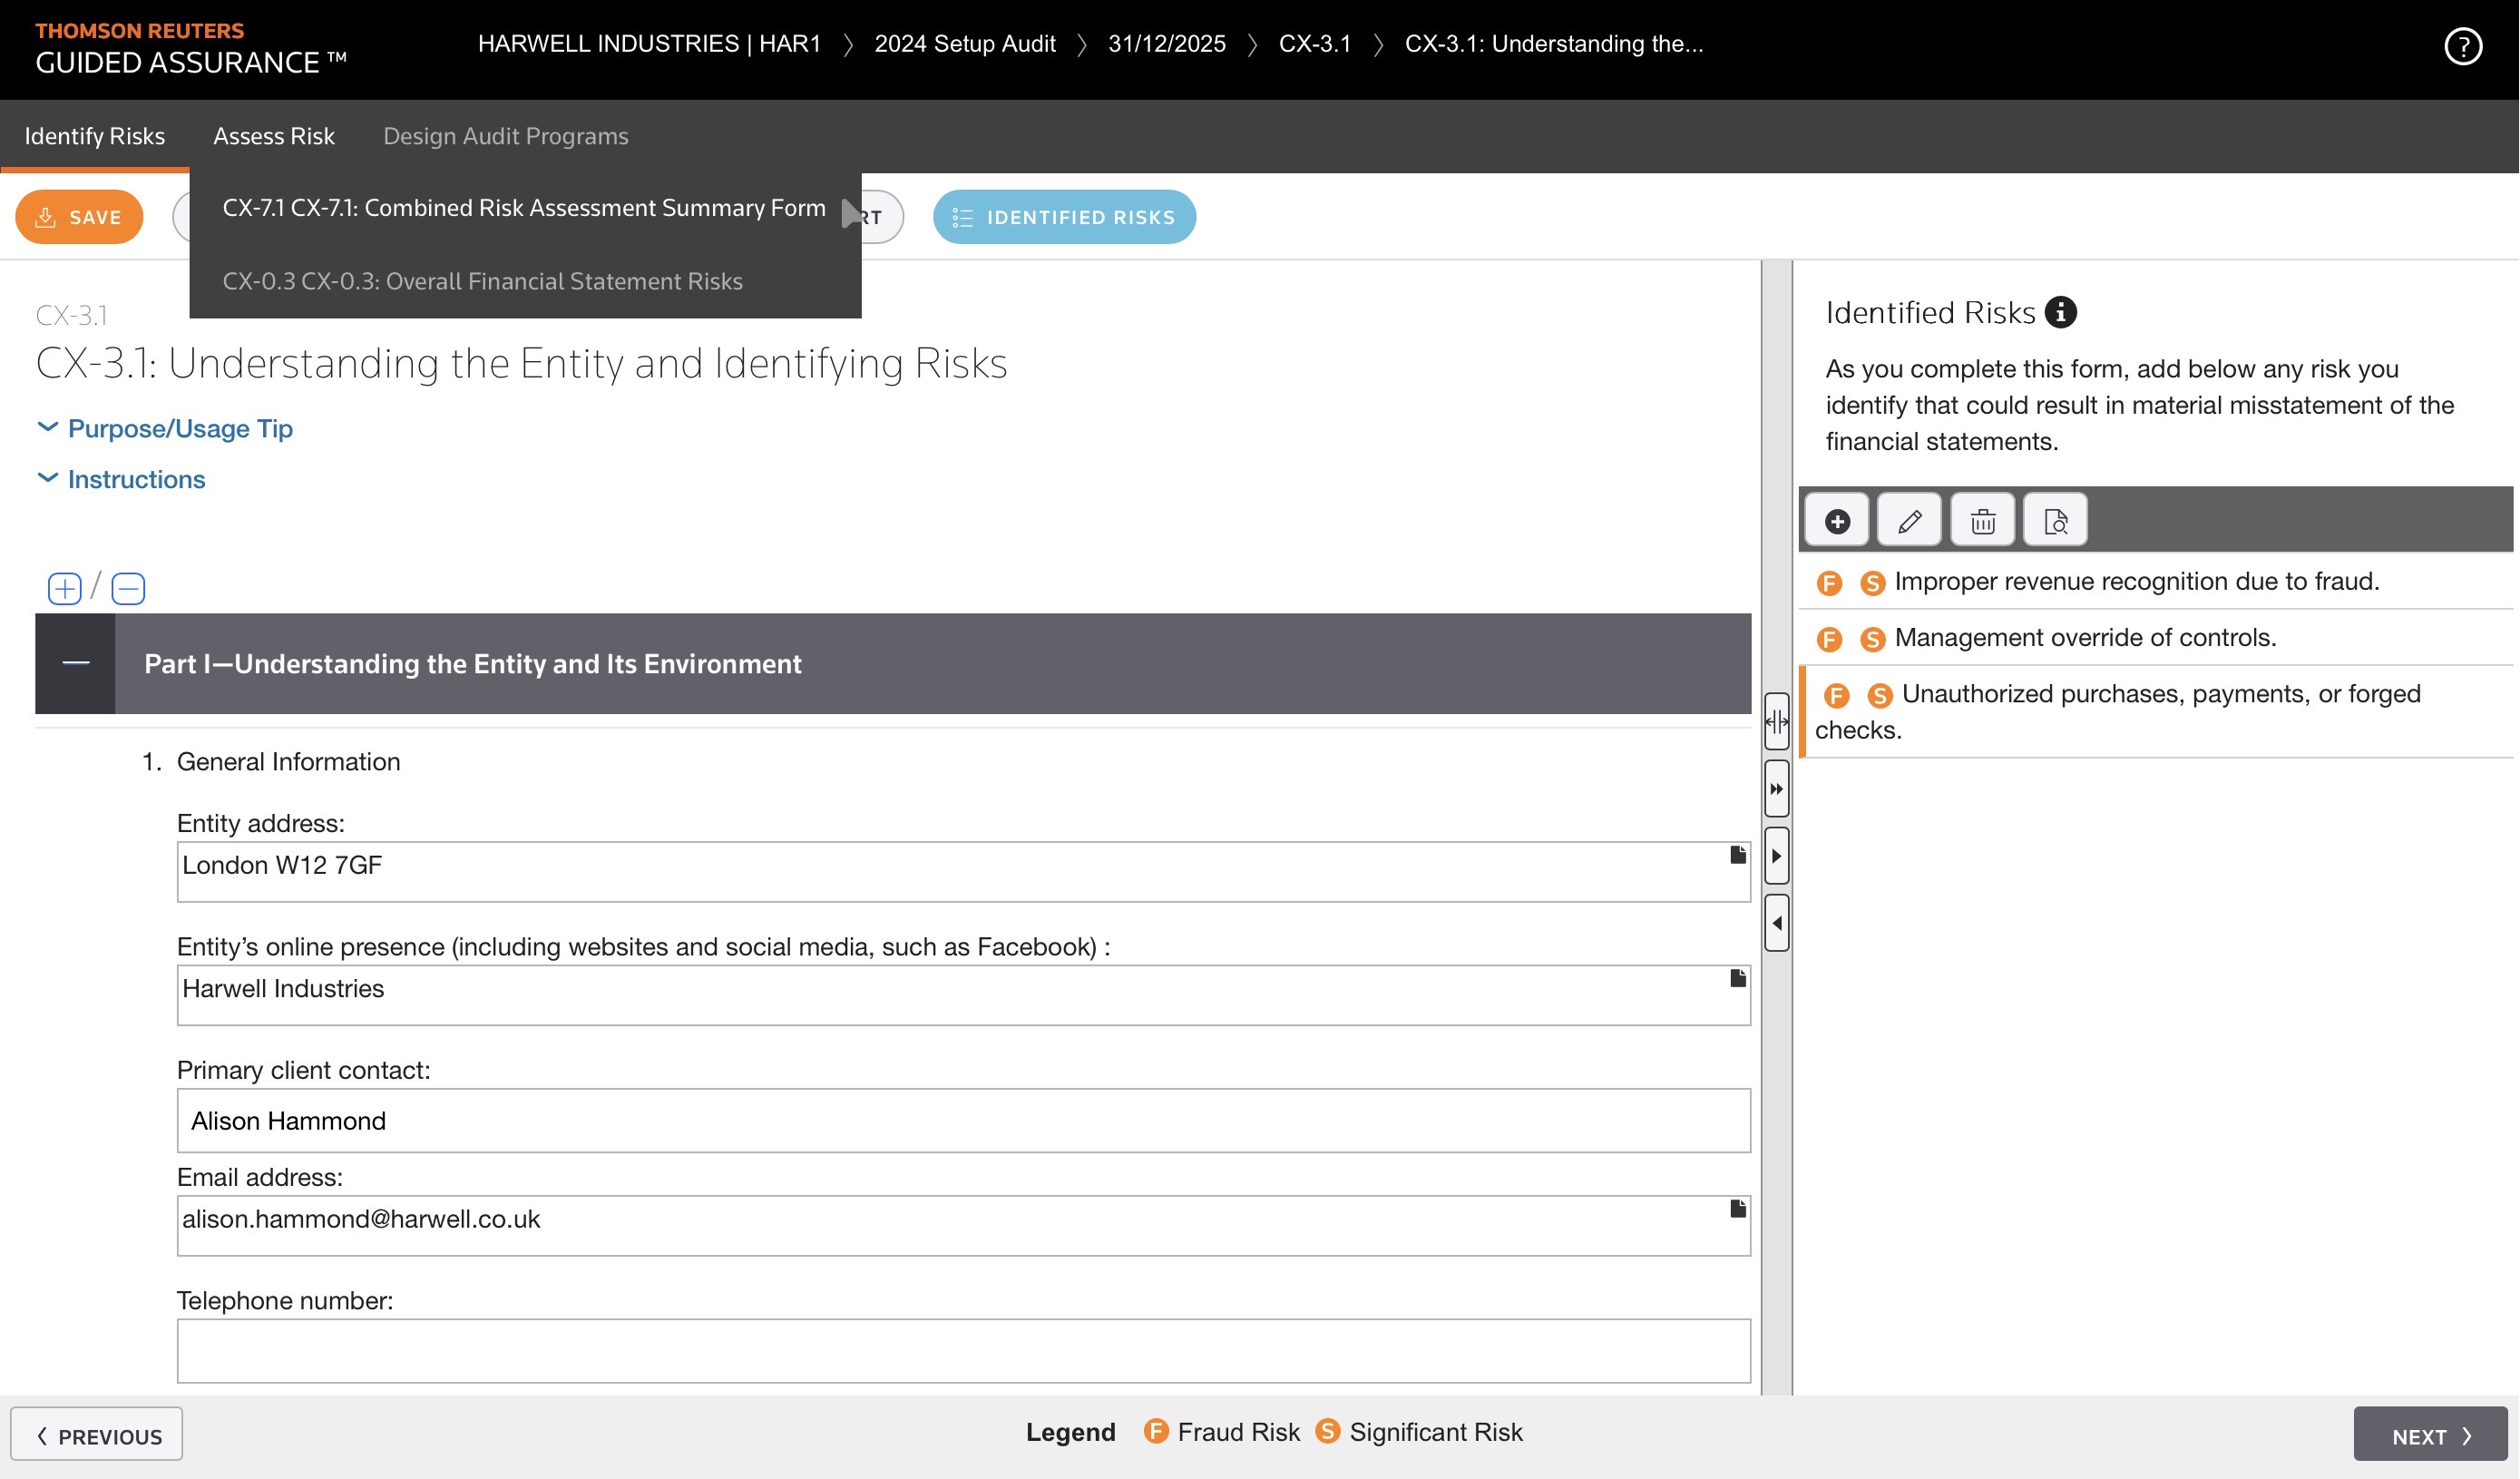
In the next section, you will assess the risk.
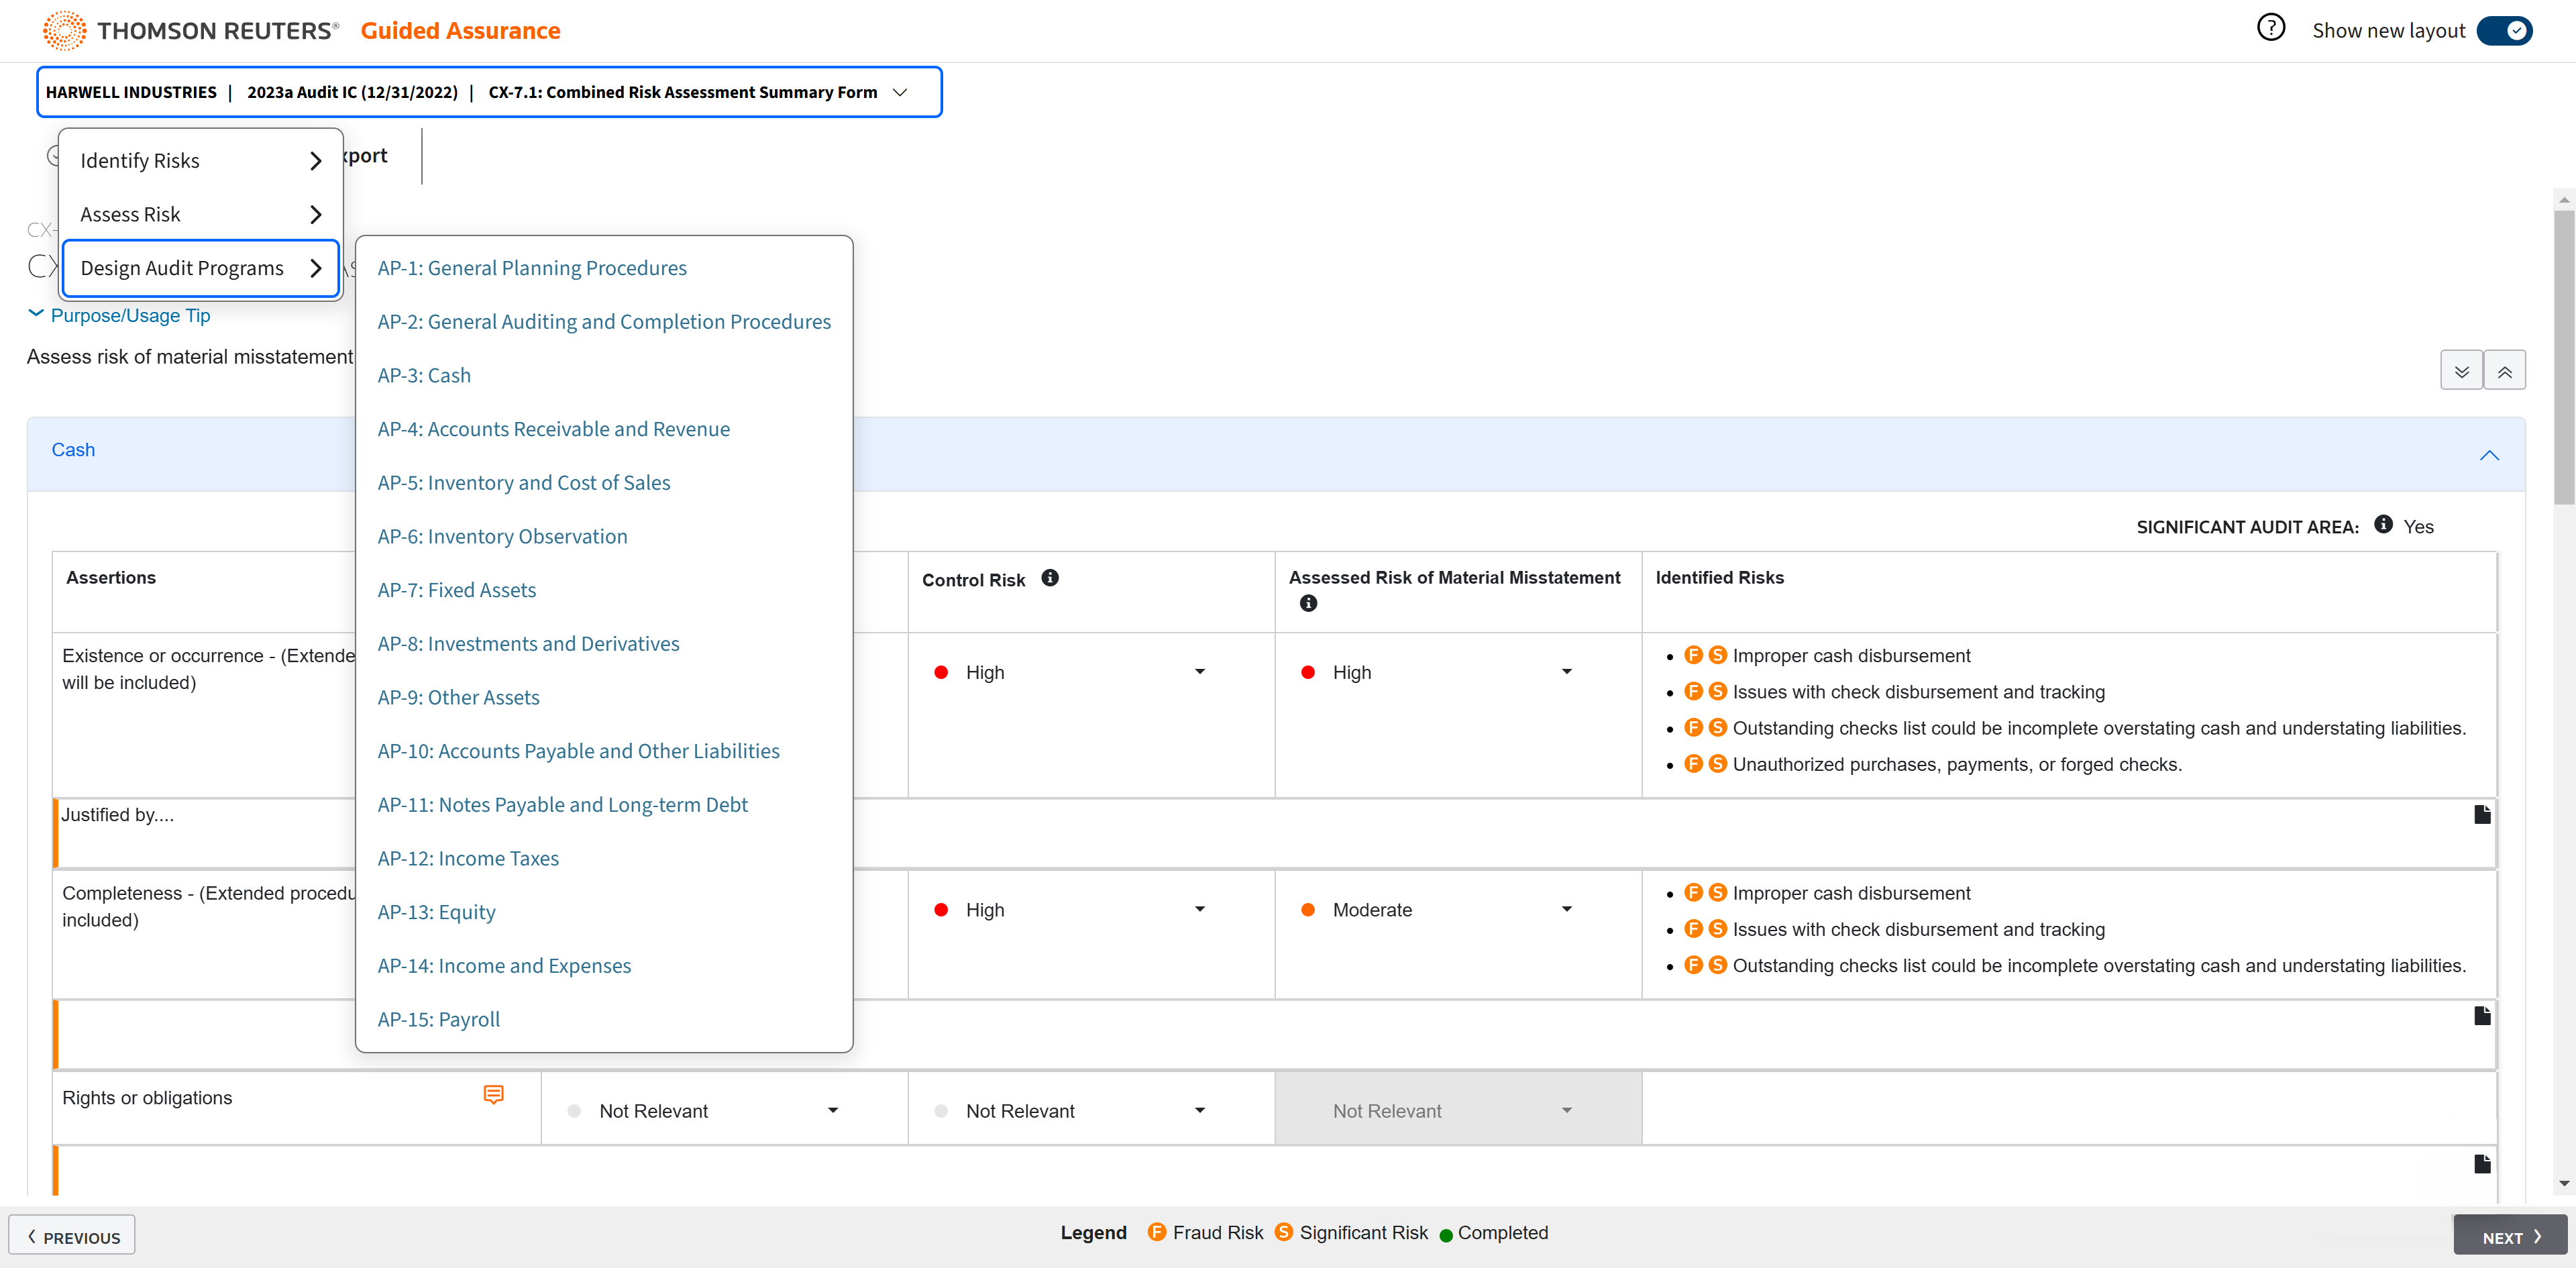
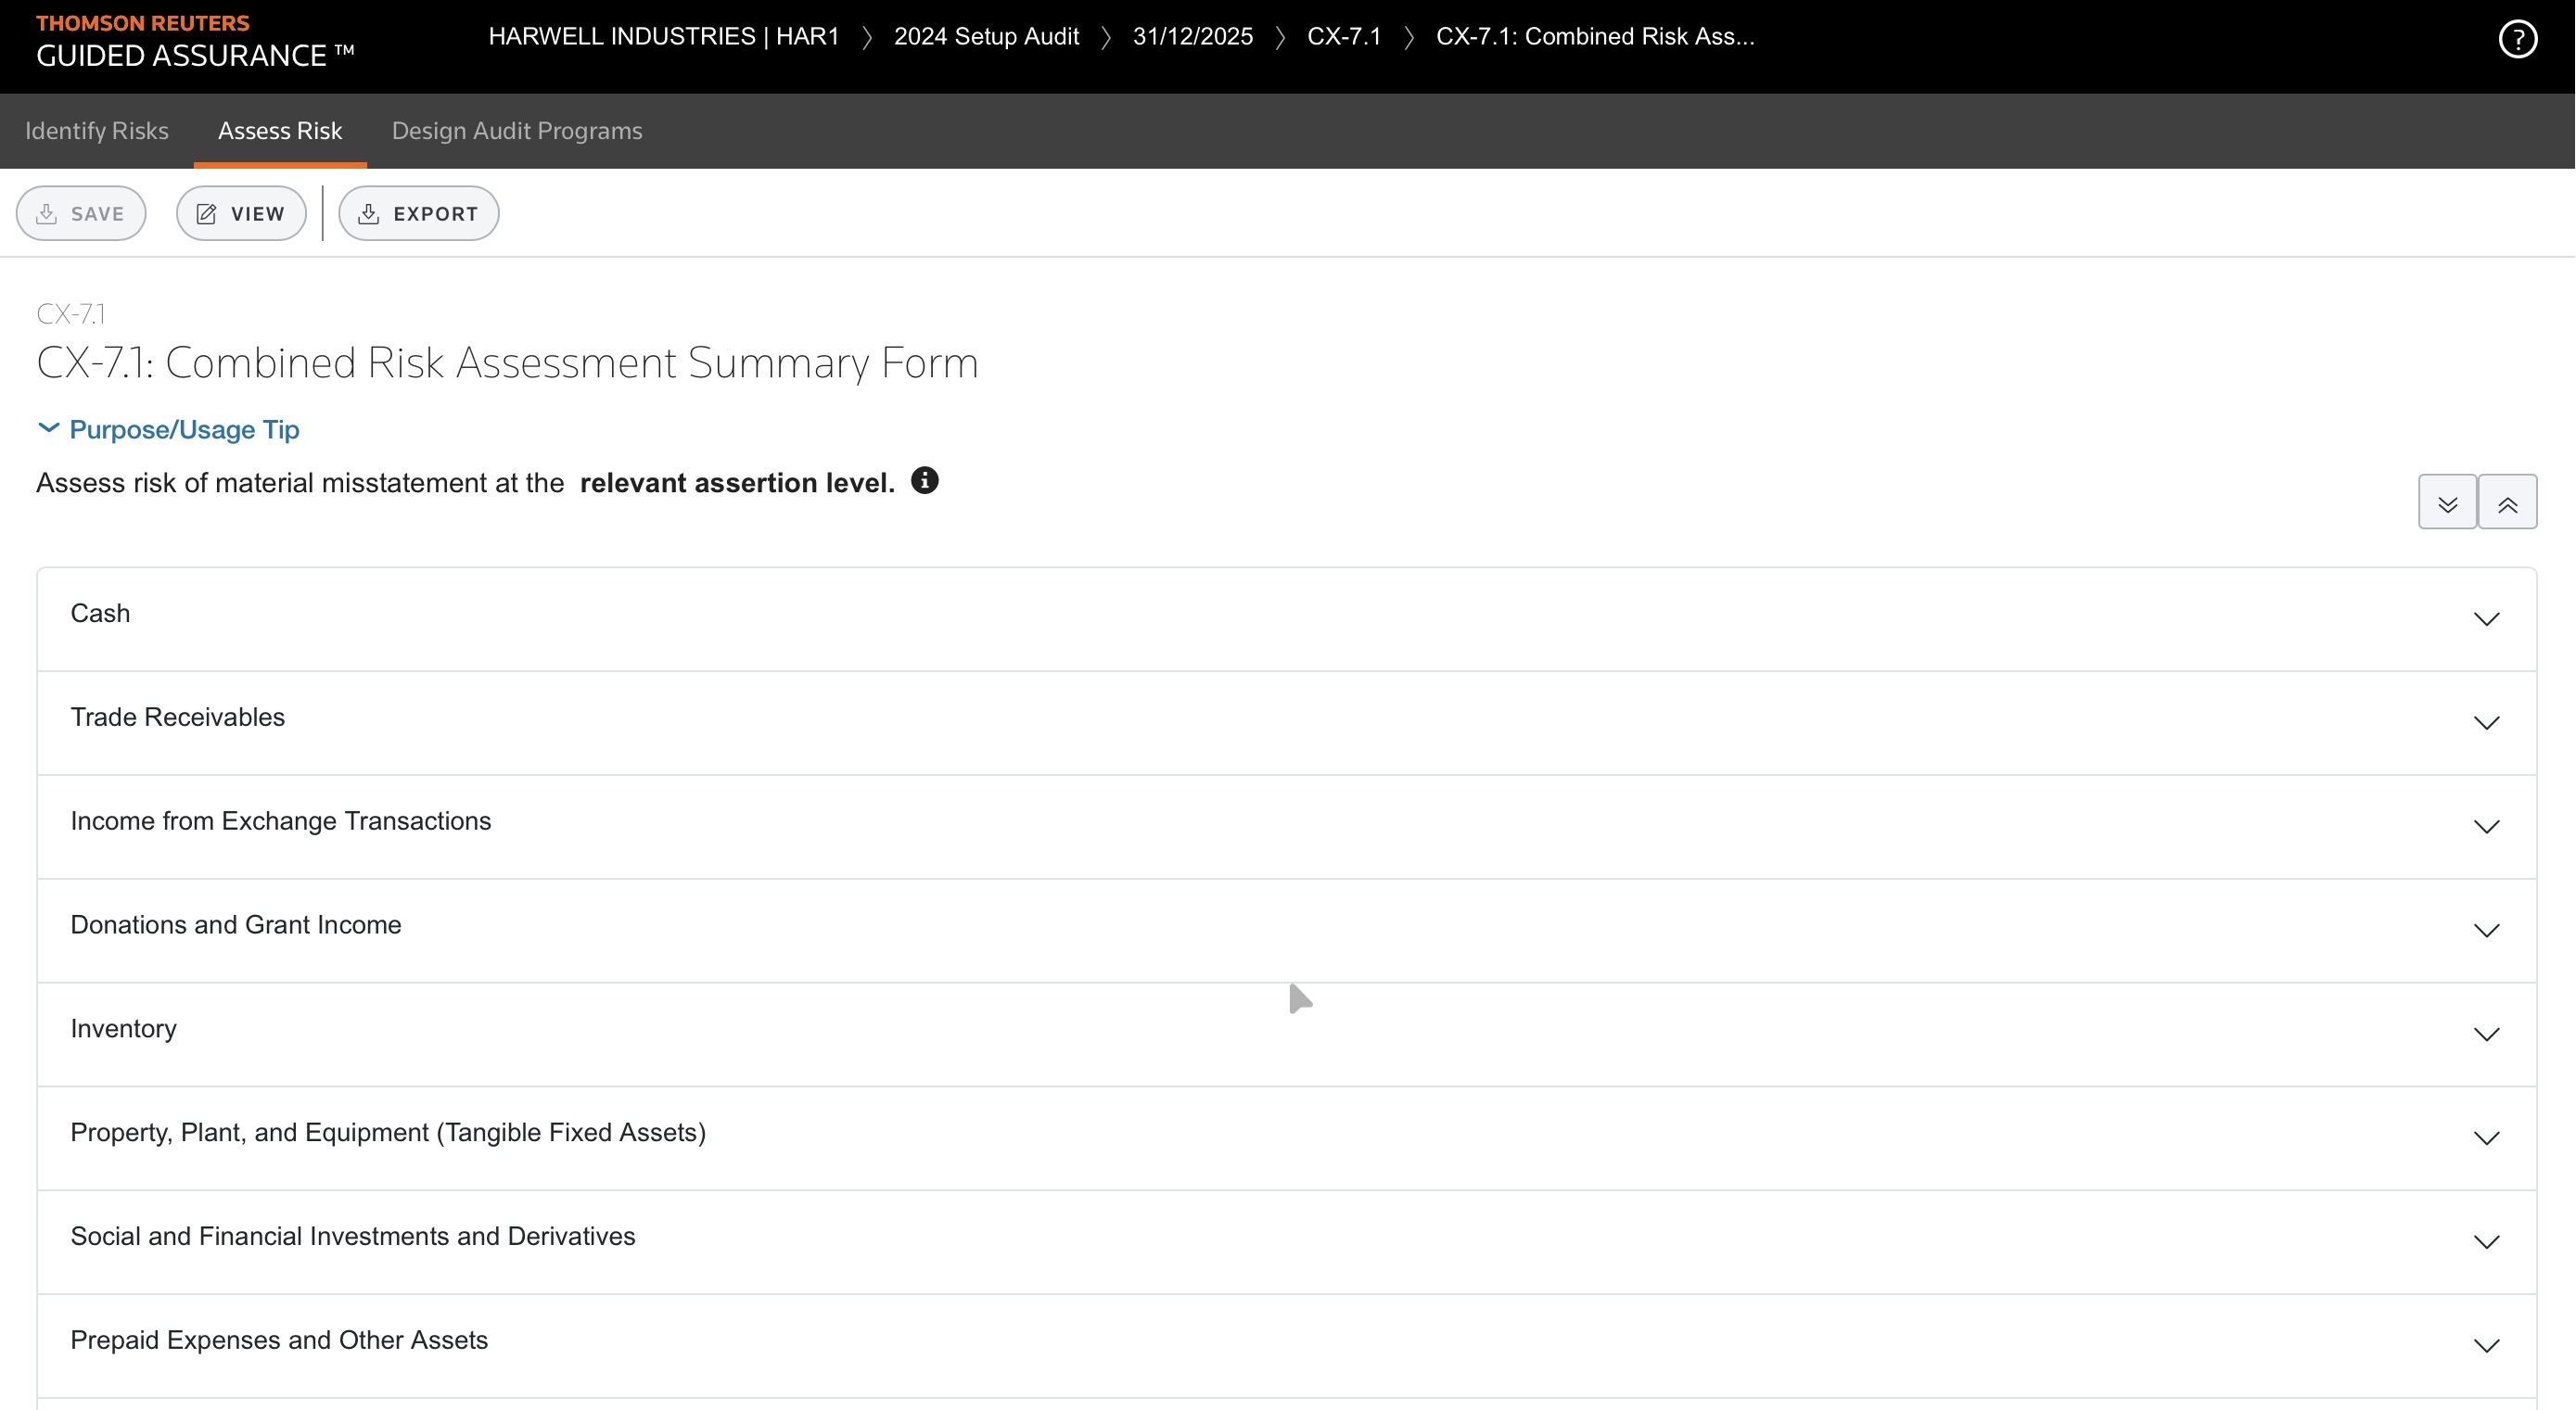
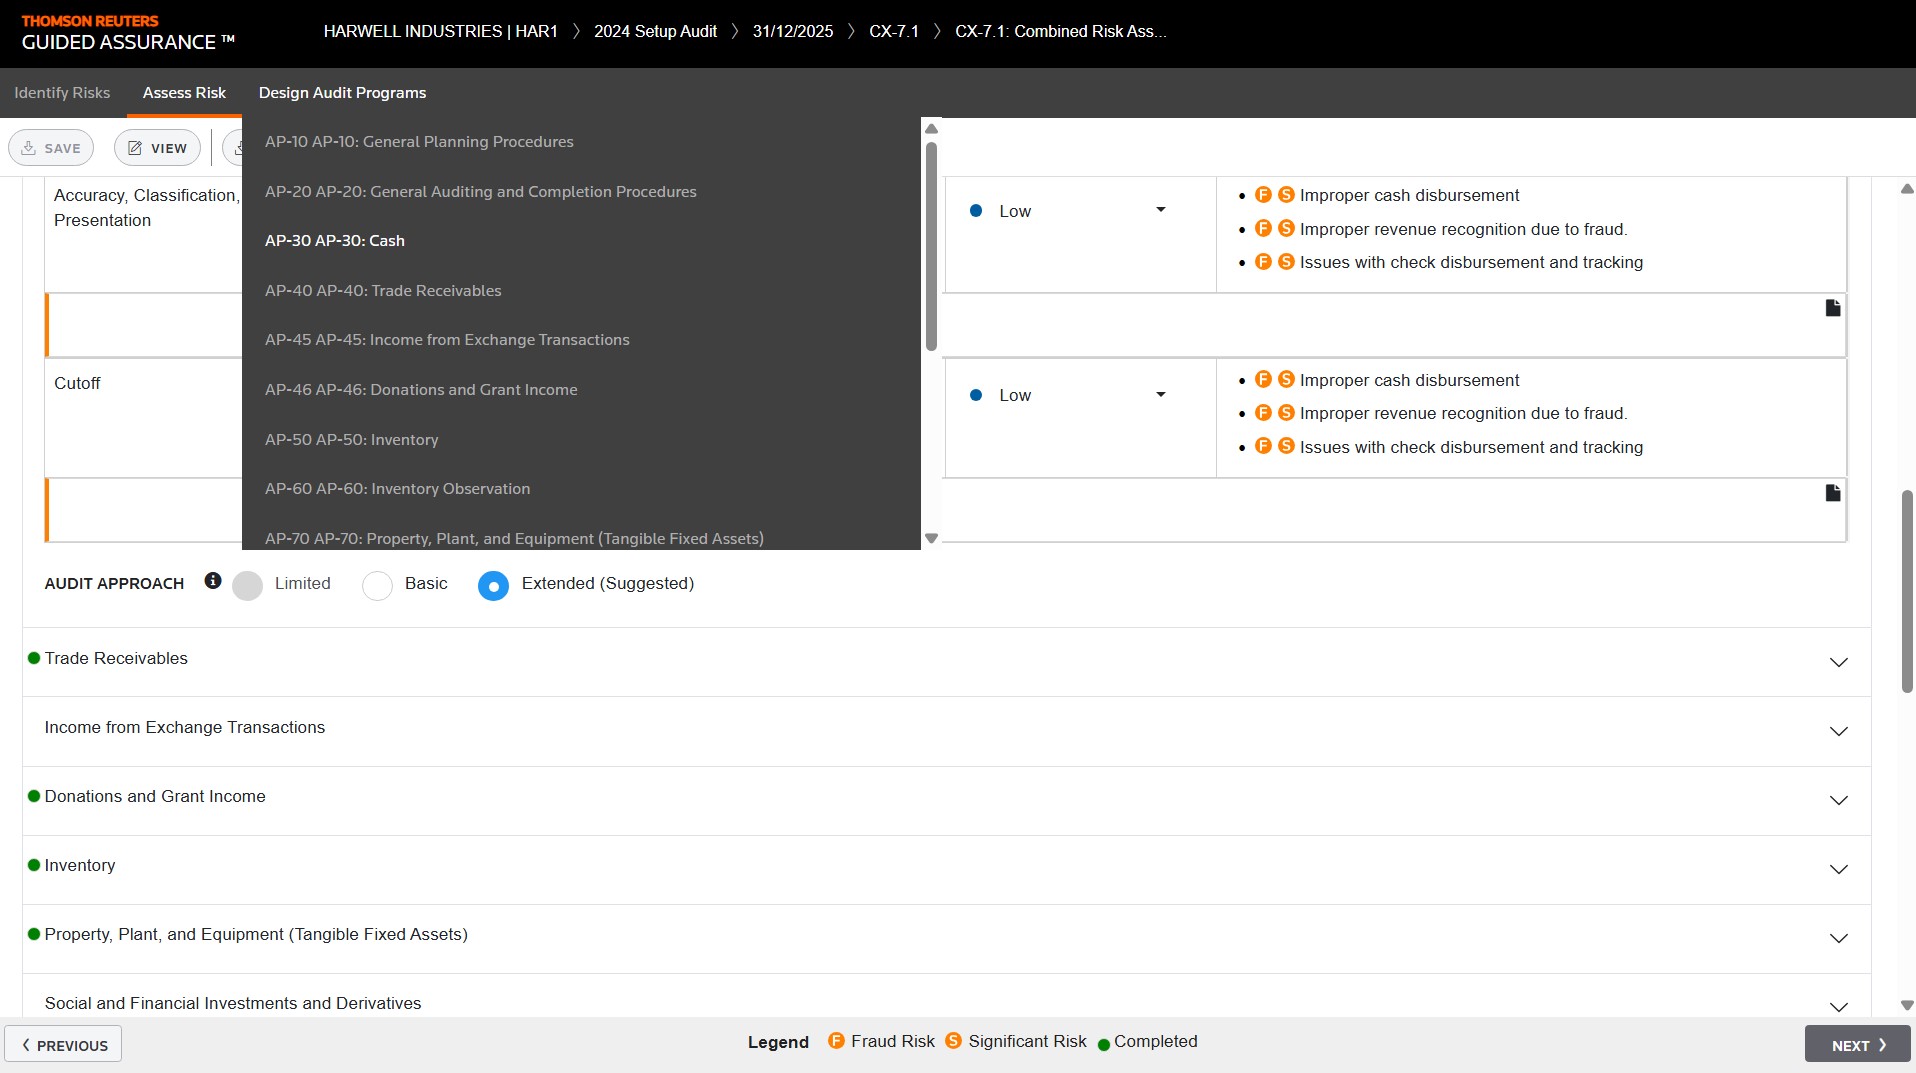
The Combined Risk Assessment Summary Form contains all different risk assessments.
Click to expand Cash.
Assertions are located on the left.
Identified Risks are located on the right.
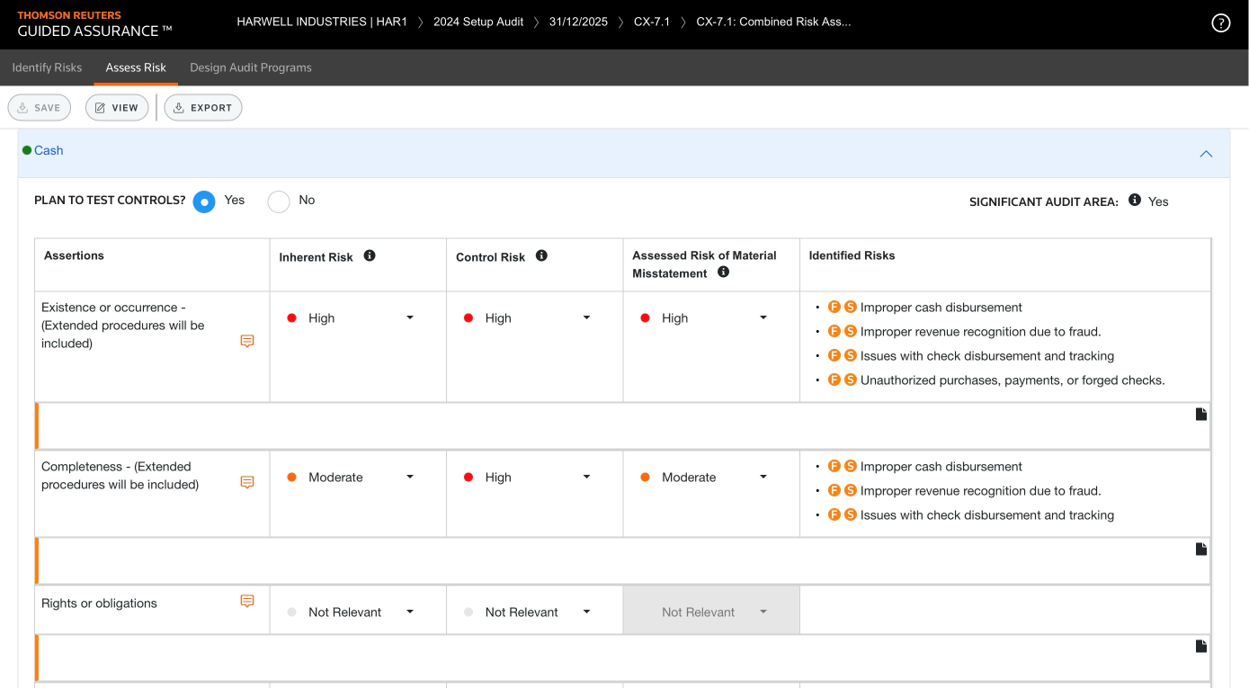
Quickly see whether this is a significant audit area.
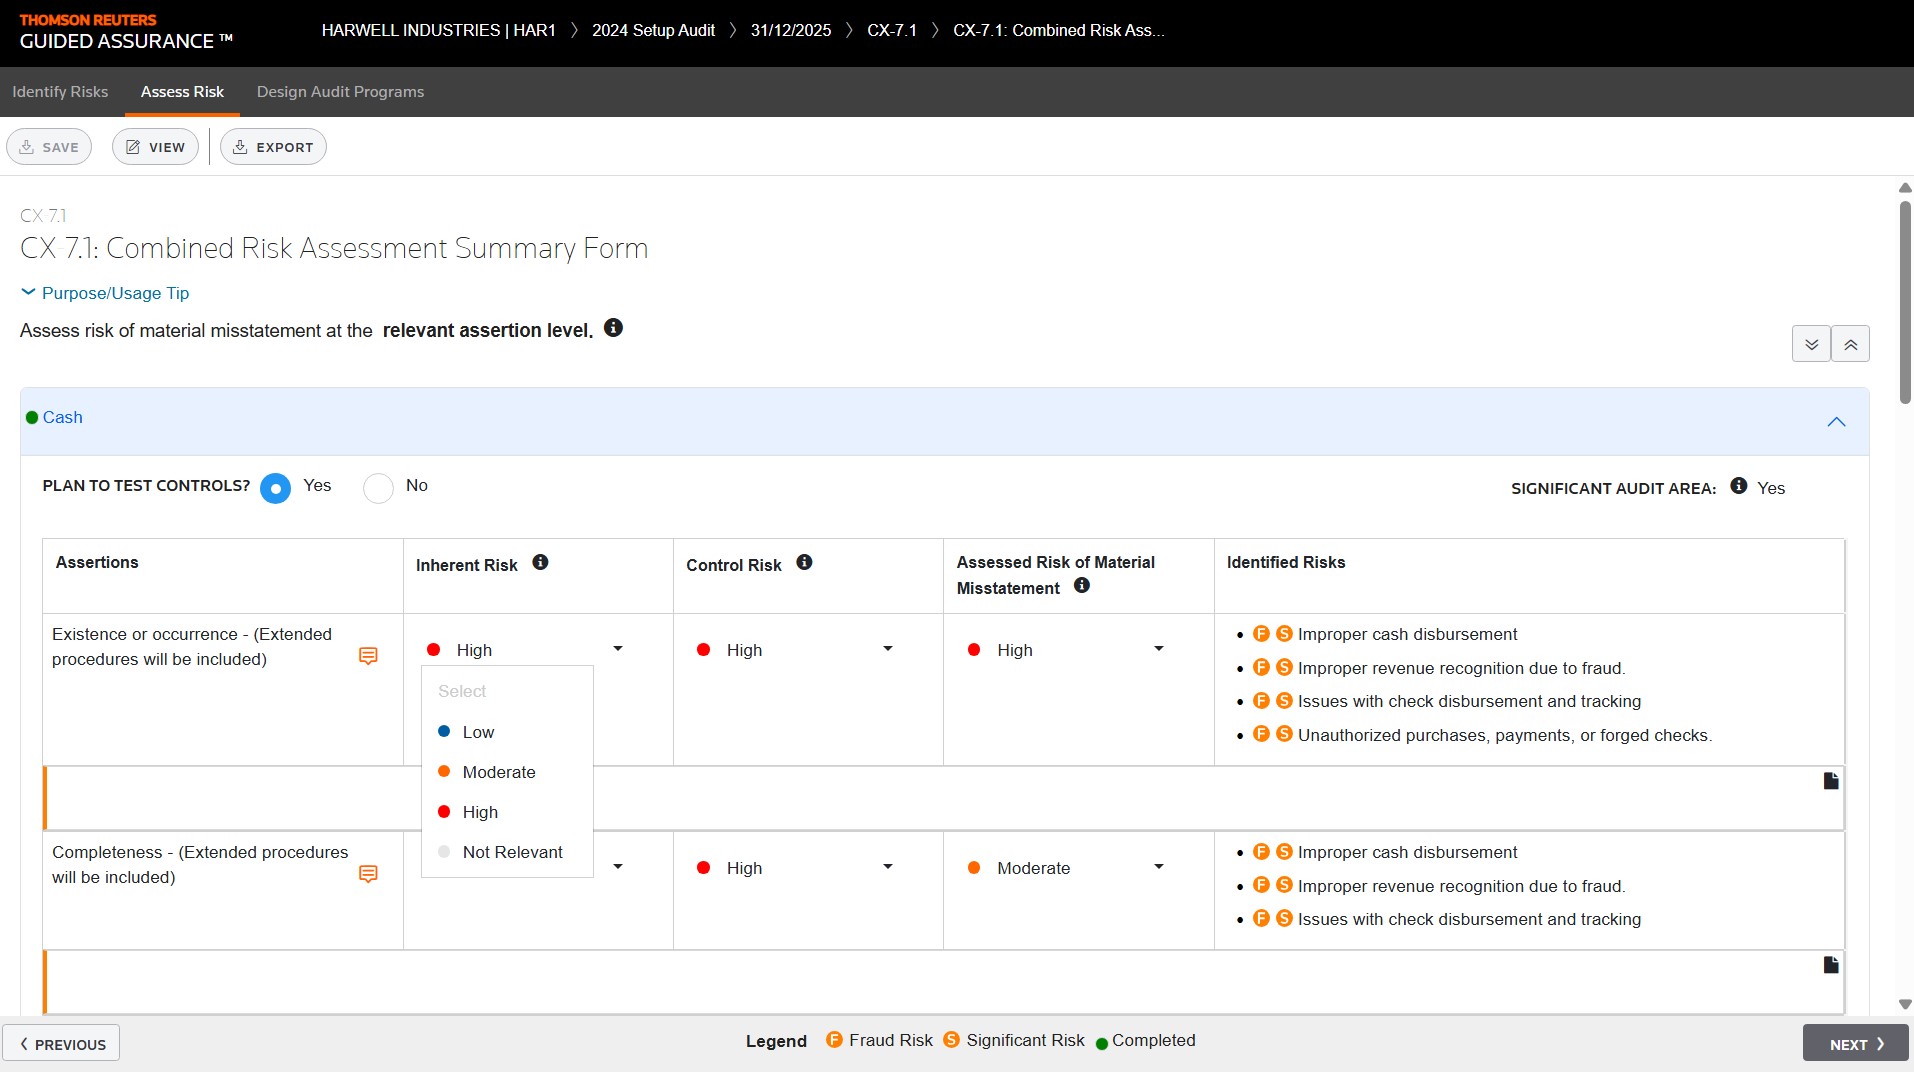
Your staff will give it an Inherent Risk and a Control Risk.
They can choose from multiple options.
Review the Assessed Risk of Material Misstatement.
Your staff can edit this if they disagree. Reviewers and peer reviewers will be notified if you've changed it.
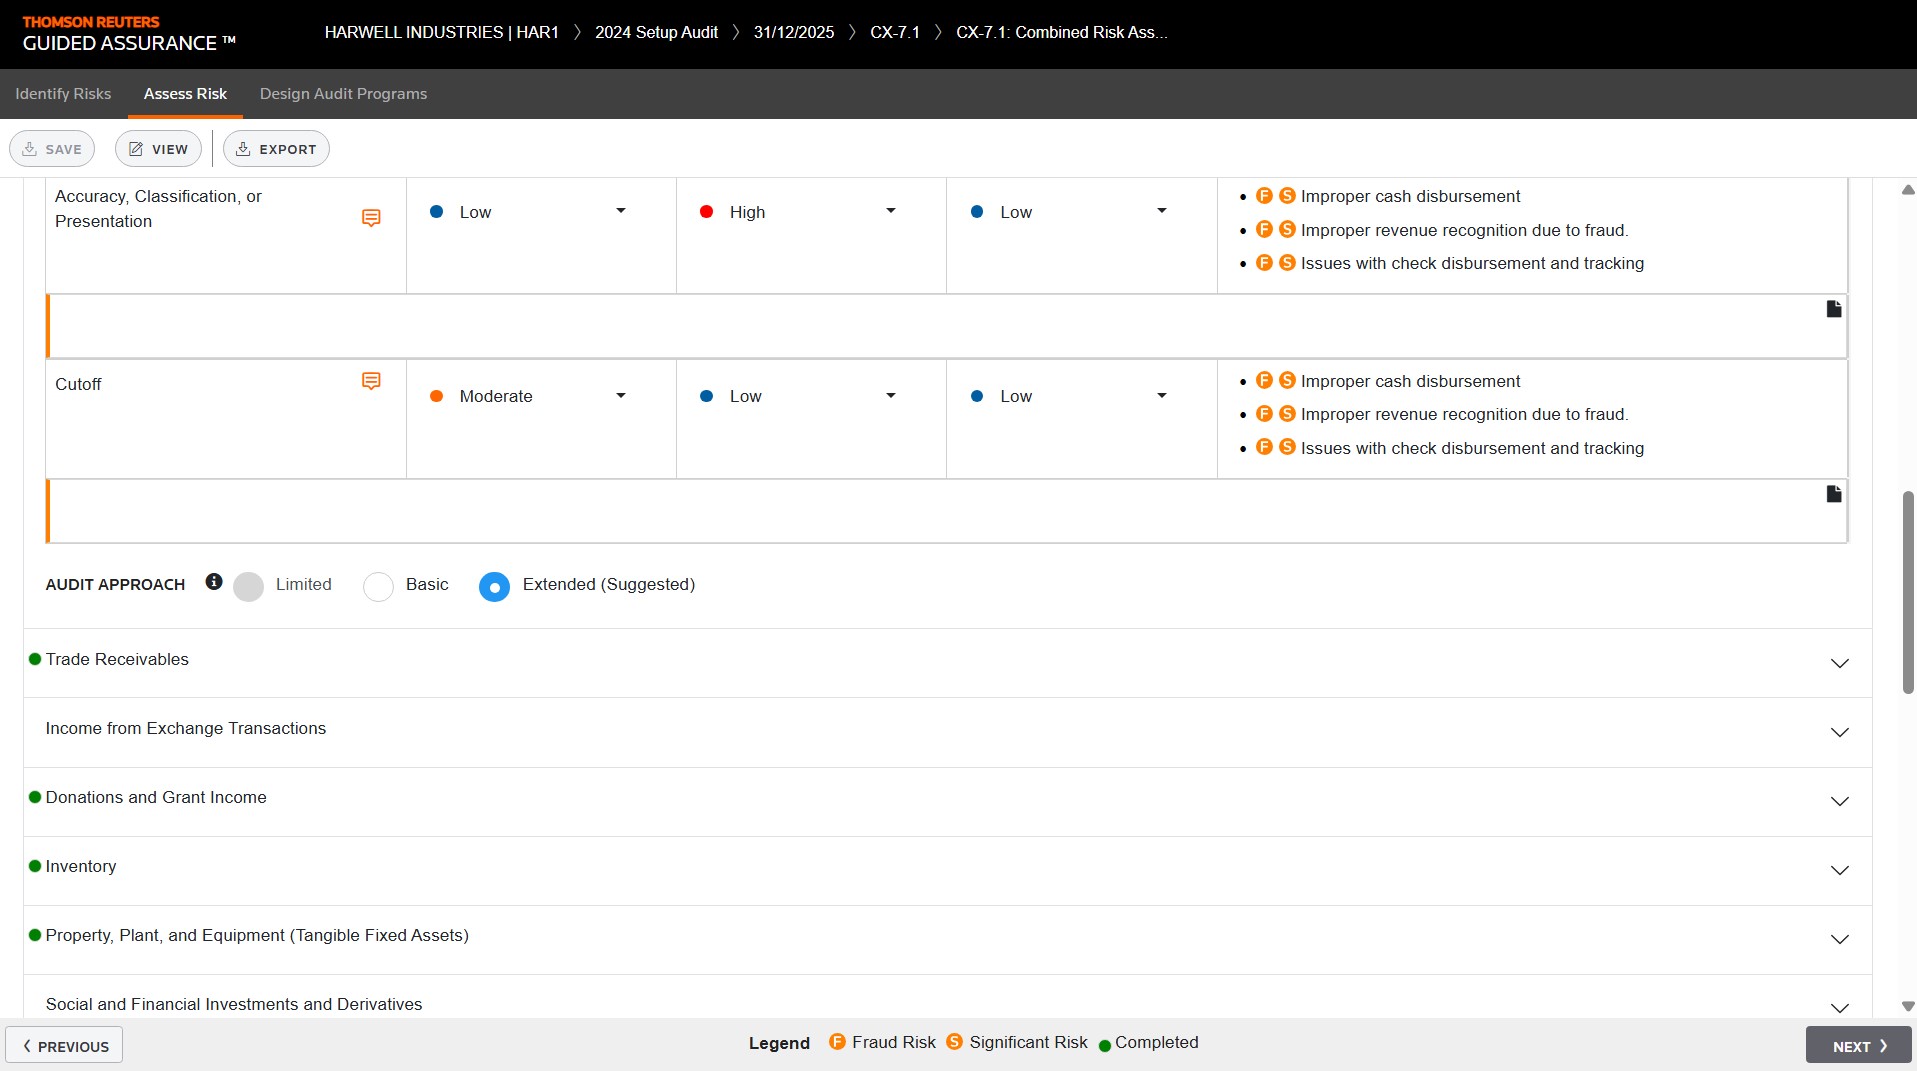
Once you've ranked everything, see the suggested audit approach - Limited, Basic, or Extended.
Once you've finished going through all the audit areas, you'll move on to Design Audit Programs.
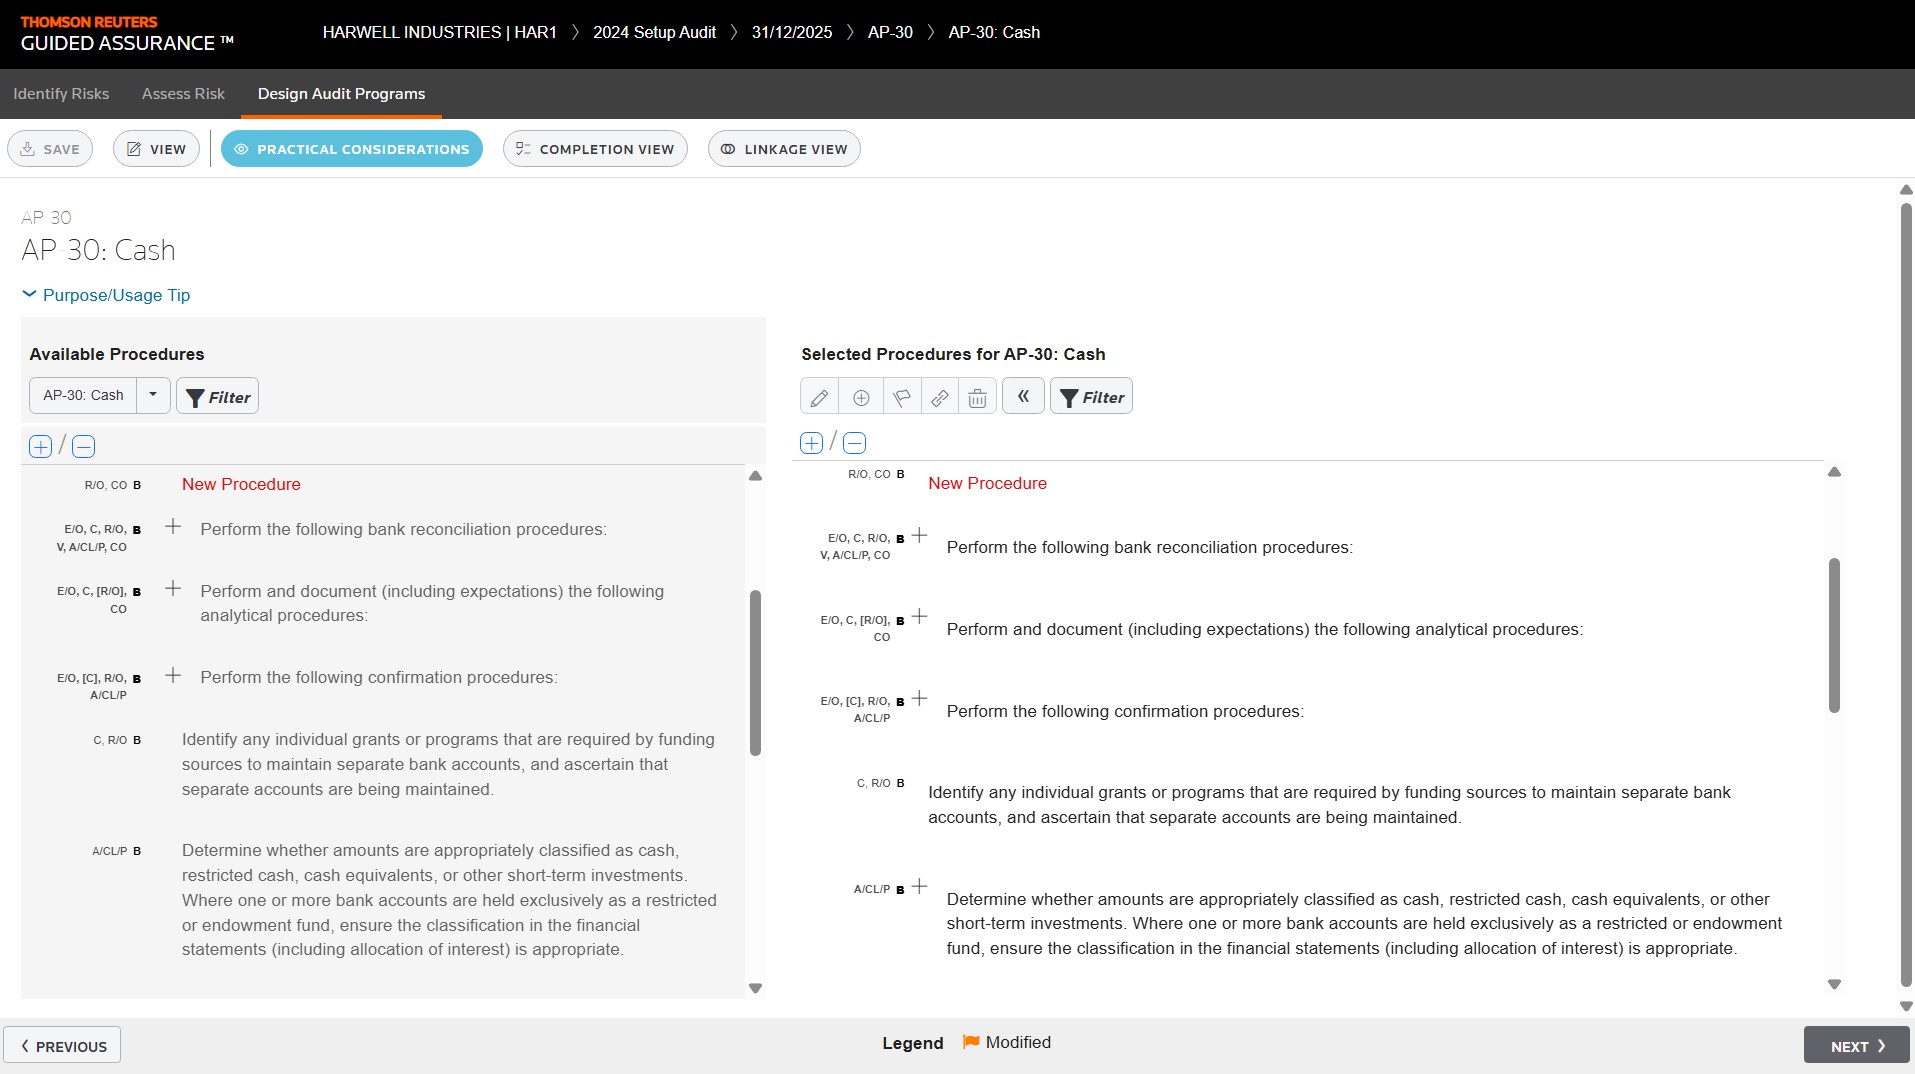
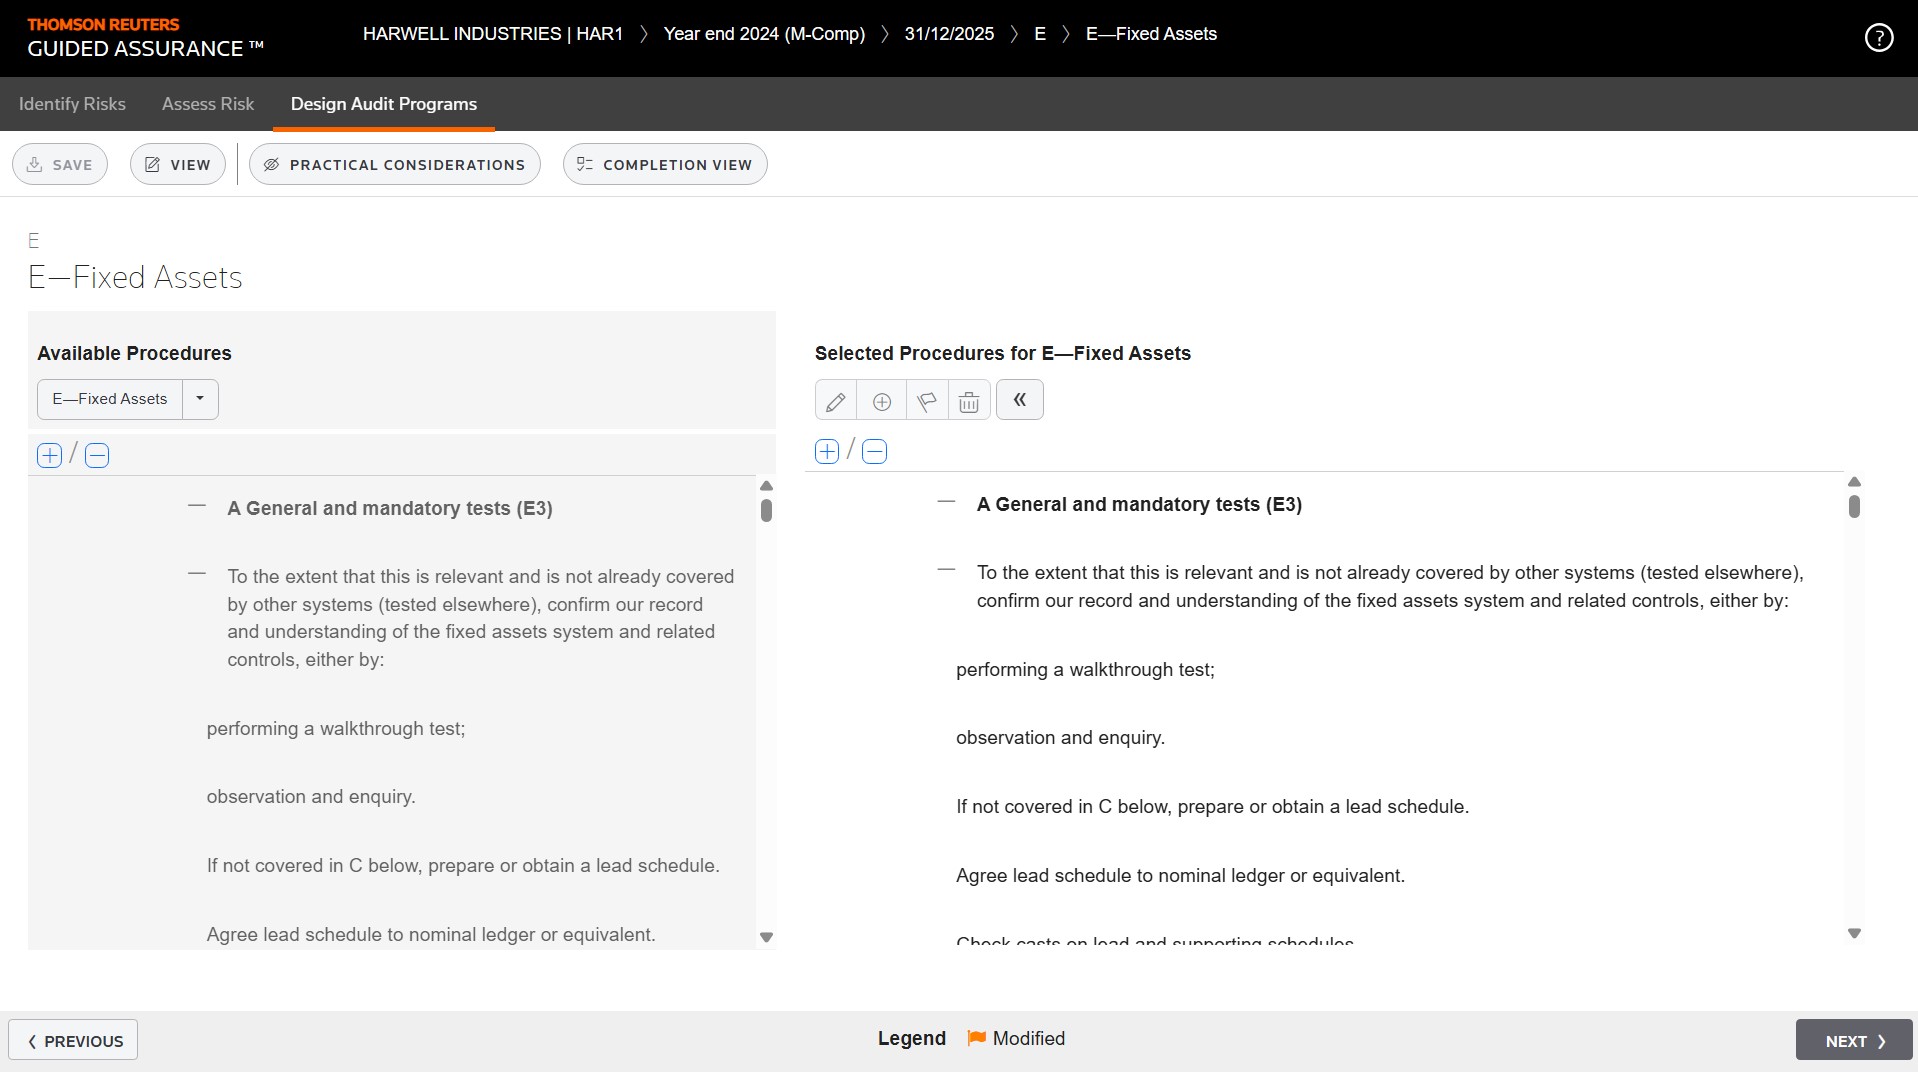
On this page, you will design what you want your staff to do in this particular audit area.
In the design view, all the Available Procedures are listed on the left.
And all the Selected Procedures are listed on the right.
At the bottom of the document is a legend. Many of the procedures in this example were selected in a prior period and rolled forward.
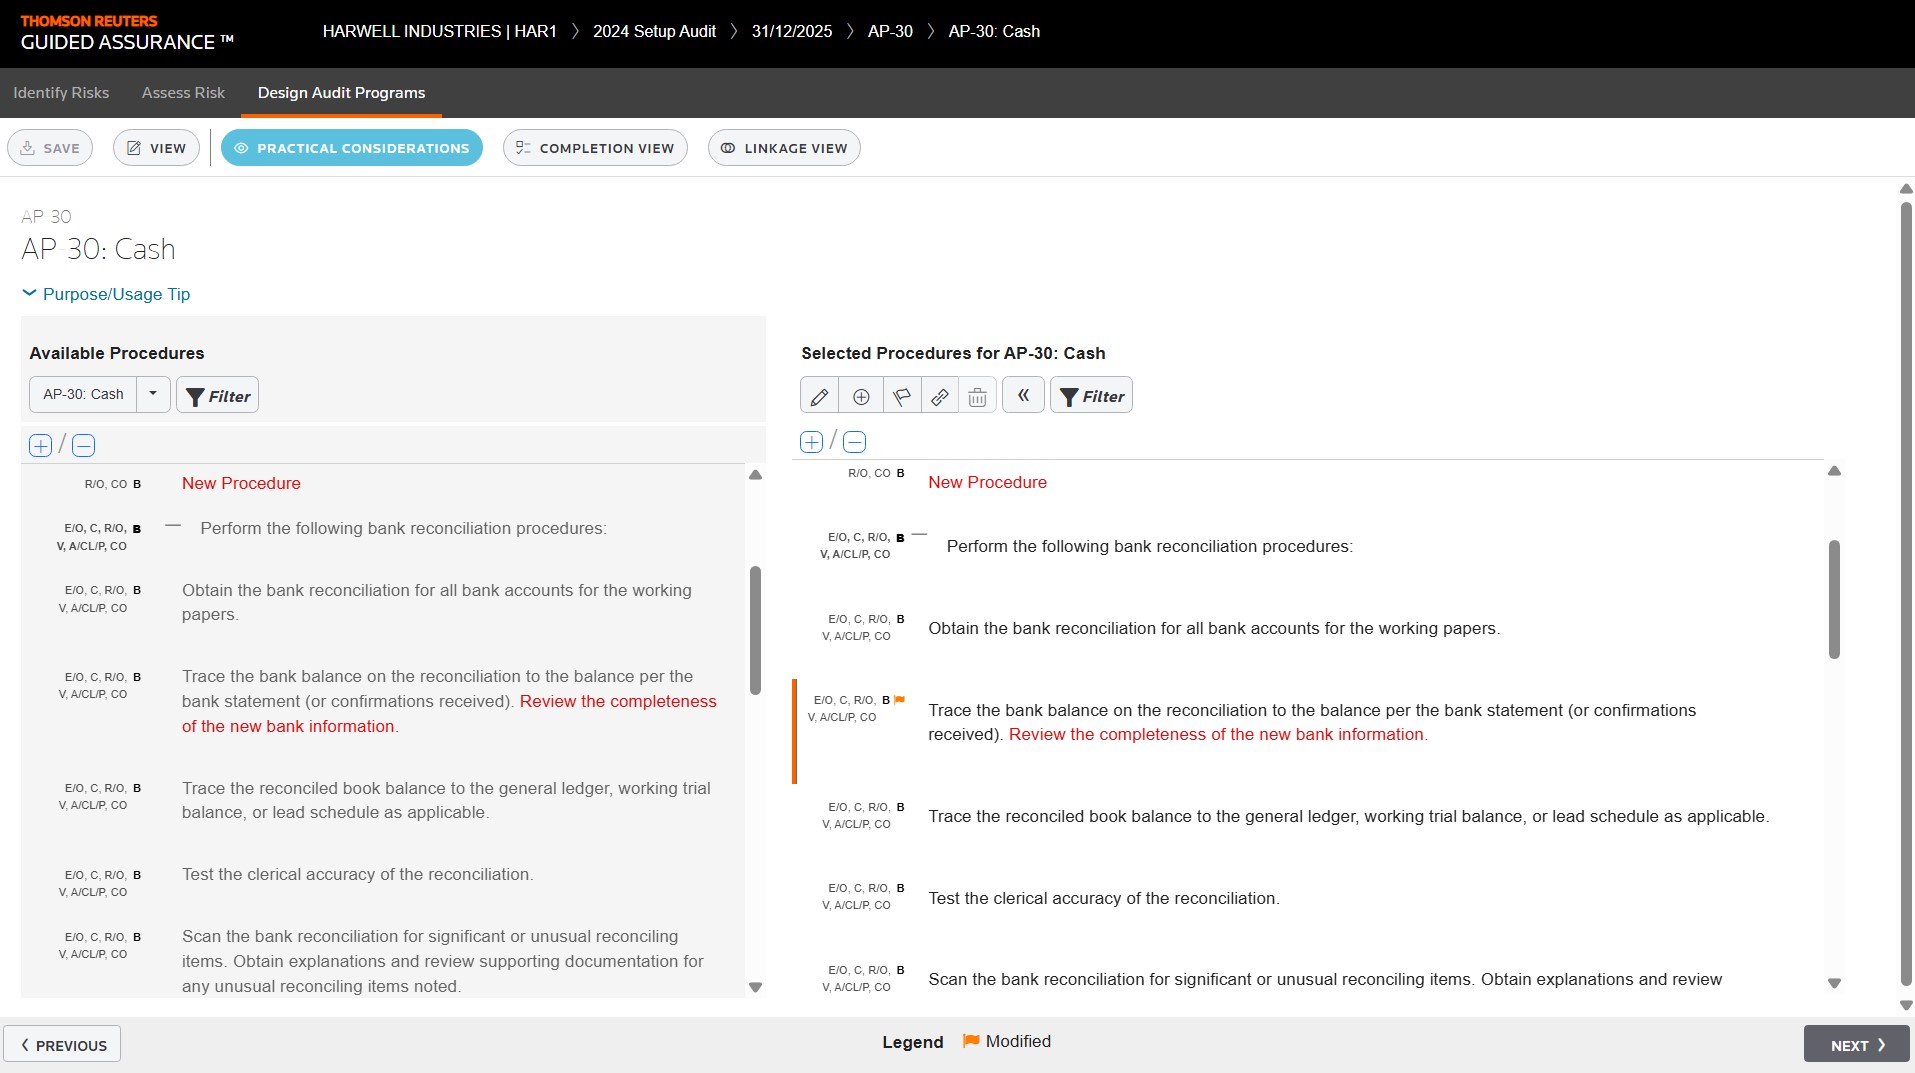
You can edit a procedure or add new ones.
Edits display in red.
So do additions.
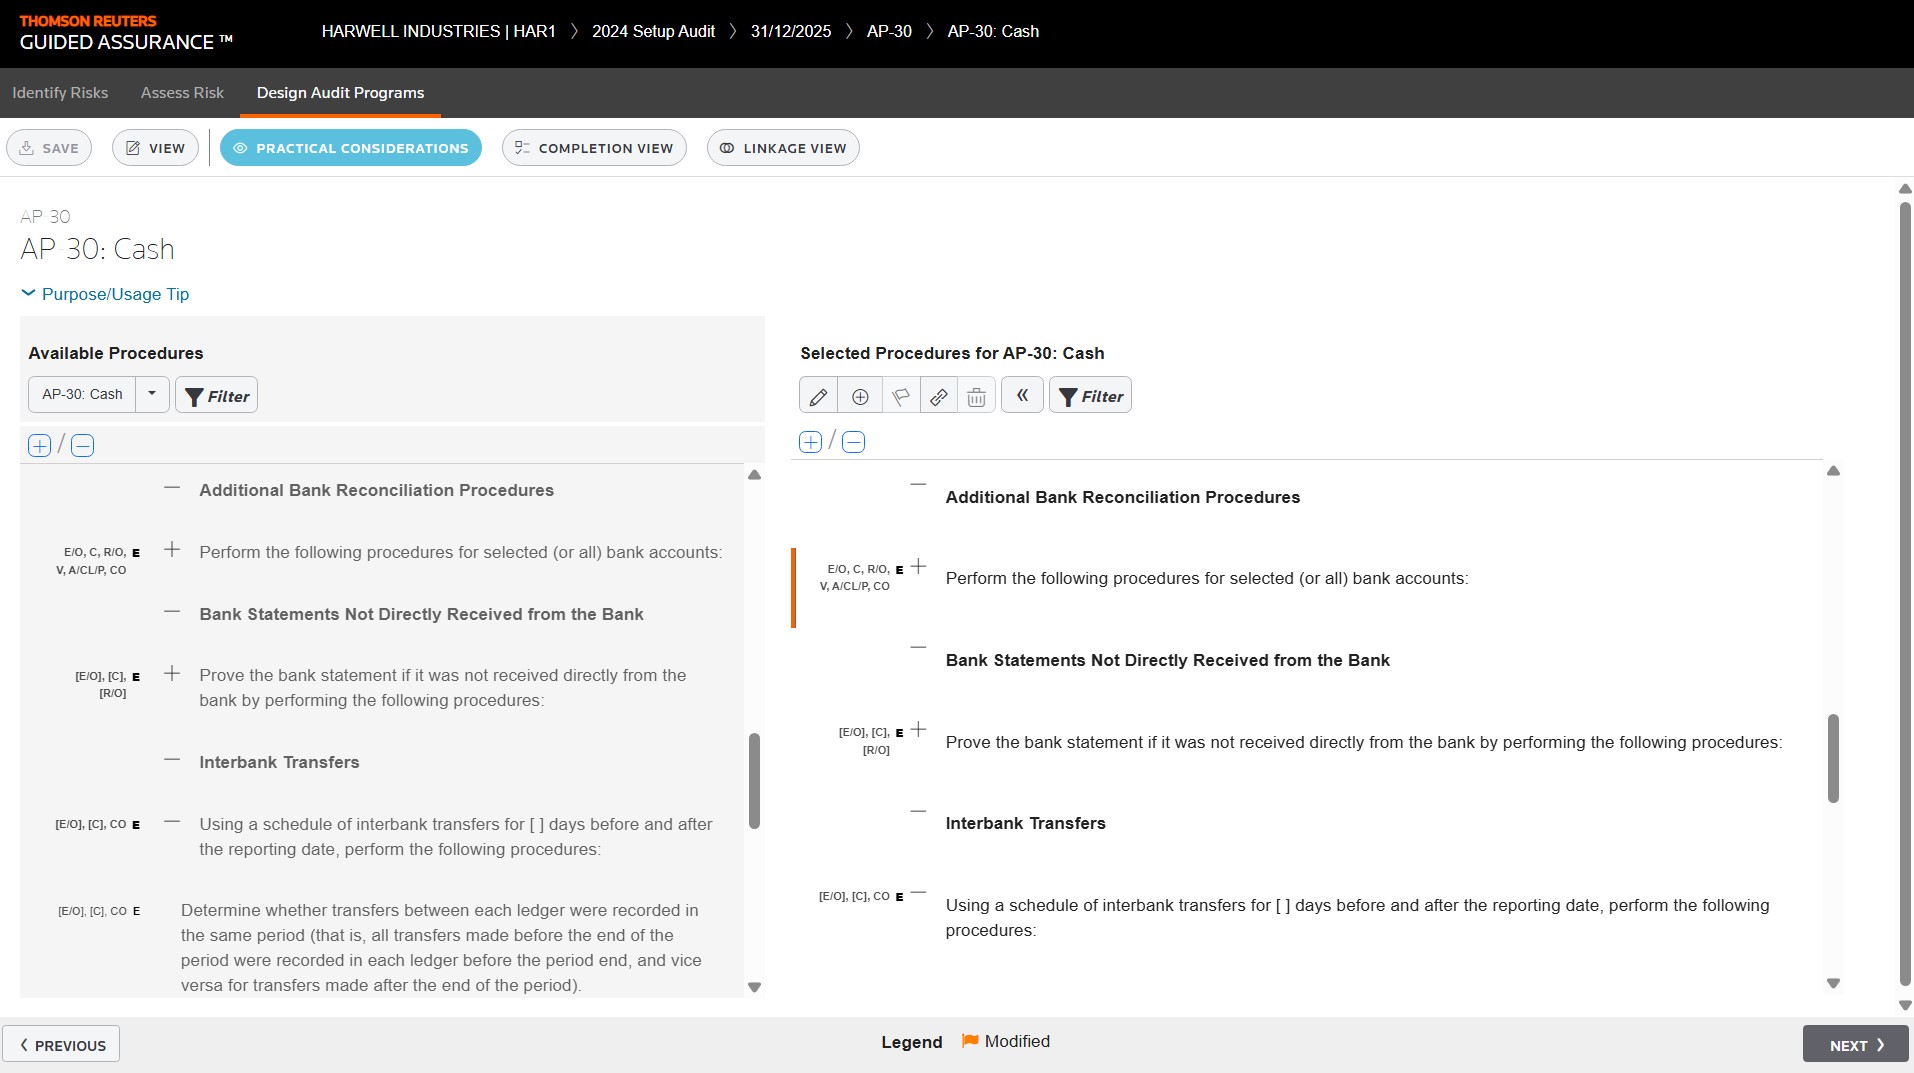
Basic procedures are listed as B.
Extended procedures are listed as E.
When done editing the procedures, you will go to the Completion View.
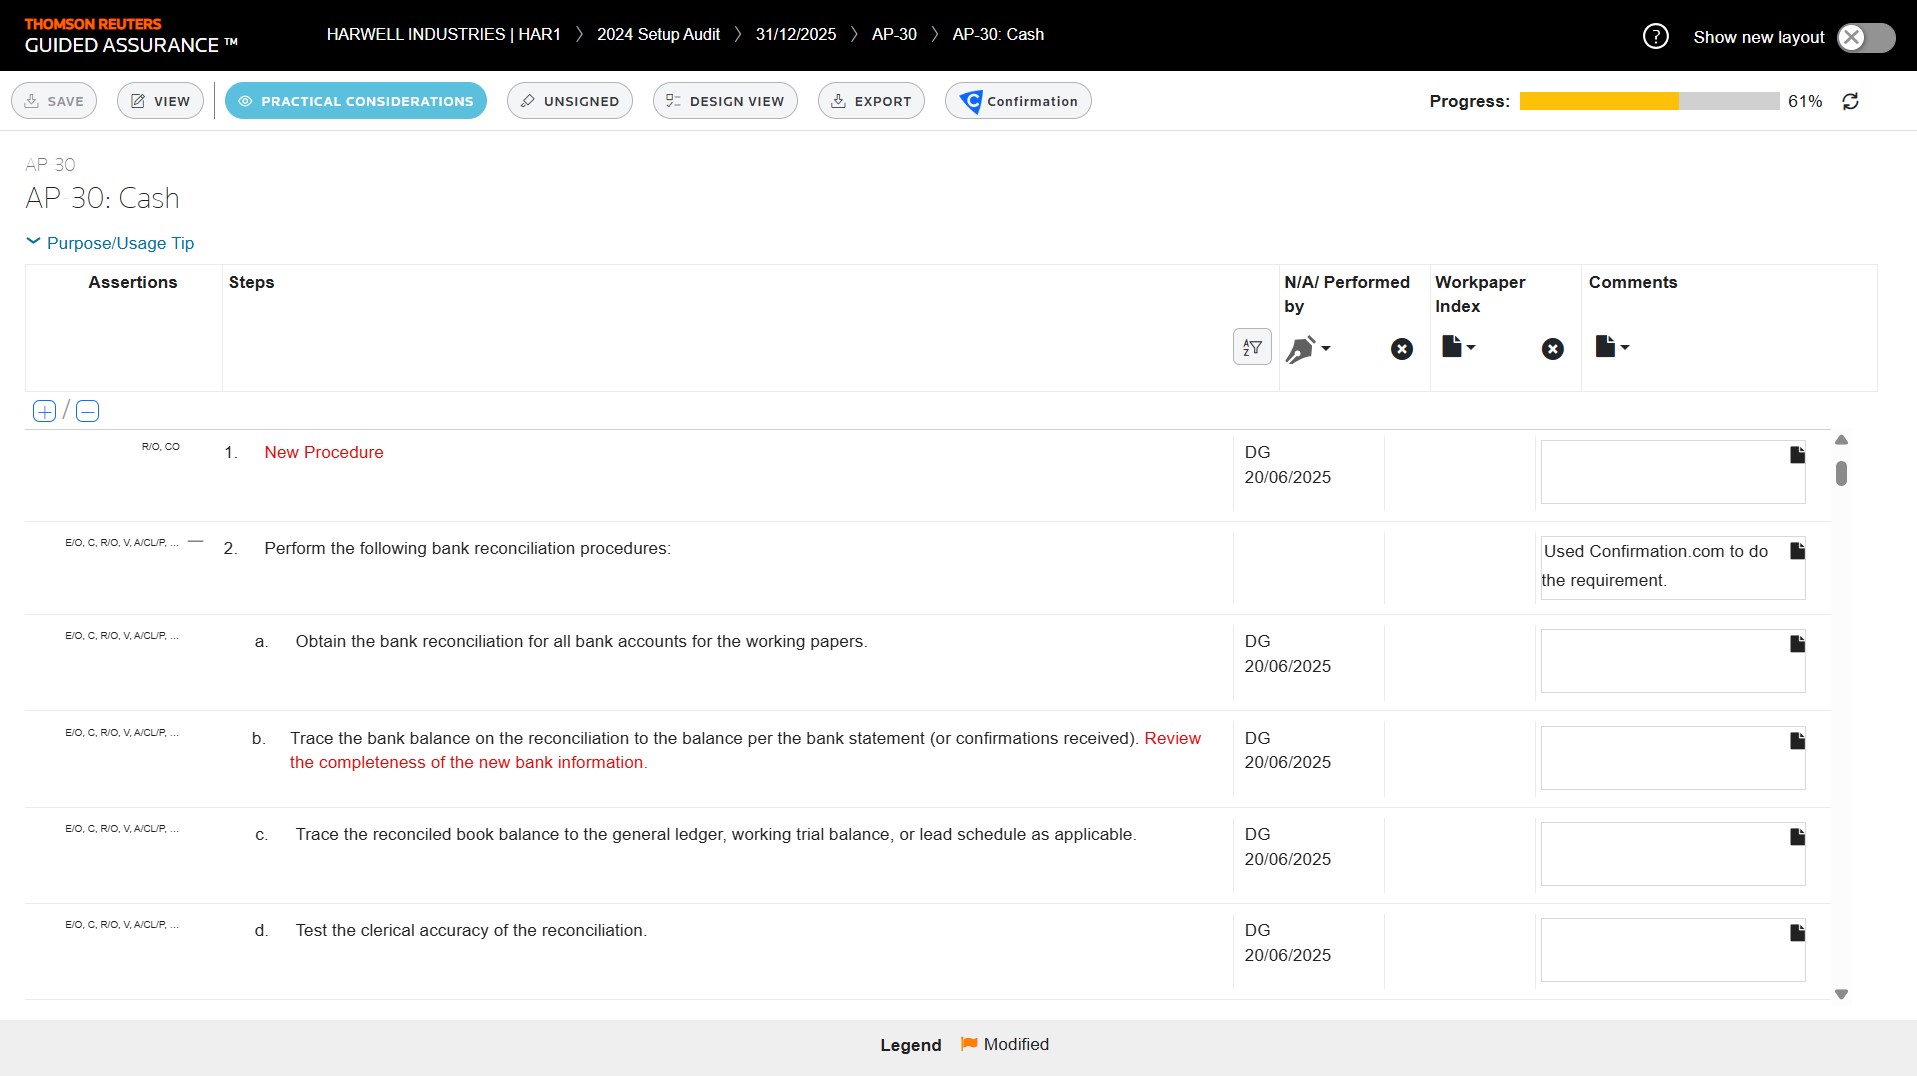
This is where your staff begins their work.
You can sign off on one or multiple steps at a time.
Track progress on the engagement at the top of the page.
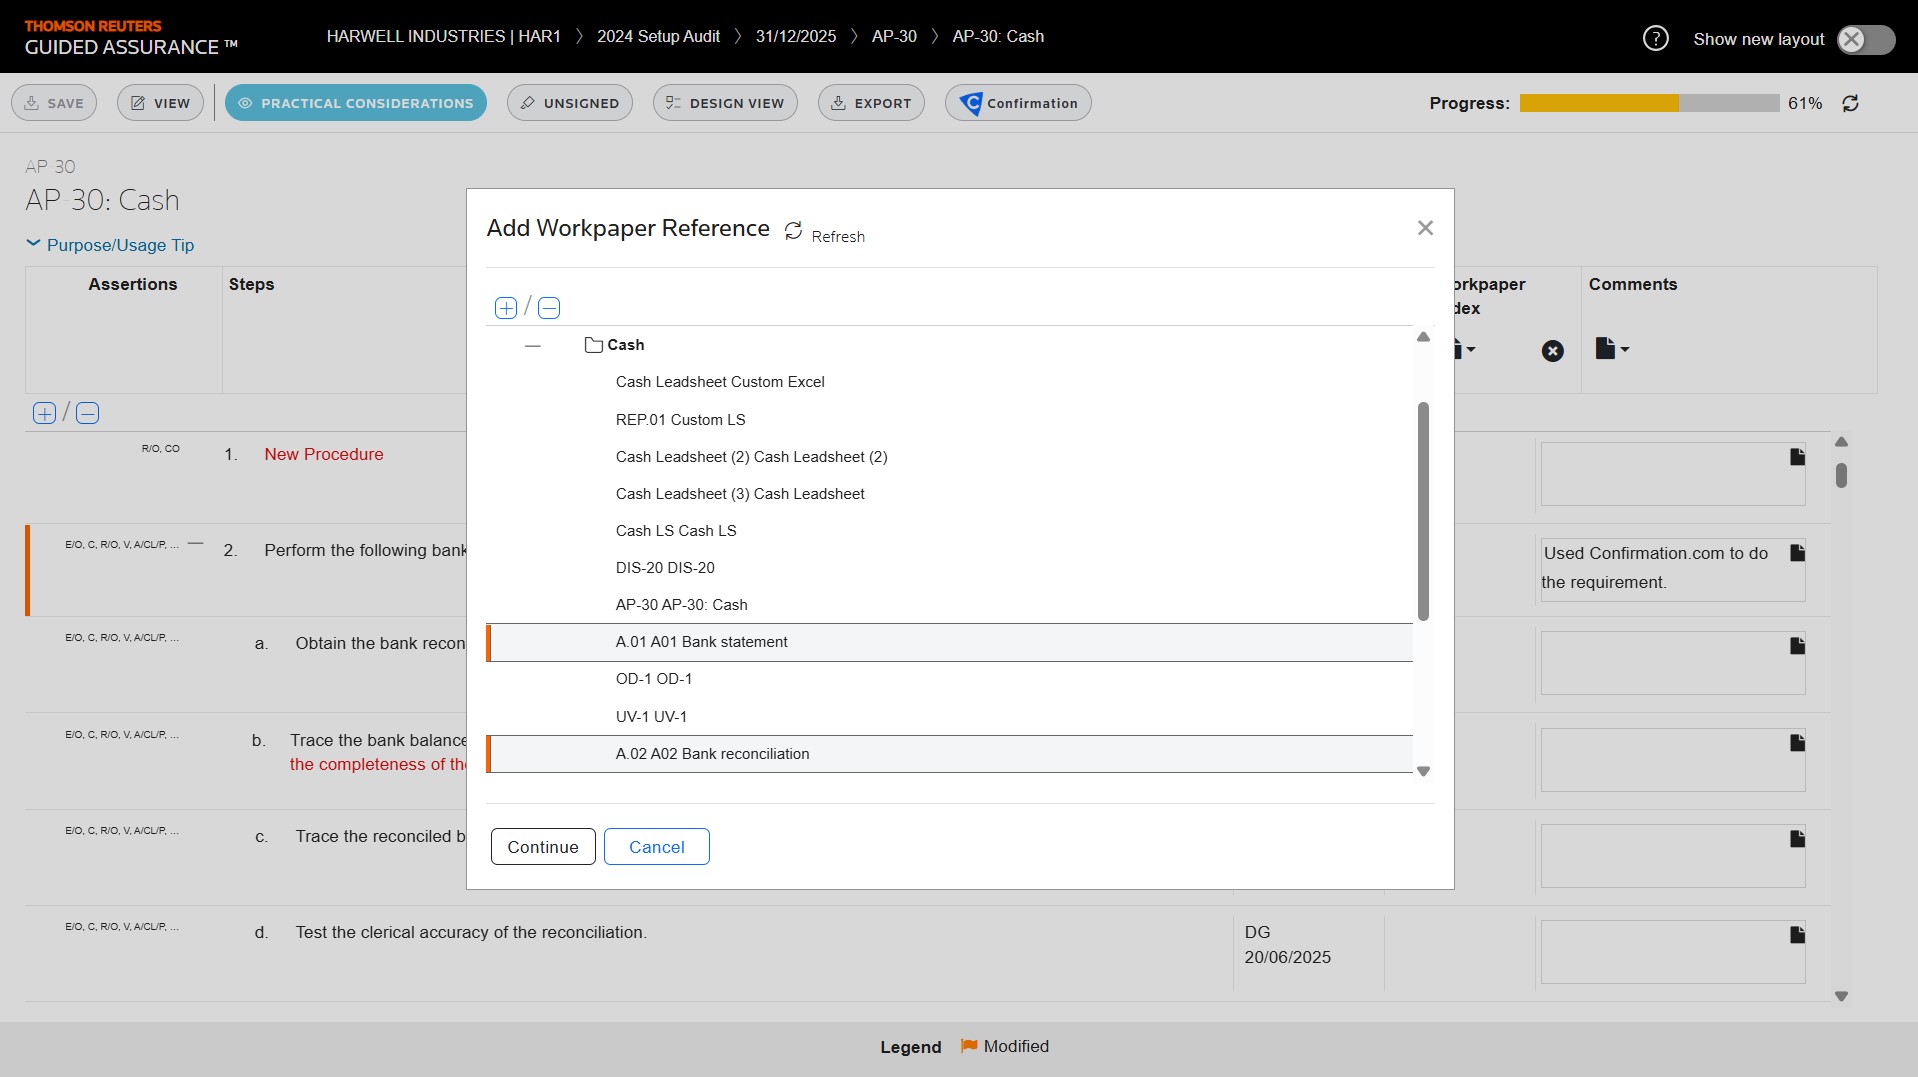
Click to add a workpaper reference.
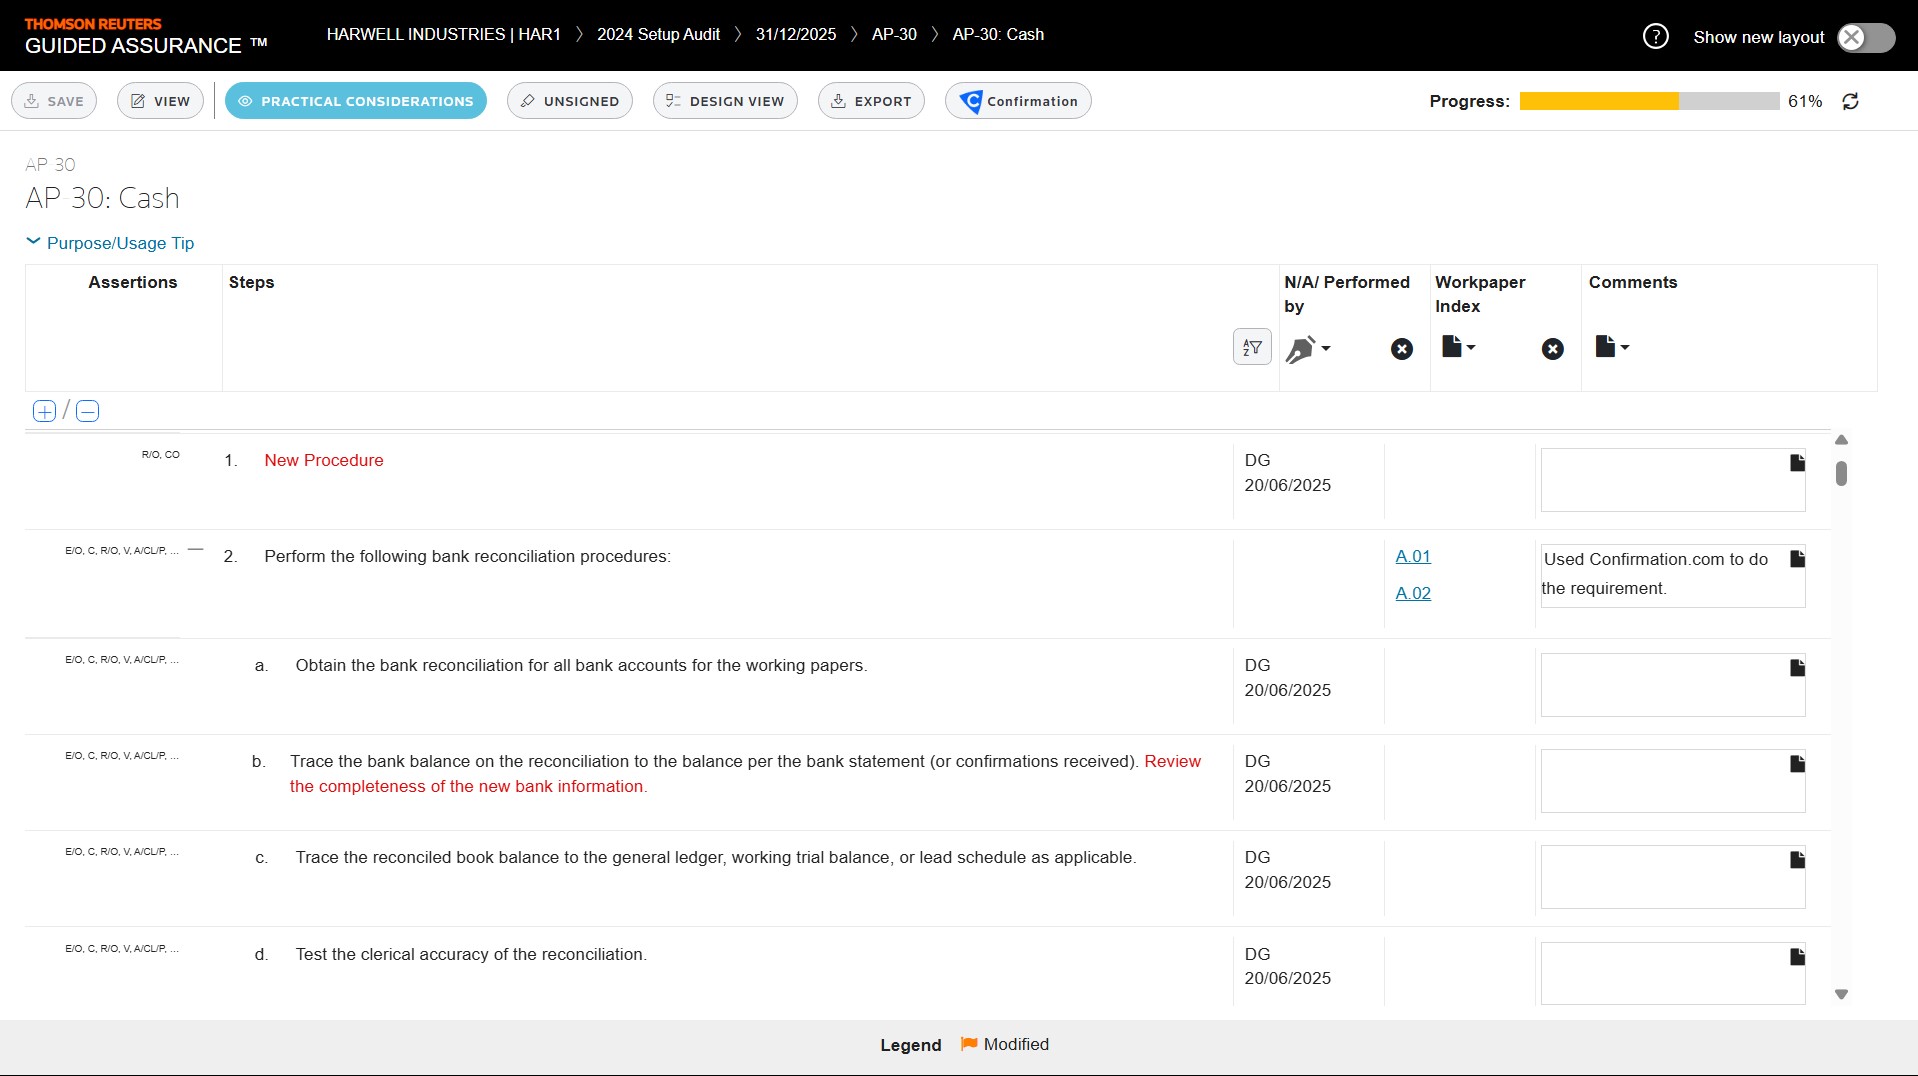
Select the workpaper references you'd like to add: in this case Bank statement and Bank reconciliation. Anything in the binder can be a workpaper reference.
The workpaper references have been added and will remain here year to year. These are the most recent versions of the documents.
You can add comments with a high level of detail — as many words as you need.
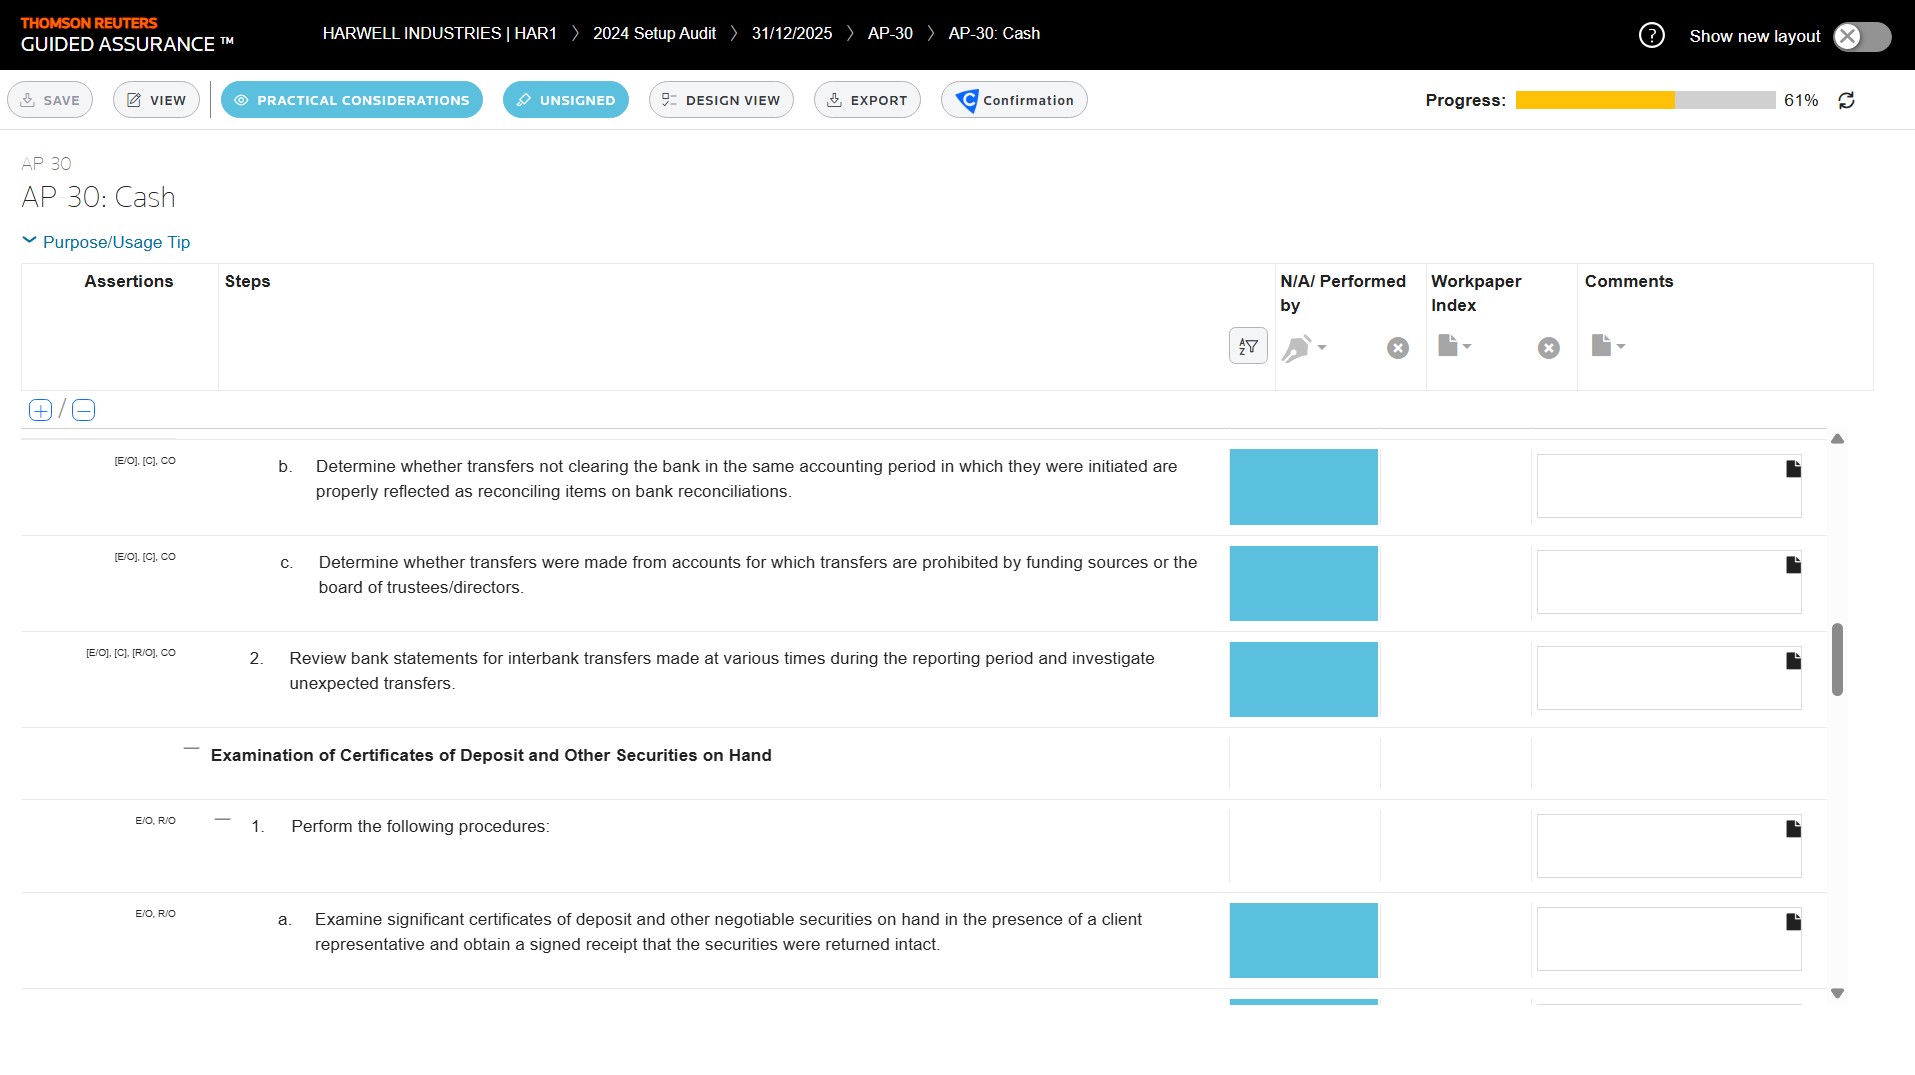
When you're nearly complete and need to see what procedures are left unsigned, click Unsigned.
All unsigned procedures will be highlighted.
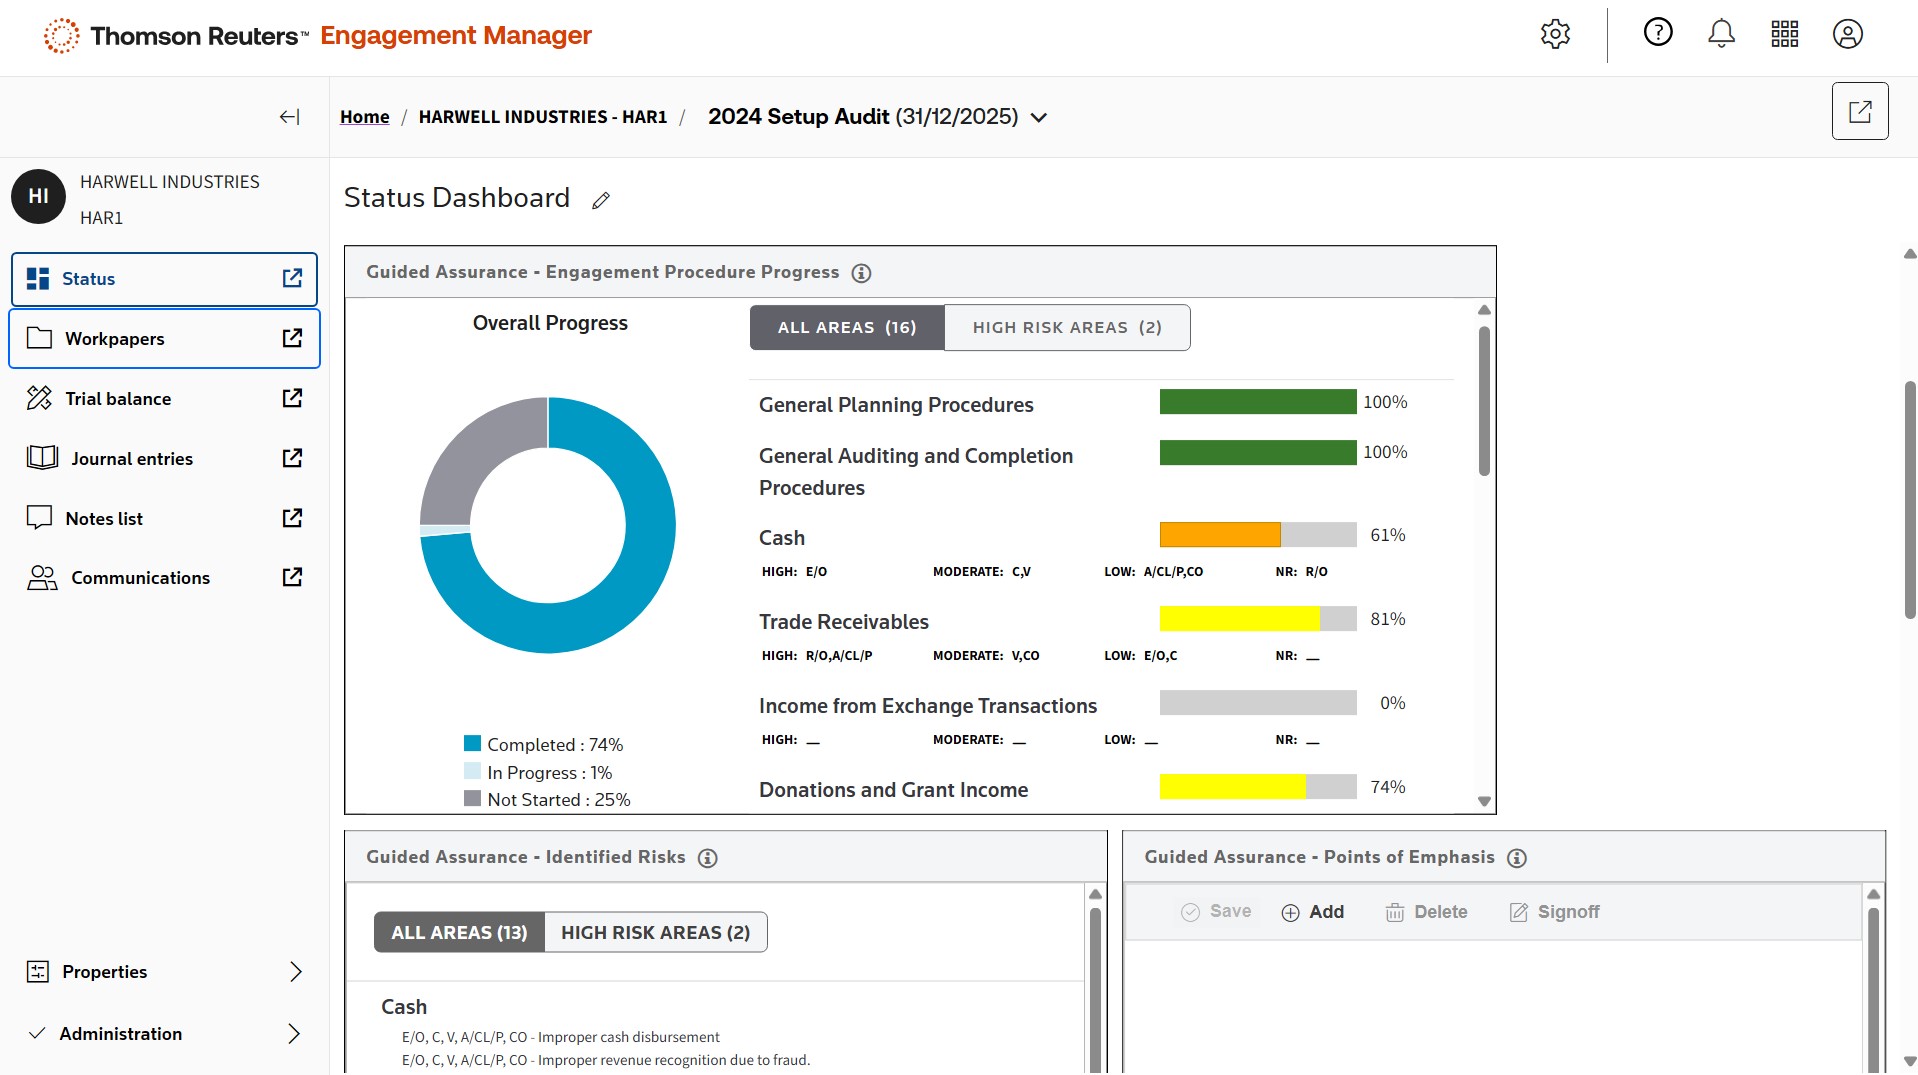
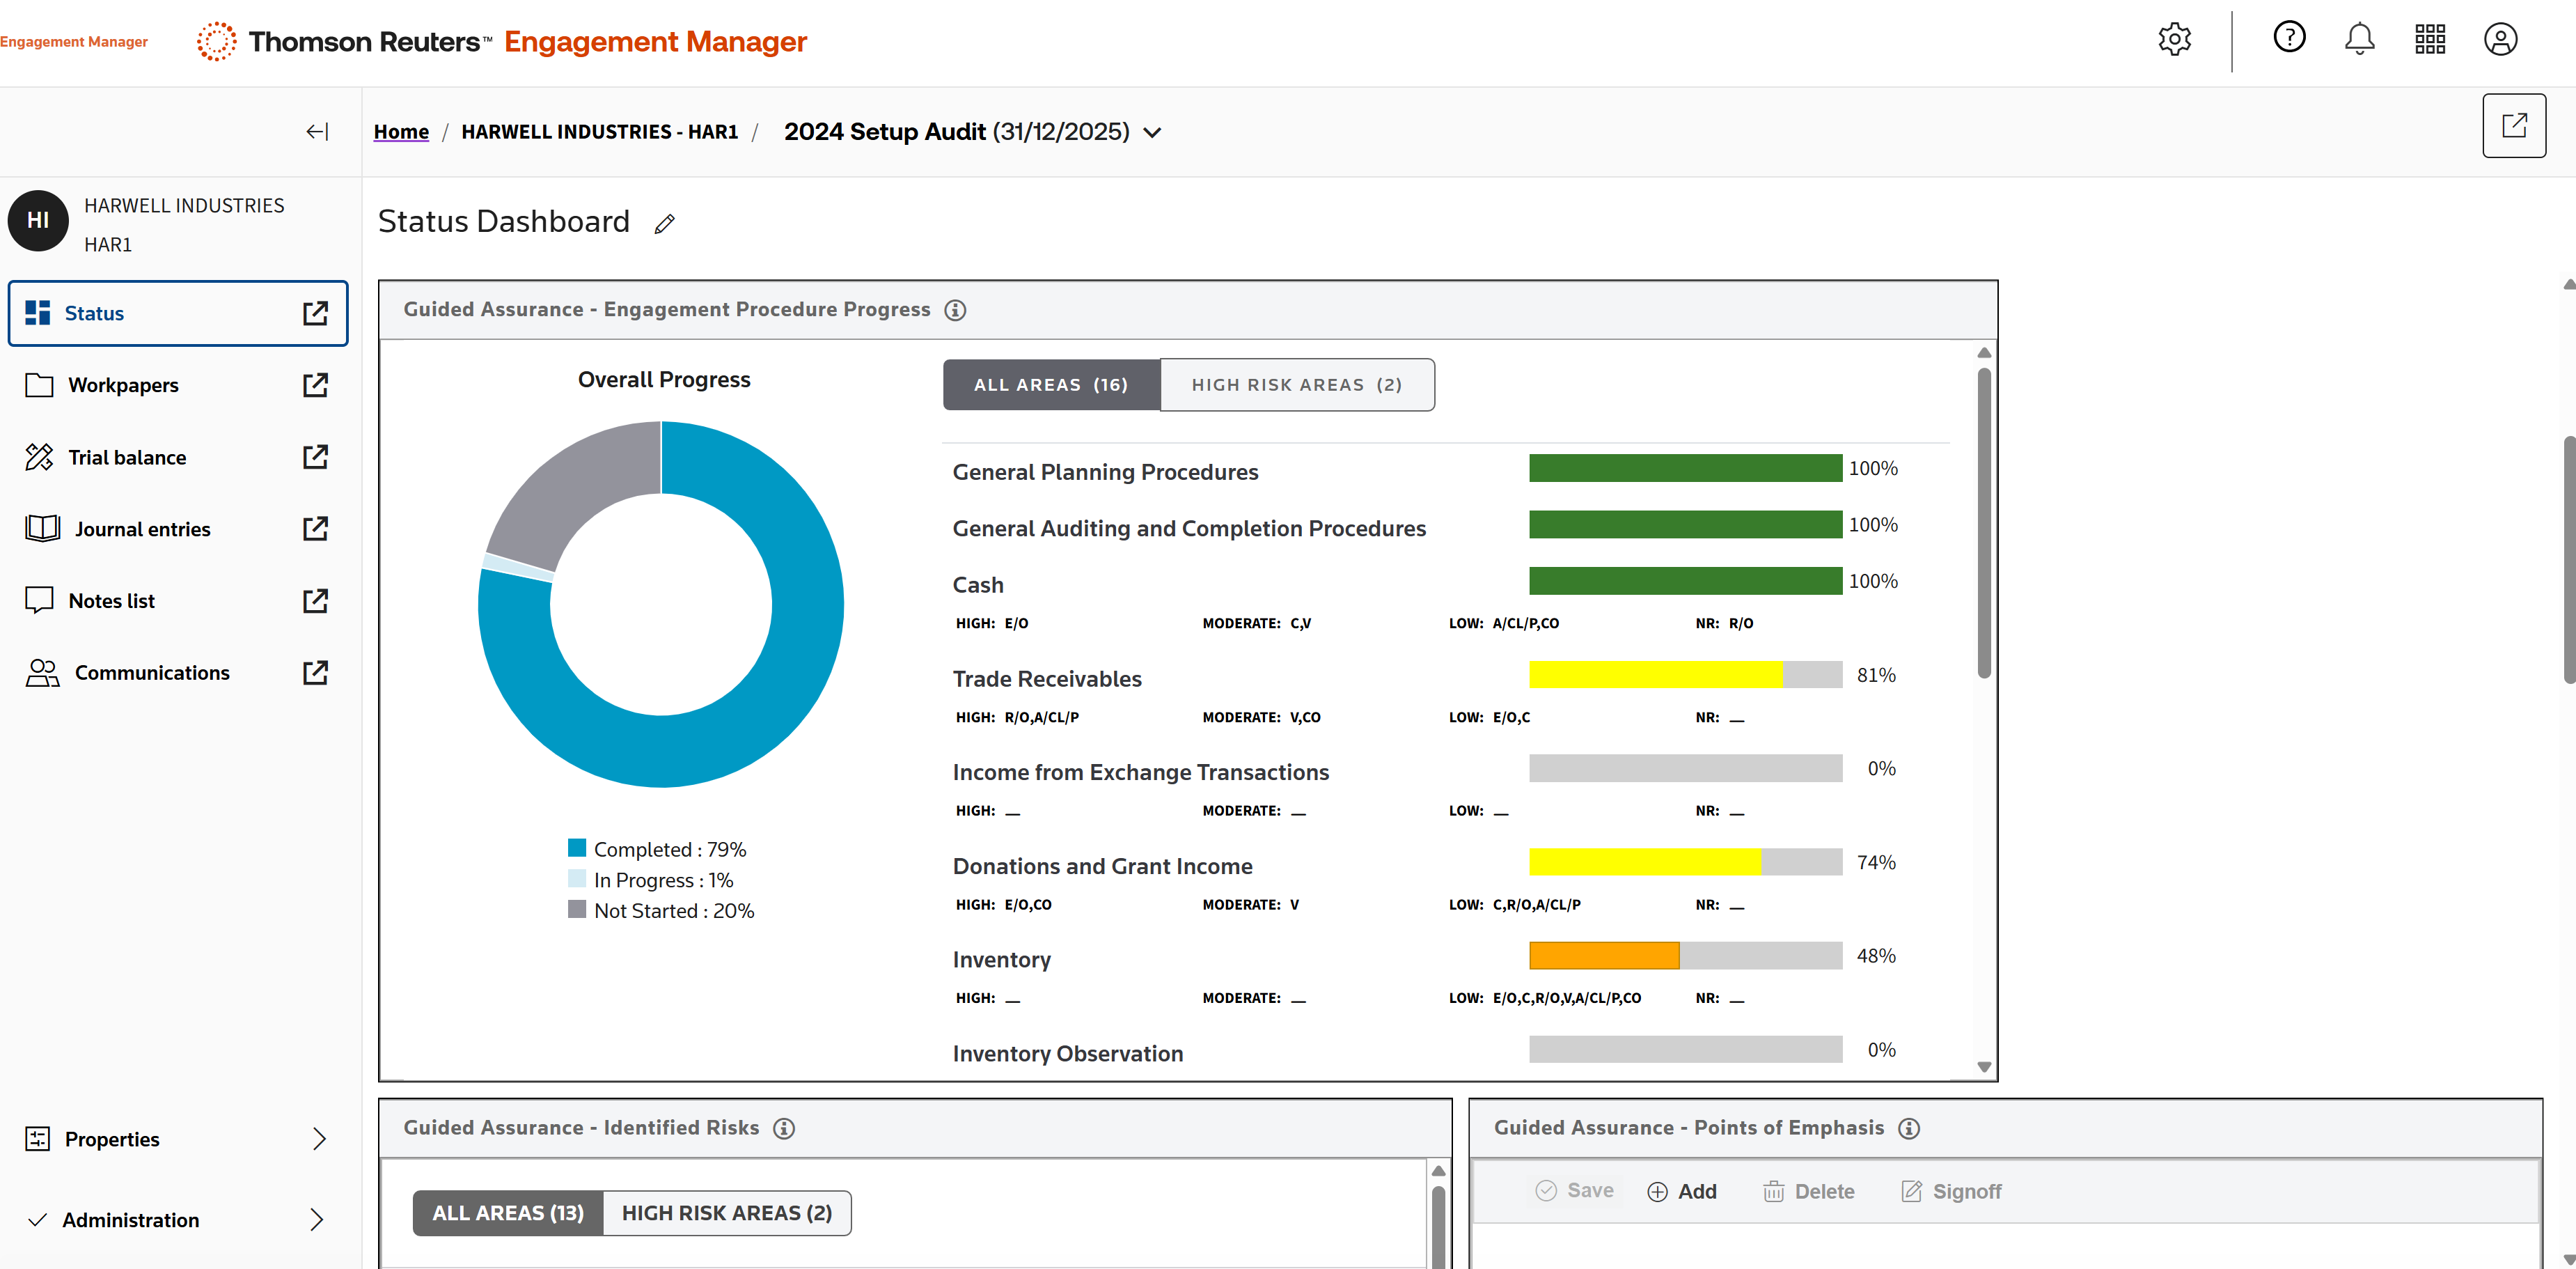
As auditors work, managers can use the Status Dashboard to check on the overall progress of an engagement.
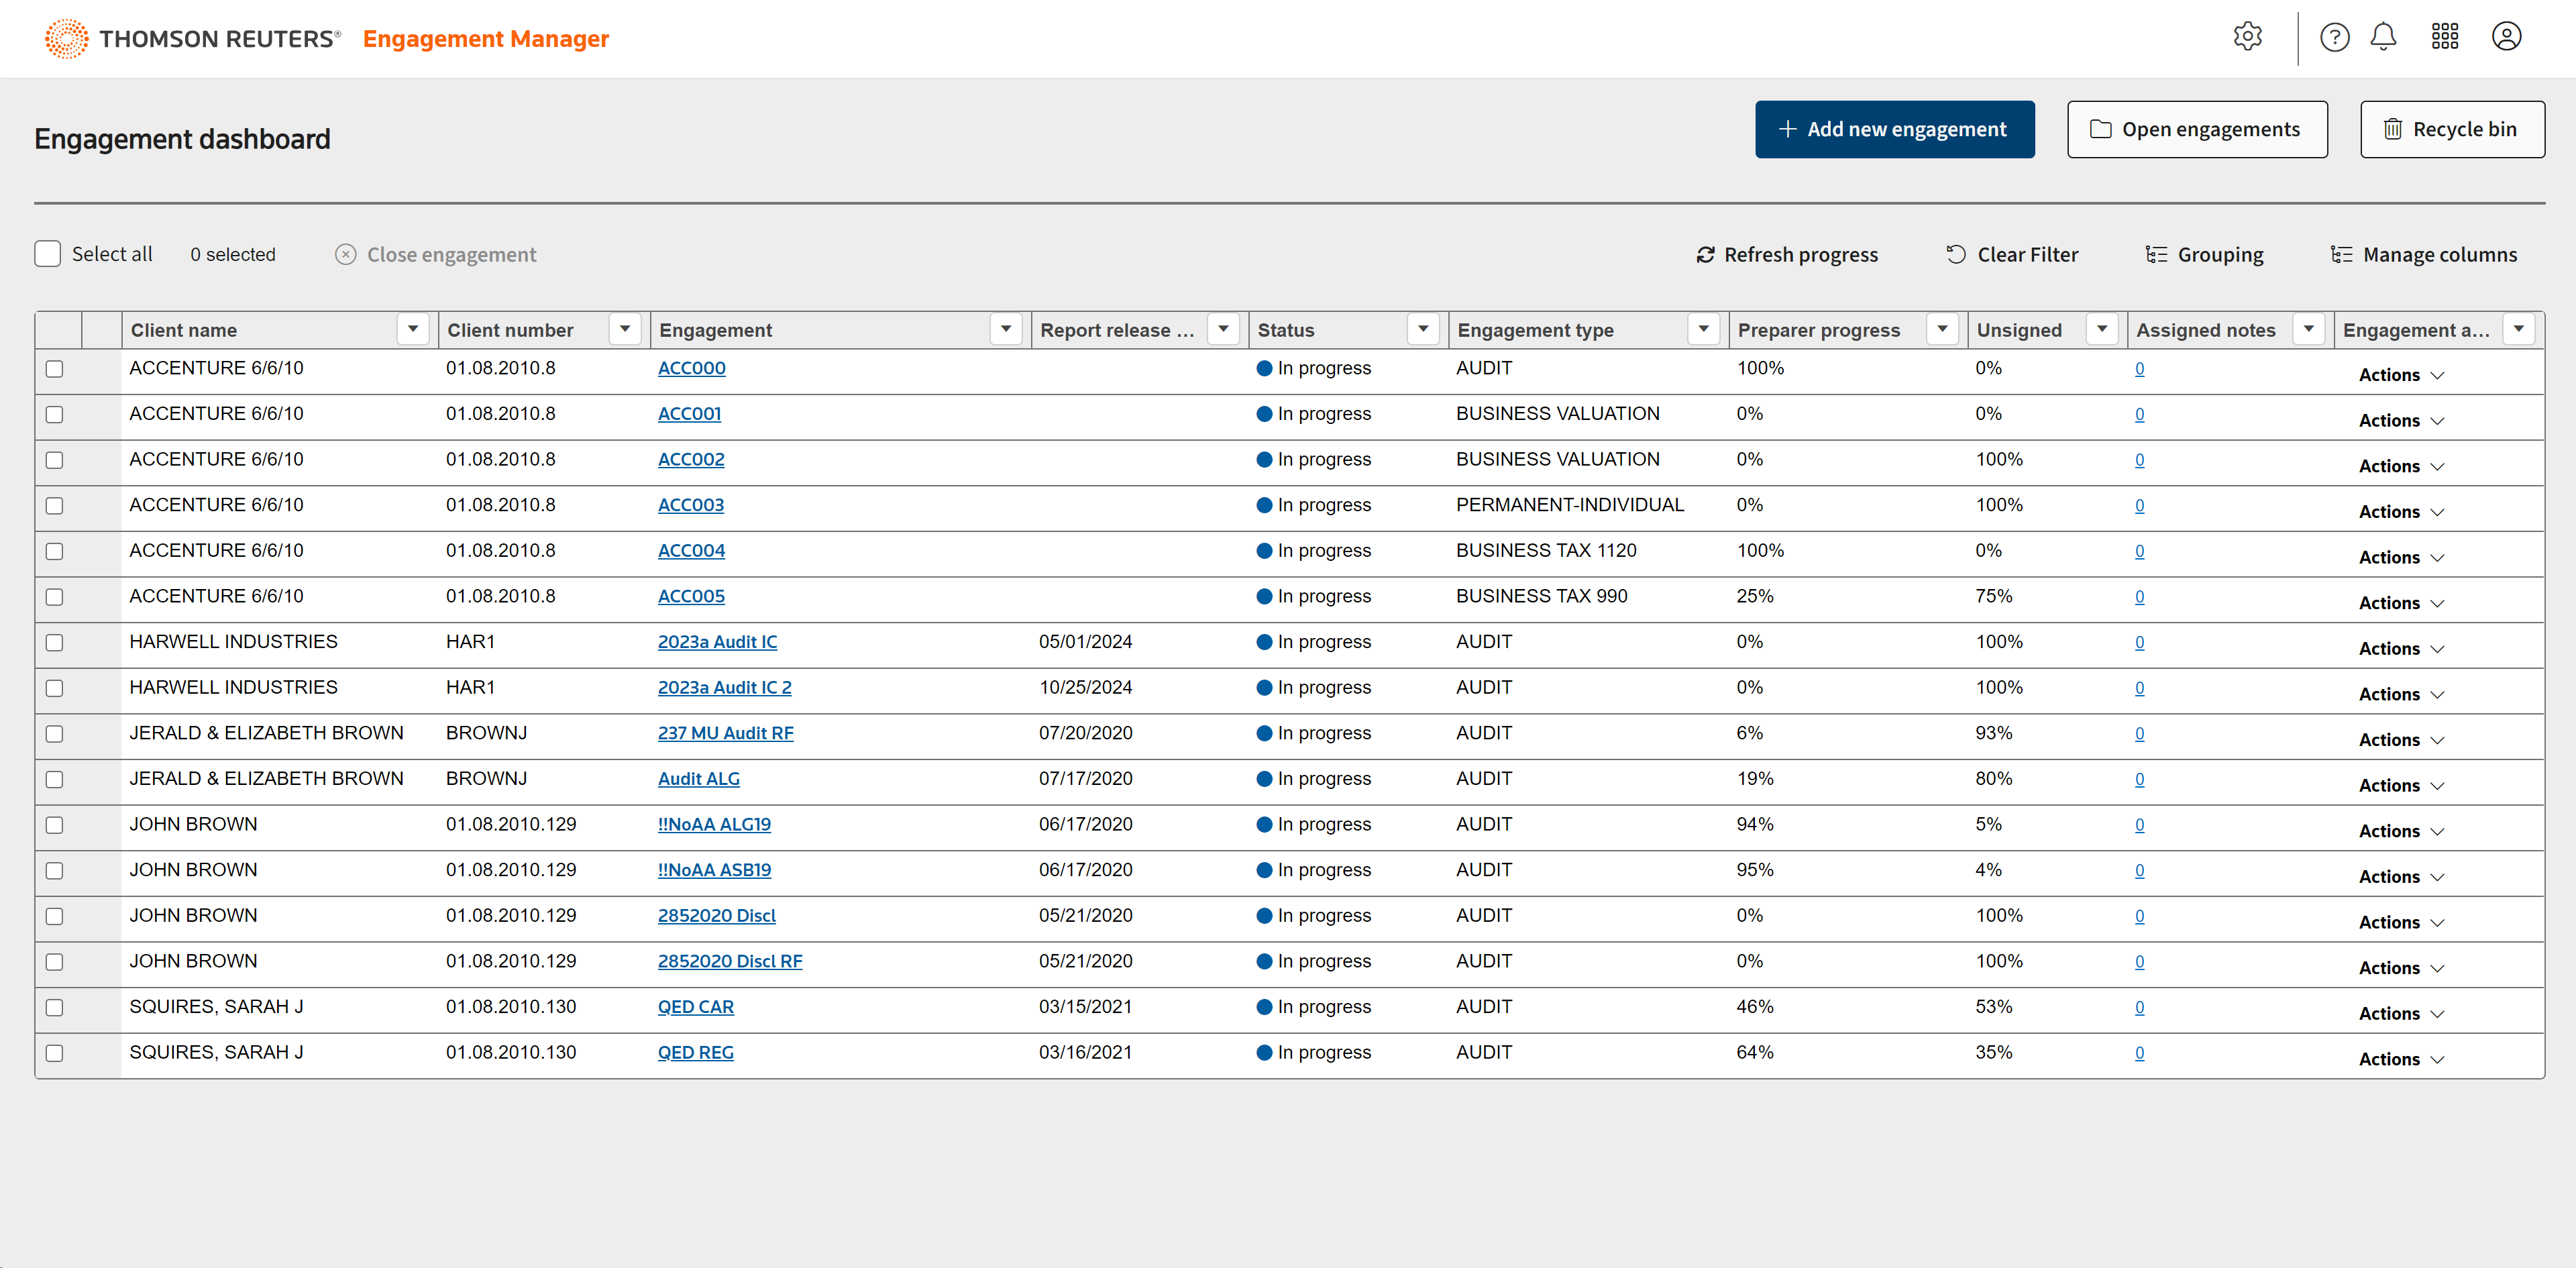
They can also check progress of the engagement, and progress of all engagements, from the Engagement dashboard.
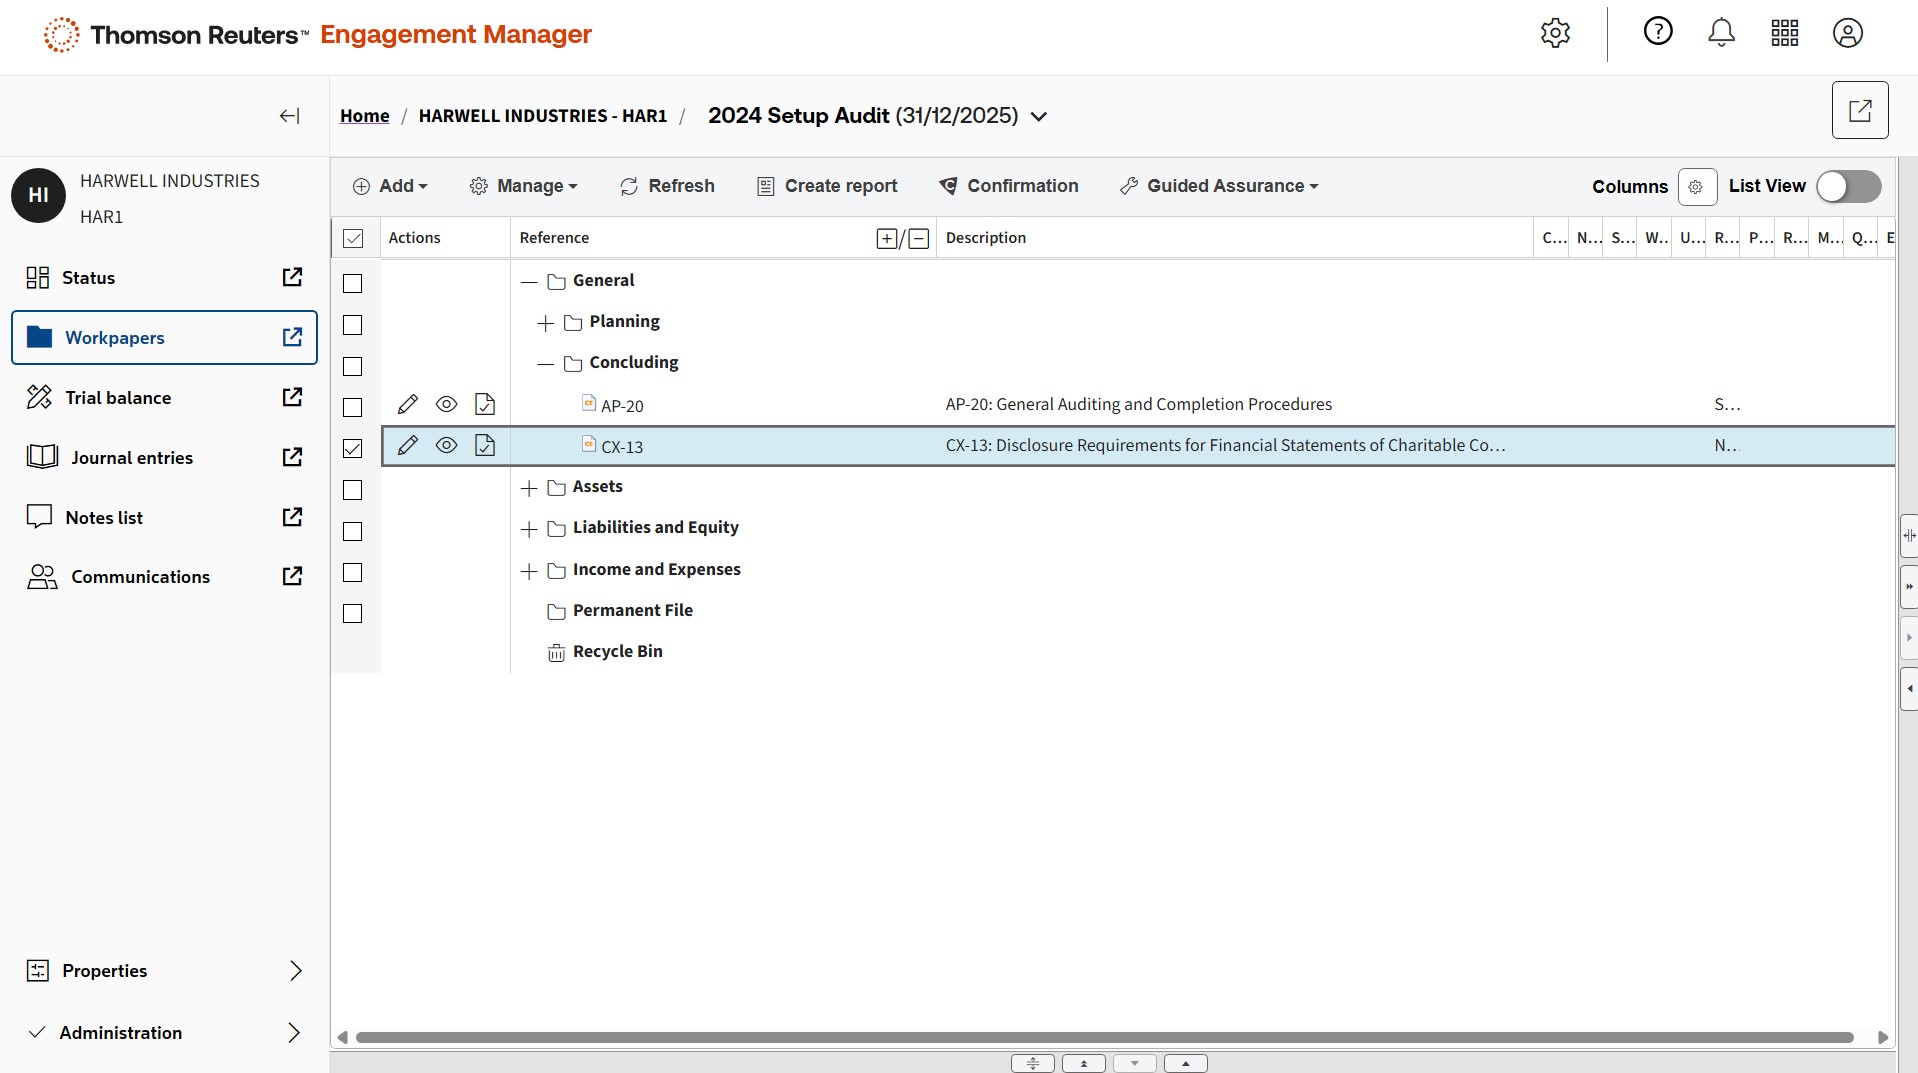
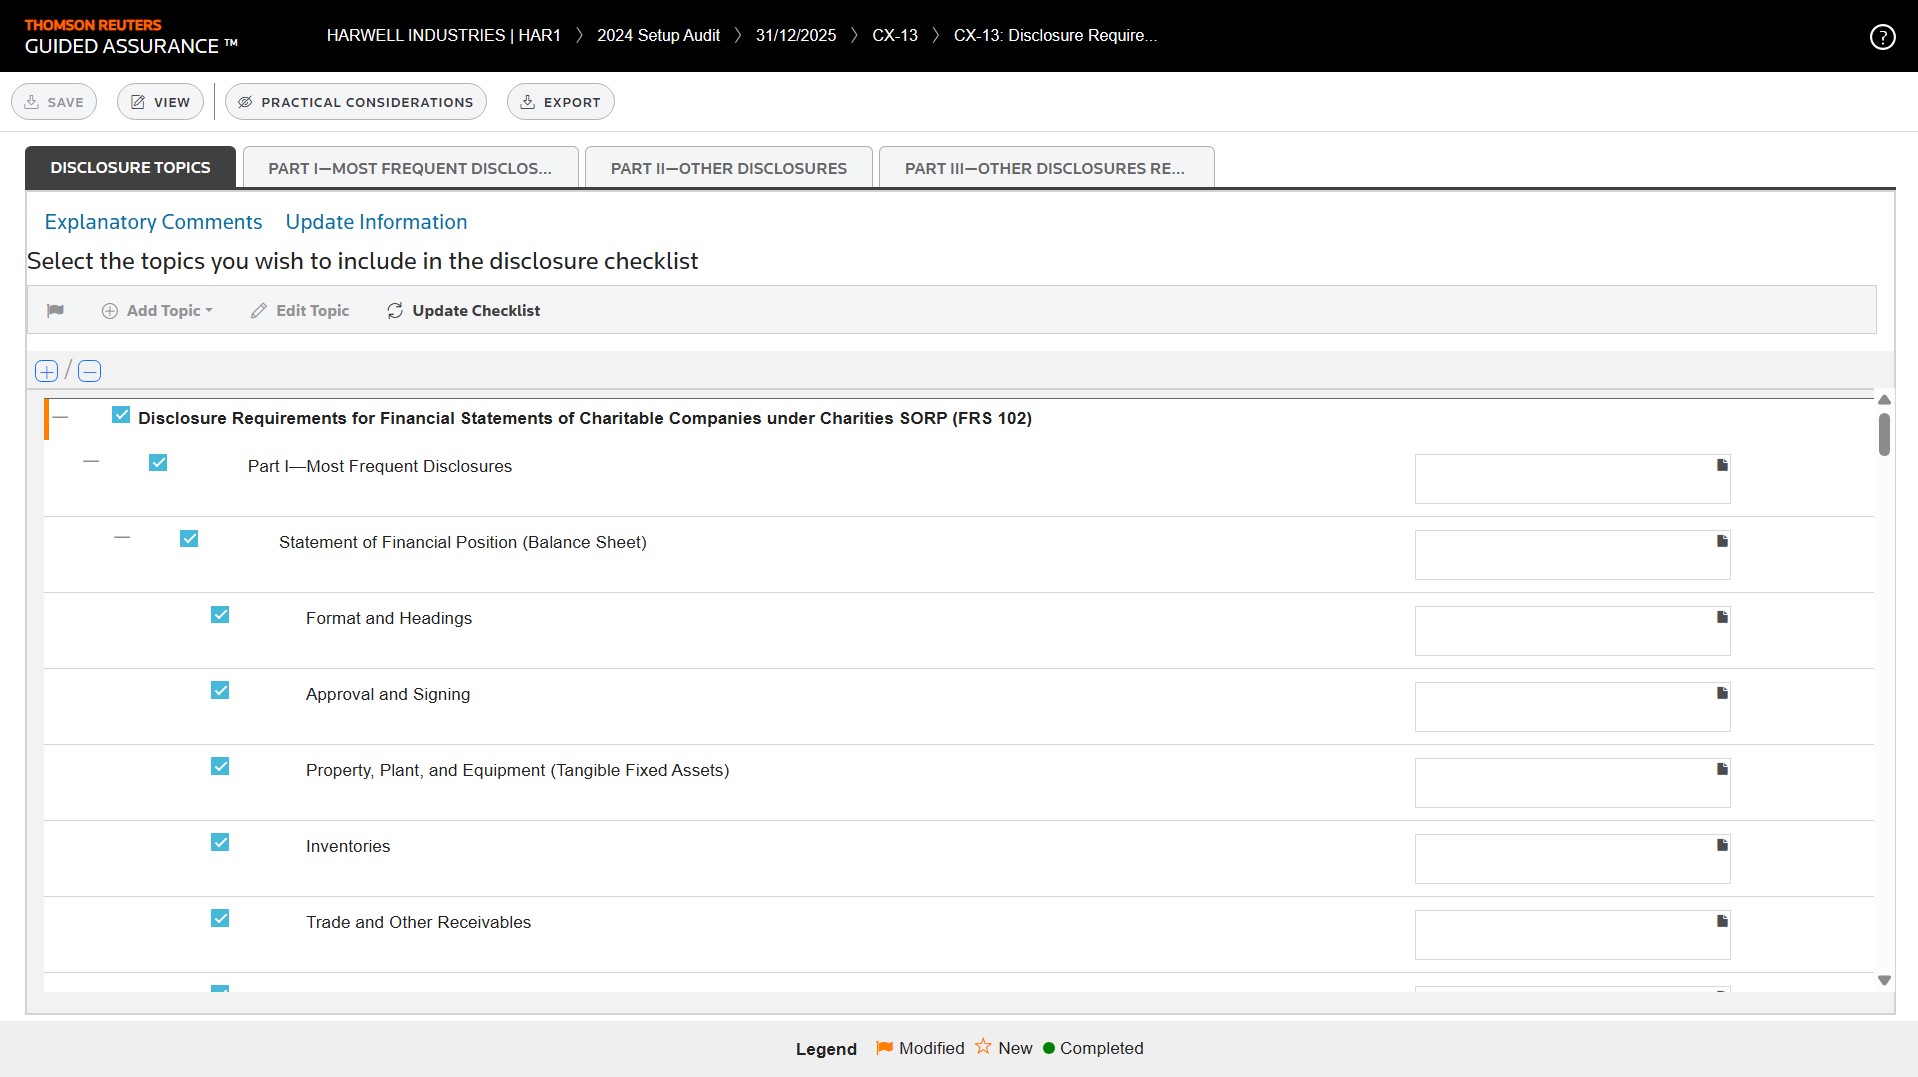
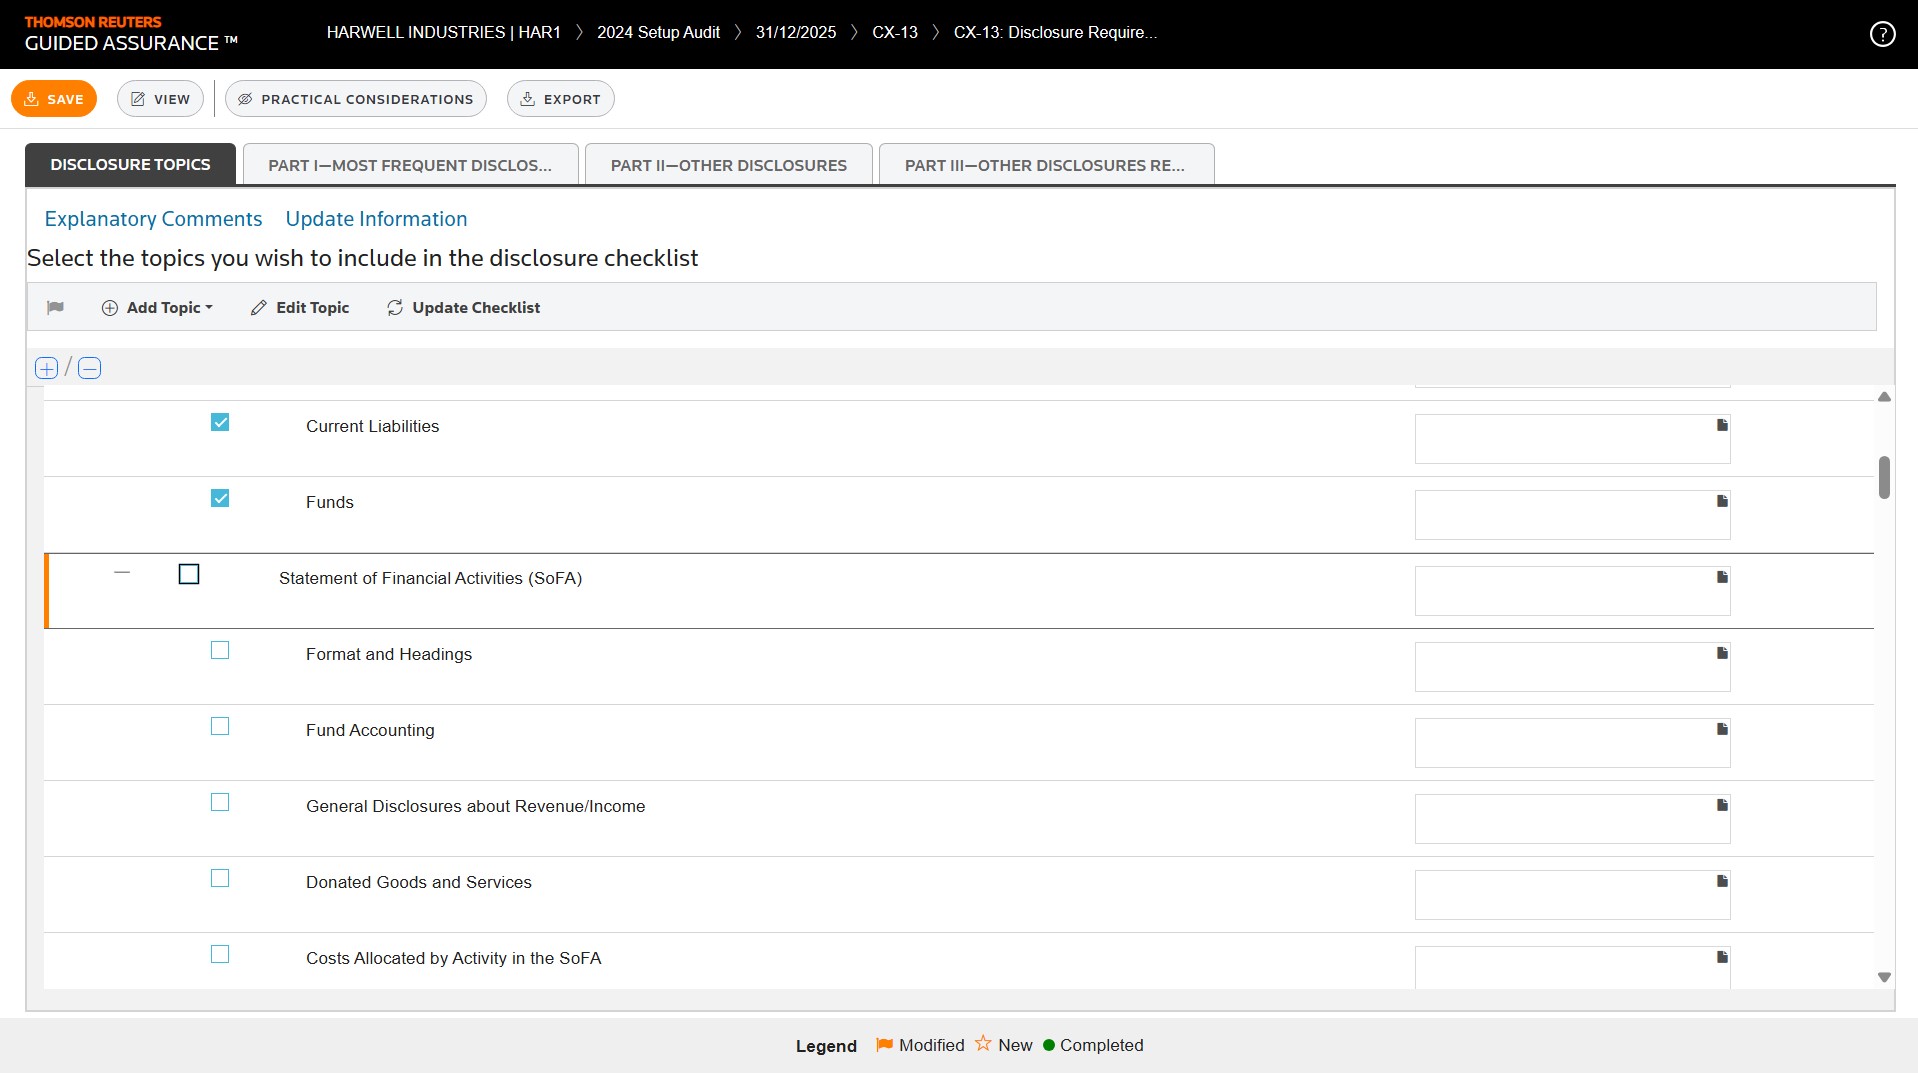
Back in Workpapers, open the Disclosure Requirements checklist.
In the disclosure checklist, your staff can uncheck anything that doesn't apply to this particular engagement.
Instead of the checklist being 130 or more pages, you can reduce it to 40 to 50. Optionally, your choices can roll forward from year to year.
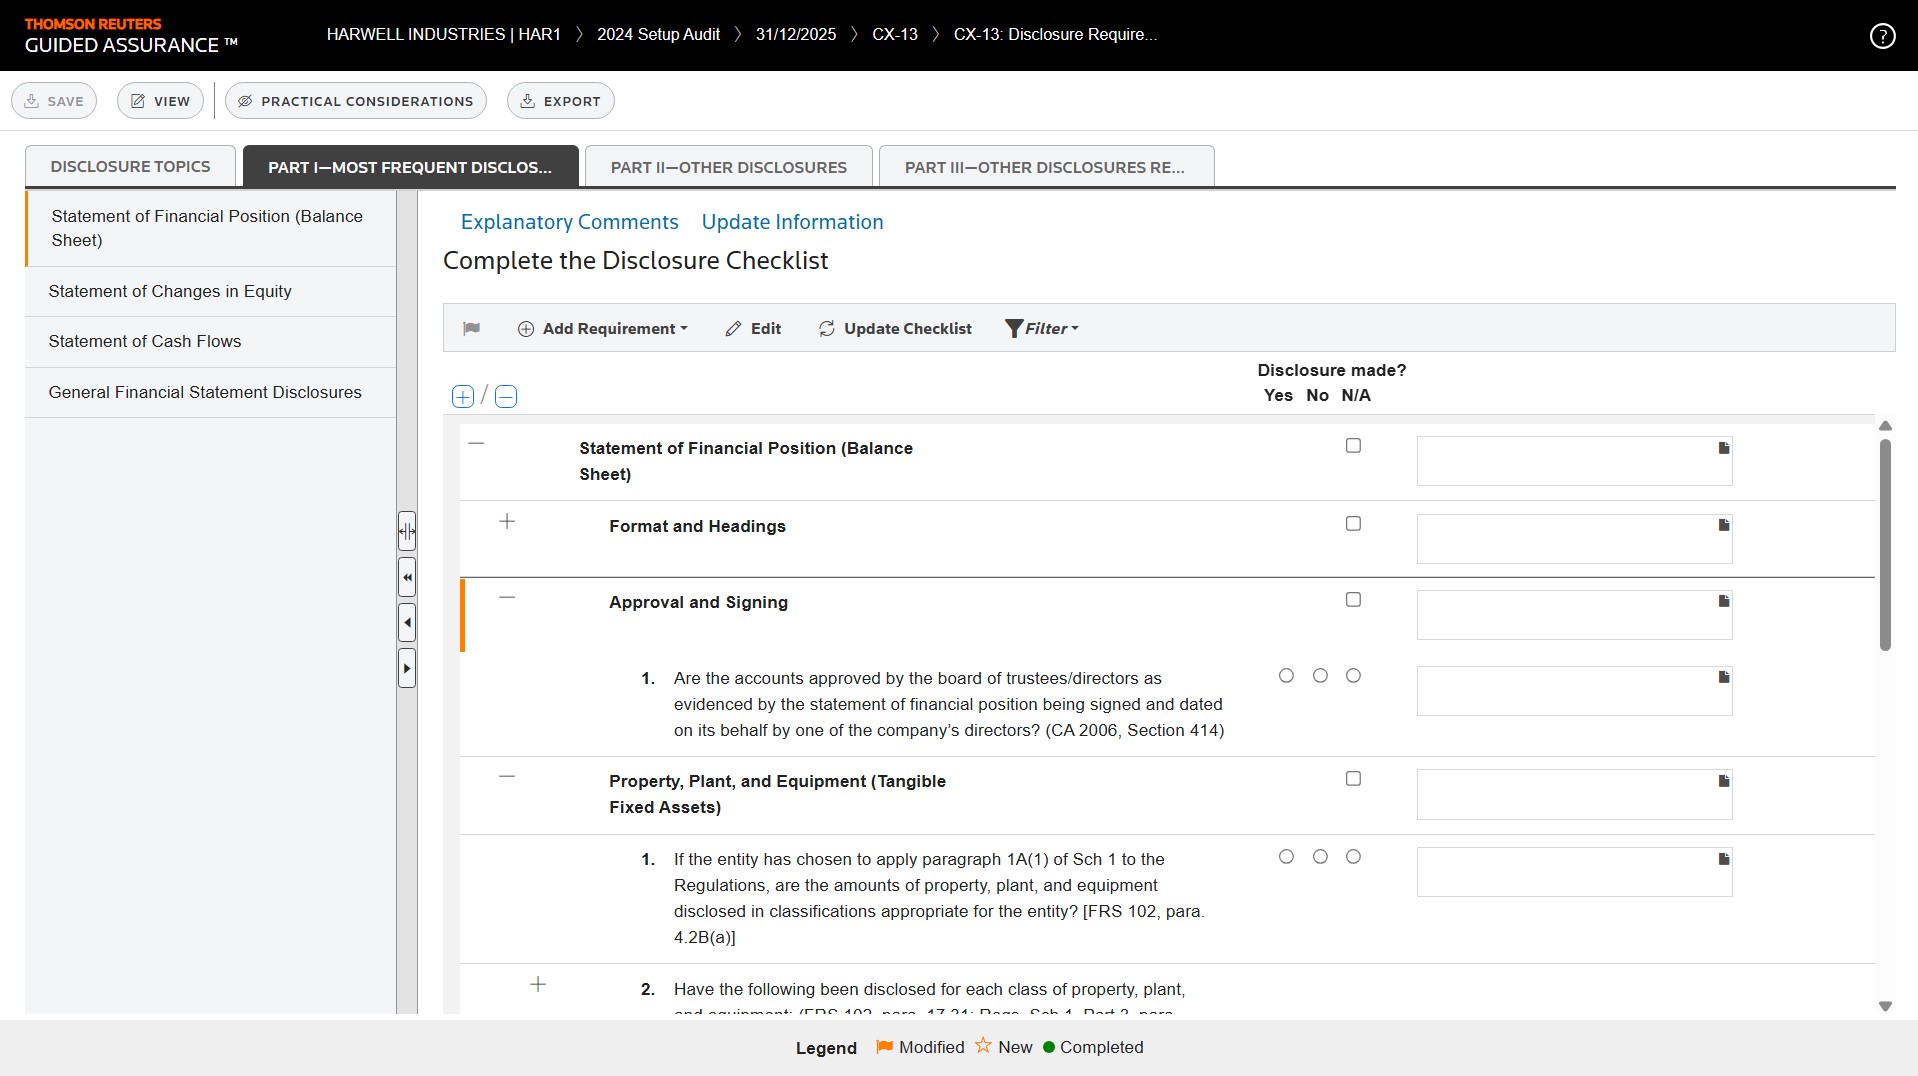
Once you've finished the disclosure checklist, you'll move to the Most Frequent Disclosures.
Cloud Audit Suite provides examples under each disclosure for the main three audits (nonpublic, non-profit, and governmental) so you don't have to find them.
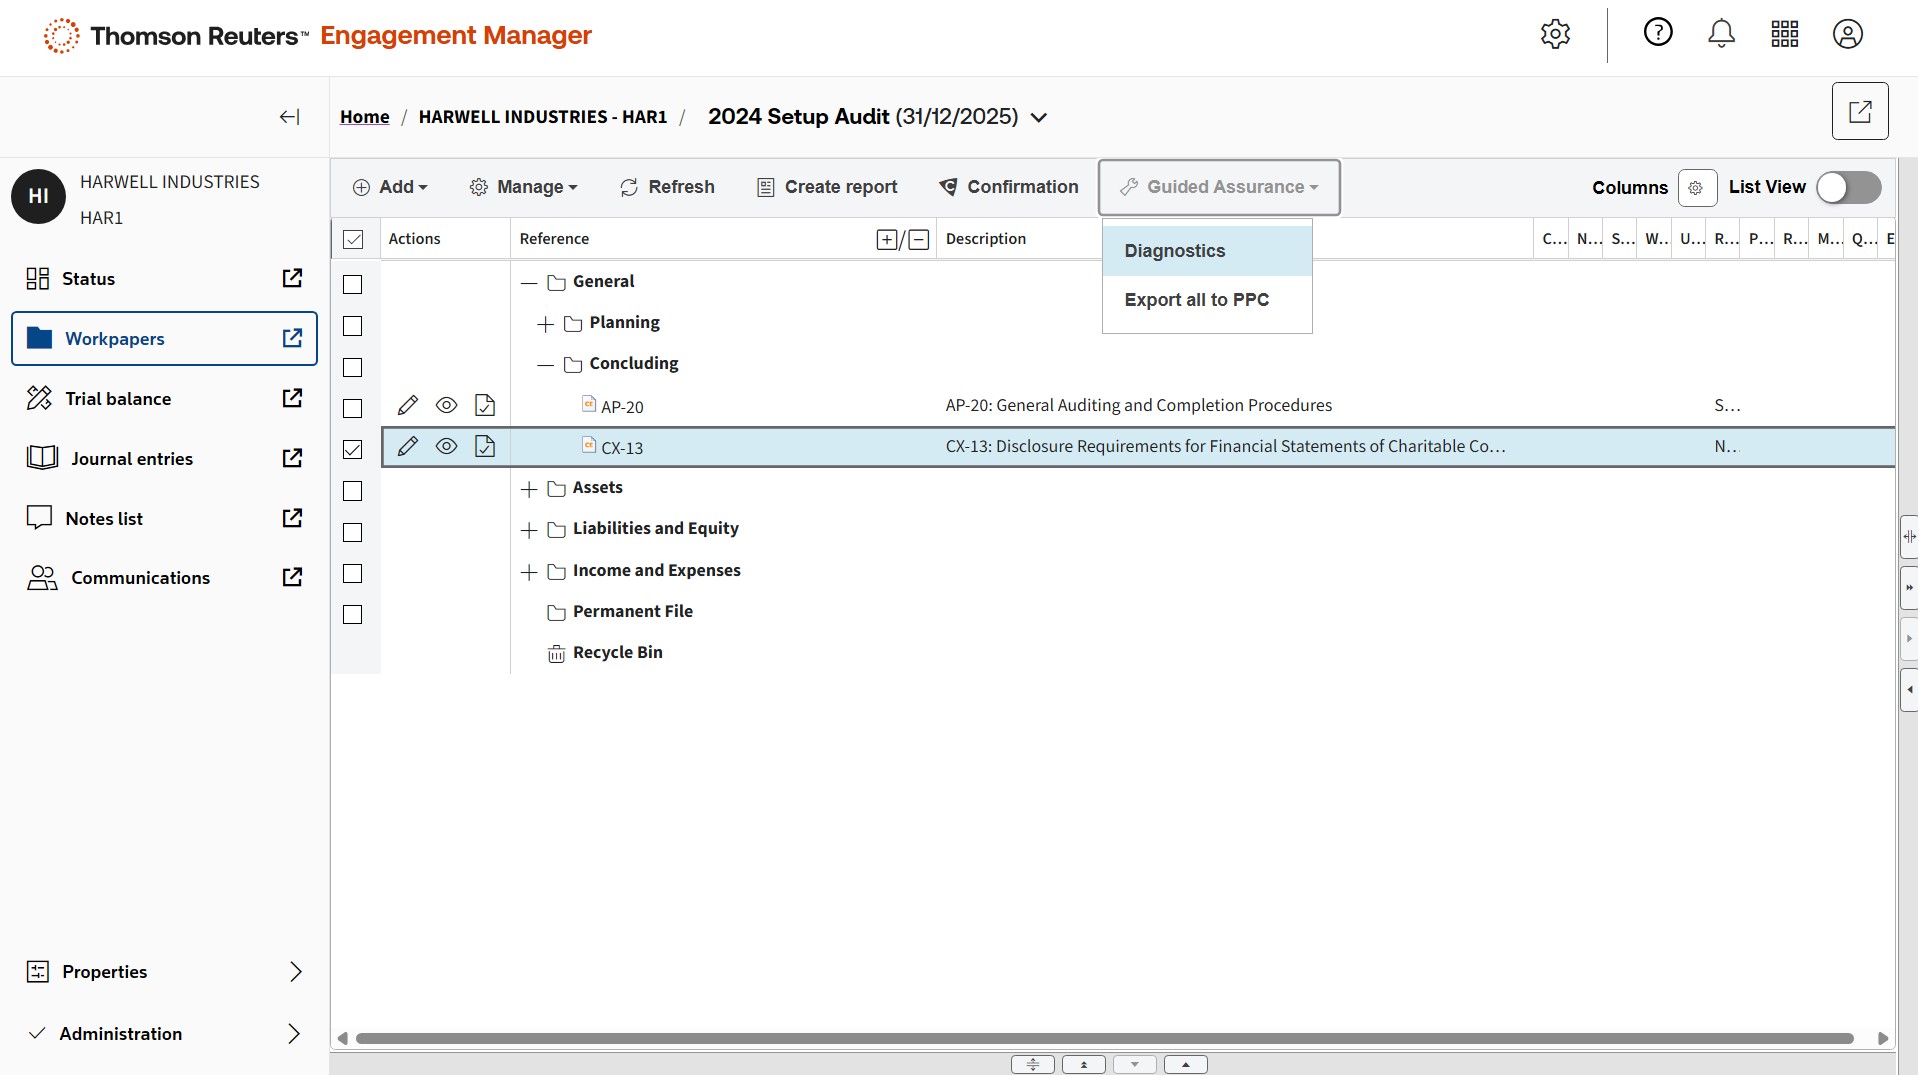
Lastly, navigate to Diagnostics.
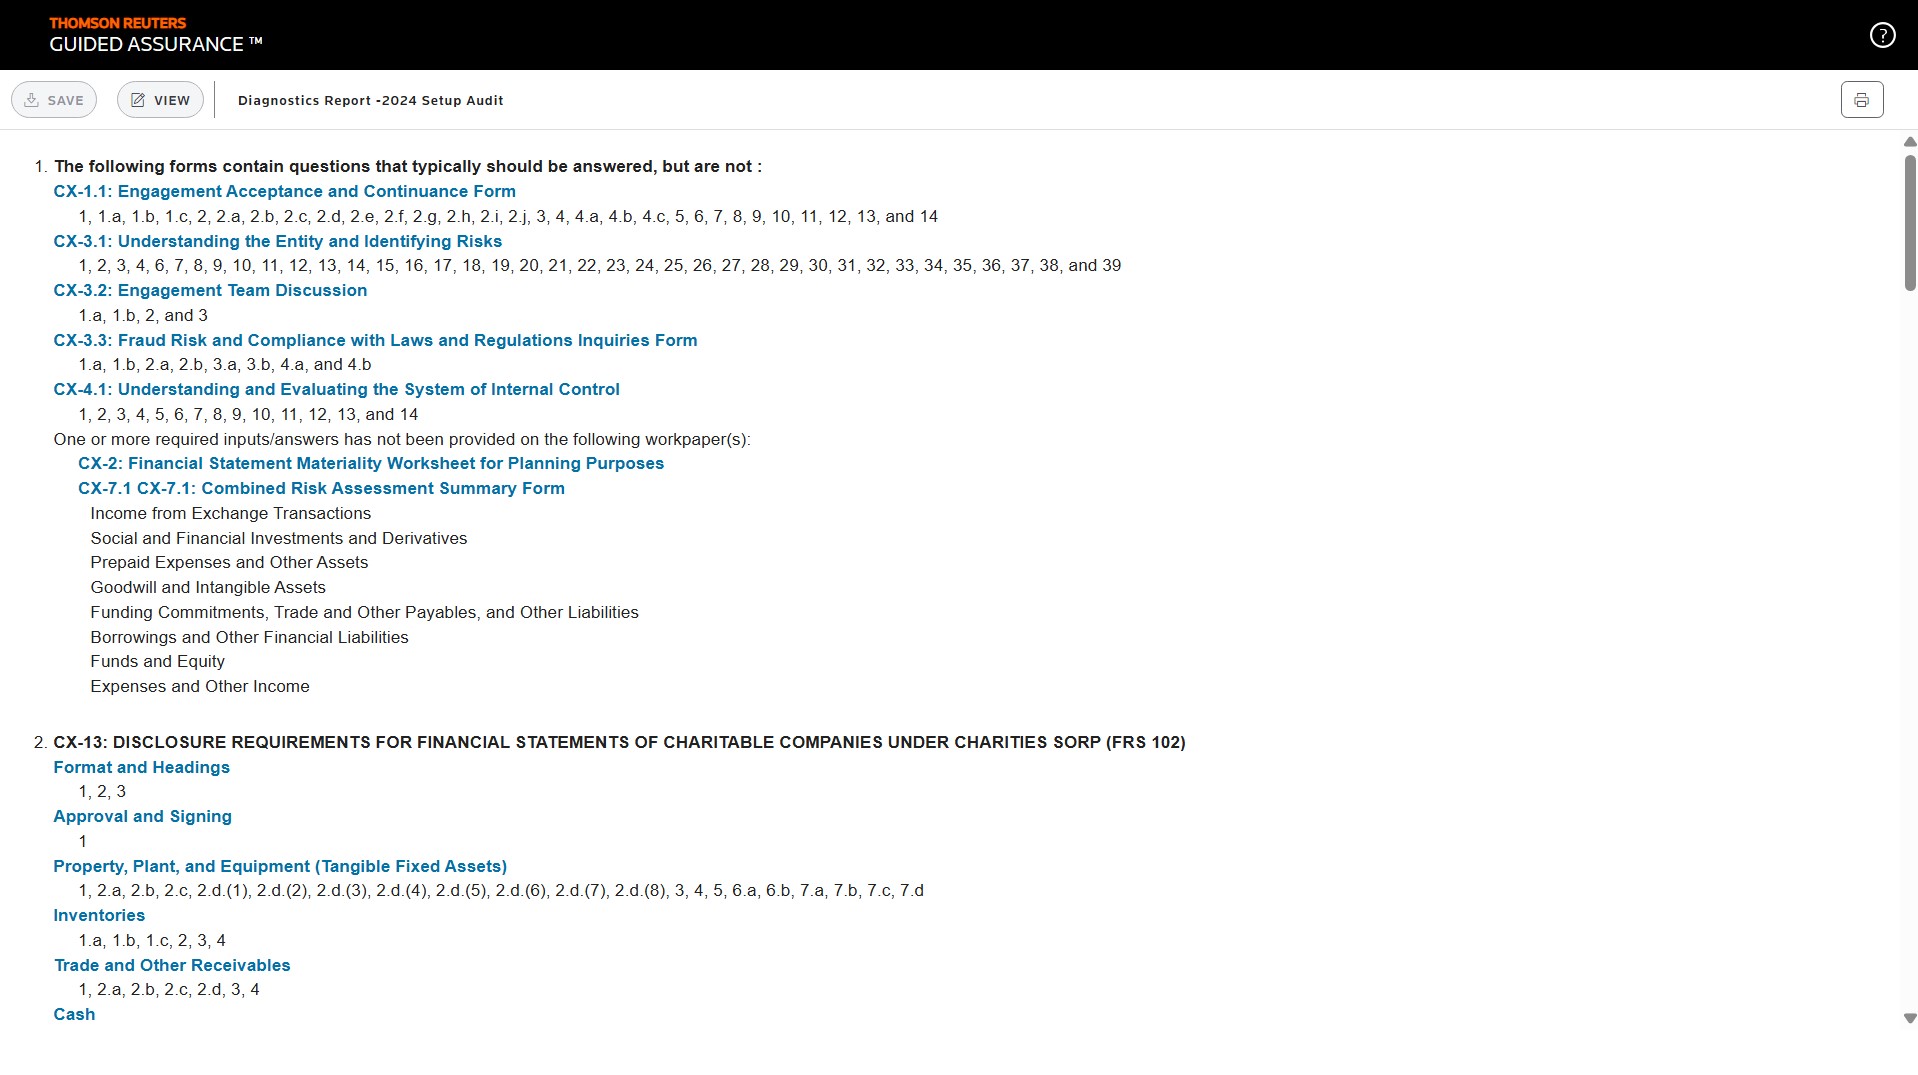
The Diagnostics Report shows both the auditor and the manager what questions in the engagement are left to answer. Once the engagement nears completion, only a few will remain.
Thomson Reuters partners with Mercia to provide additional industry titles. This methodology is designed to equip professionals with the necessary programs, documents, and guidance to conduct audits in compliance with UK International Standards on Auditing (ISAs) and the Financial Reporting Council (FRC) Ethical Standard.
Guided audit process - Mercia:
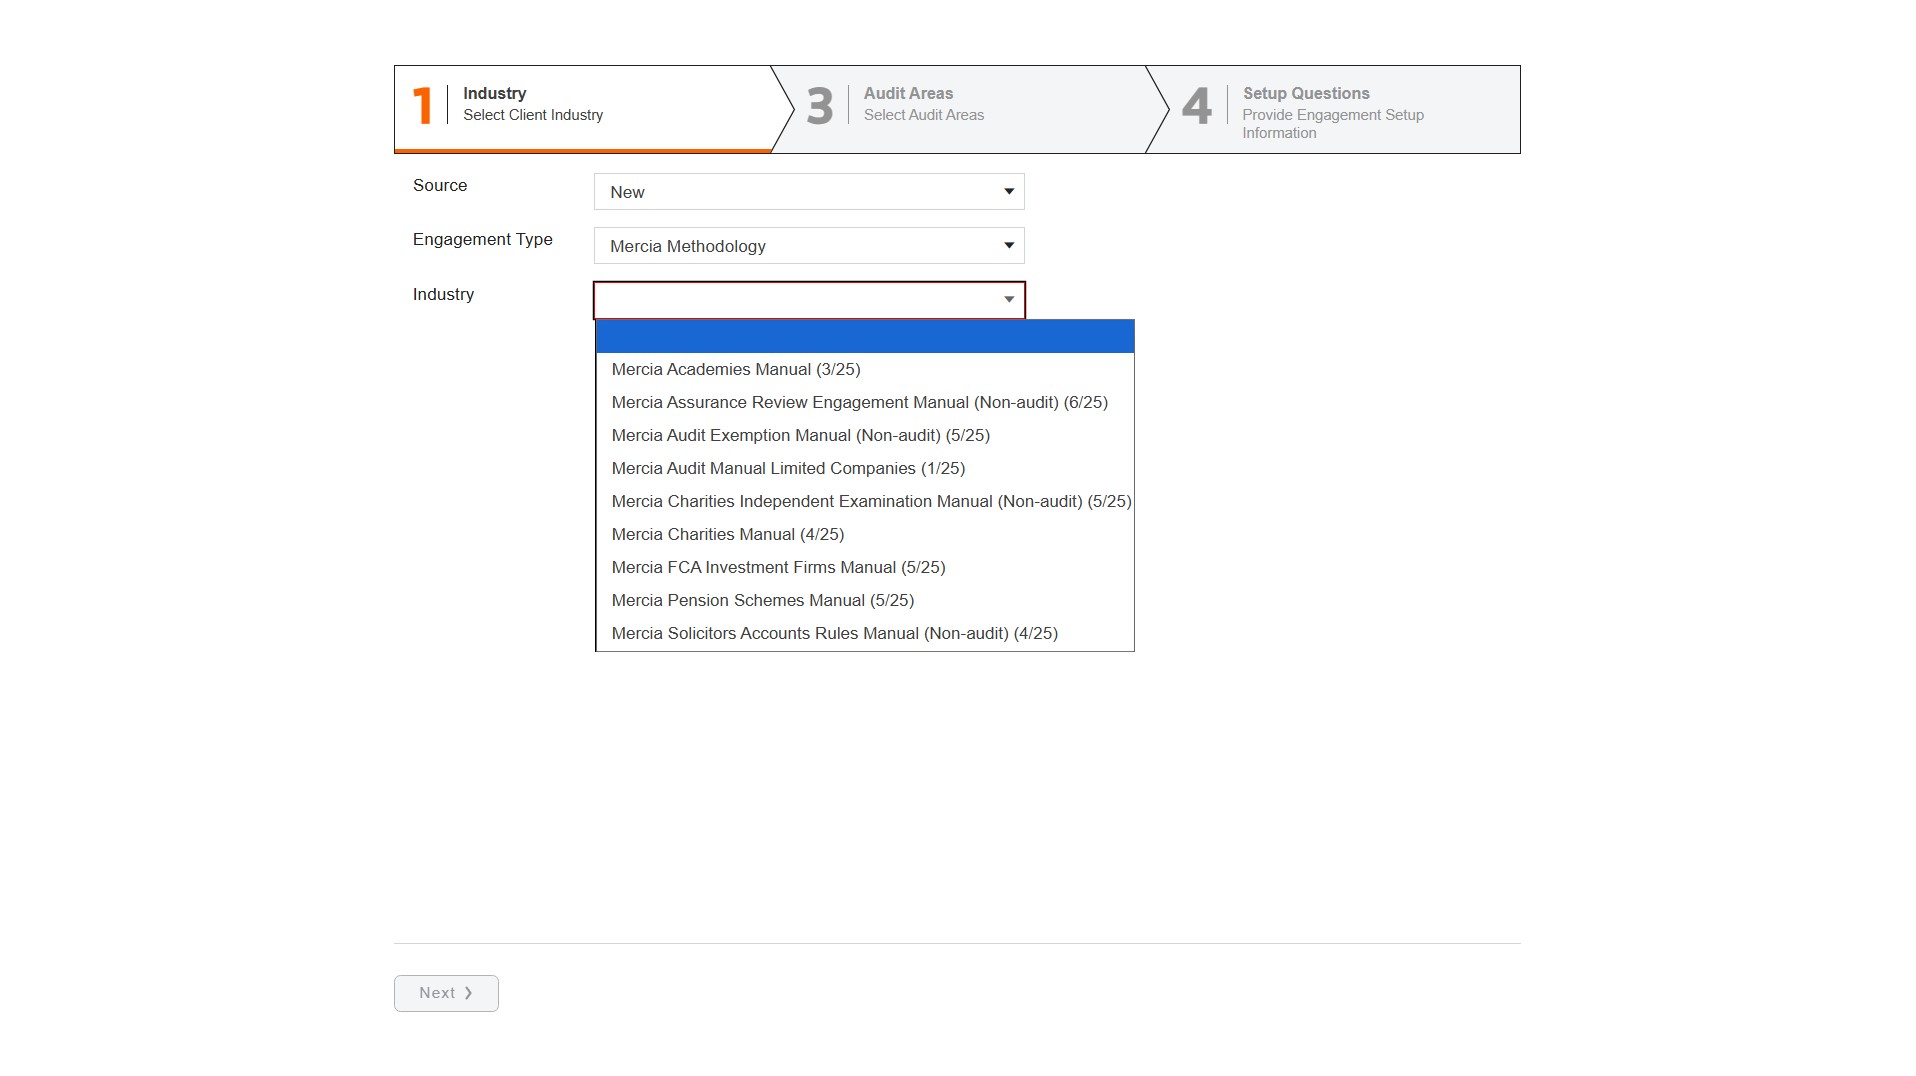
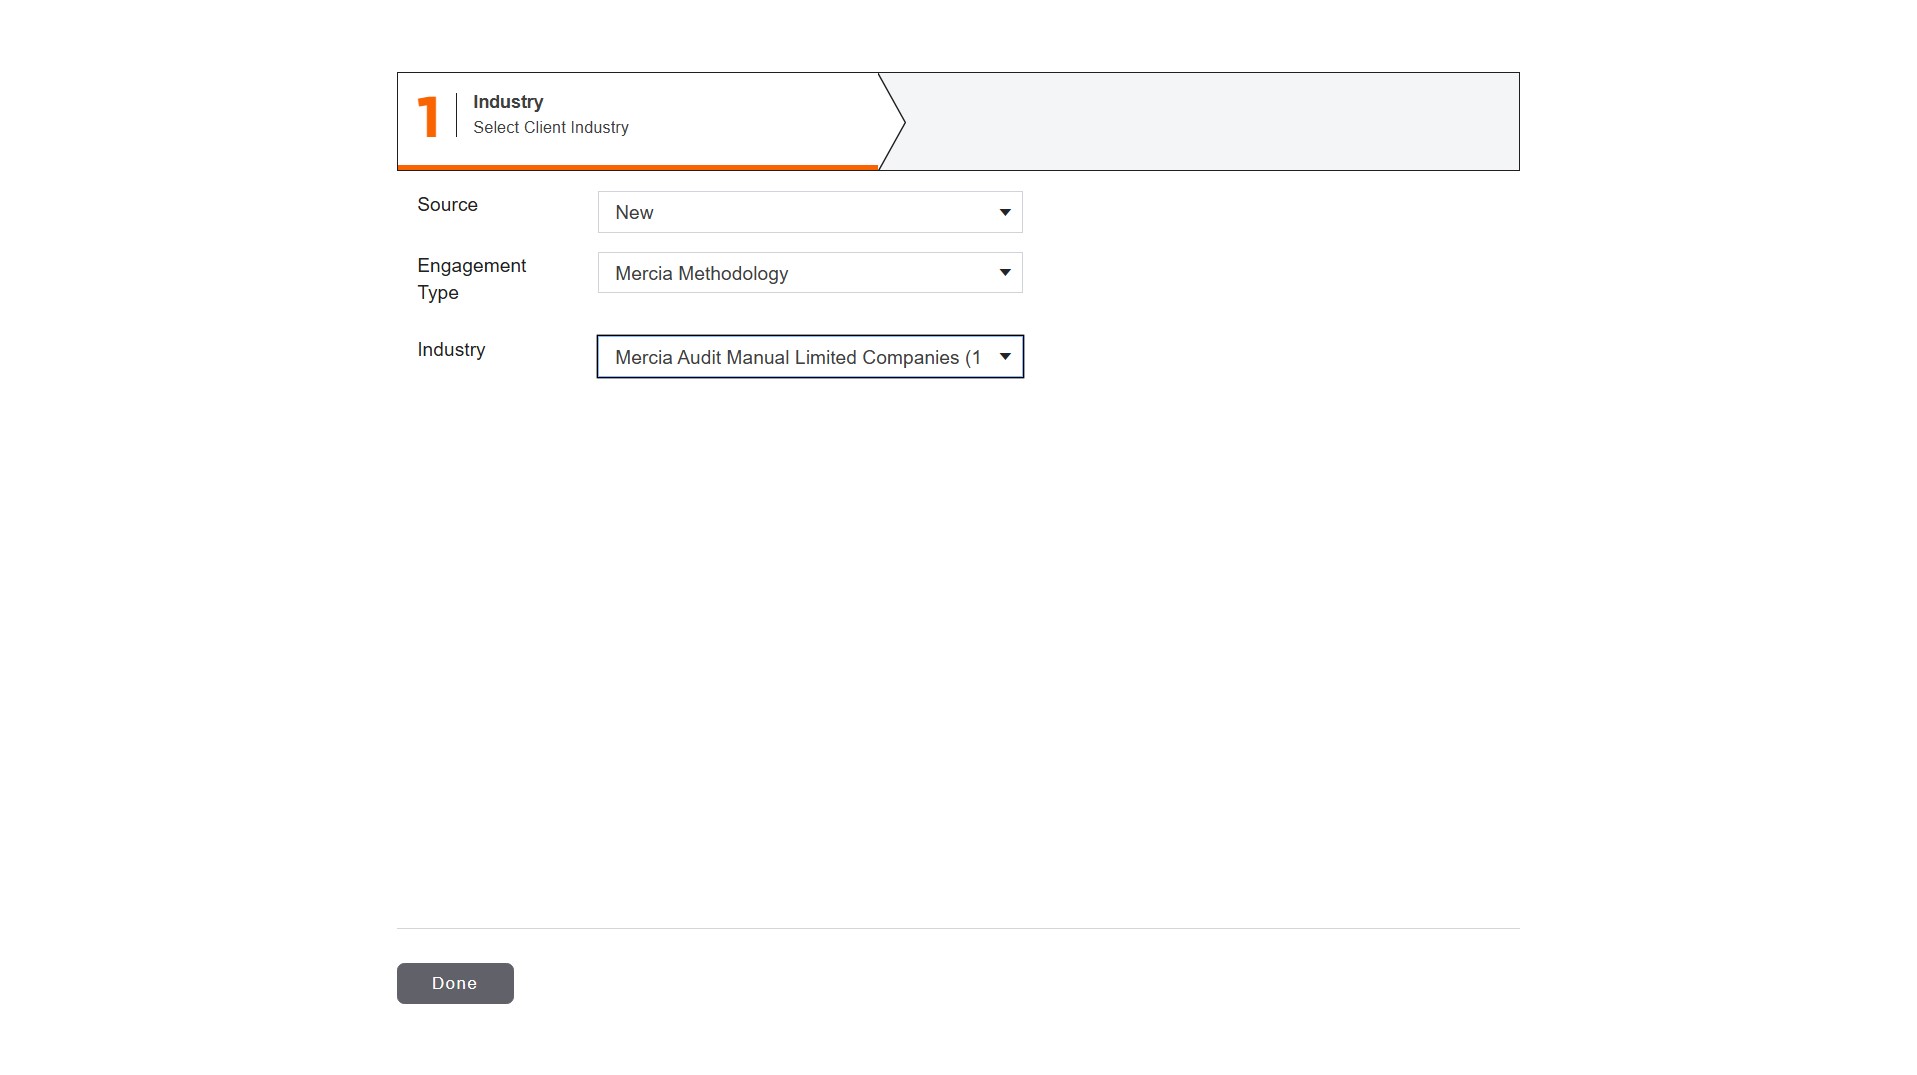
Select the type of industry and hit Done.
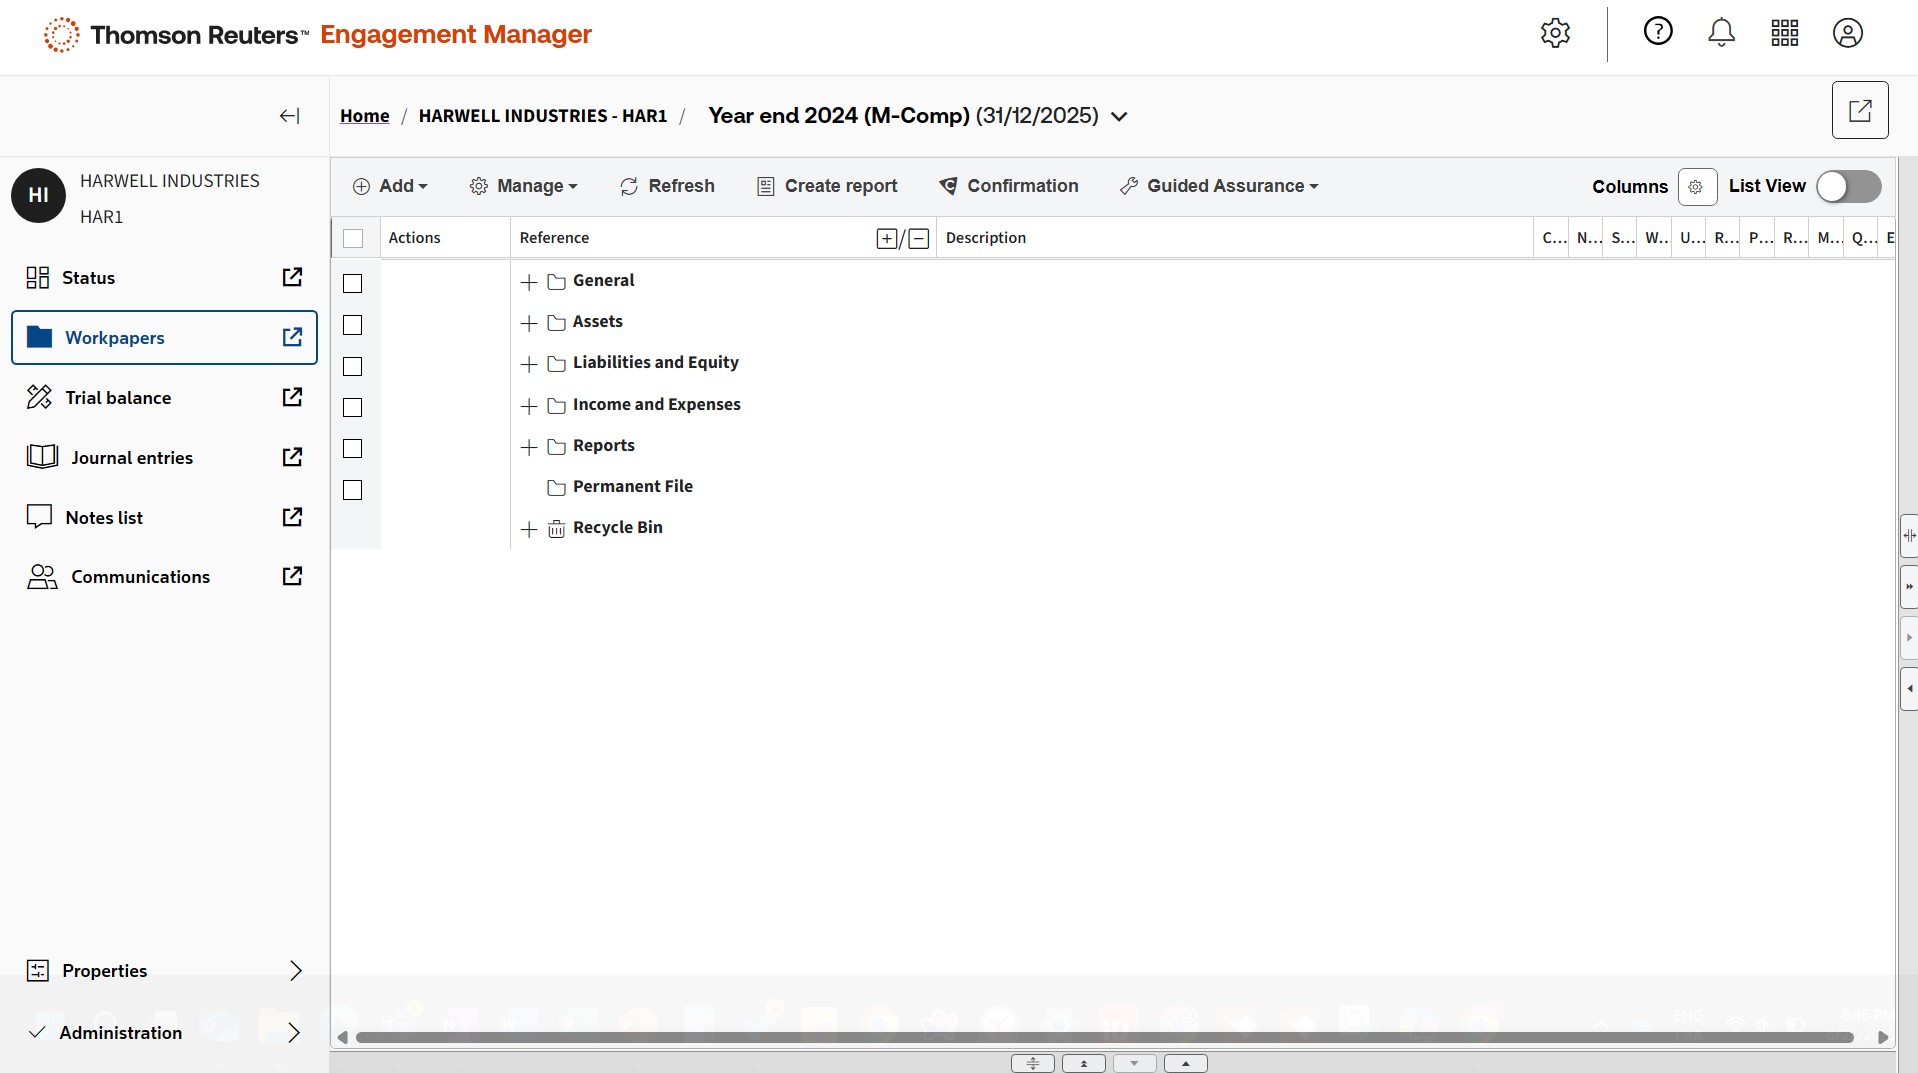
Once you've completed setup, all the documents you need are automatically populated.
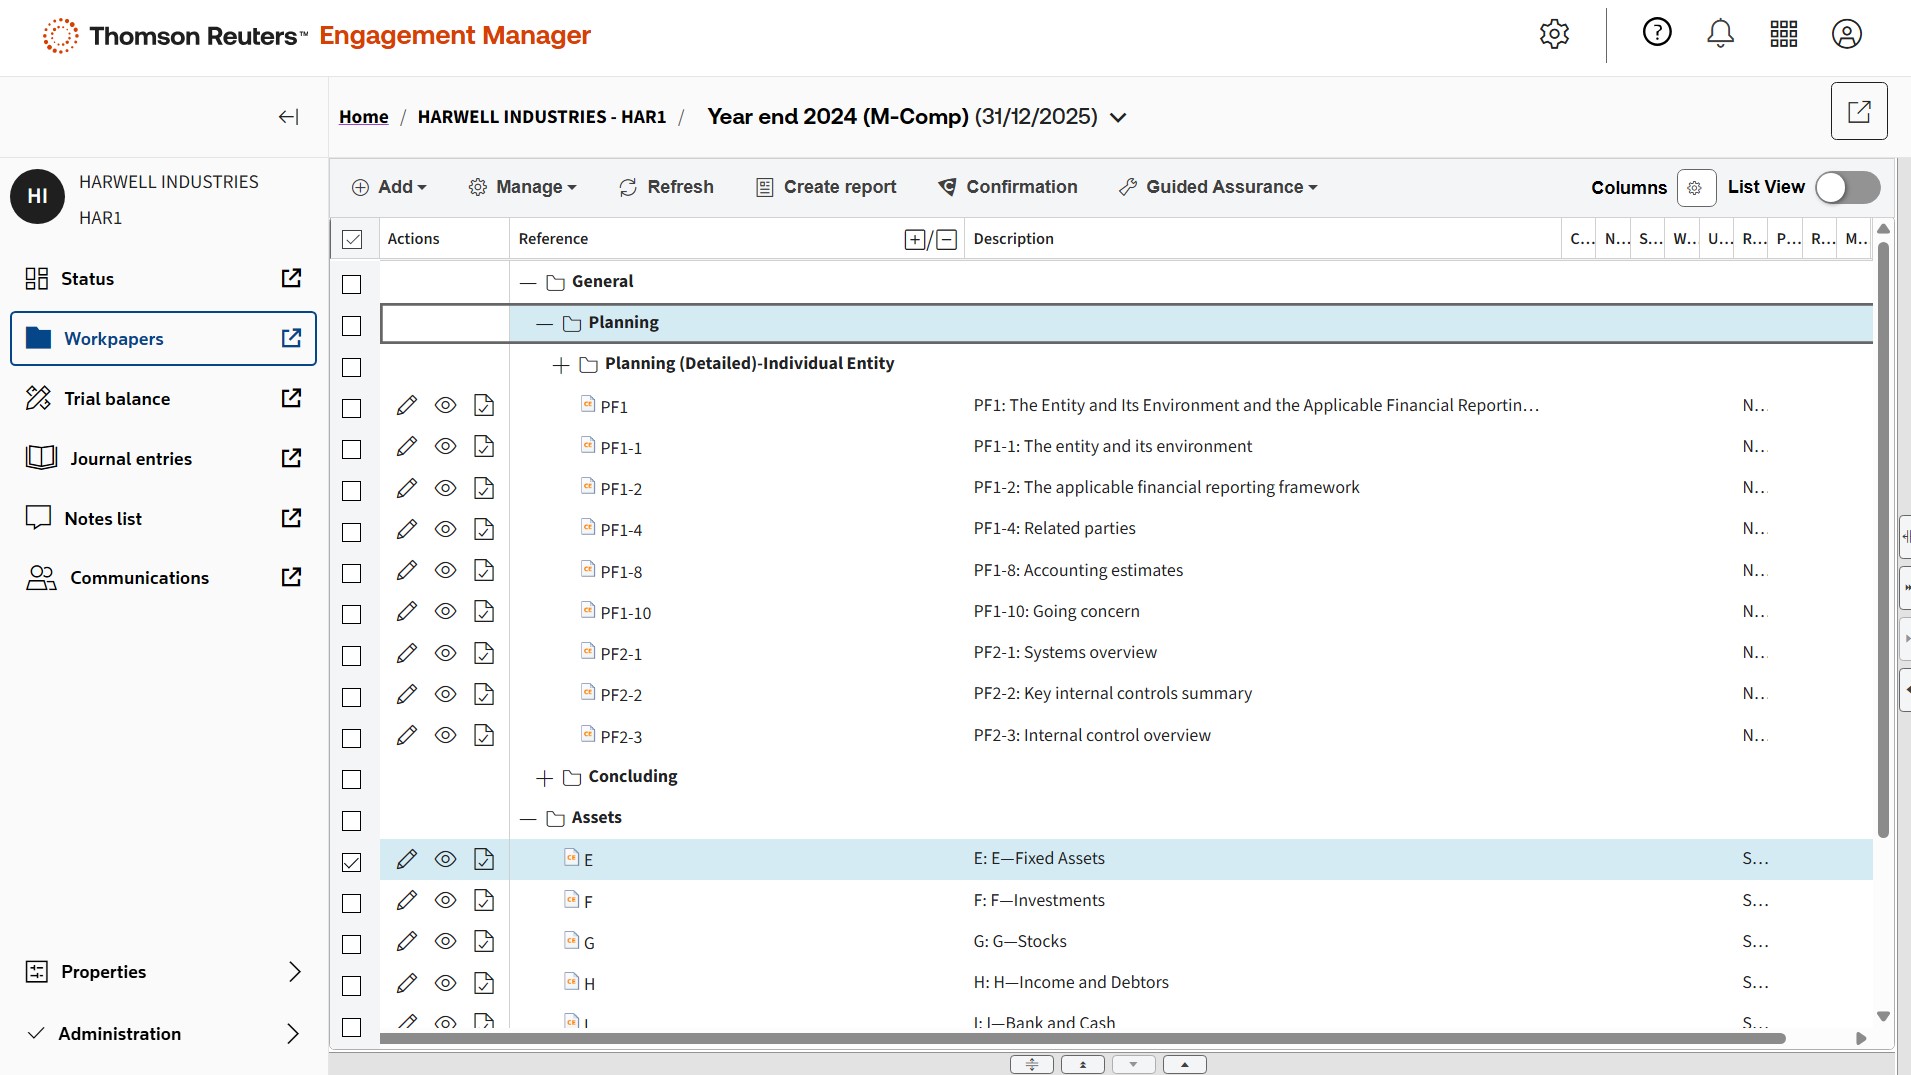
We leverage Mercia’s references to ensure a familiar experience, while also providing the enhanced capabilities of Cloud Audit Suite.
Mercia references are embedded throughout the audit workflow, giving users quick access to relevant information and ensuring a consistent, efficient process.
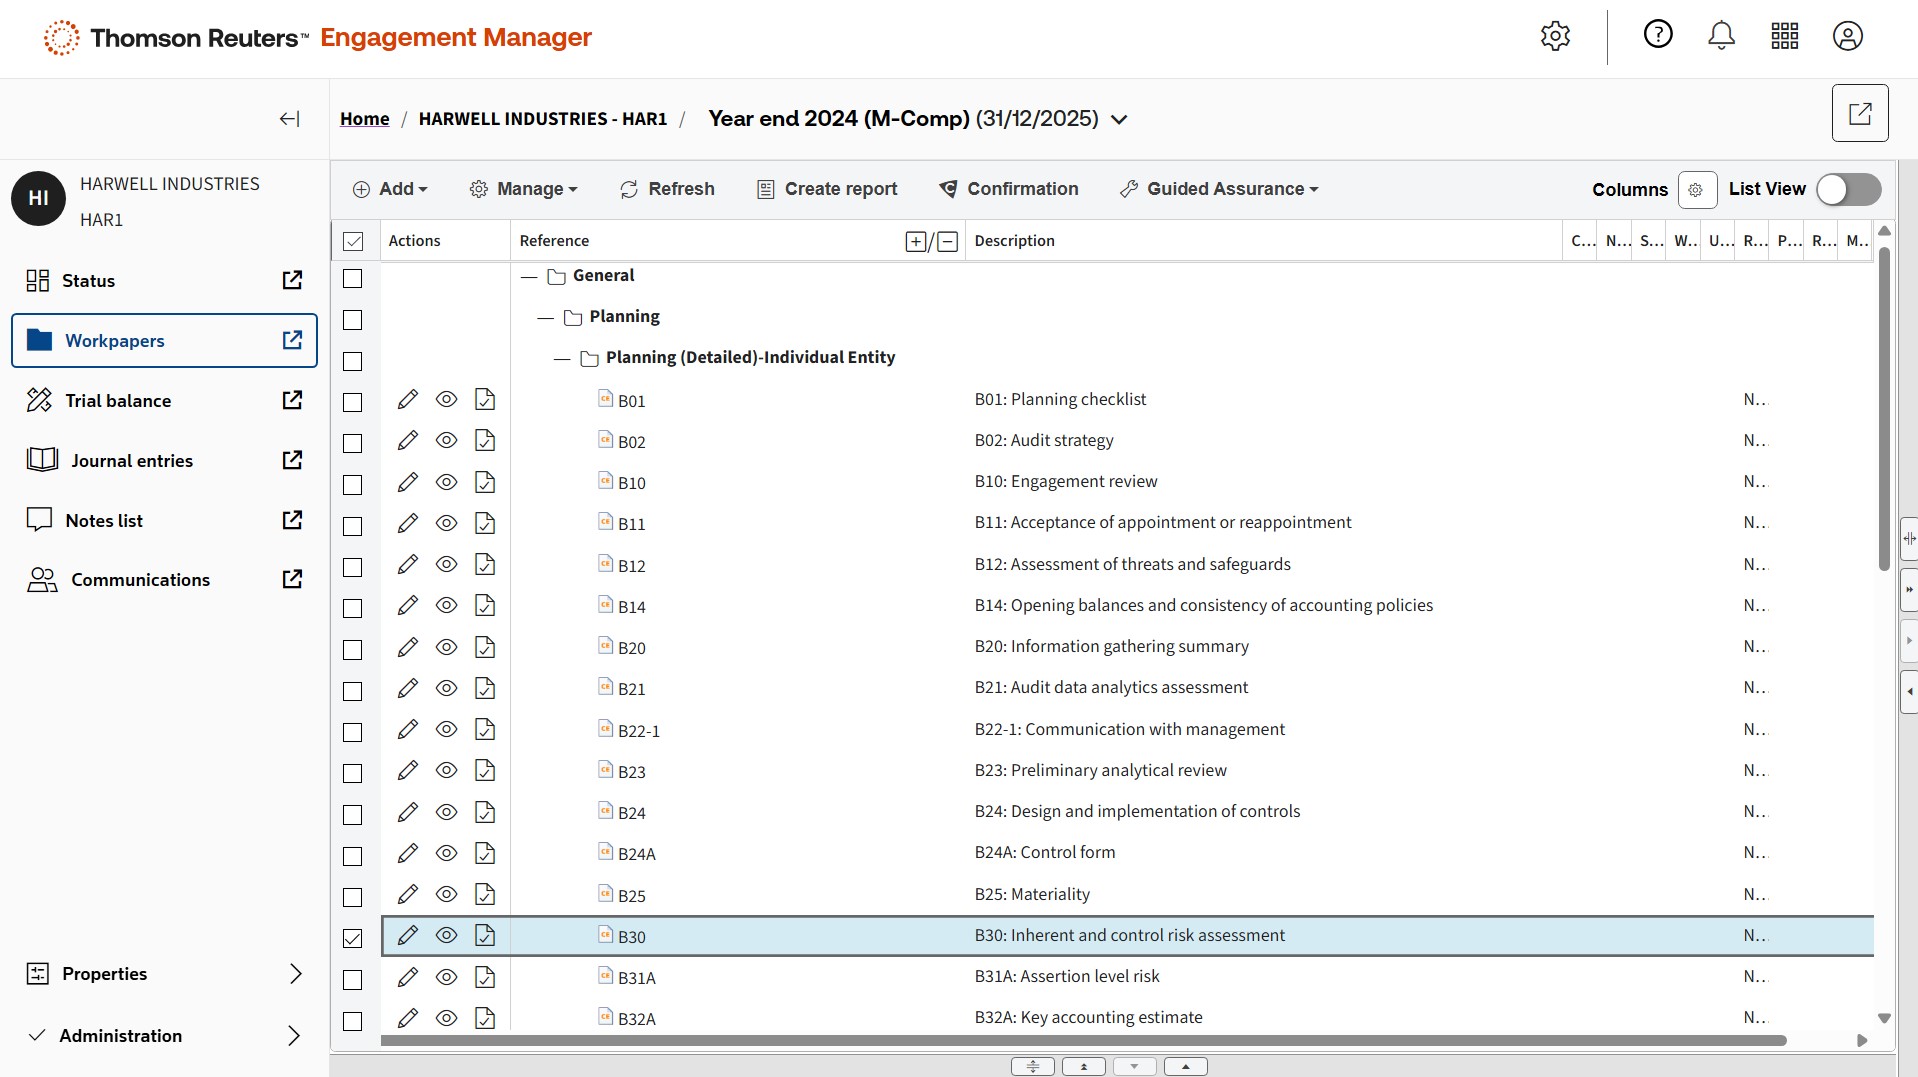
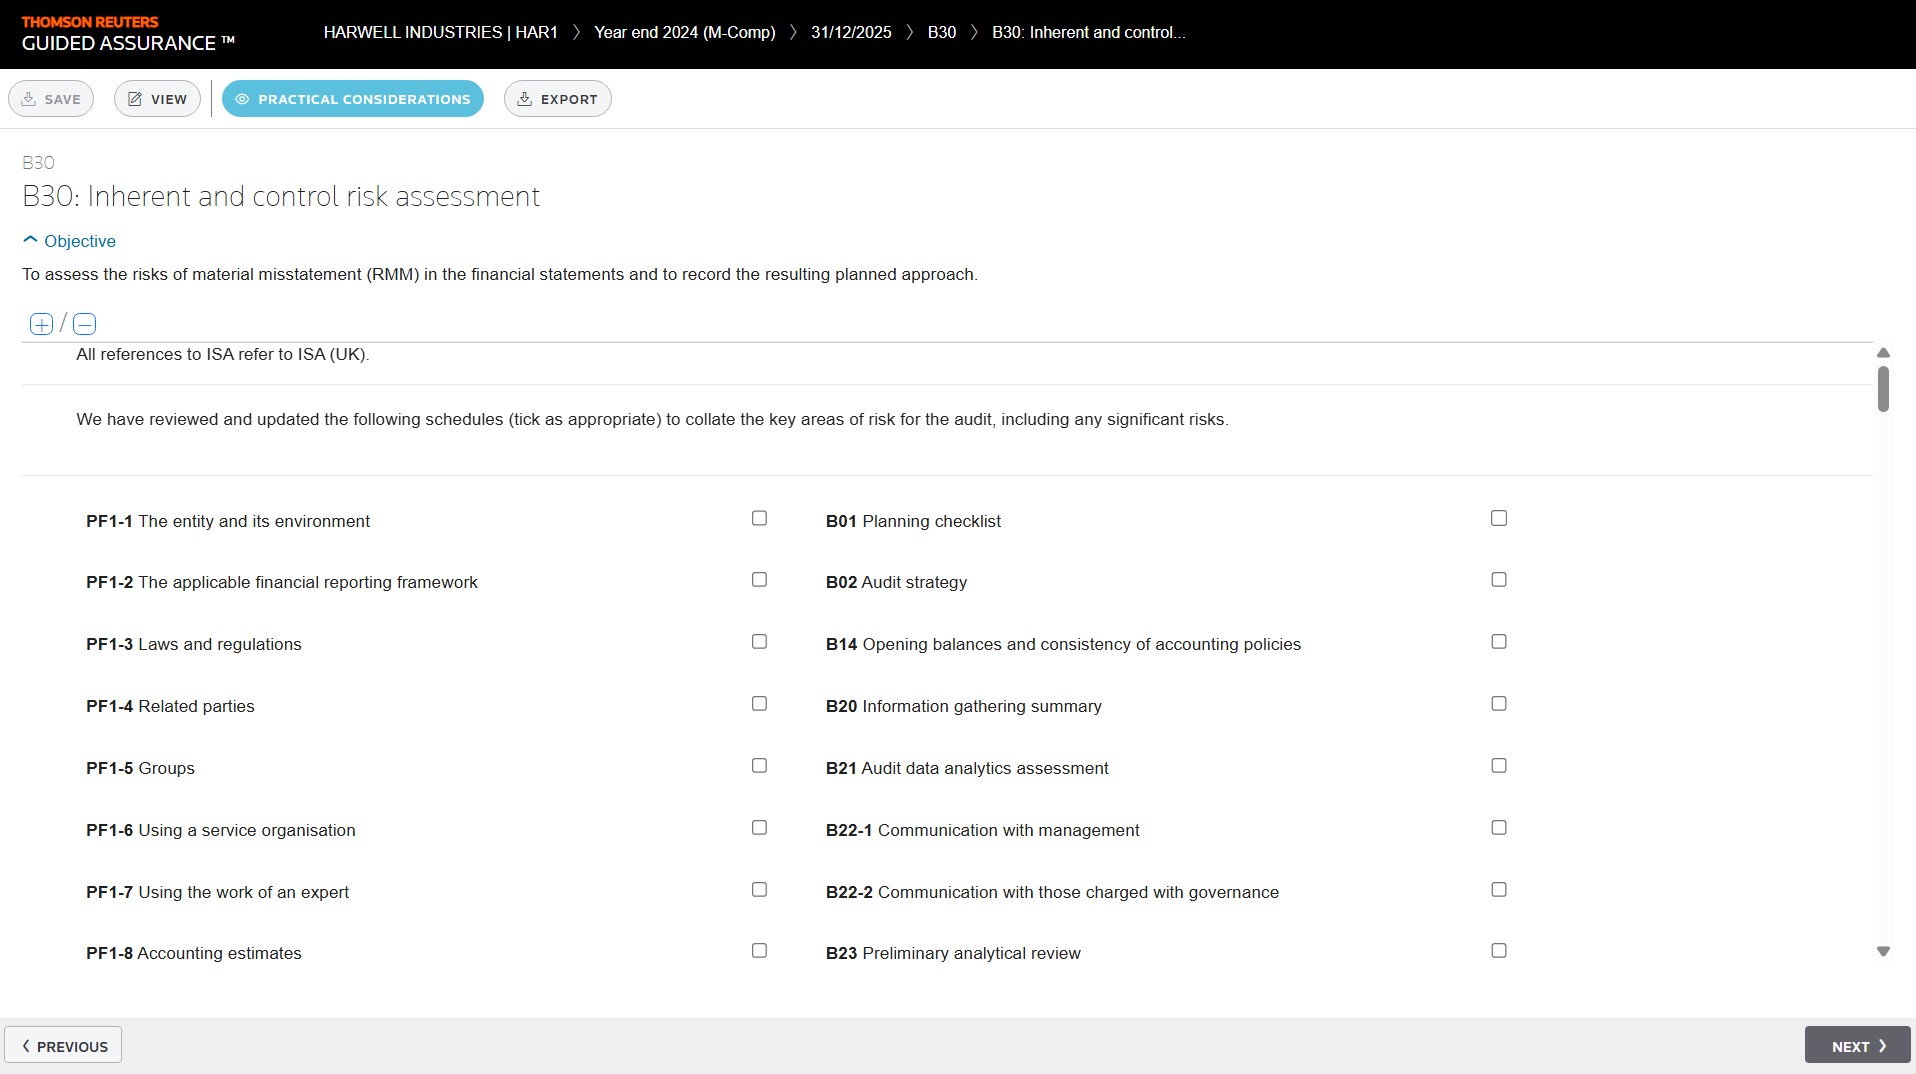
The Inherent and control risk assessment form guides you through separate, structured evaluations of each risk, ensuring compliance with the latest audit standards and a thorough understanding of your client’s environment.
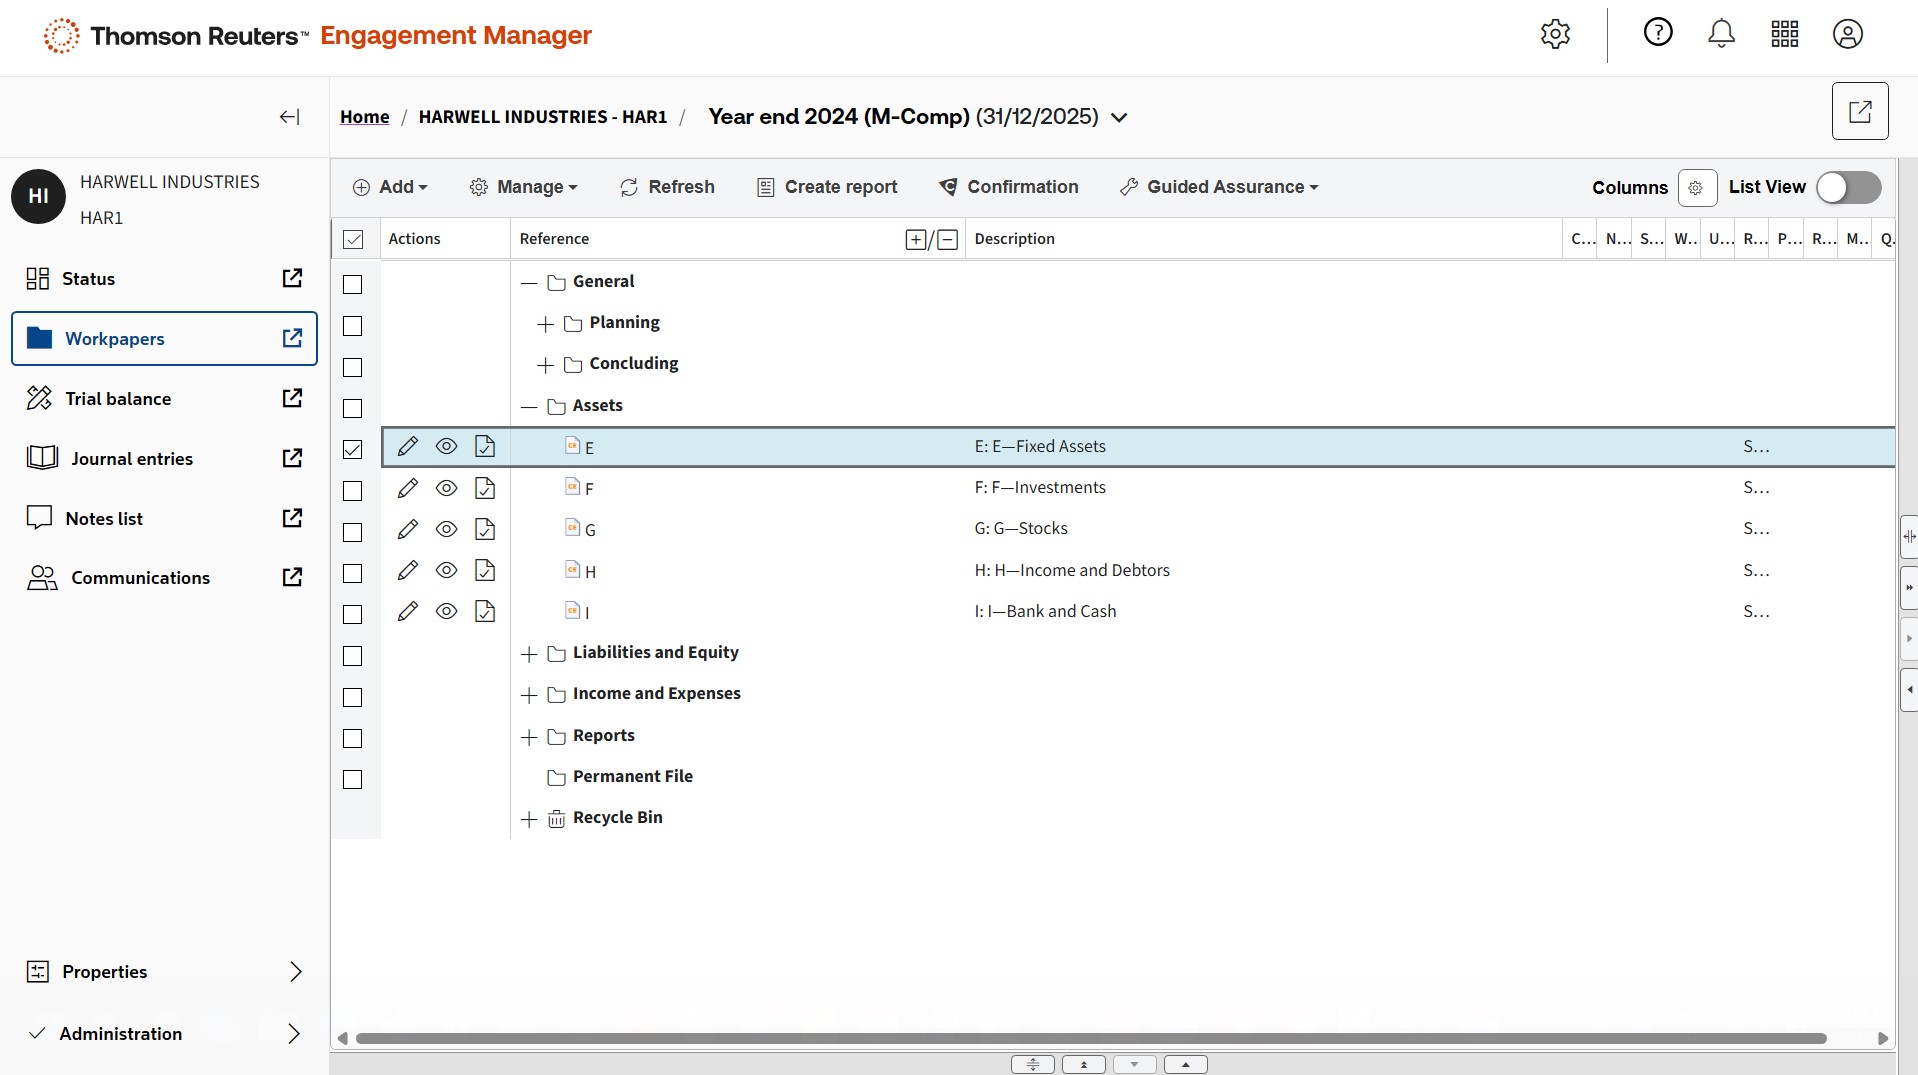
The engagement combines the Thomson Reuters structure with Mercia methodology, making it easy to navigate your audit workflow and programs.
Audit Programs provide the same powerful design and customisation options, now enhanced with Mercia’s trusted templates as your starting point.
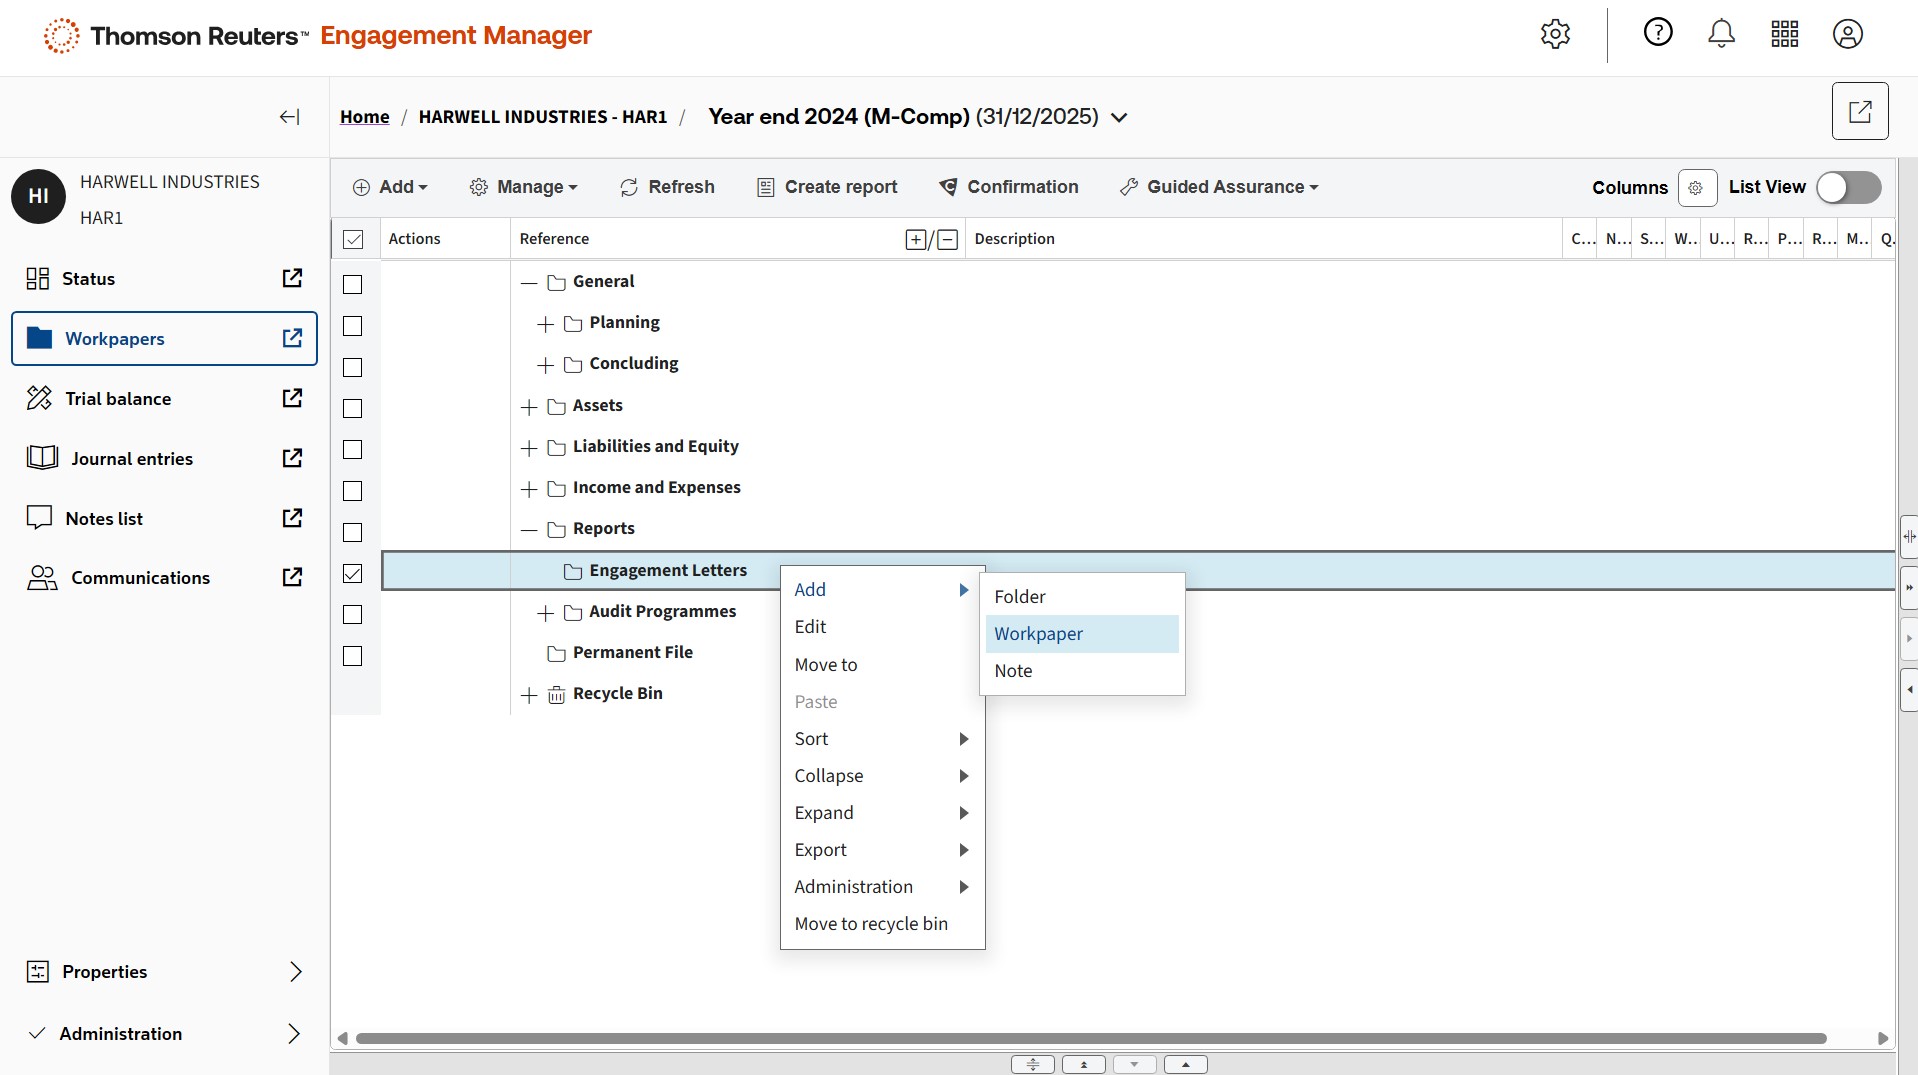
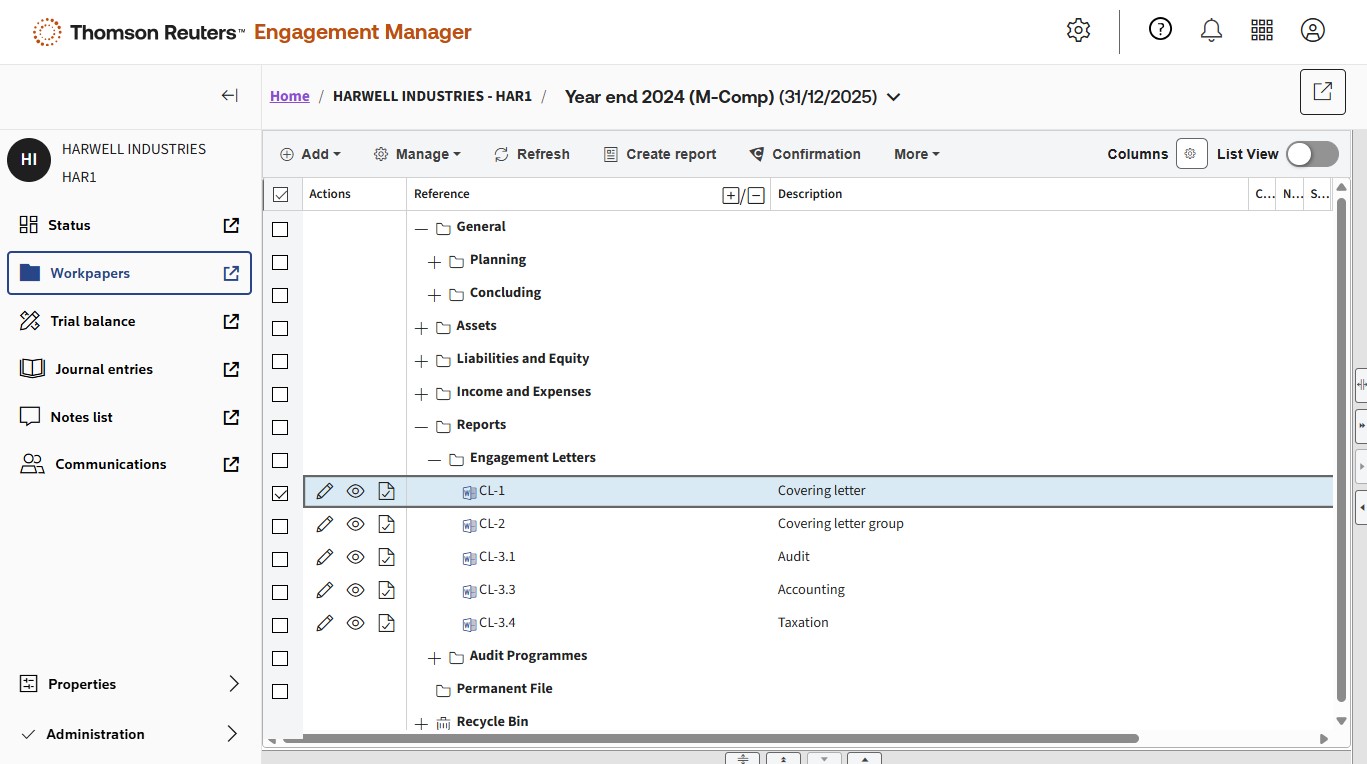
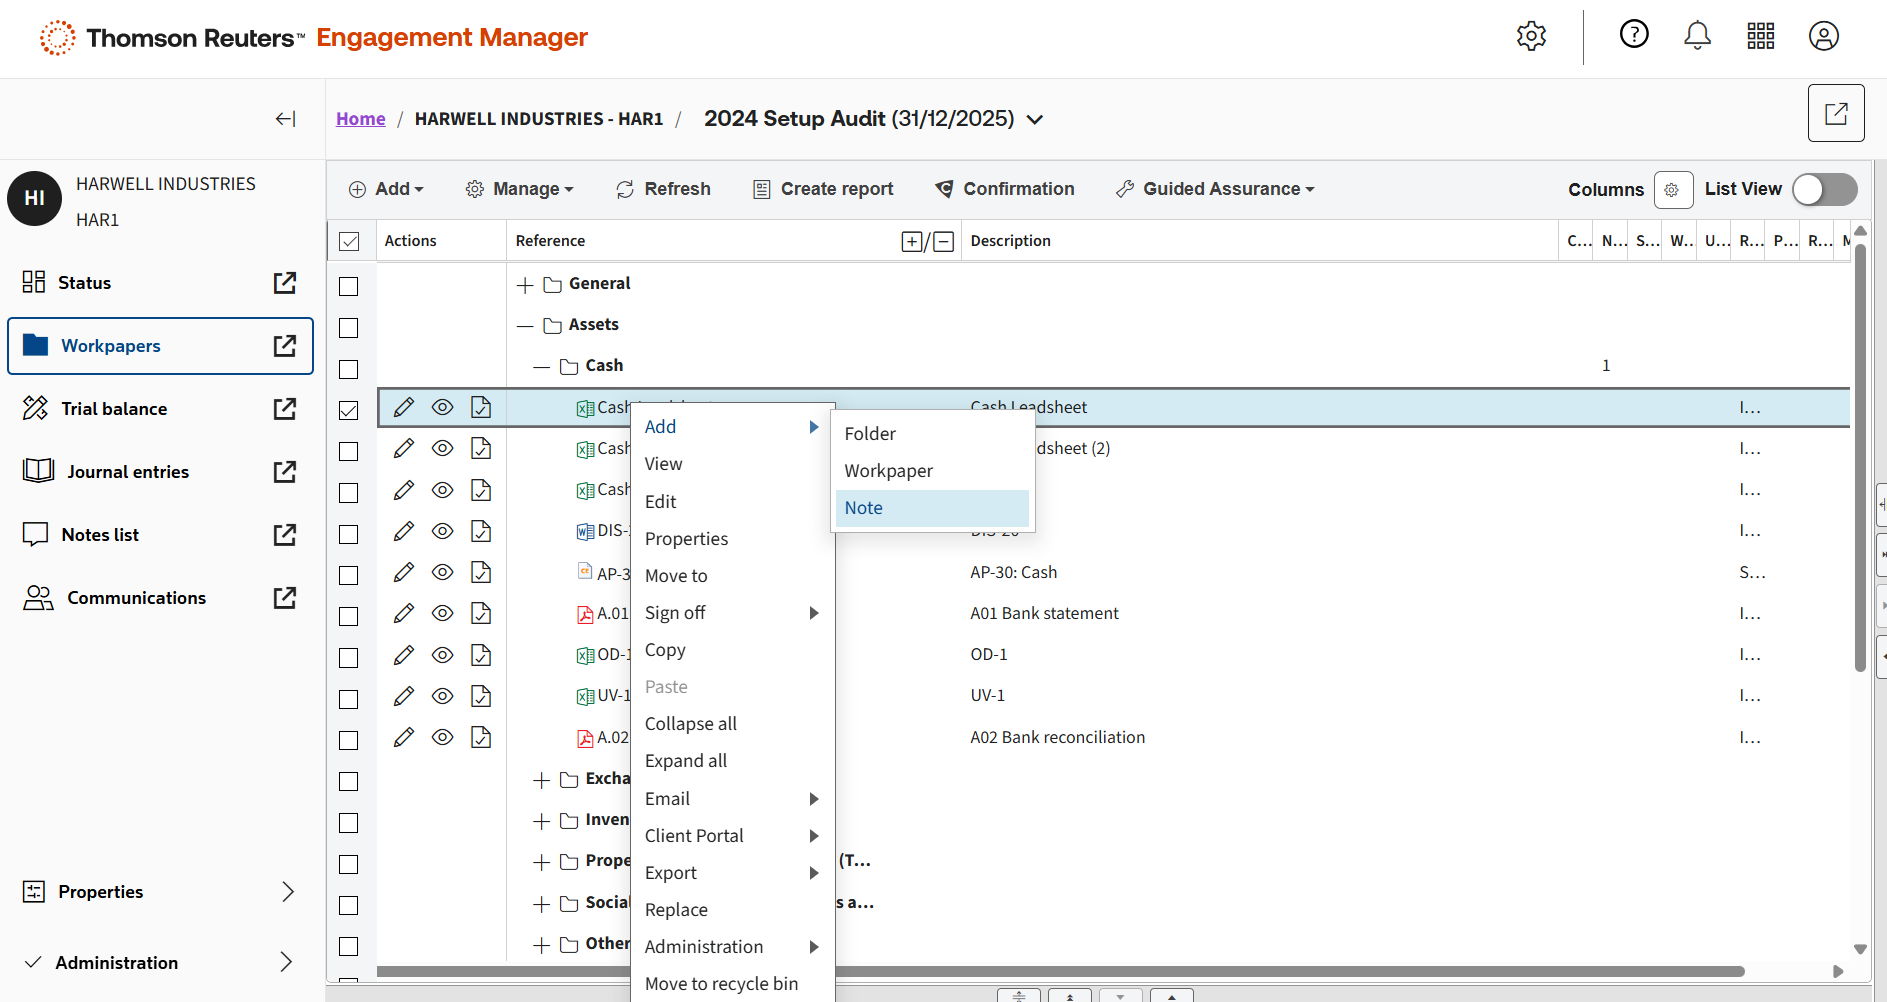
Right-click any folder to easily upload and manage documents within your engagement.
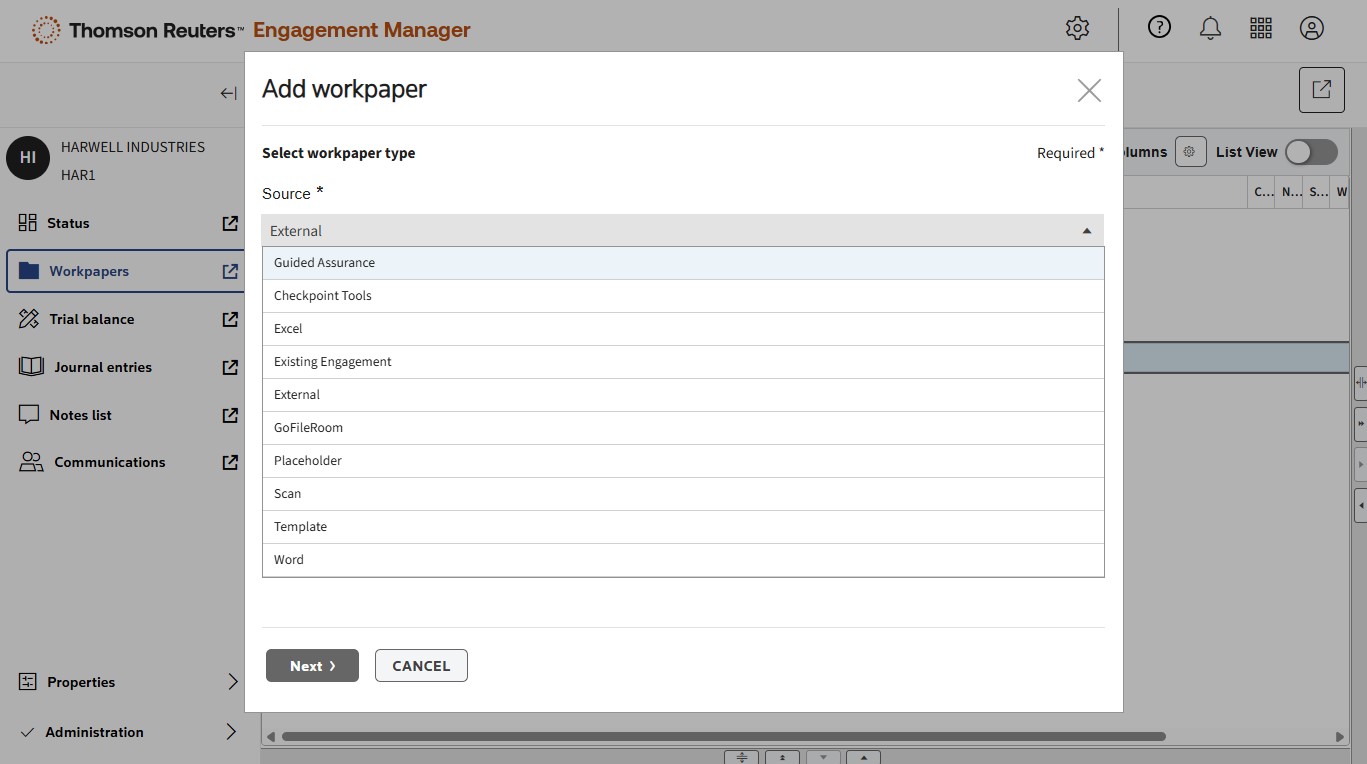
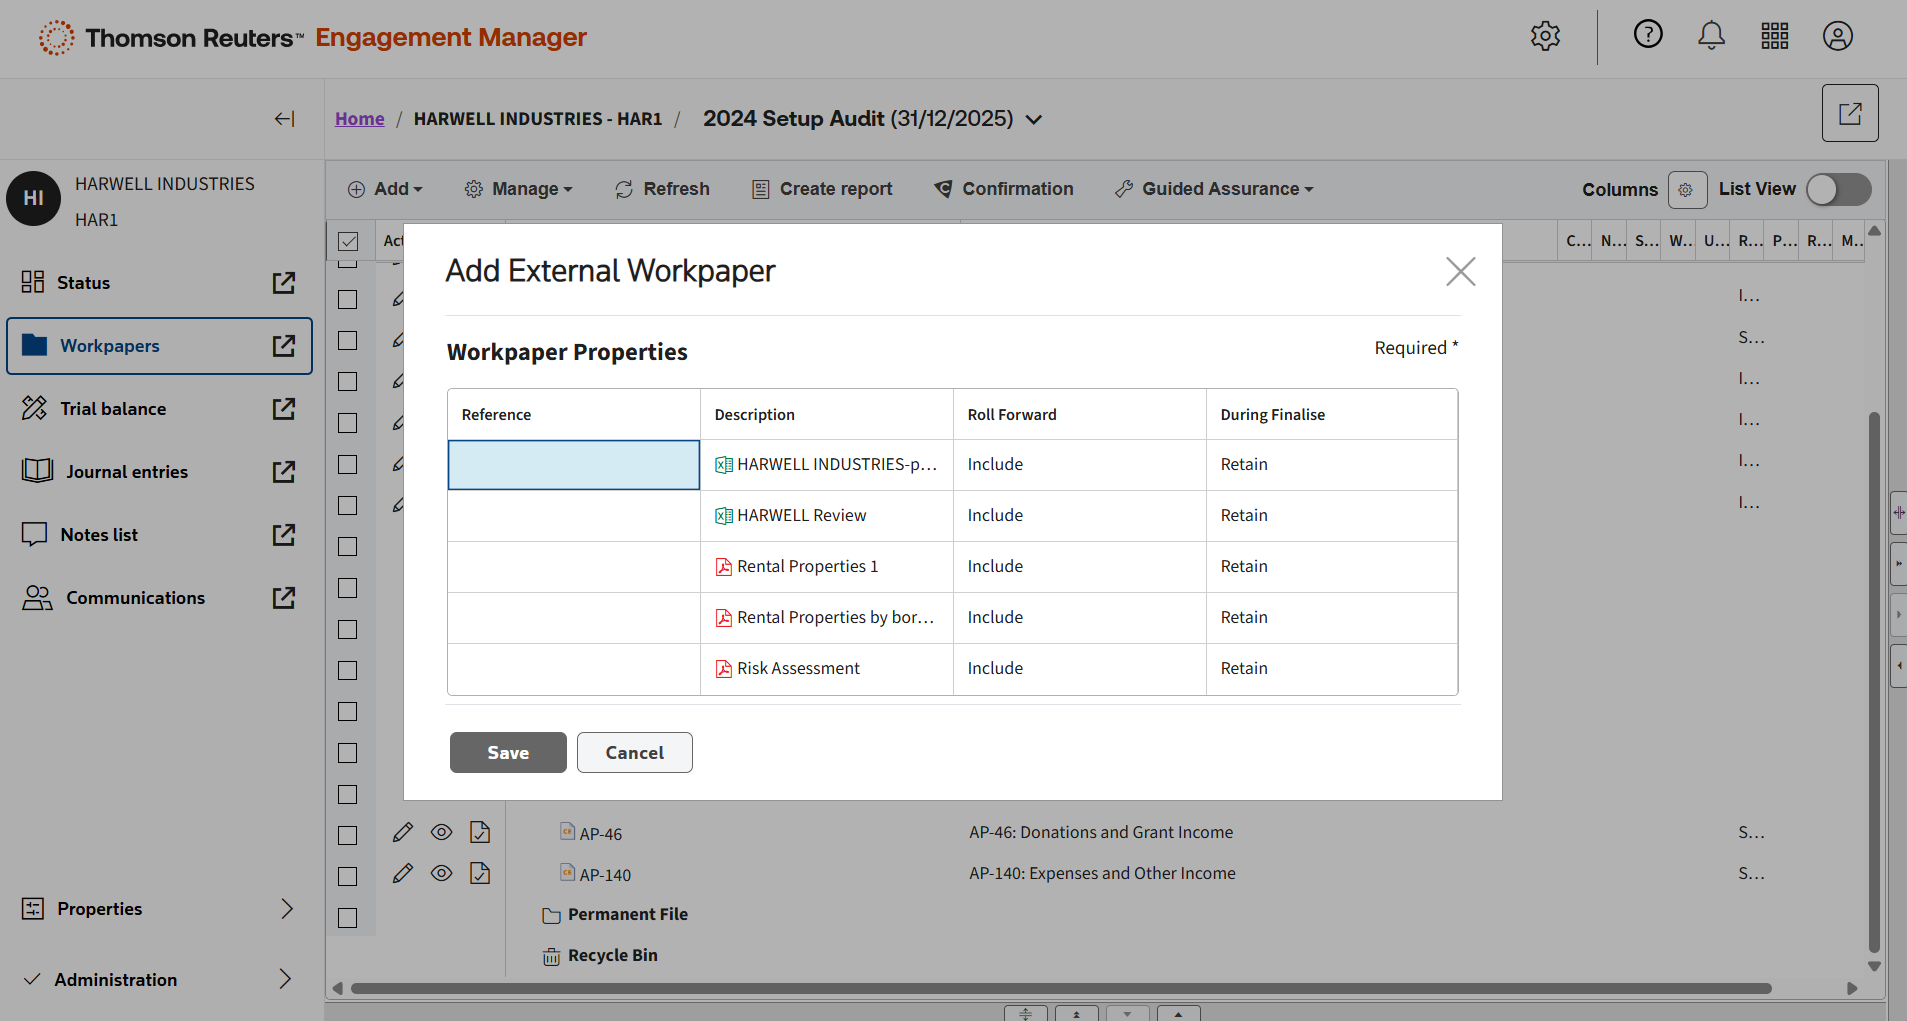
You’ll have multiple options to select as a source — such as external documents, other engagements, or Guided Assurance.
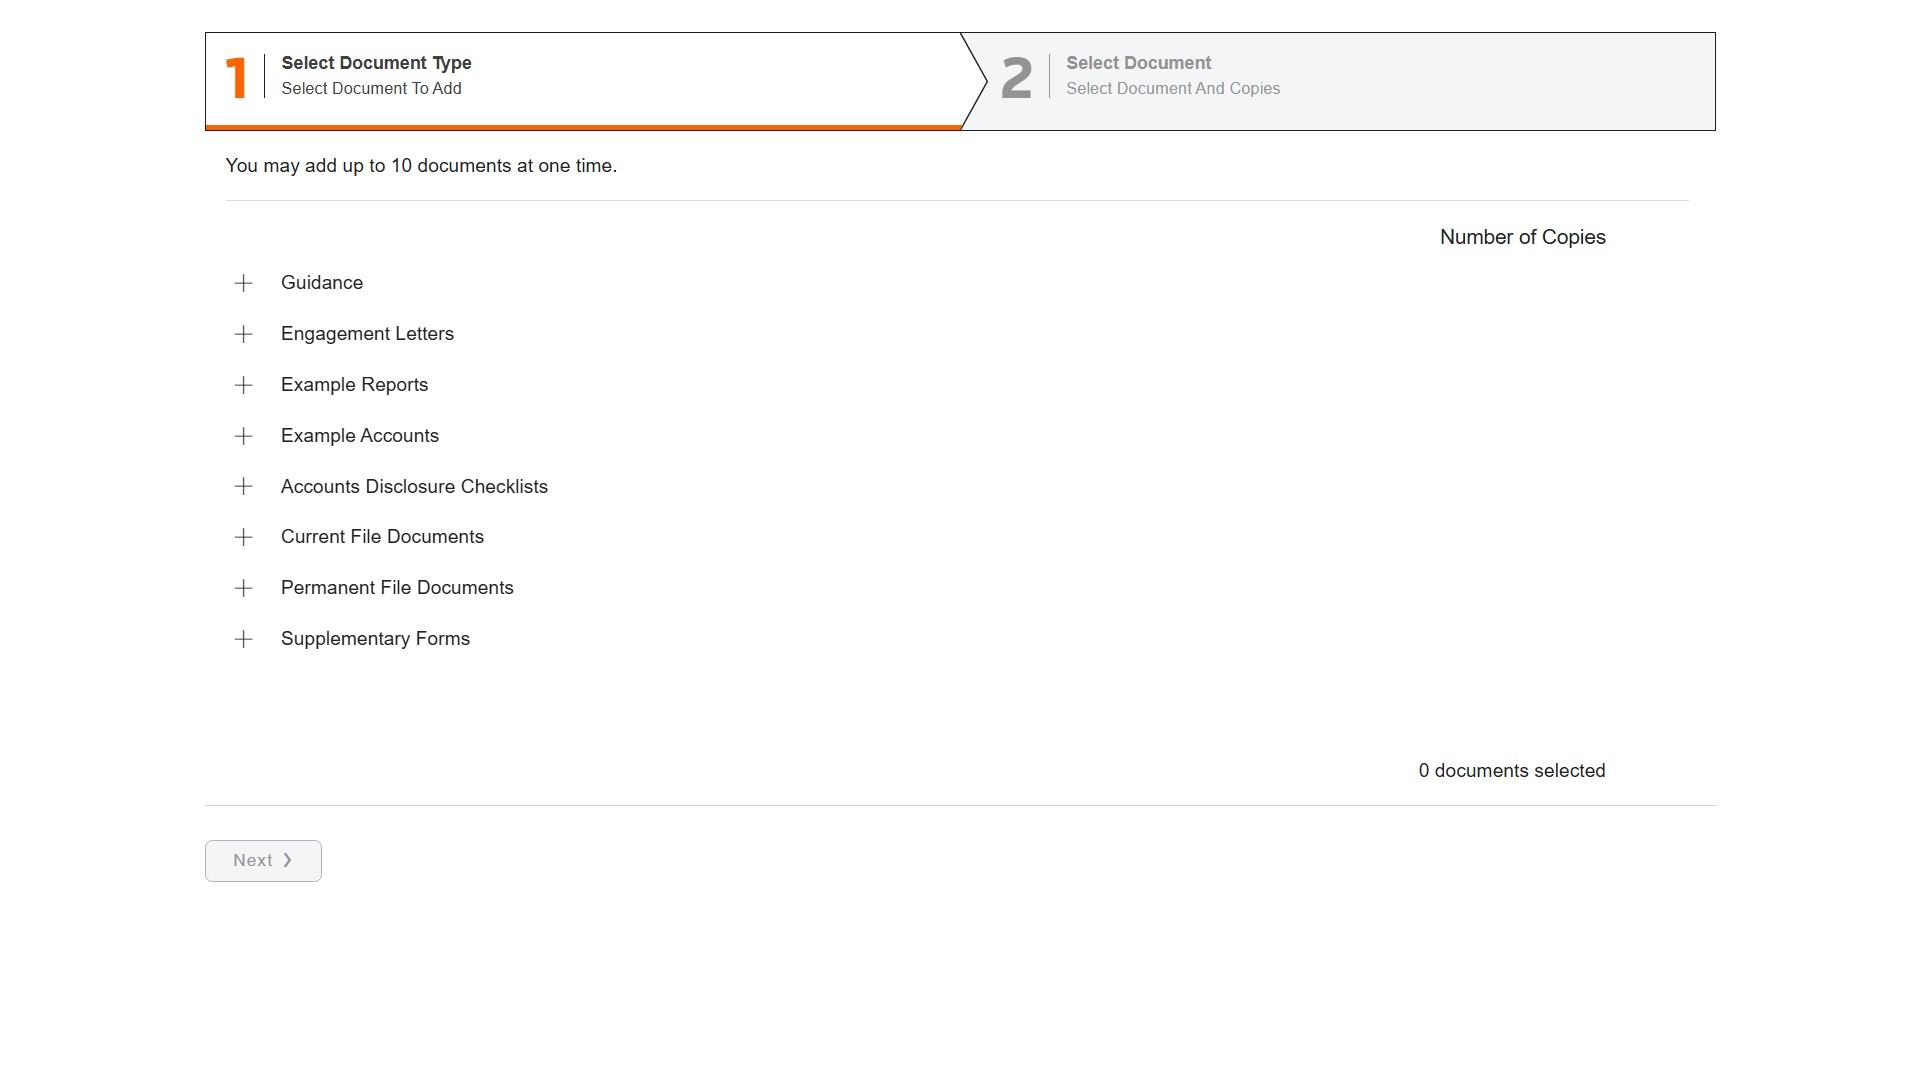
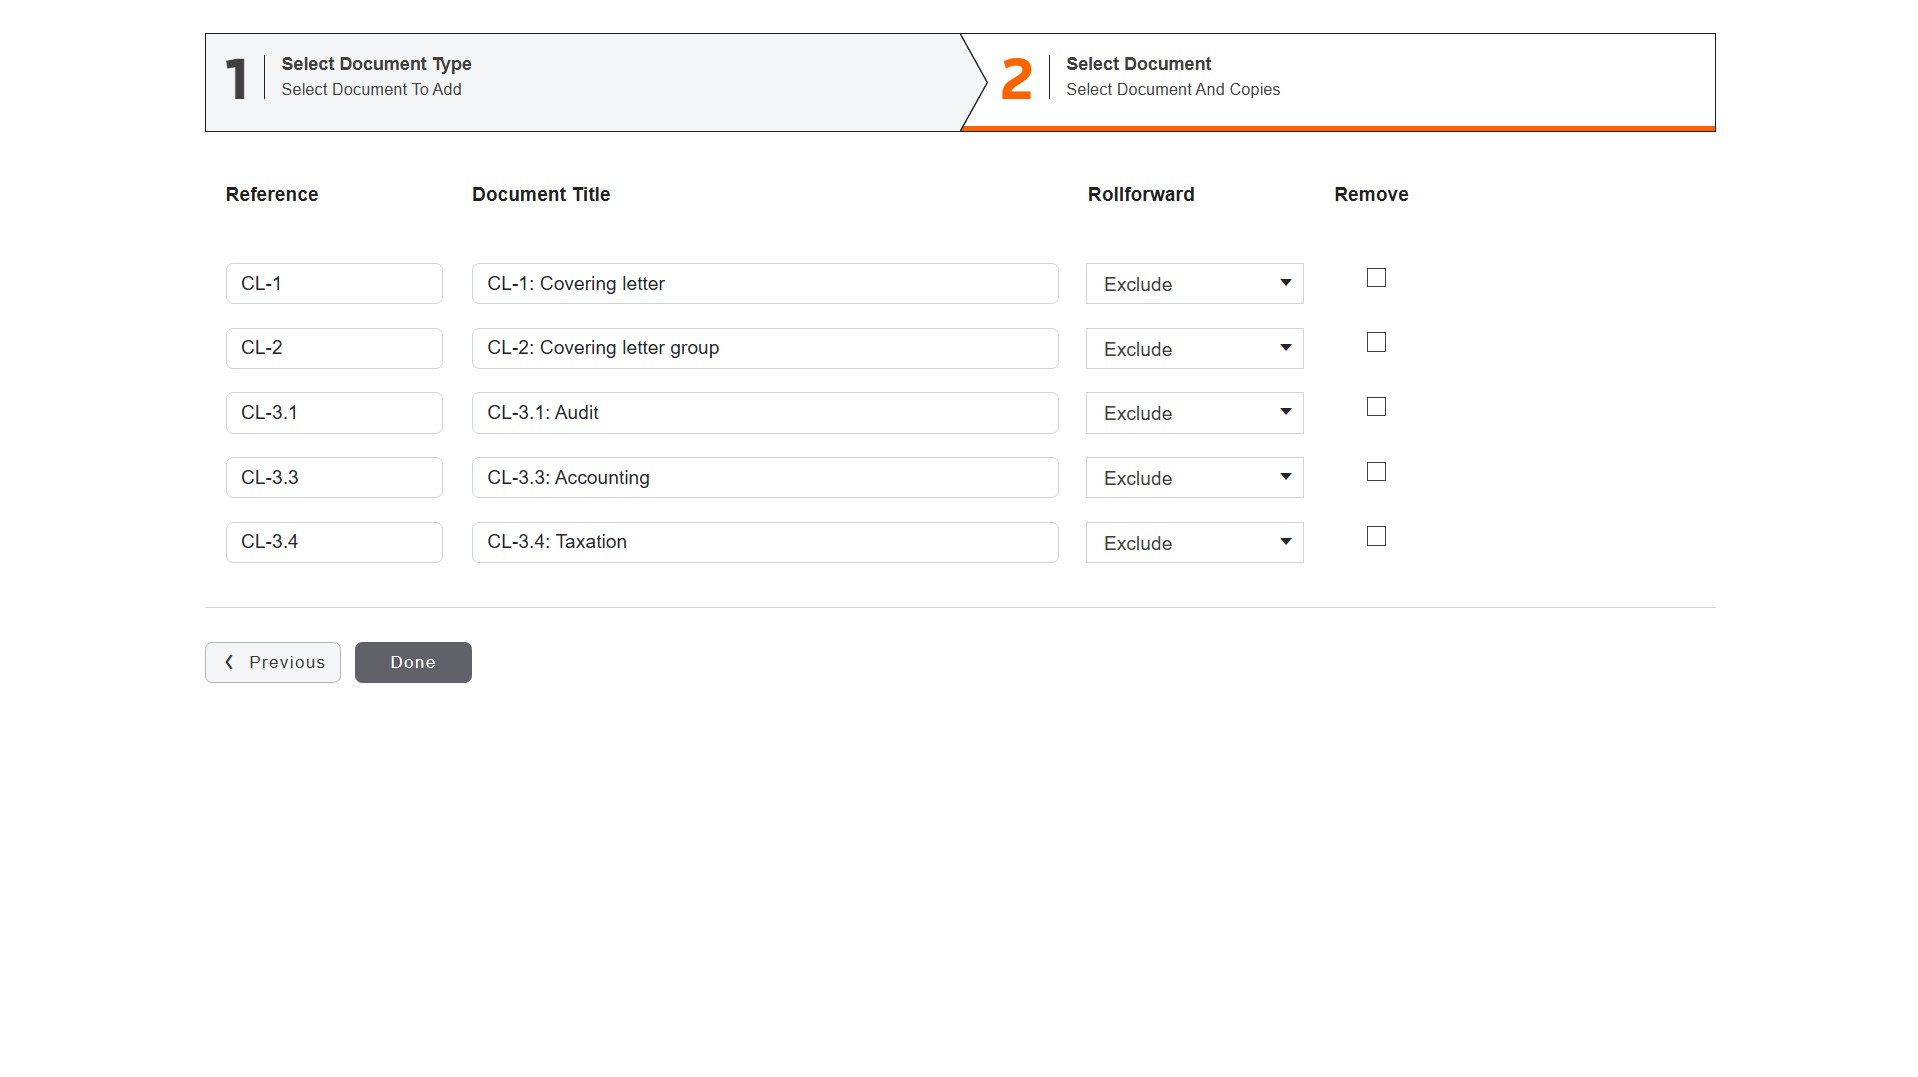
When selecting Guided Assurance, you’ll see a familiar contents structure — making it easy to add workpapers, letters, and more to your engagement.
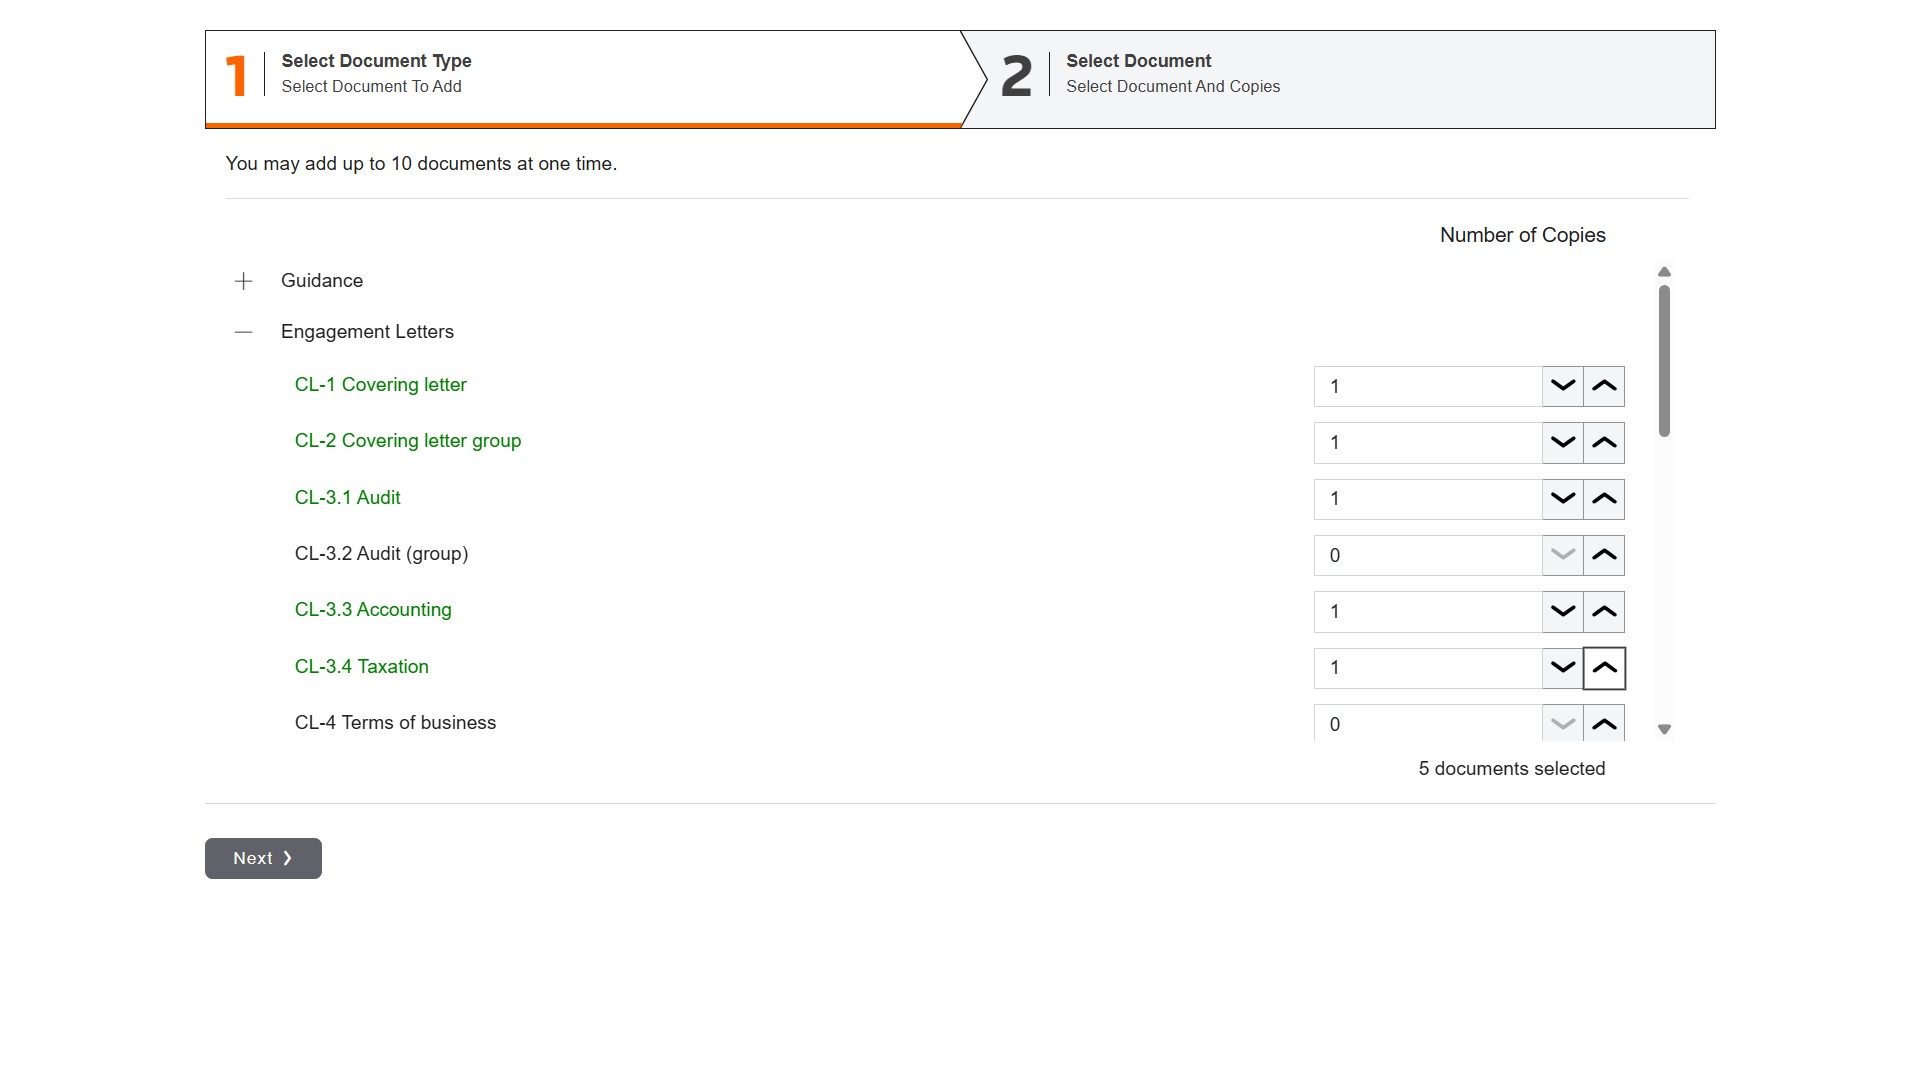
You can add up to 10 documents at a time.
You can keep the original Mercia references or modify them to suit your engagement needs.
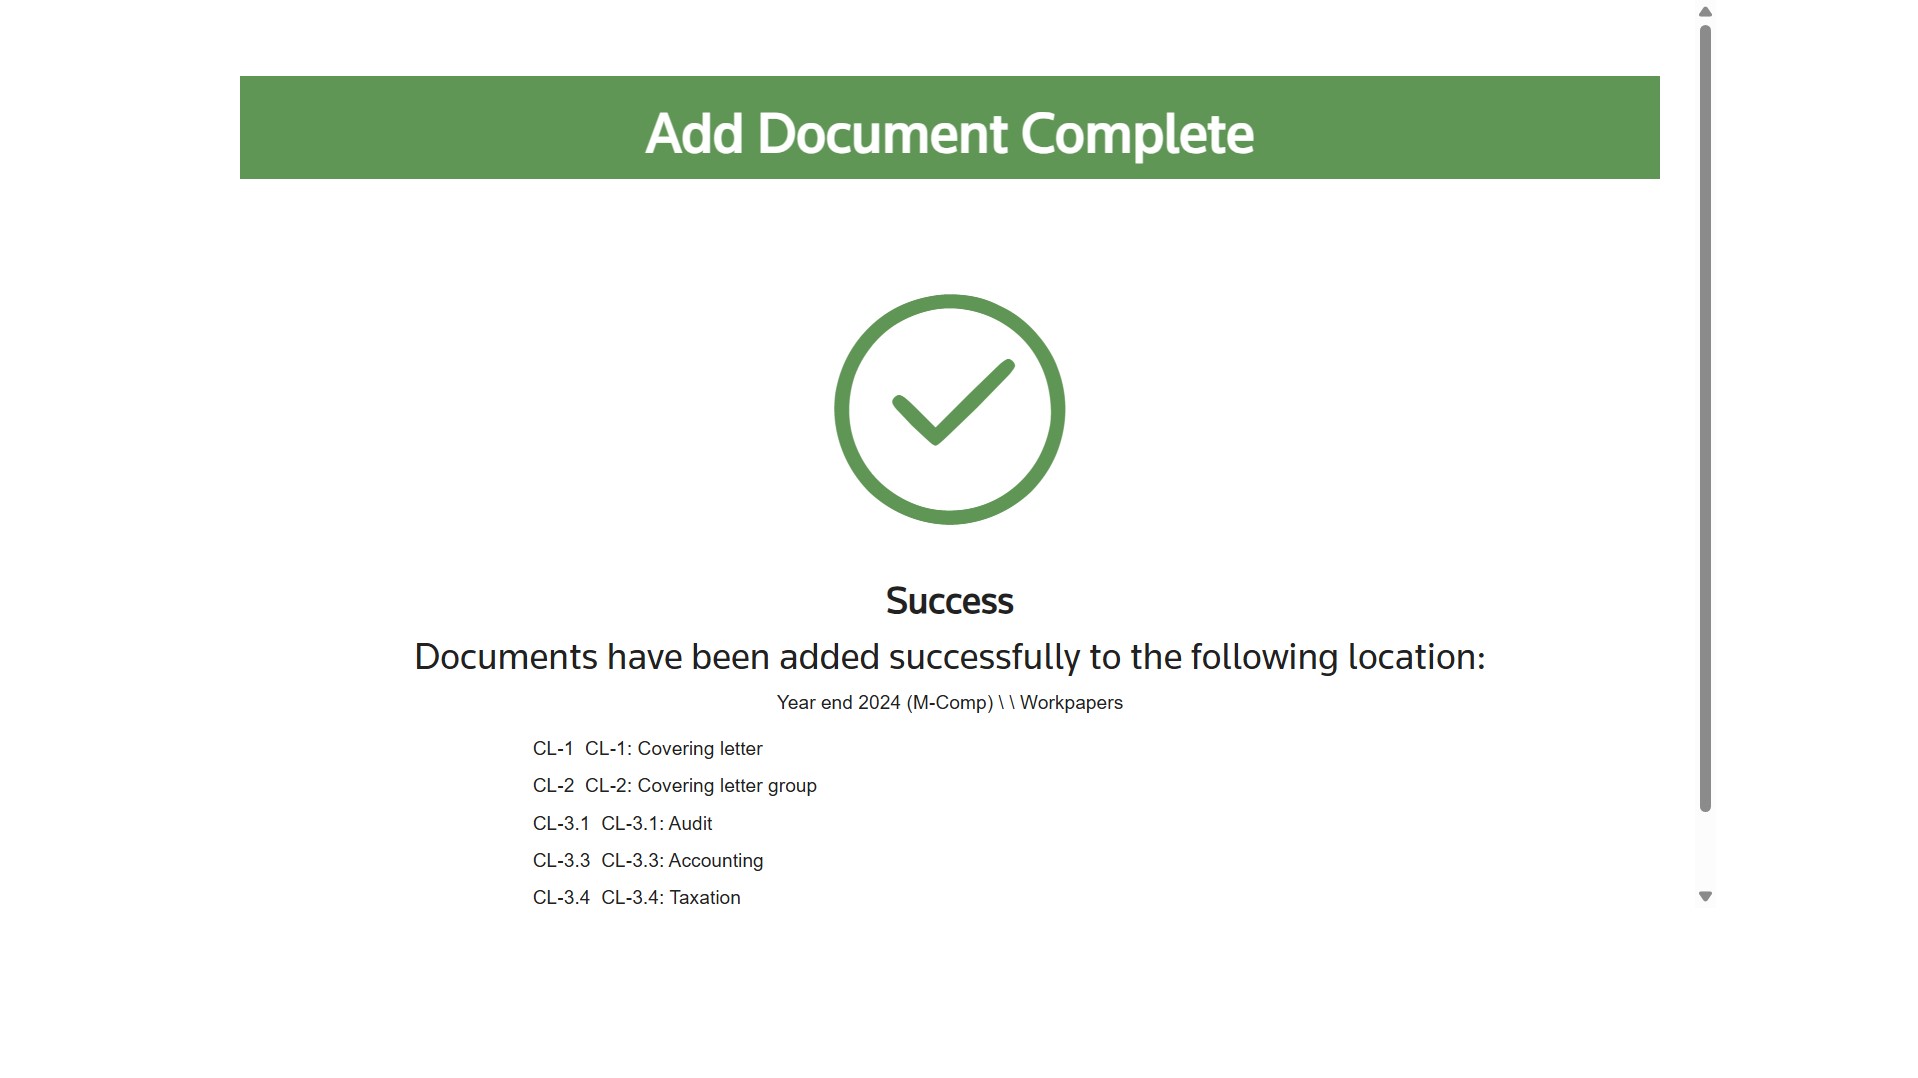
The documents have been successfully added to the selected folder and are now ready for further processing.
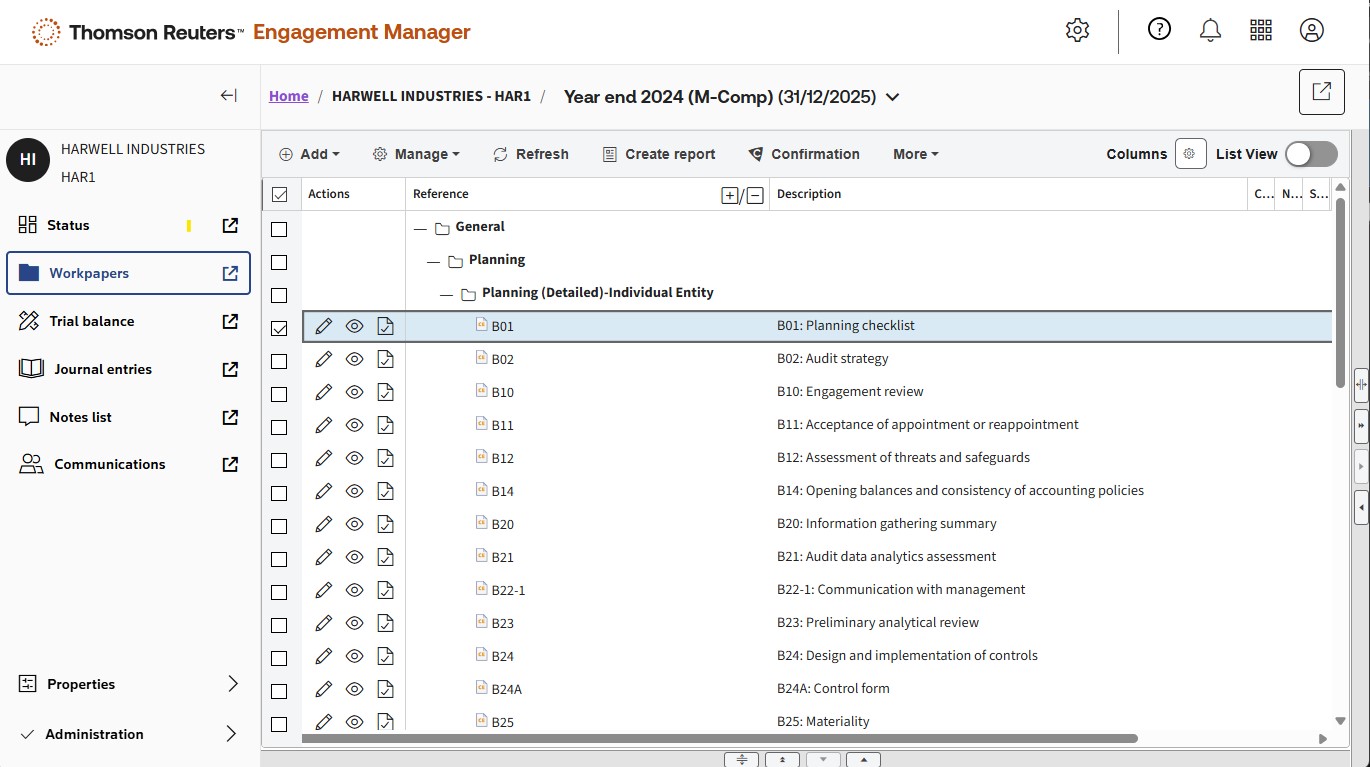
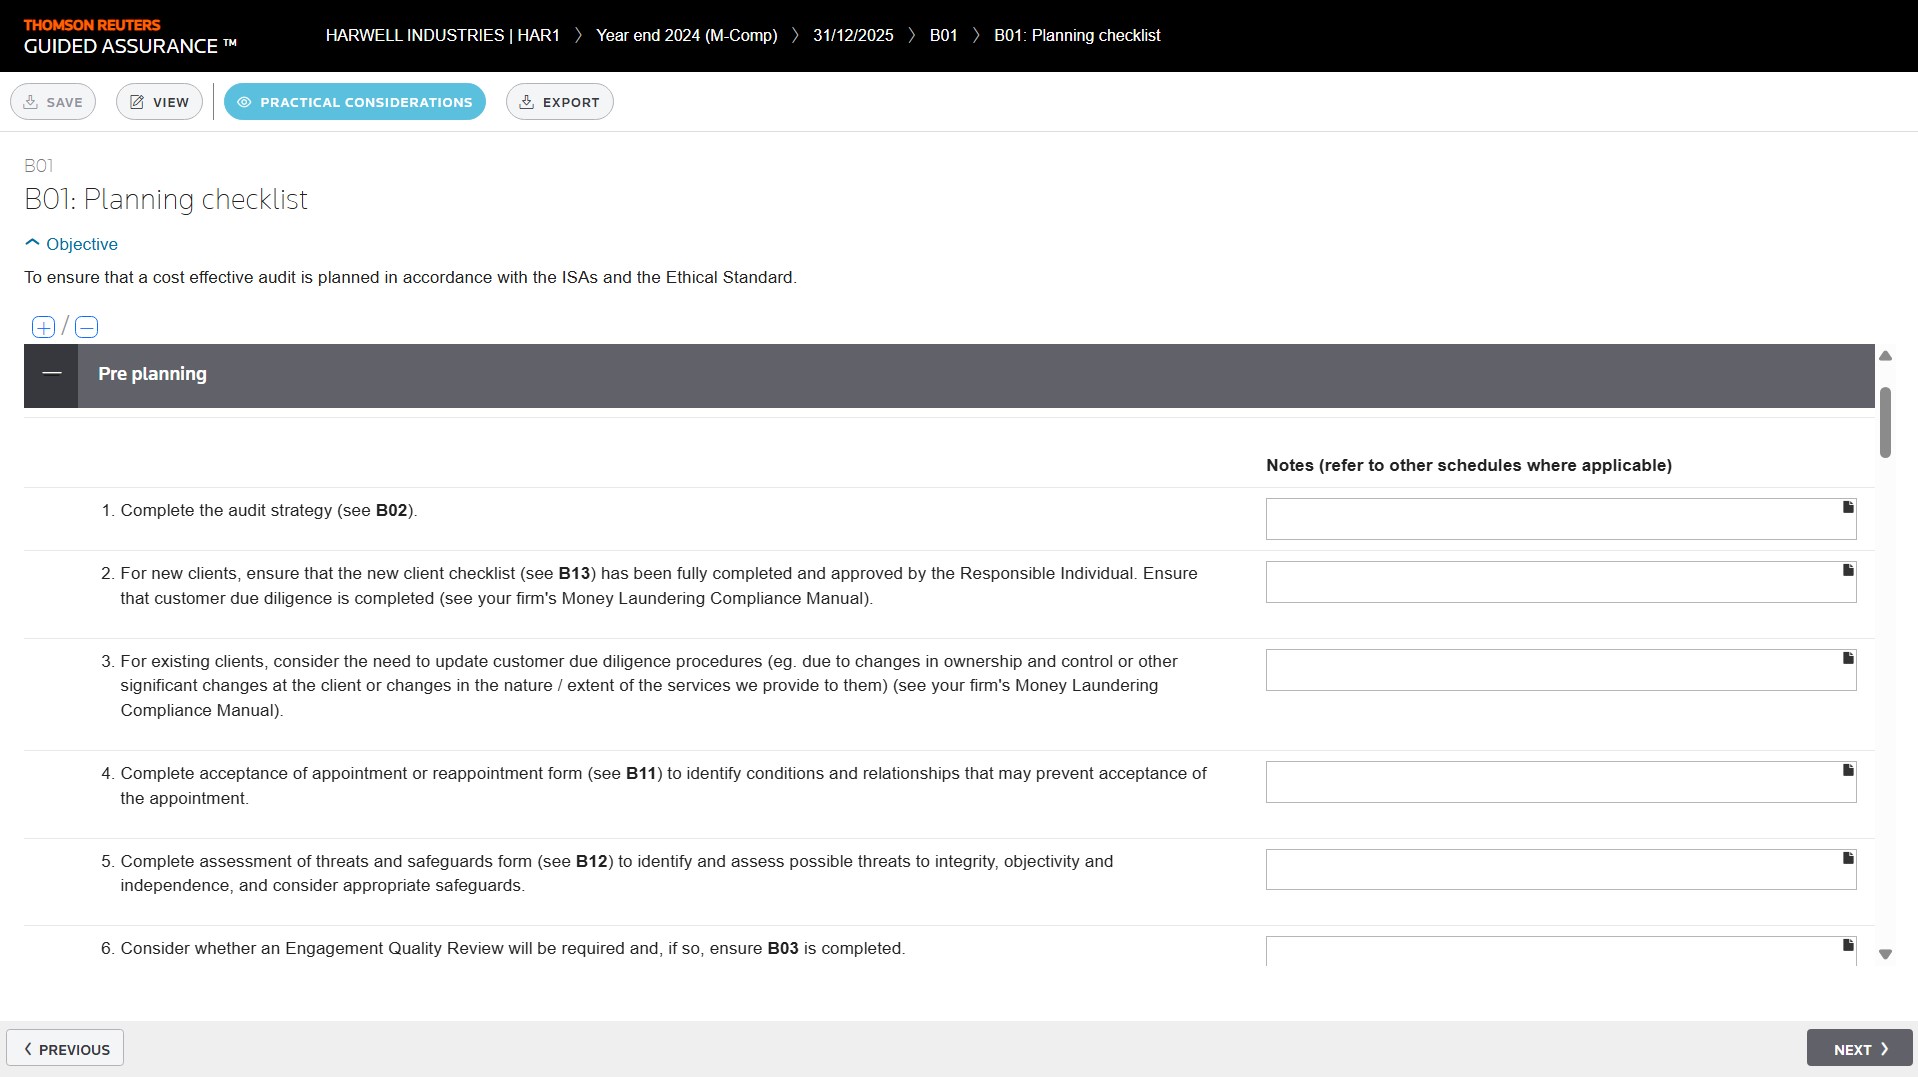
You’ll enjoy a familiar structure while leveraging the powerful features of the Thomson Reuters platform. Let’s take the Planning checklist as an example.
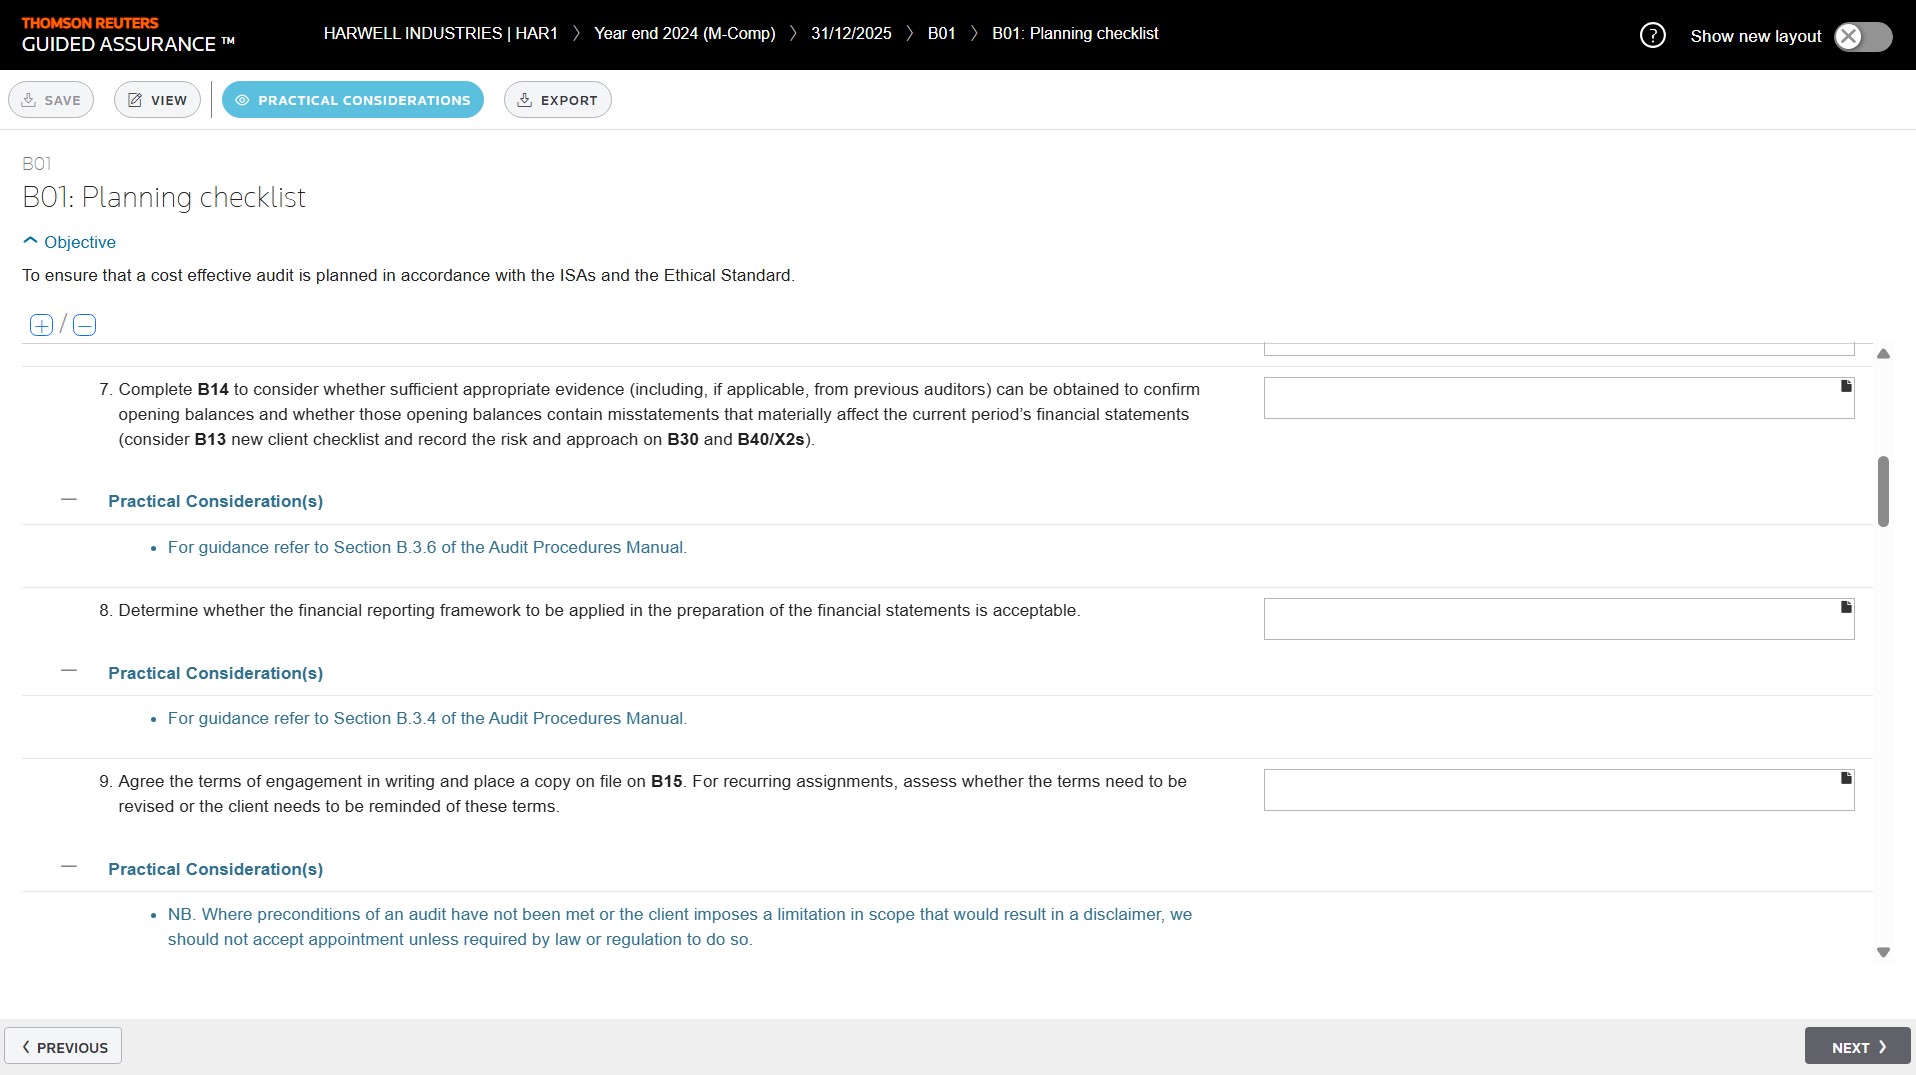
You have access to familiar menus, practical considerations, and helpful instructions — available whenever you need them.
Guidance is available when you enable Practical Considerations or refer to the Audit Procedures Manual for further assistance.
Engagement manager Rely on a comprehensive audit workflow management hub with full trial balance capabilities, workpaper management, and seamless integration with up-to-date audit methodology. Easily communicate relevant information to clients and view the progress of the audit overall.
Engagement manager:
From a single location, access workpaper management, trial balance, journal entries, notes, confirmations, and client communications.
View the engagement progress at a glance in the Status Dashboard.
Trial balance Prepare financial statements quickly and accurately with fast imports and customisable features. Multiple users can work in a trial balance at the same time. You do not have to check in and check out the trial balance in order to make changes. Cloud Audit Suite handles consolidations extremely efficiently, including multi-tiered consolidations.
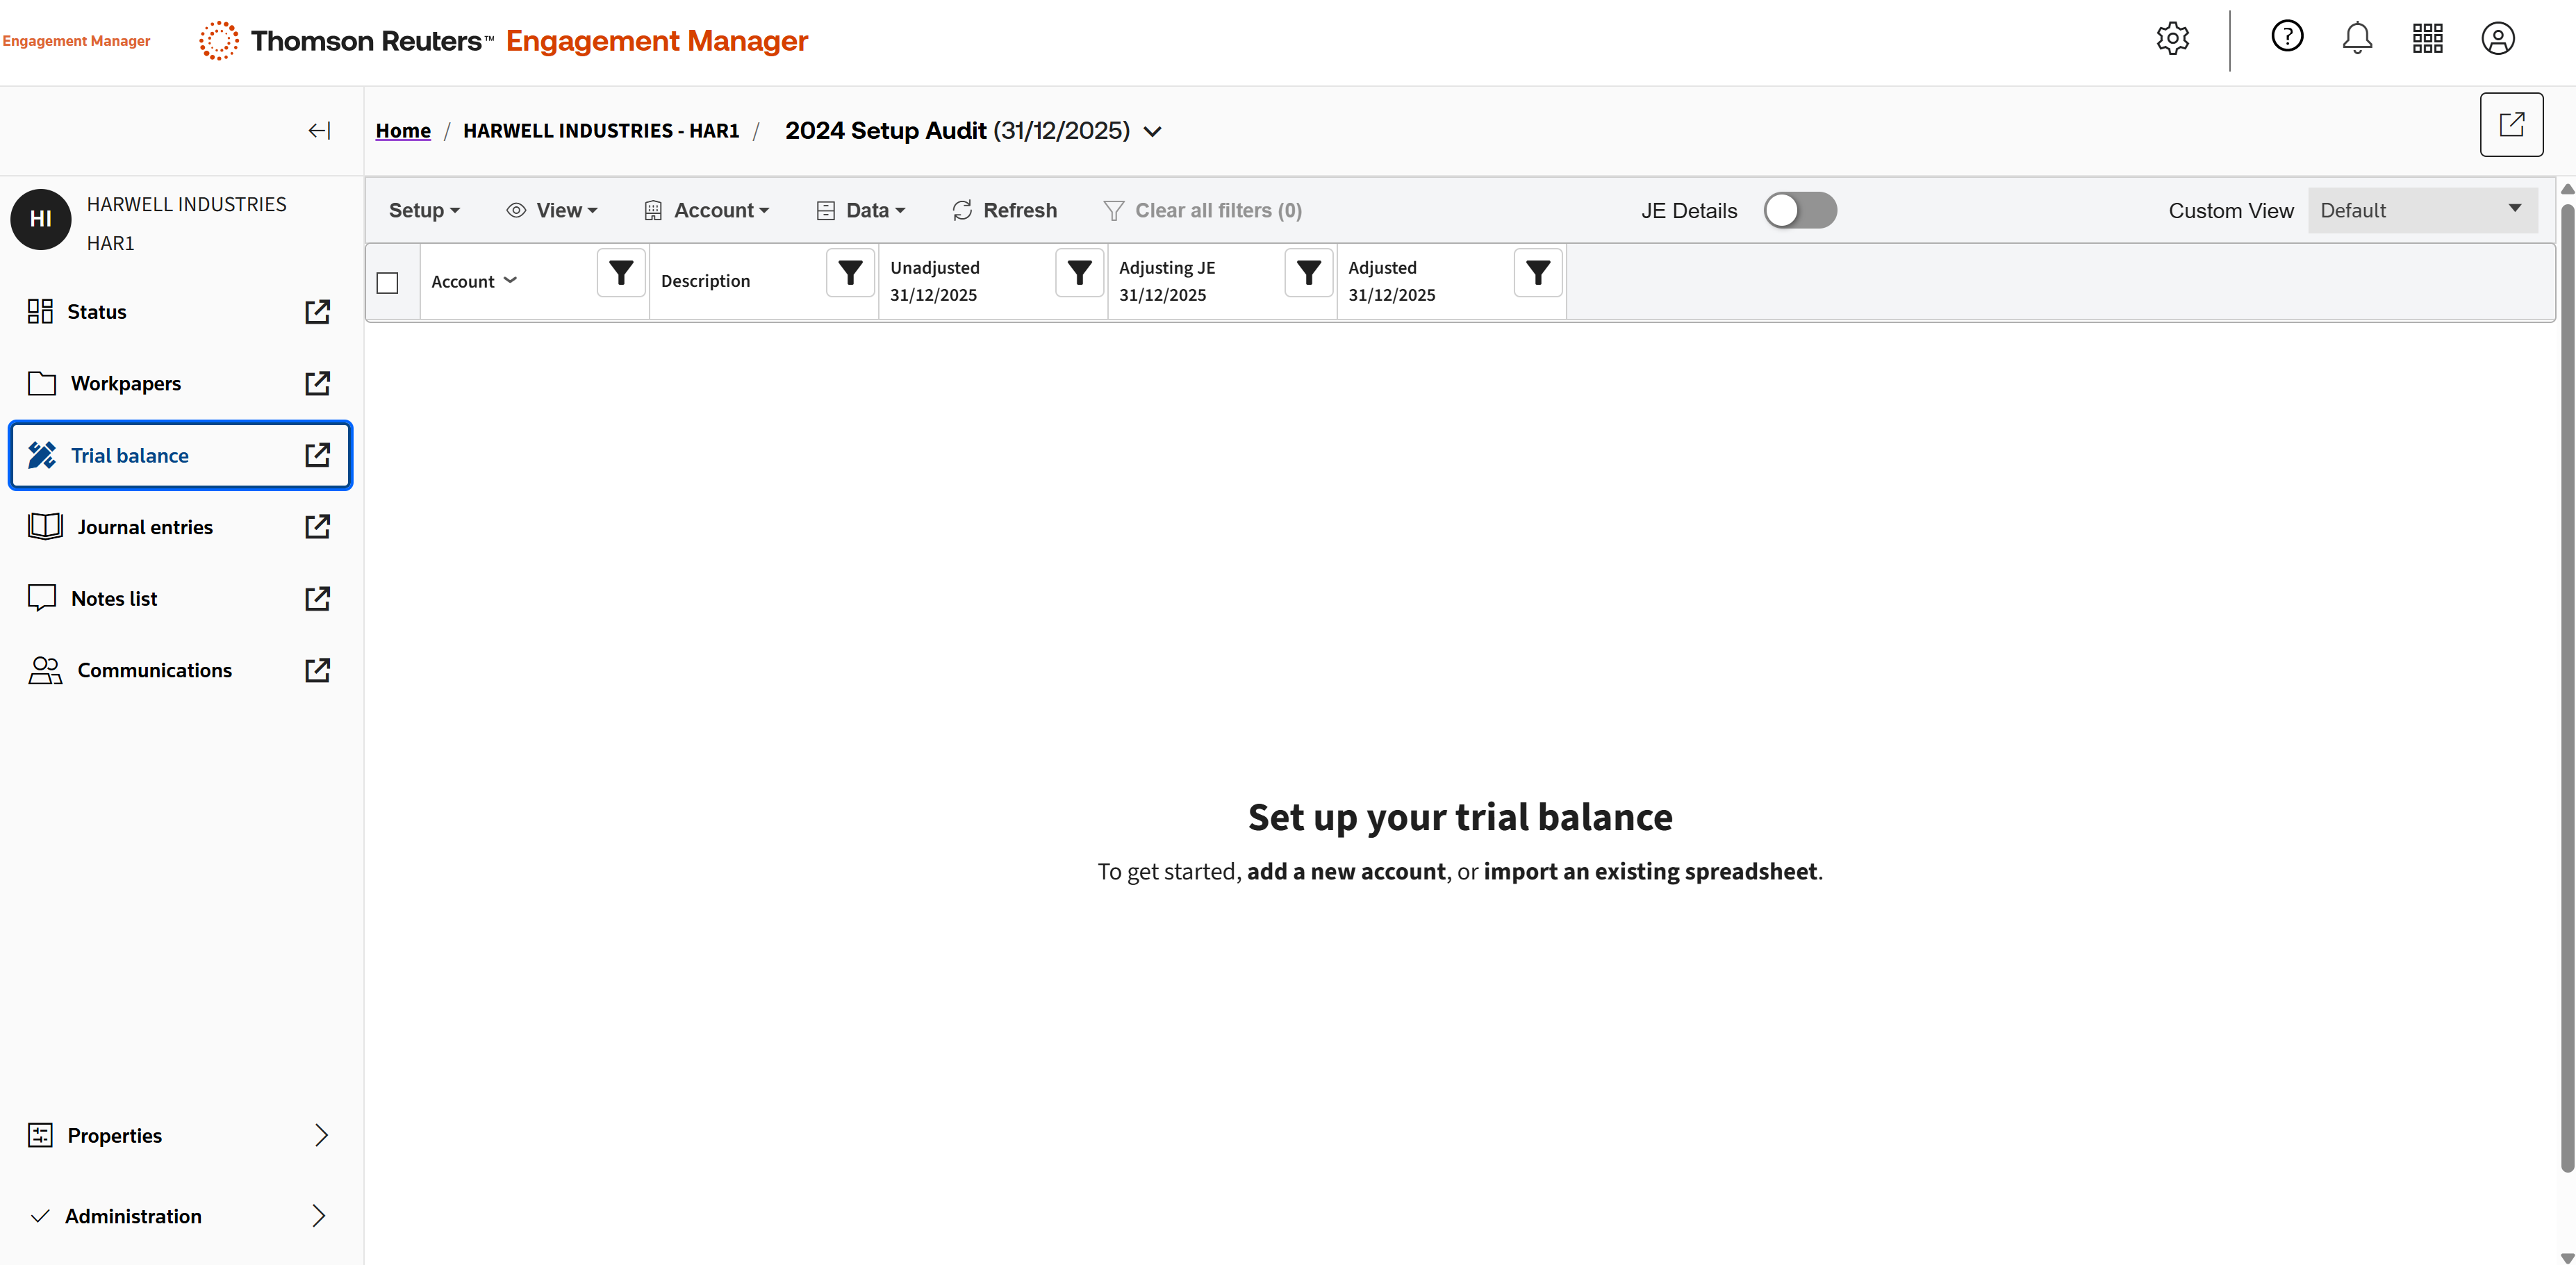
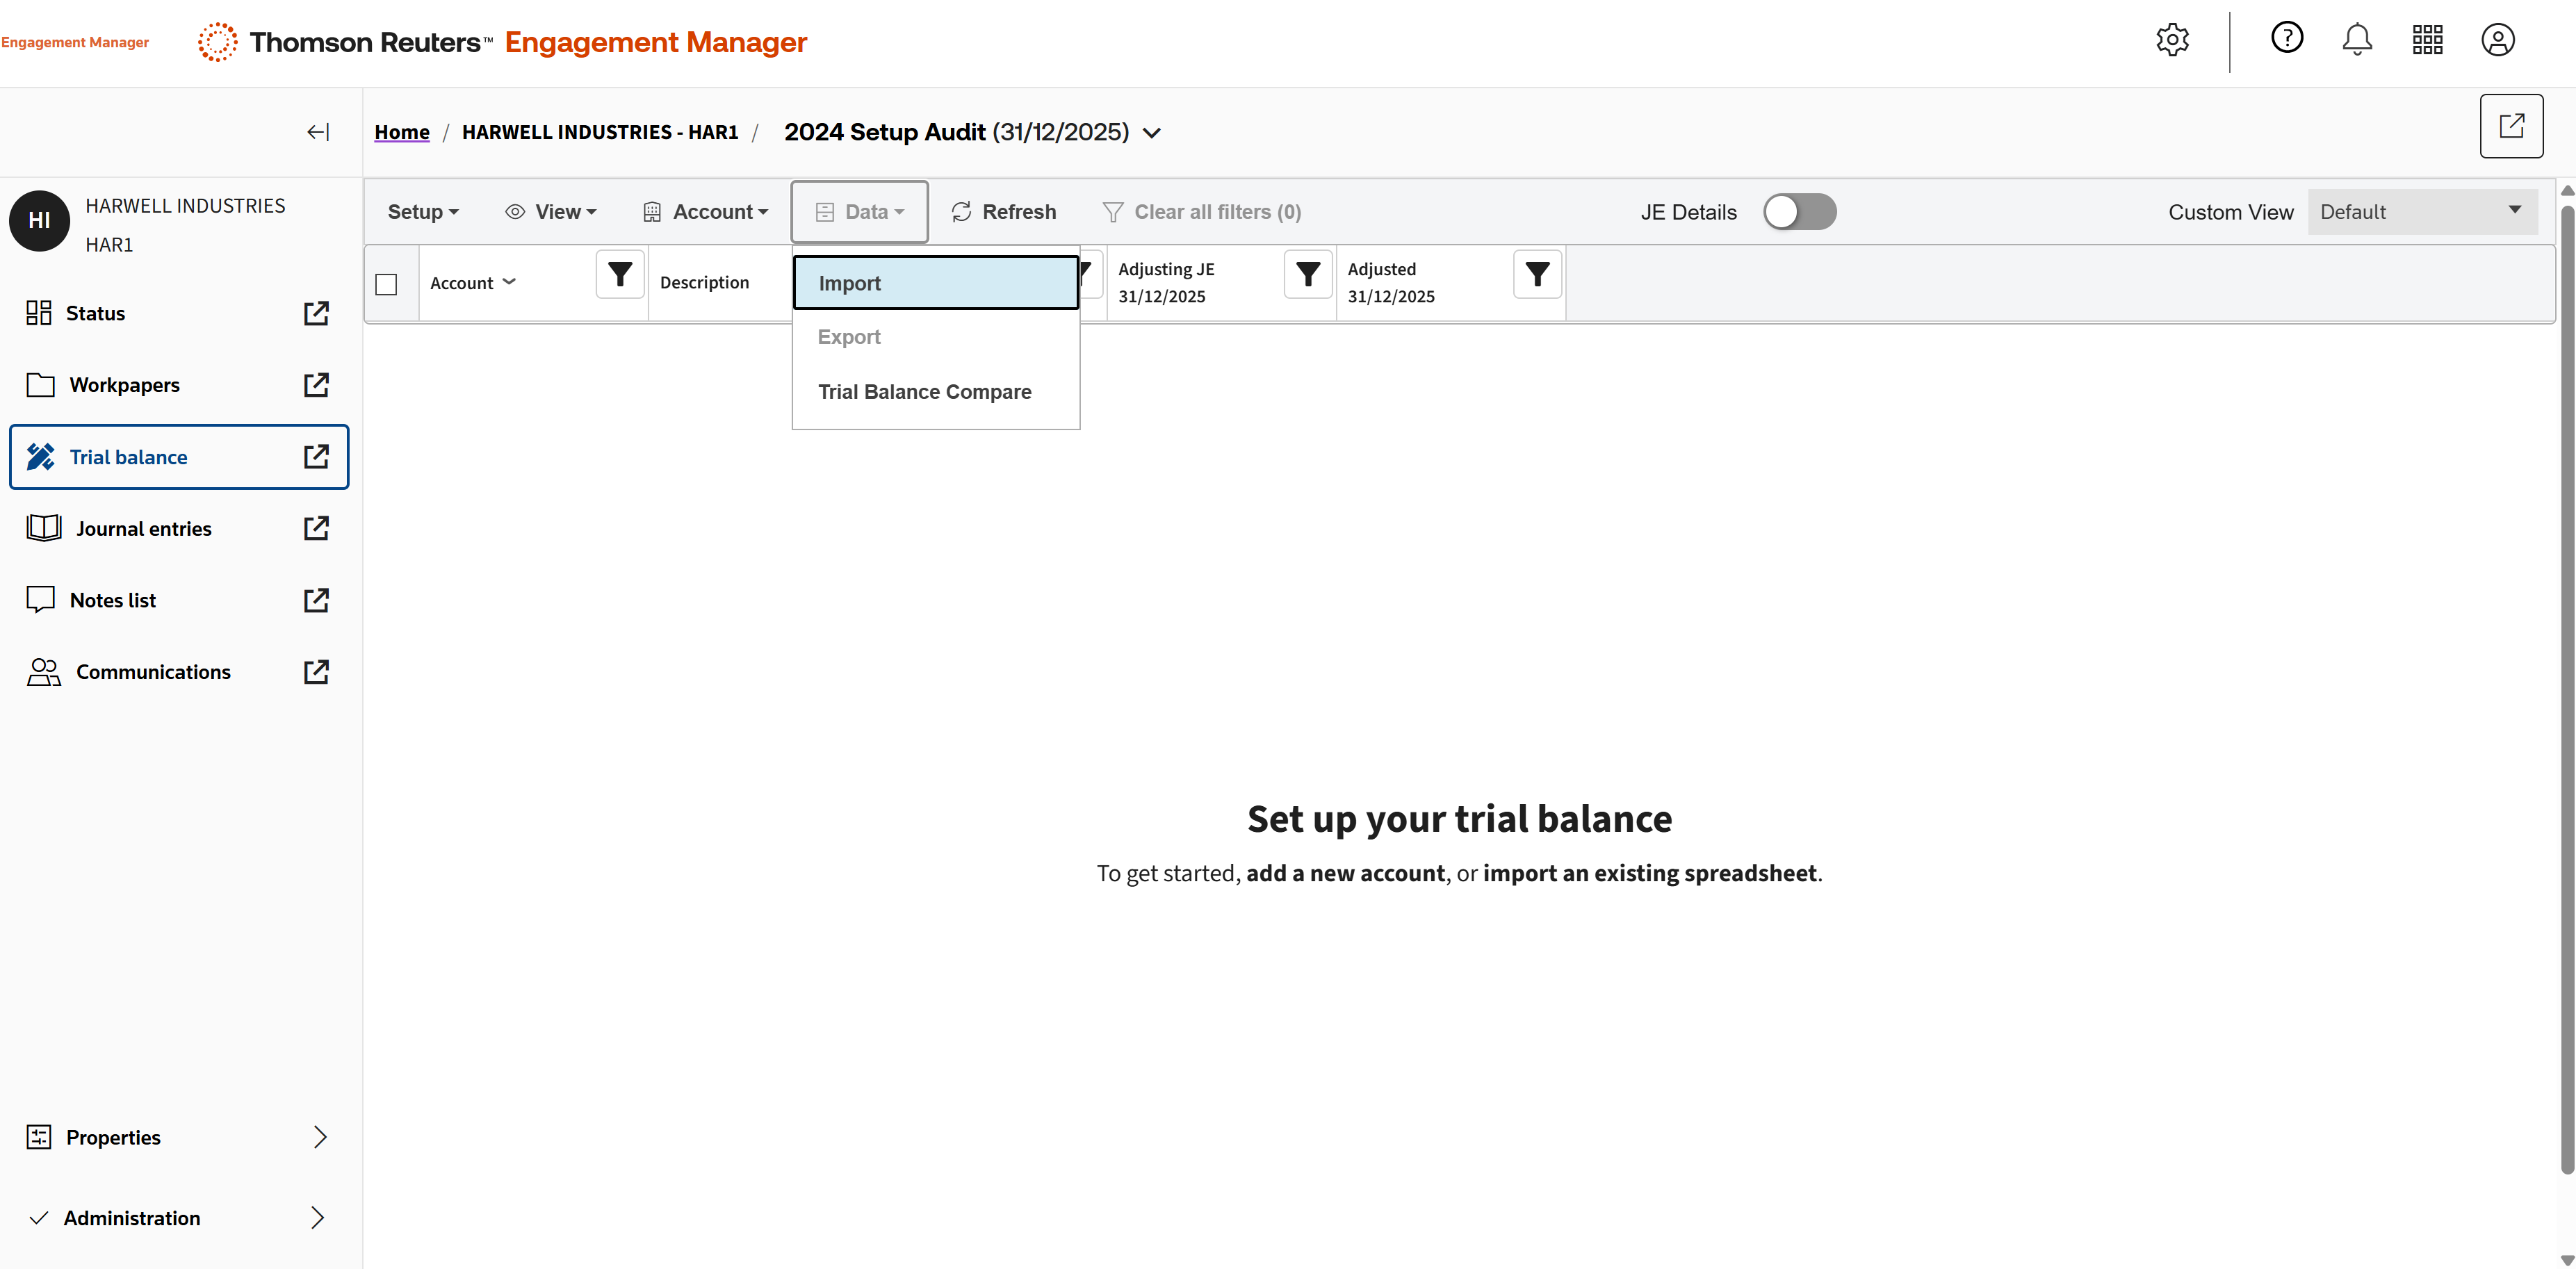
The trial balance can be imported from Excel. For this method, choose Data, then Import. (Alternatively, you can add accounts one at a time, and enter balances and group accounts directly in the Trial balance grid.)
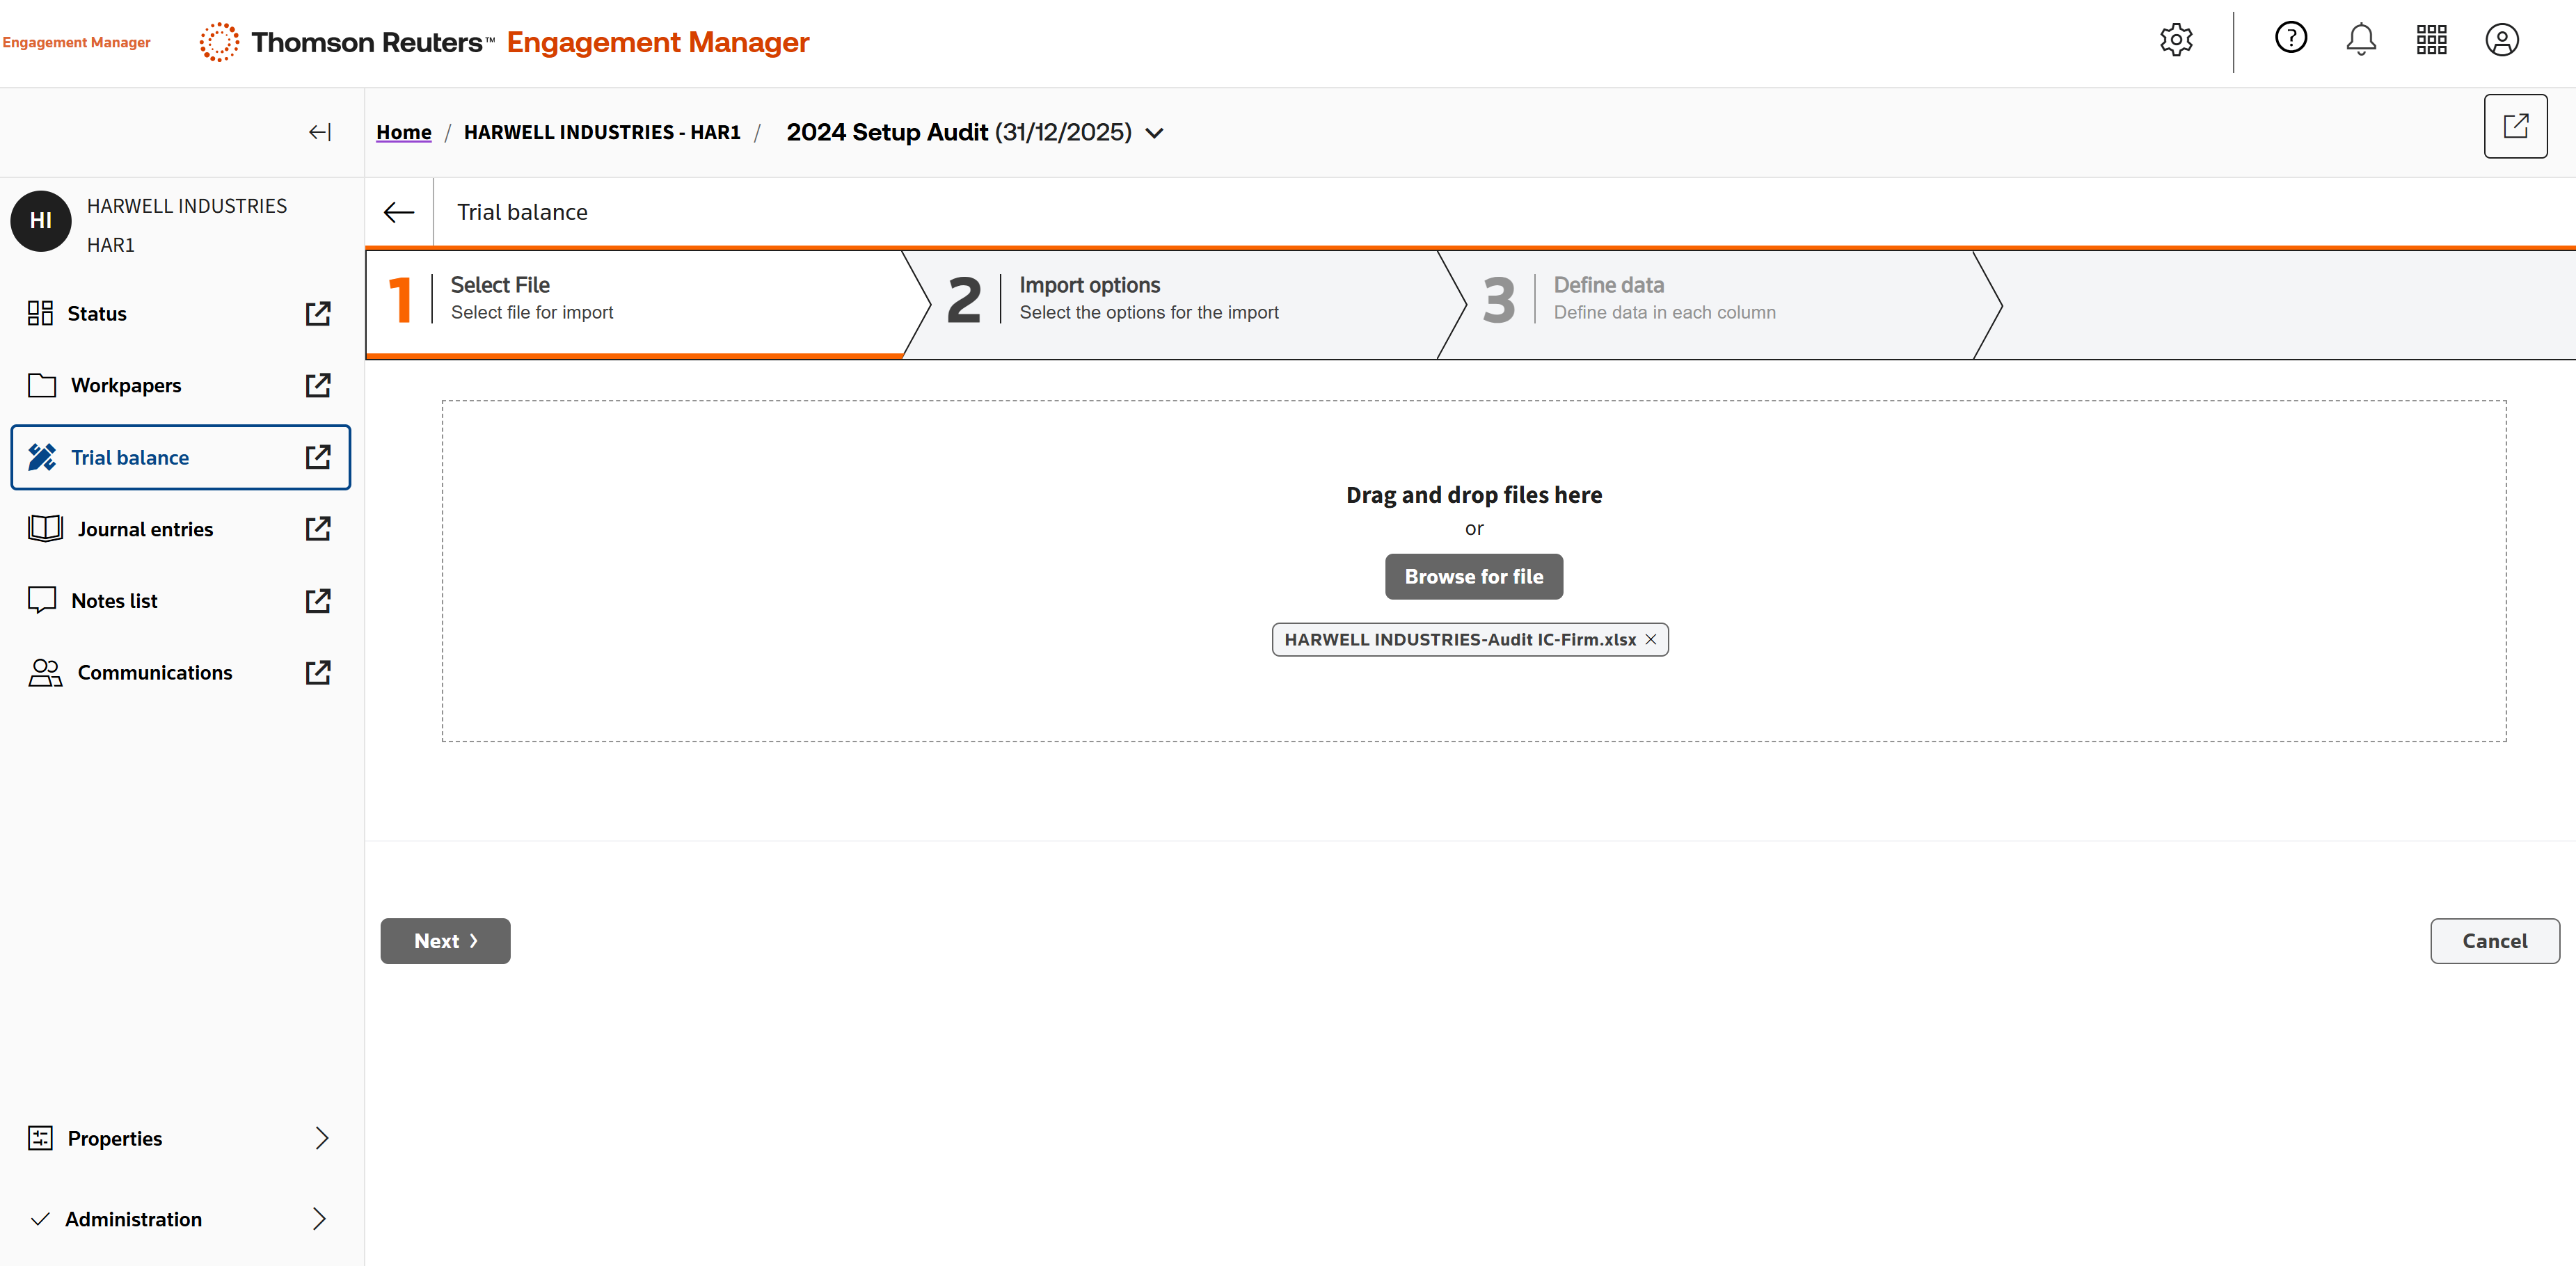
Drag and drop the Excel file here, or click Browse for file and navigate to its location to upload the file.
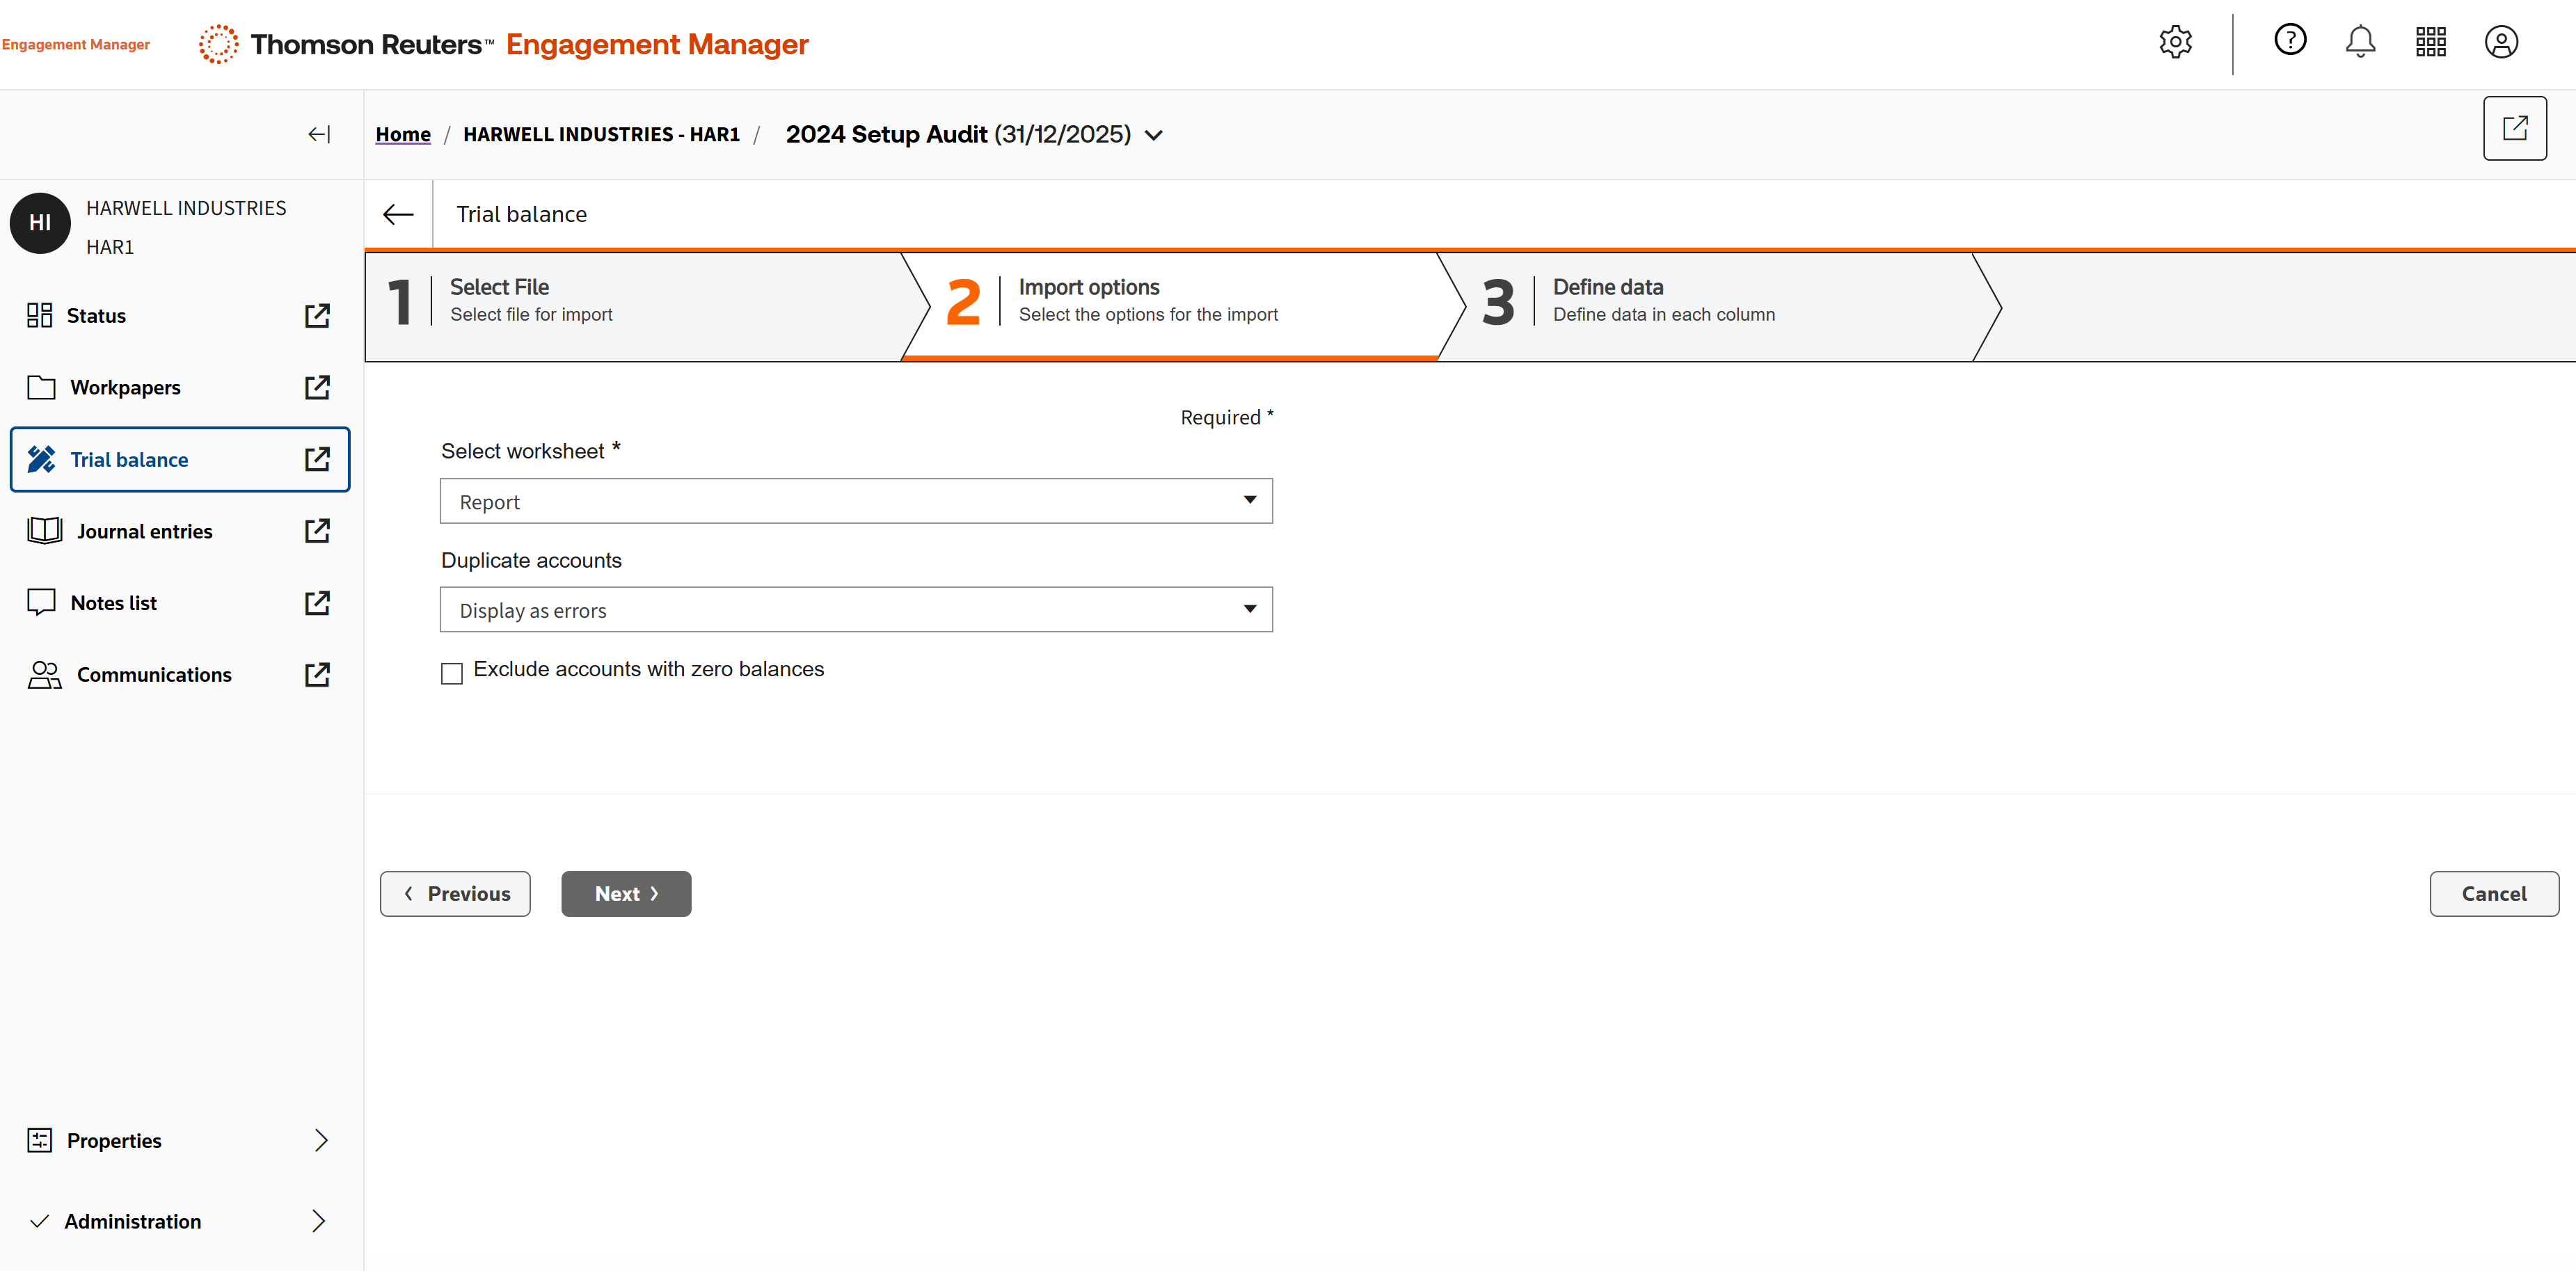
Select Report.
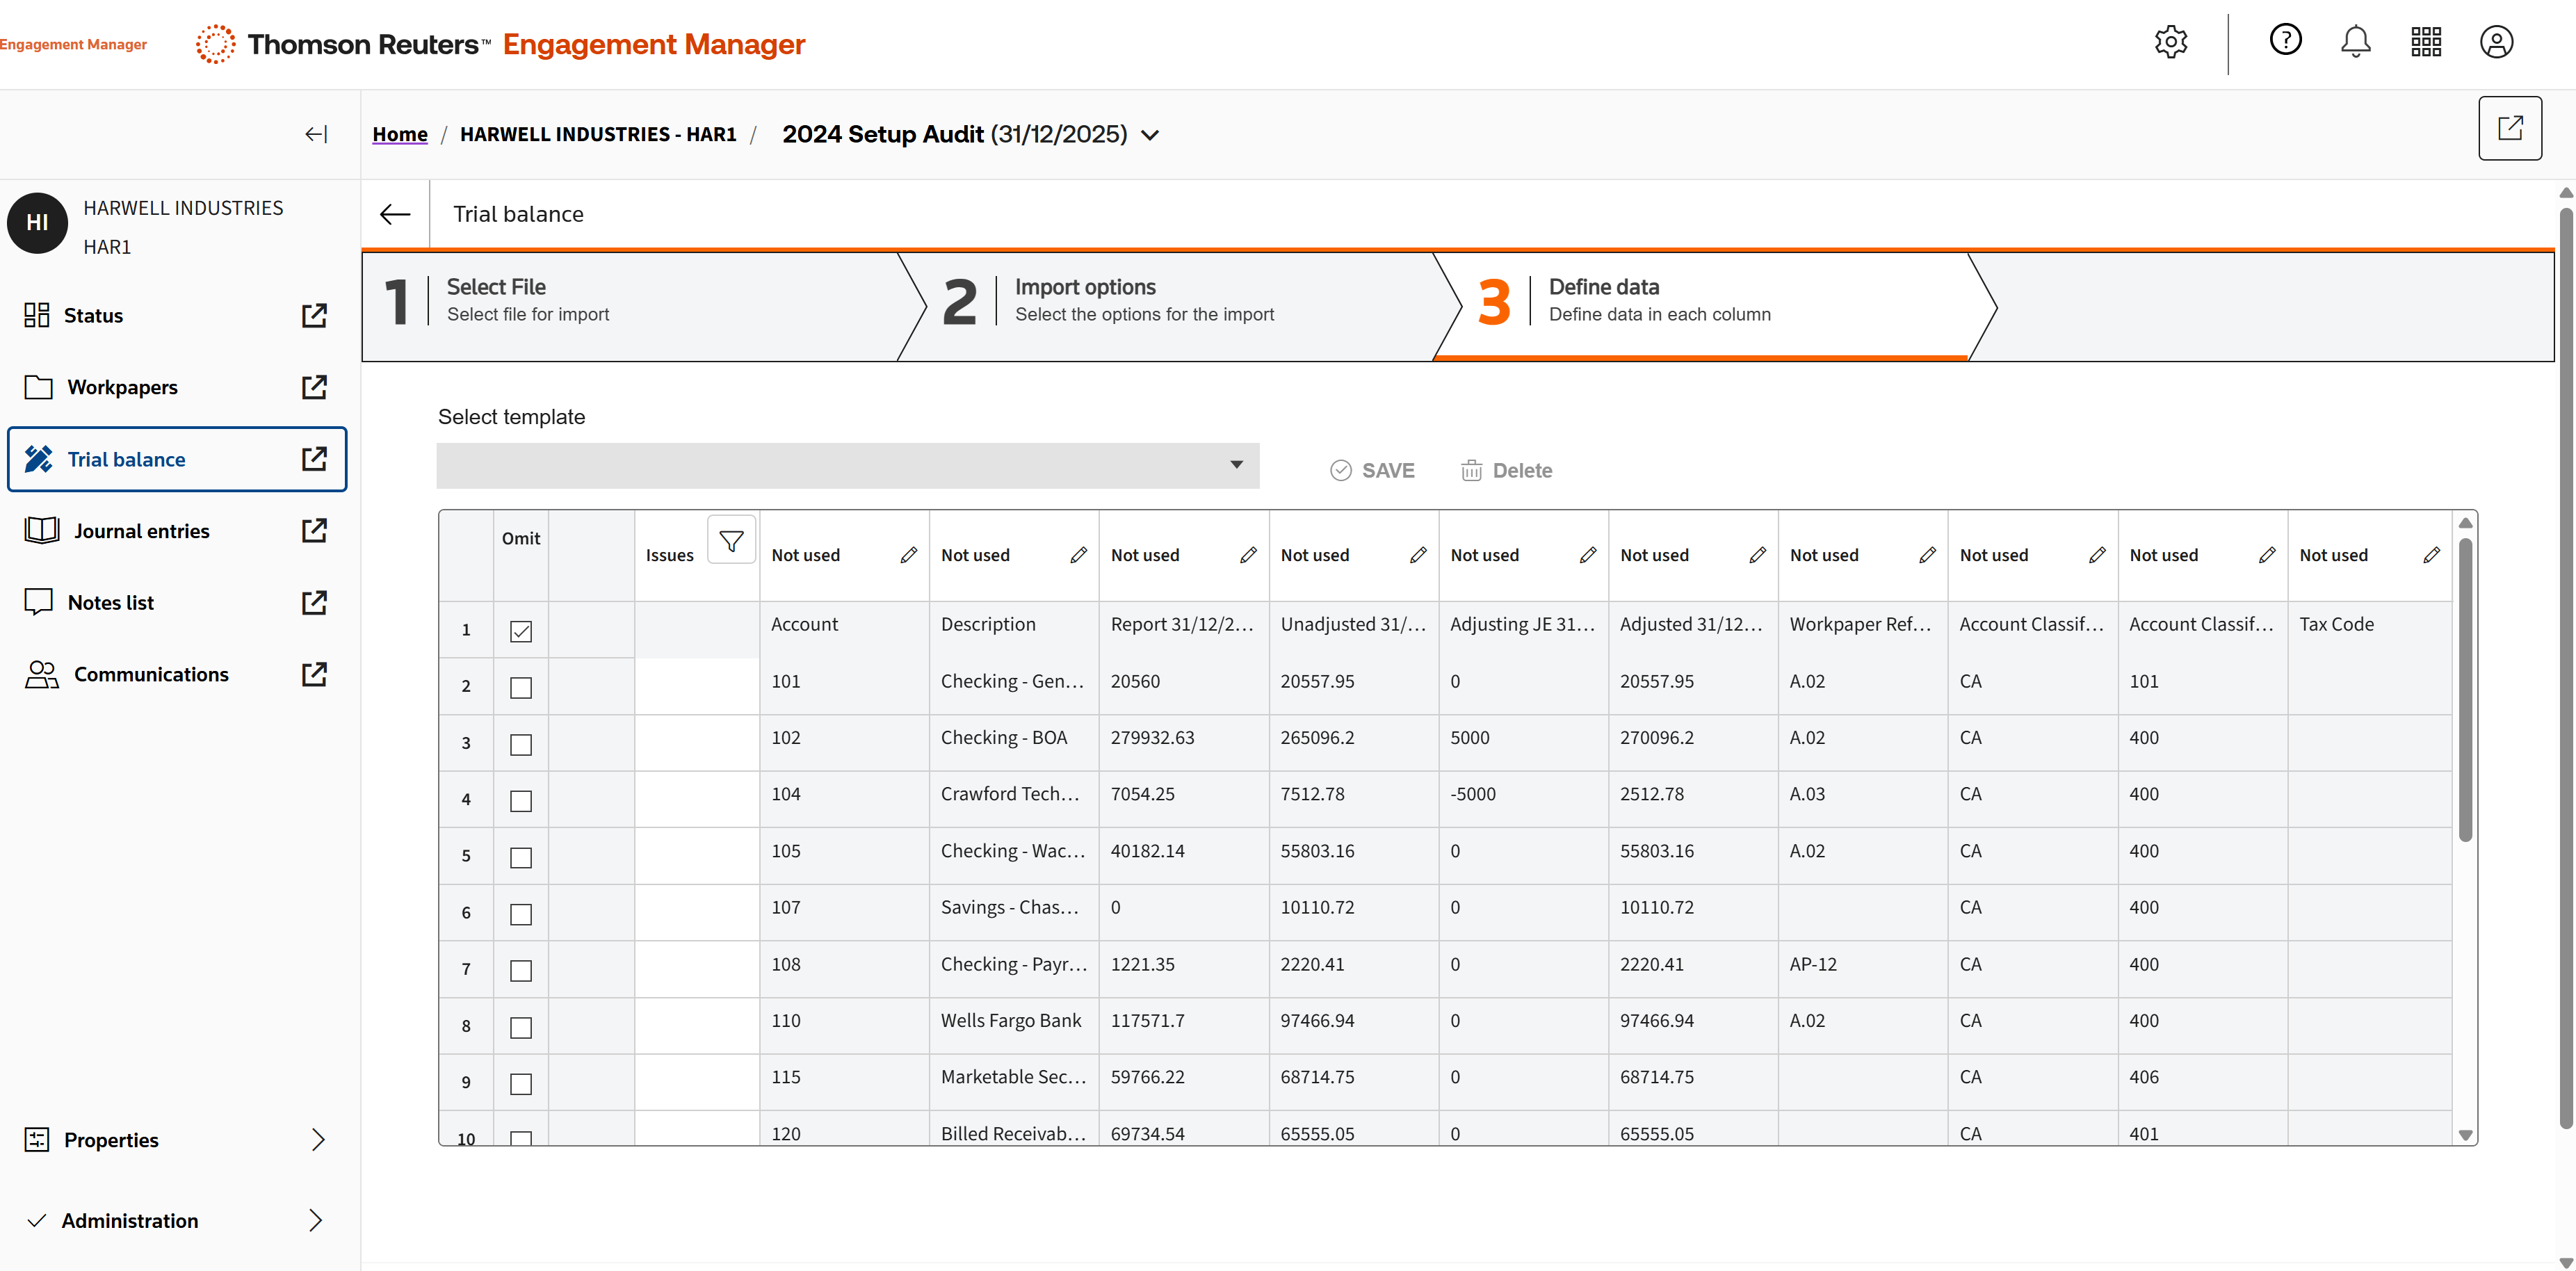
Map the columns you want for your import. (We provide instruction for this step.)
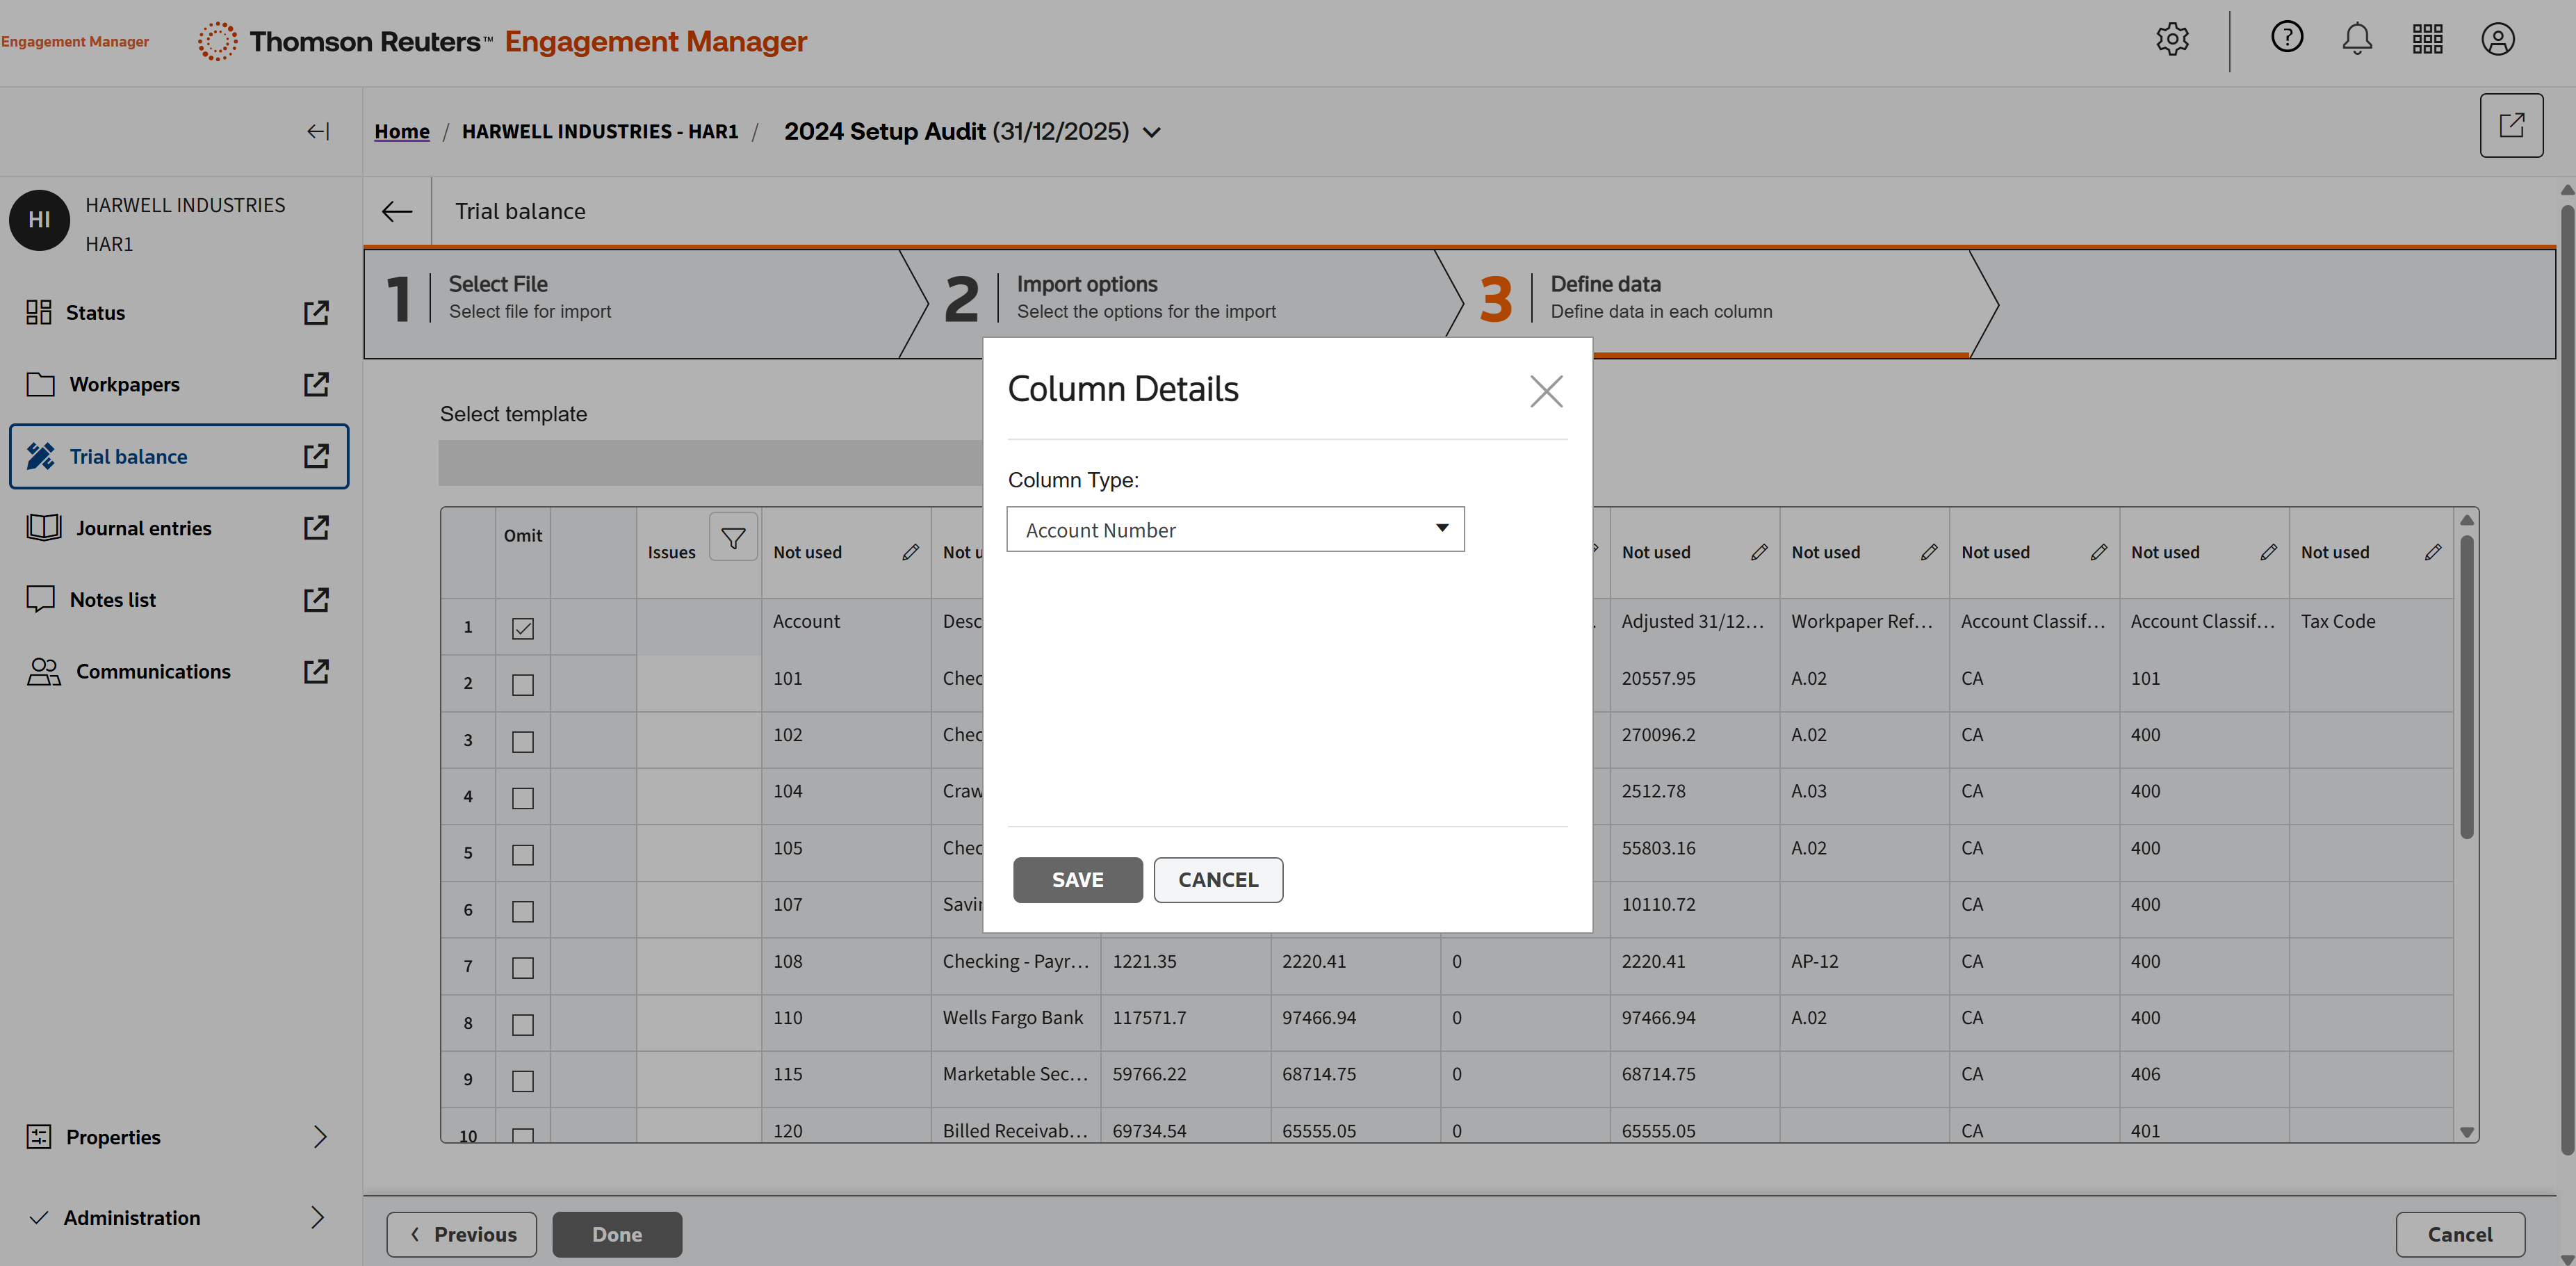
Map Account Number for the first column.
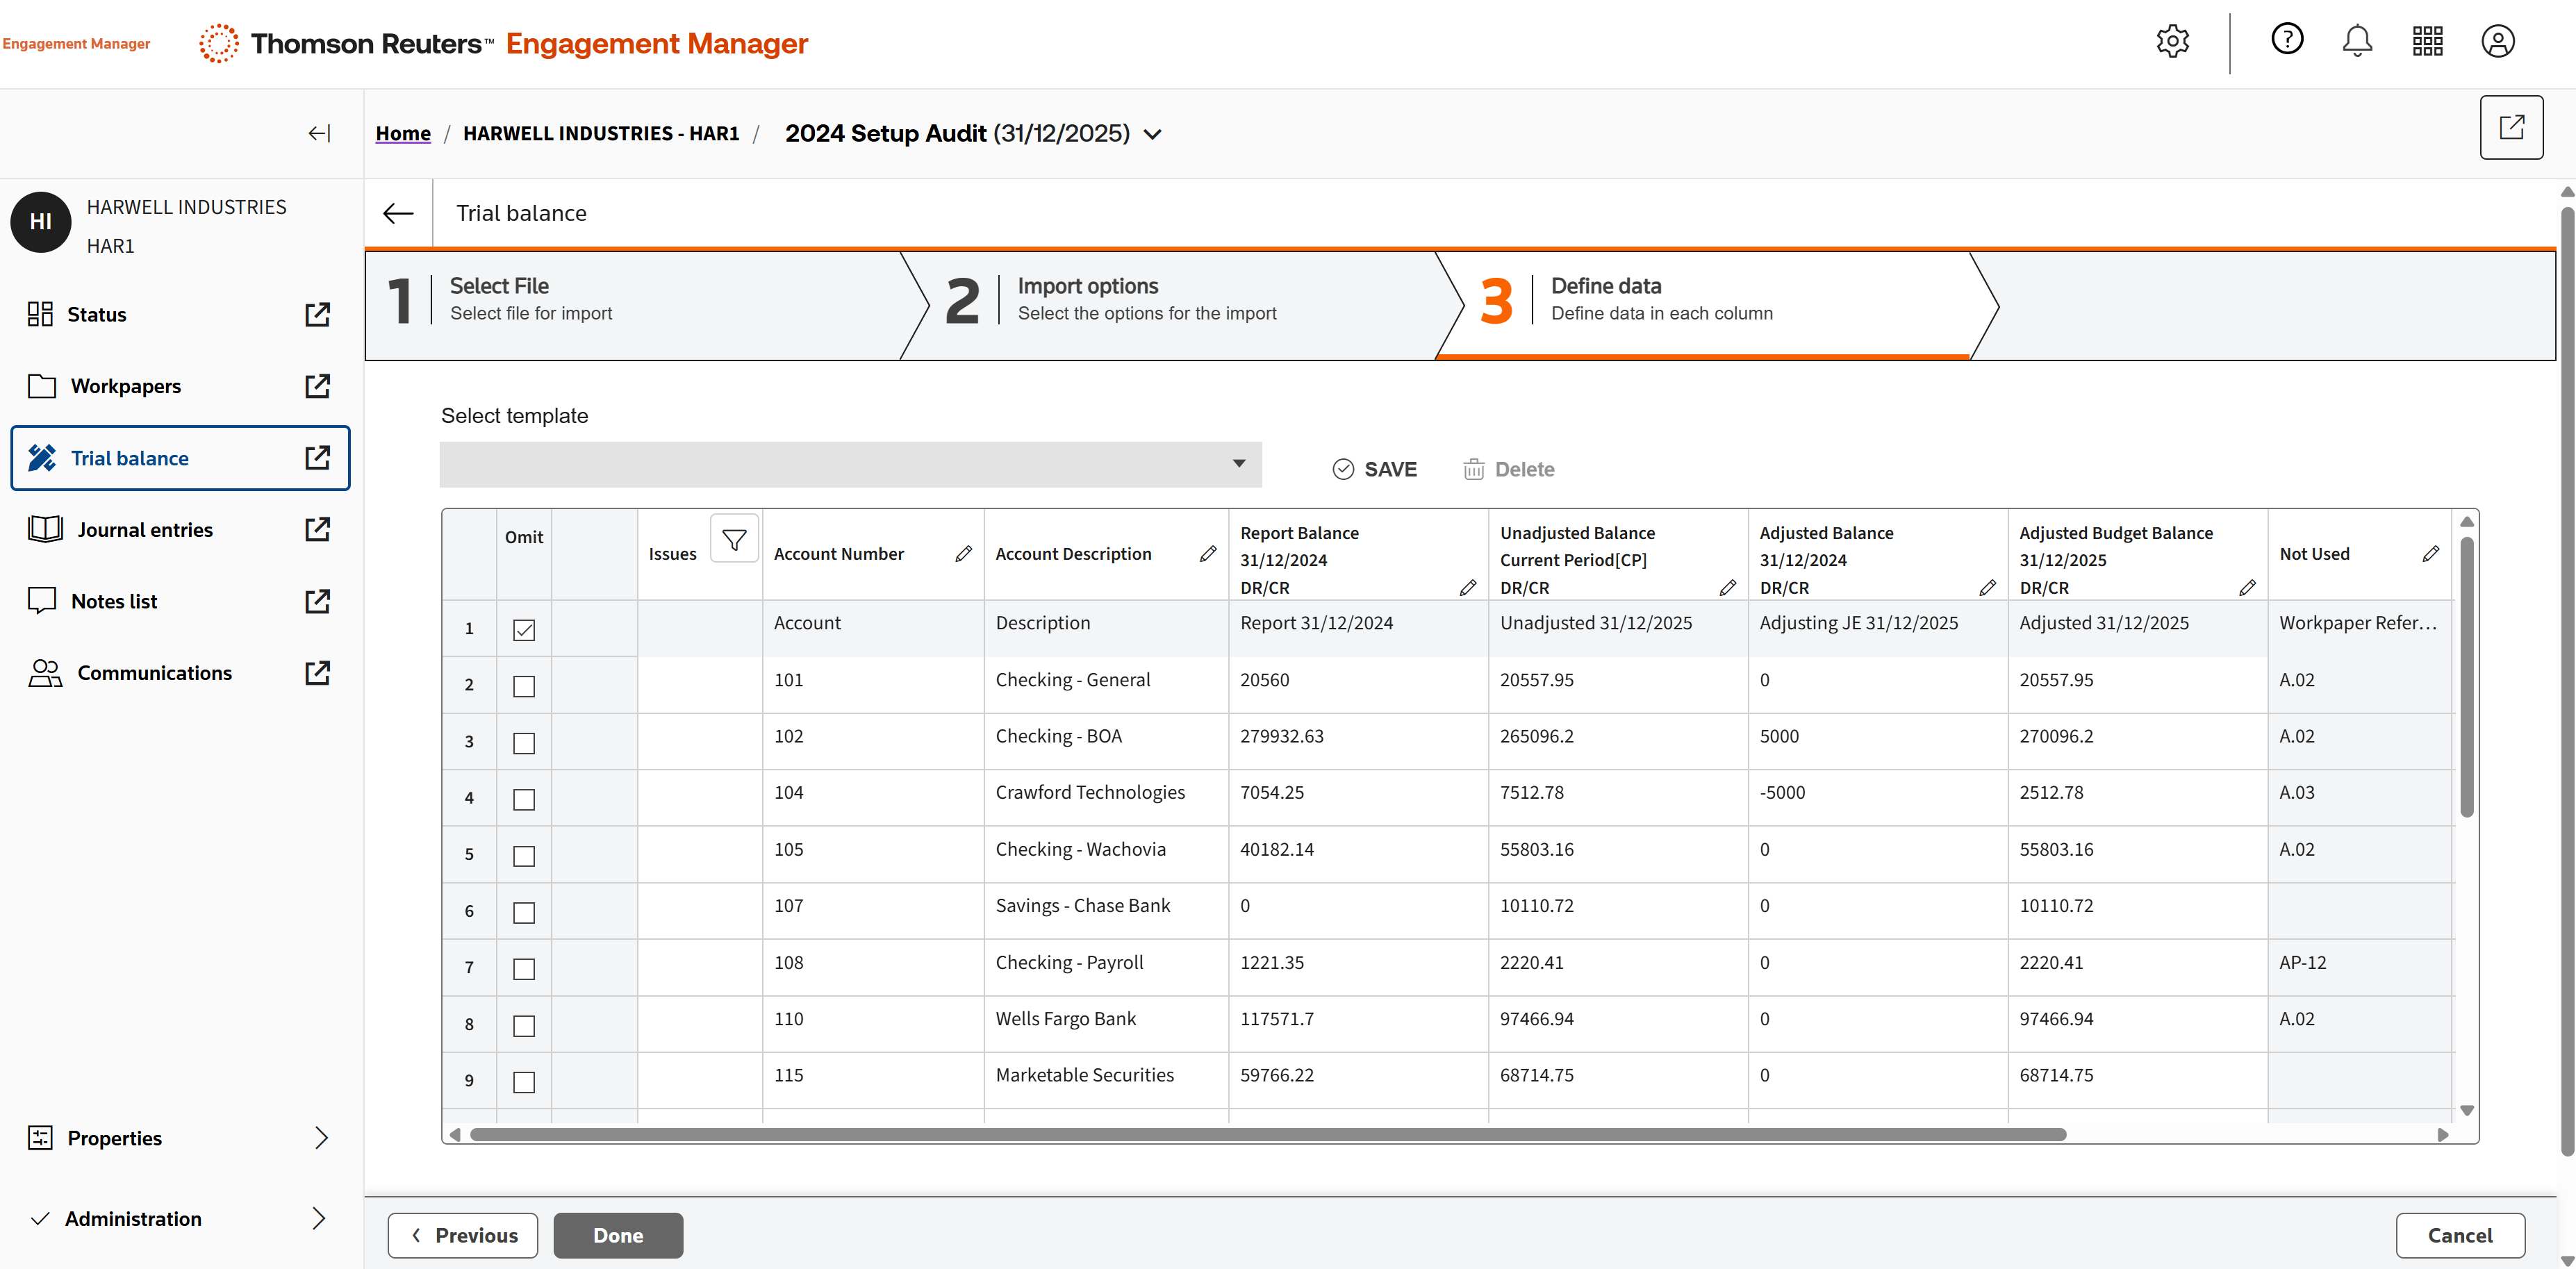
When all columns needed are mapped, click Done.
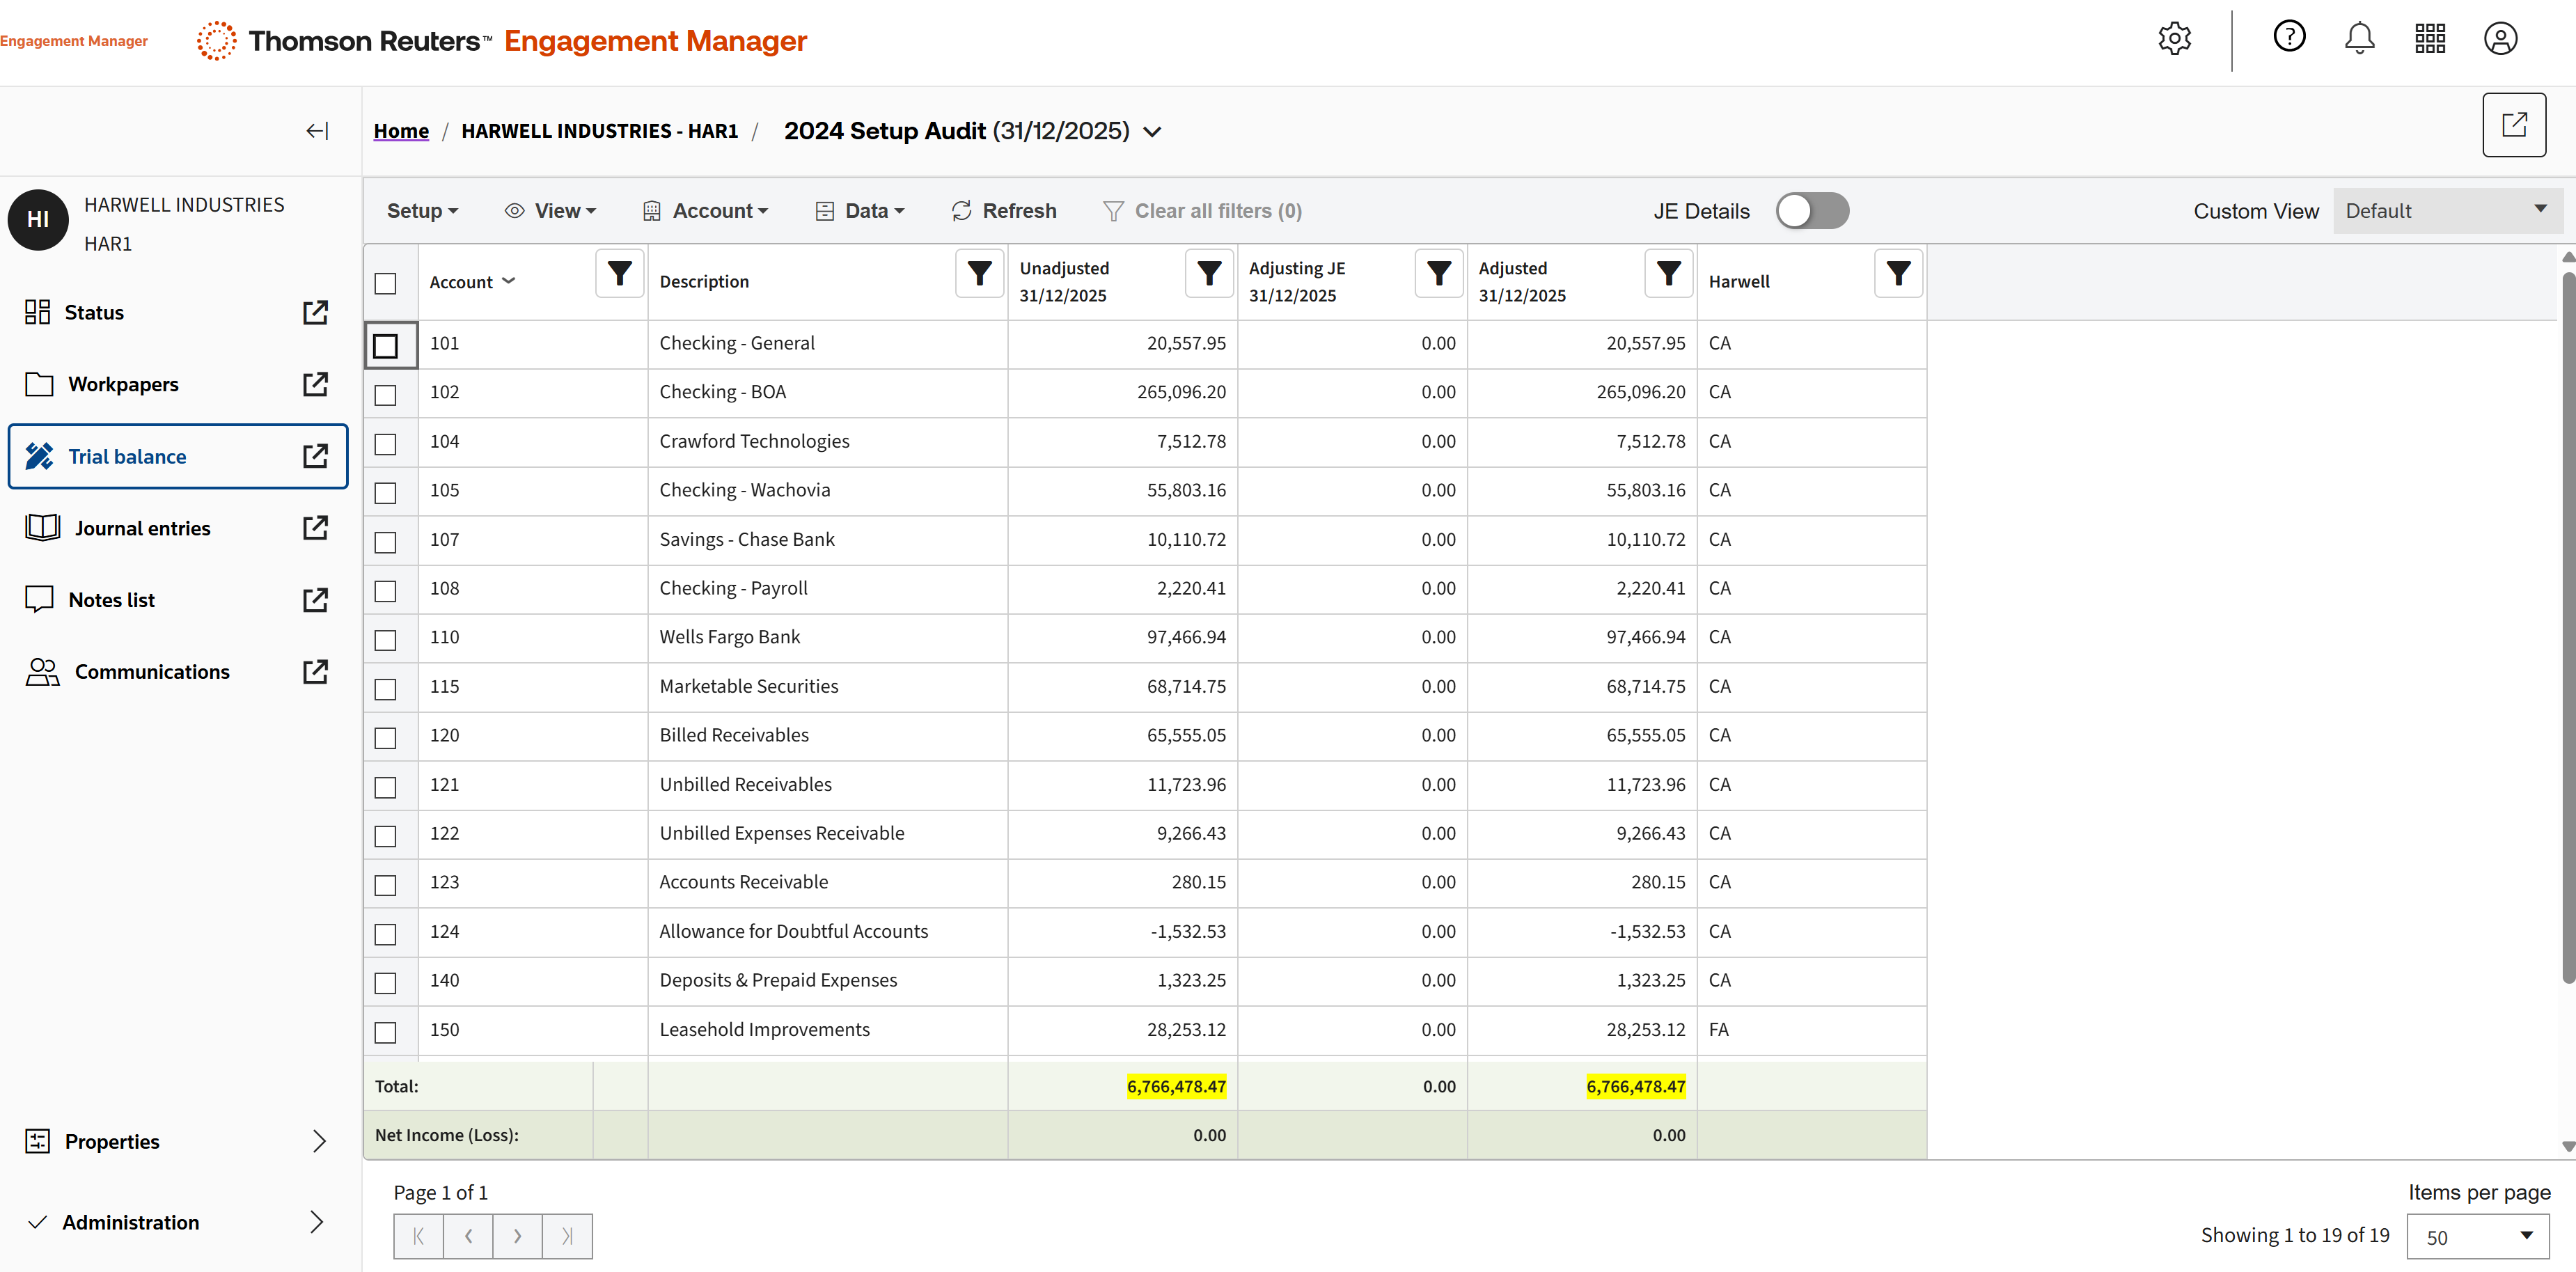
The file has been imported into the trial balance. Even with large imports, this process takes seconds.
You can filter the trial balance data as needed.
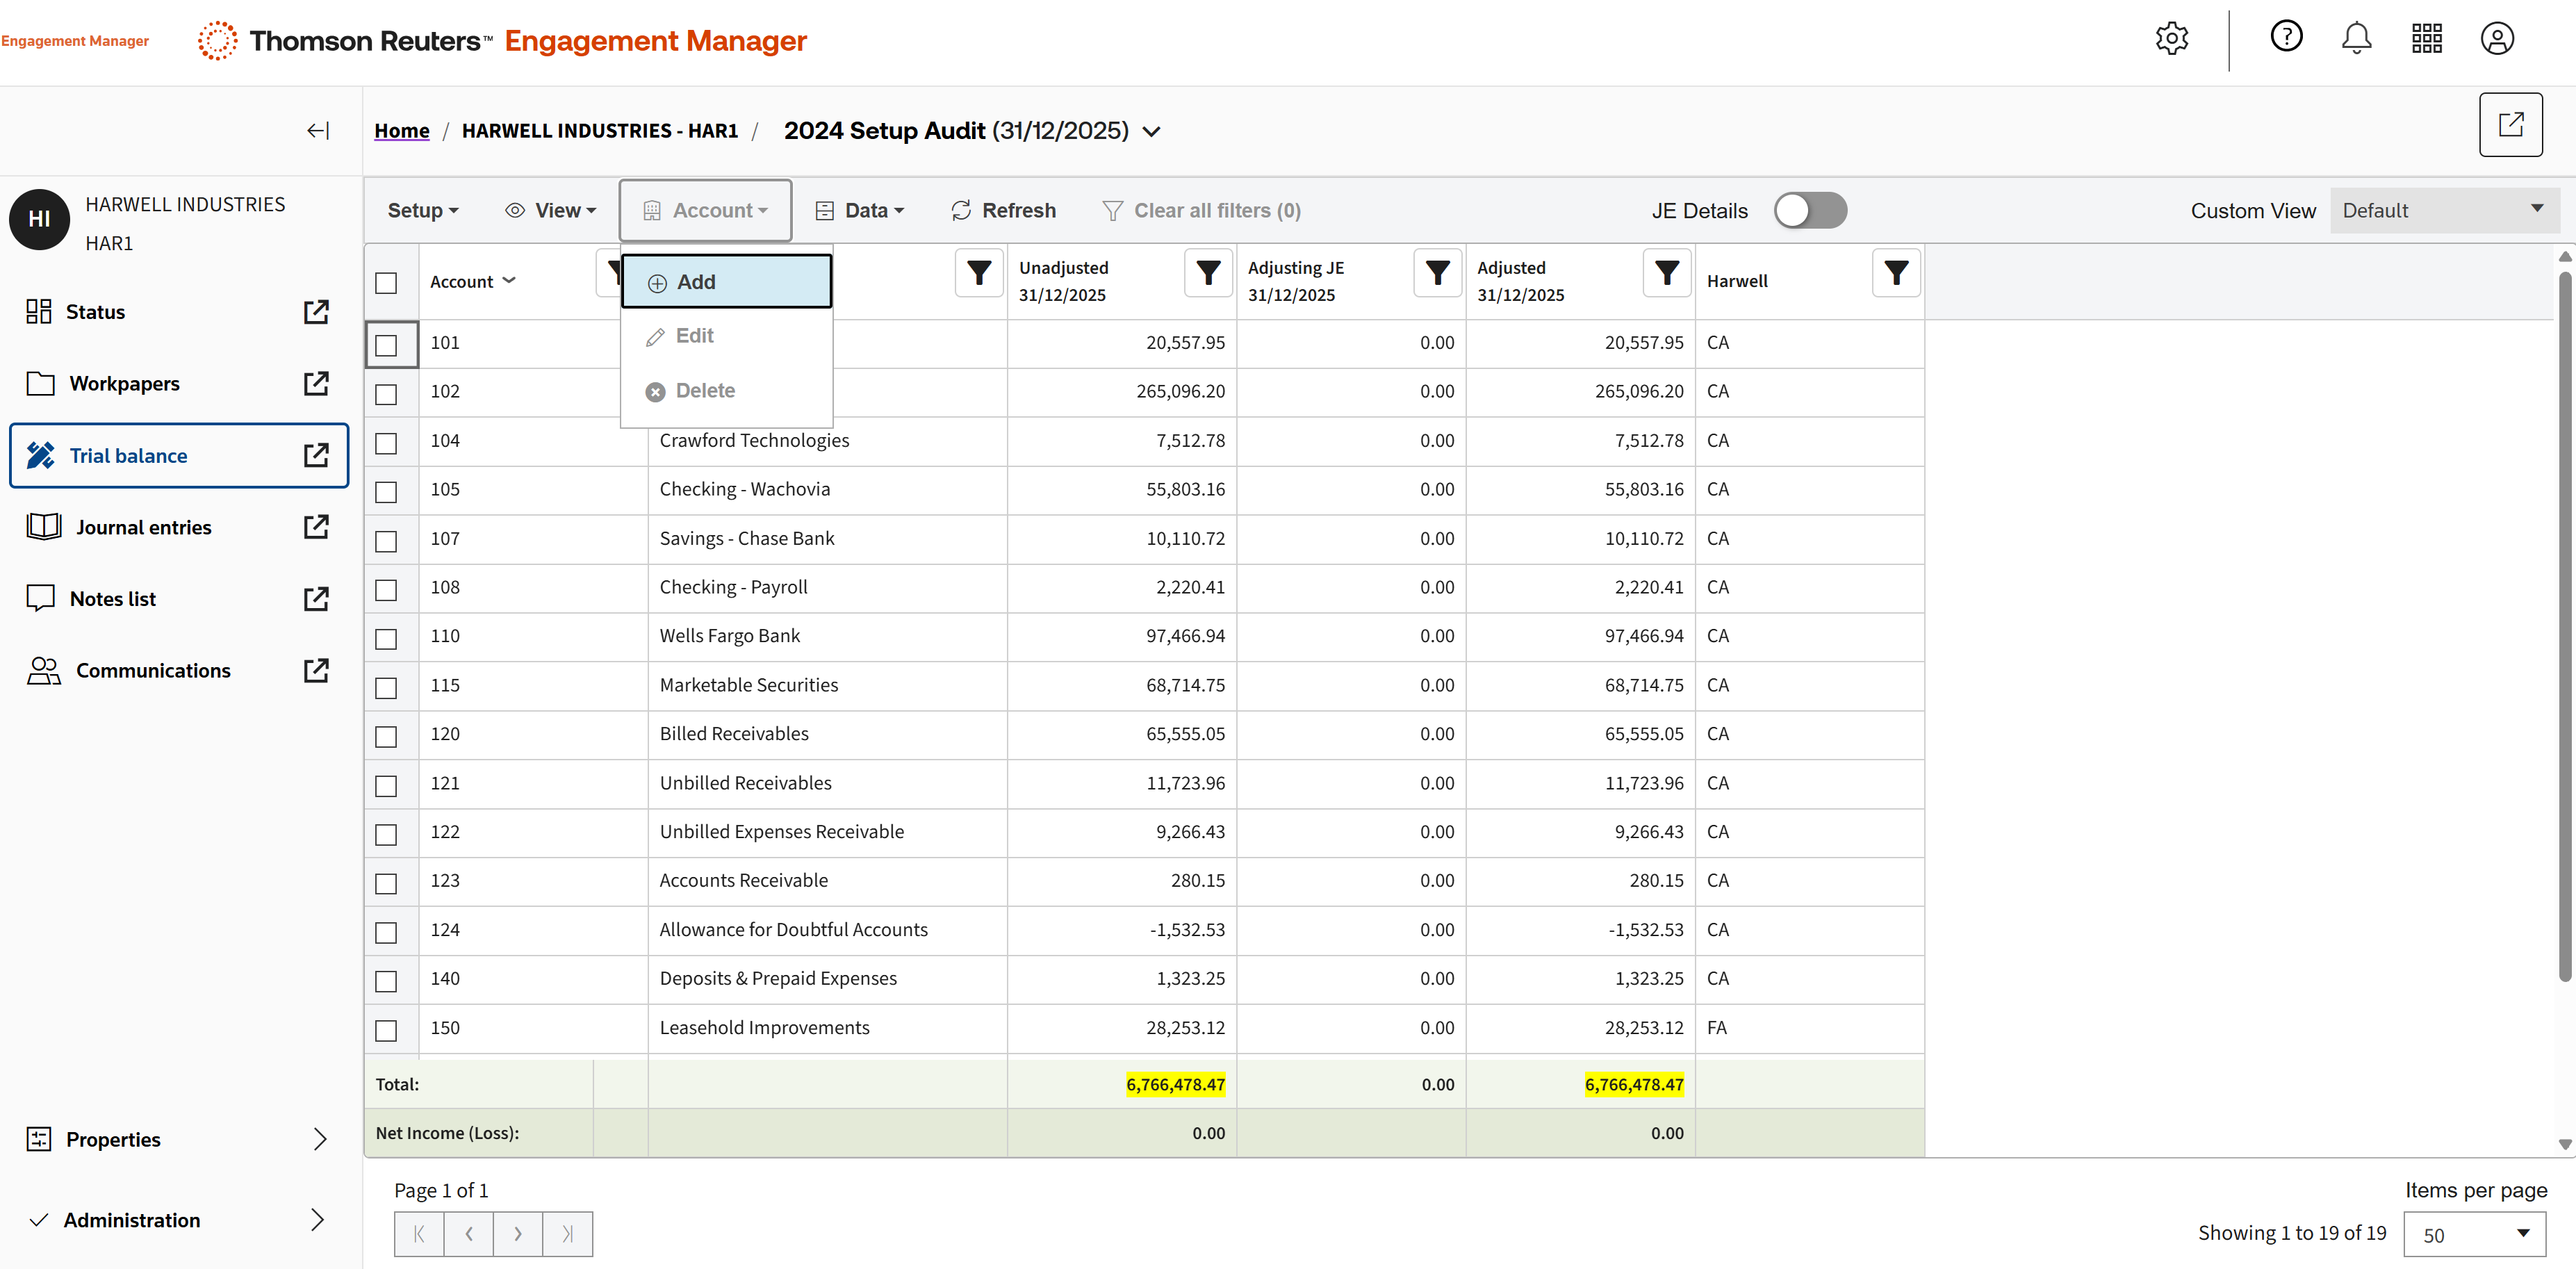
If you need to manually add accounts, select Account, then Add.
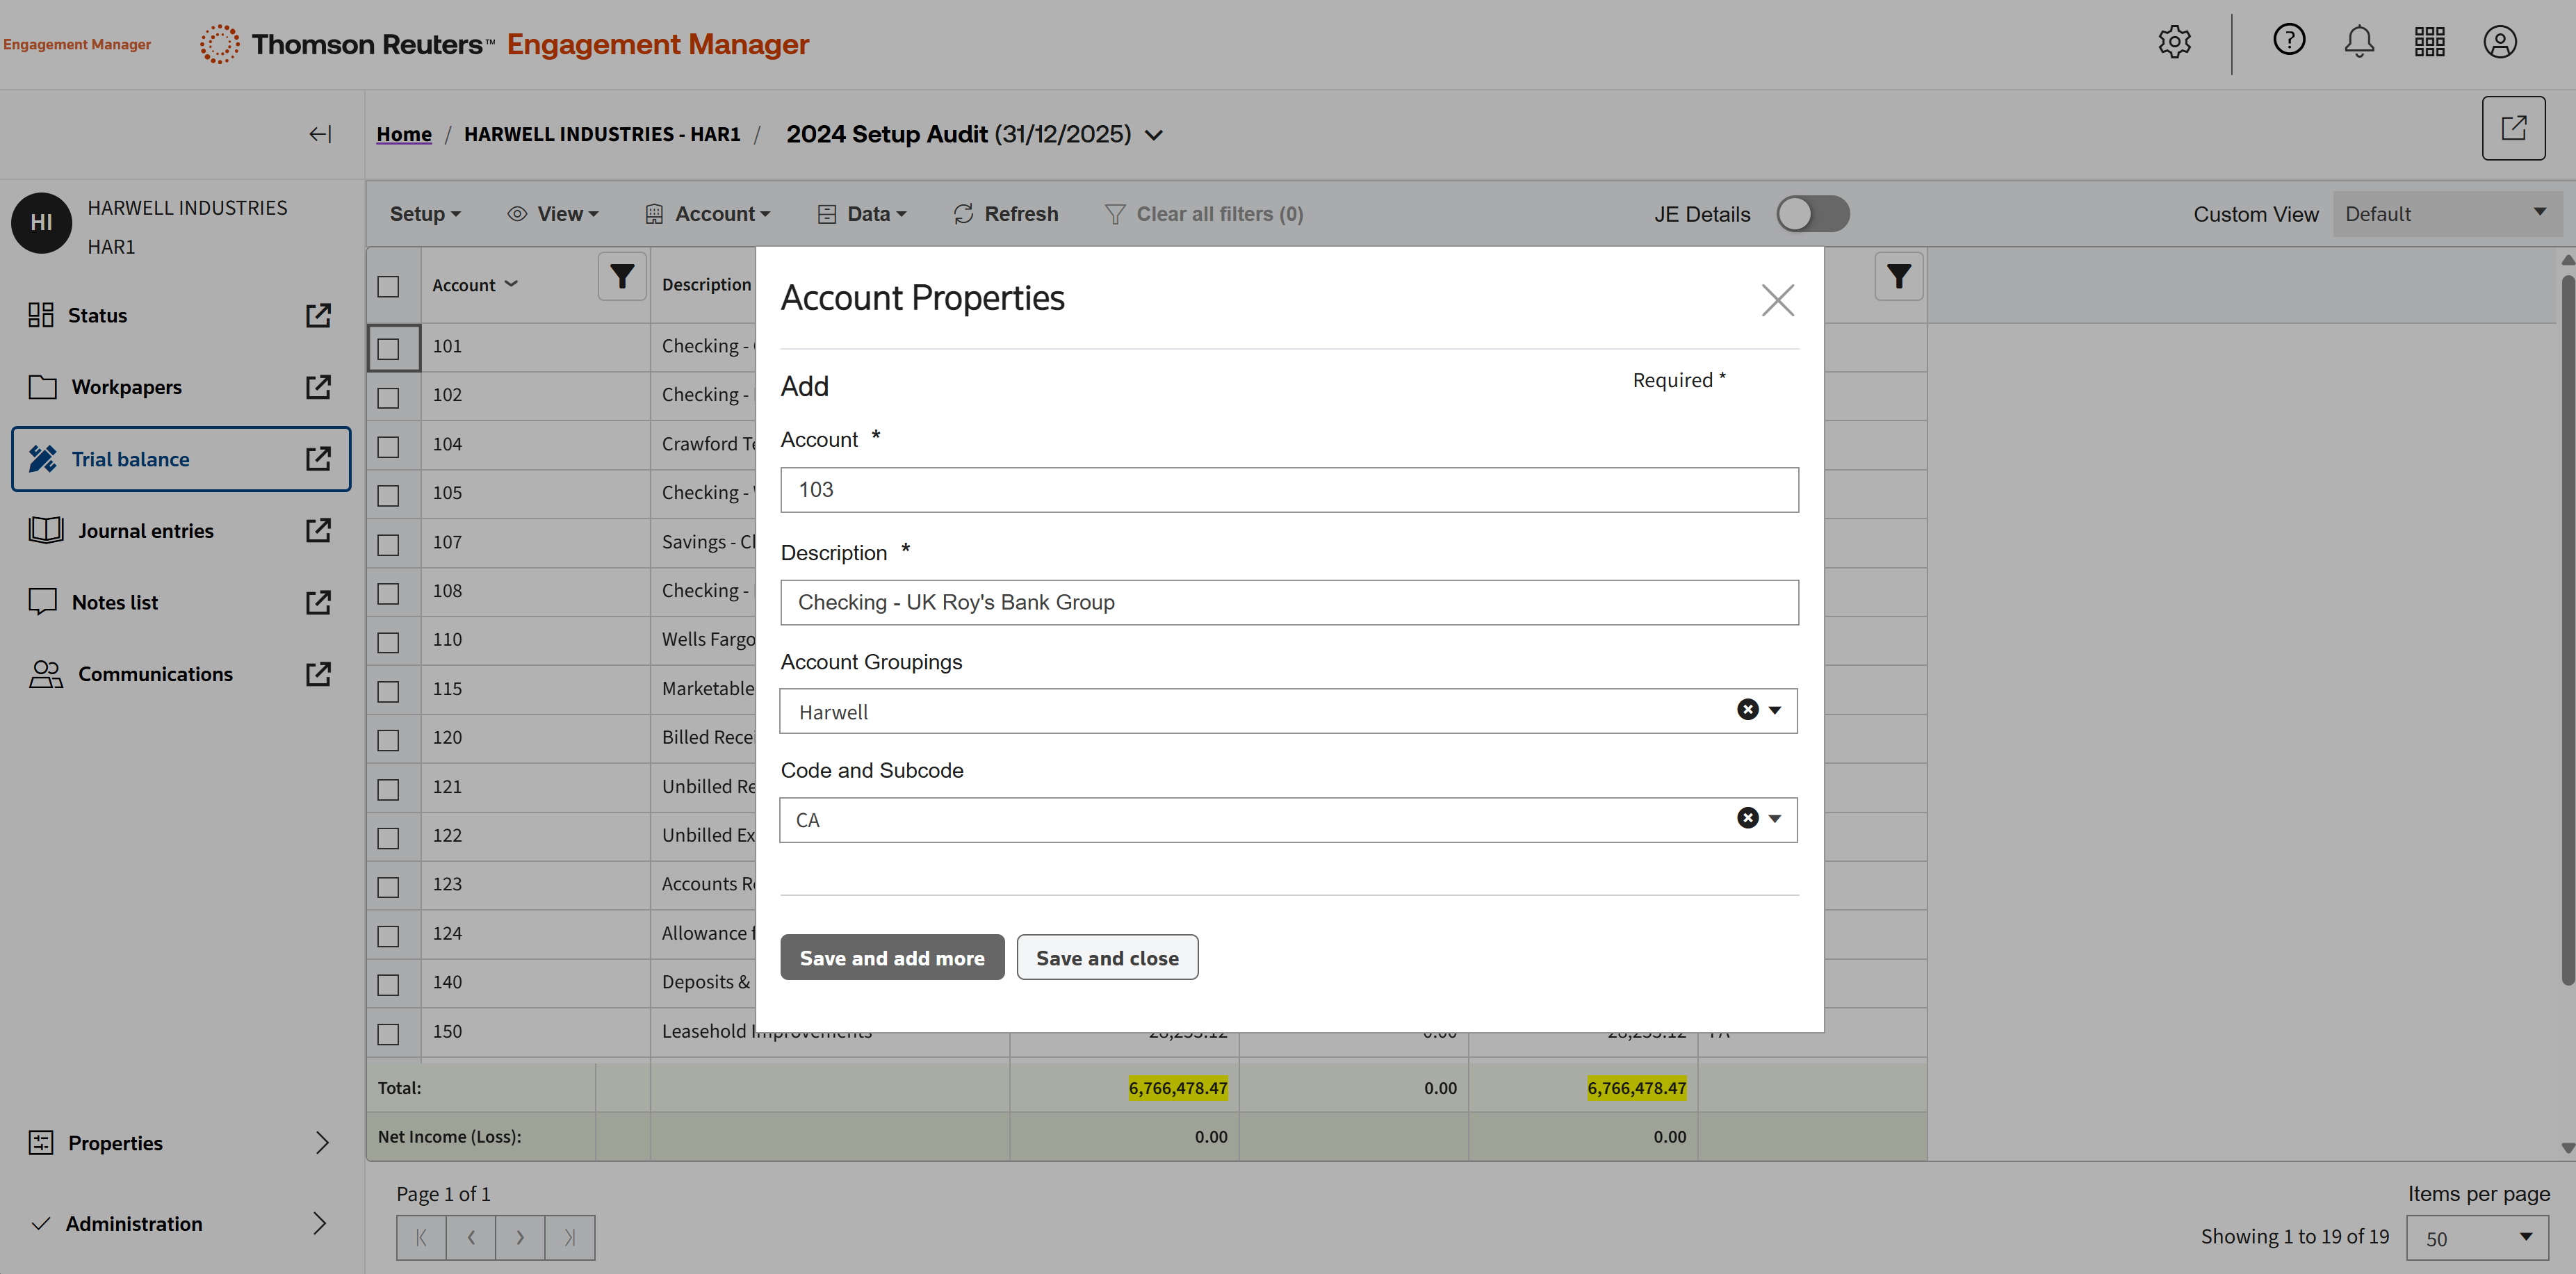
Fill in the account properties, then save.
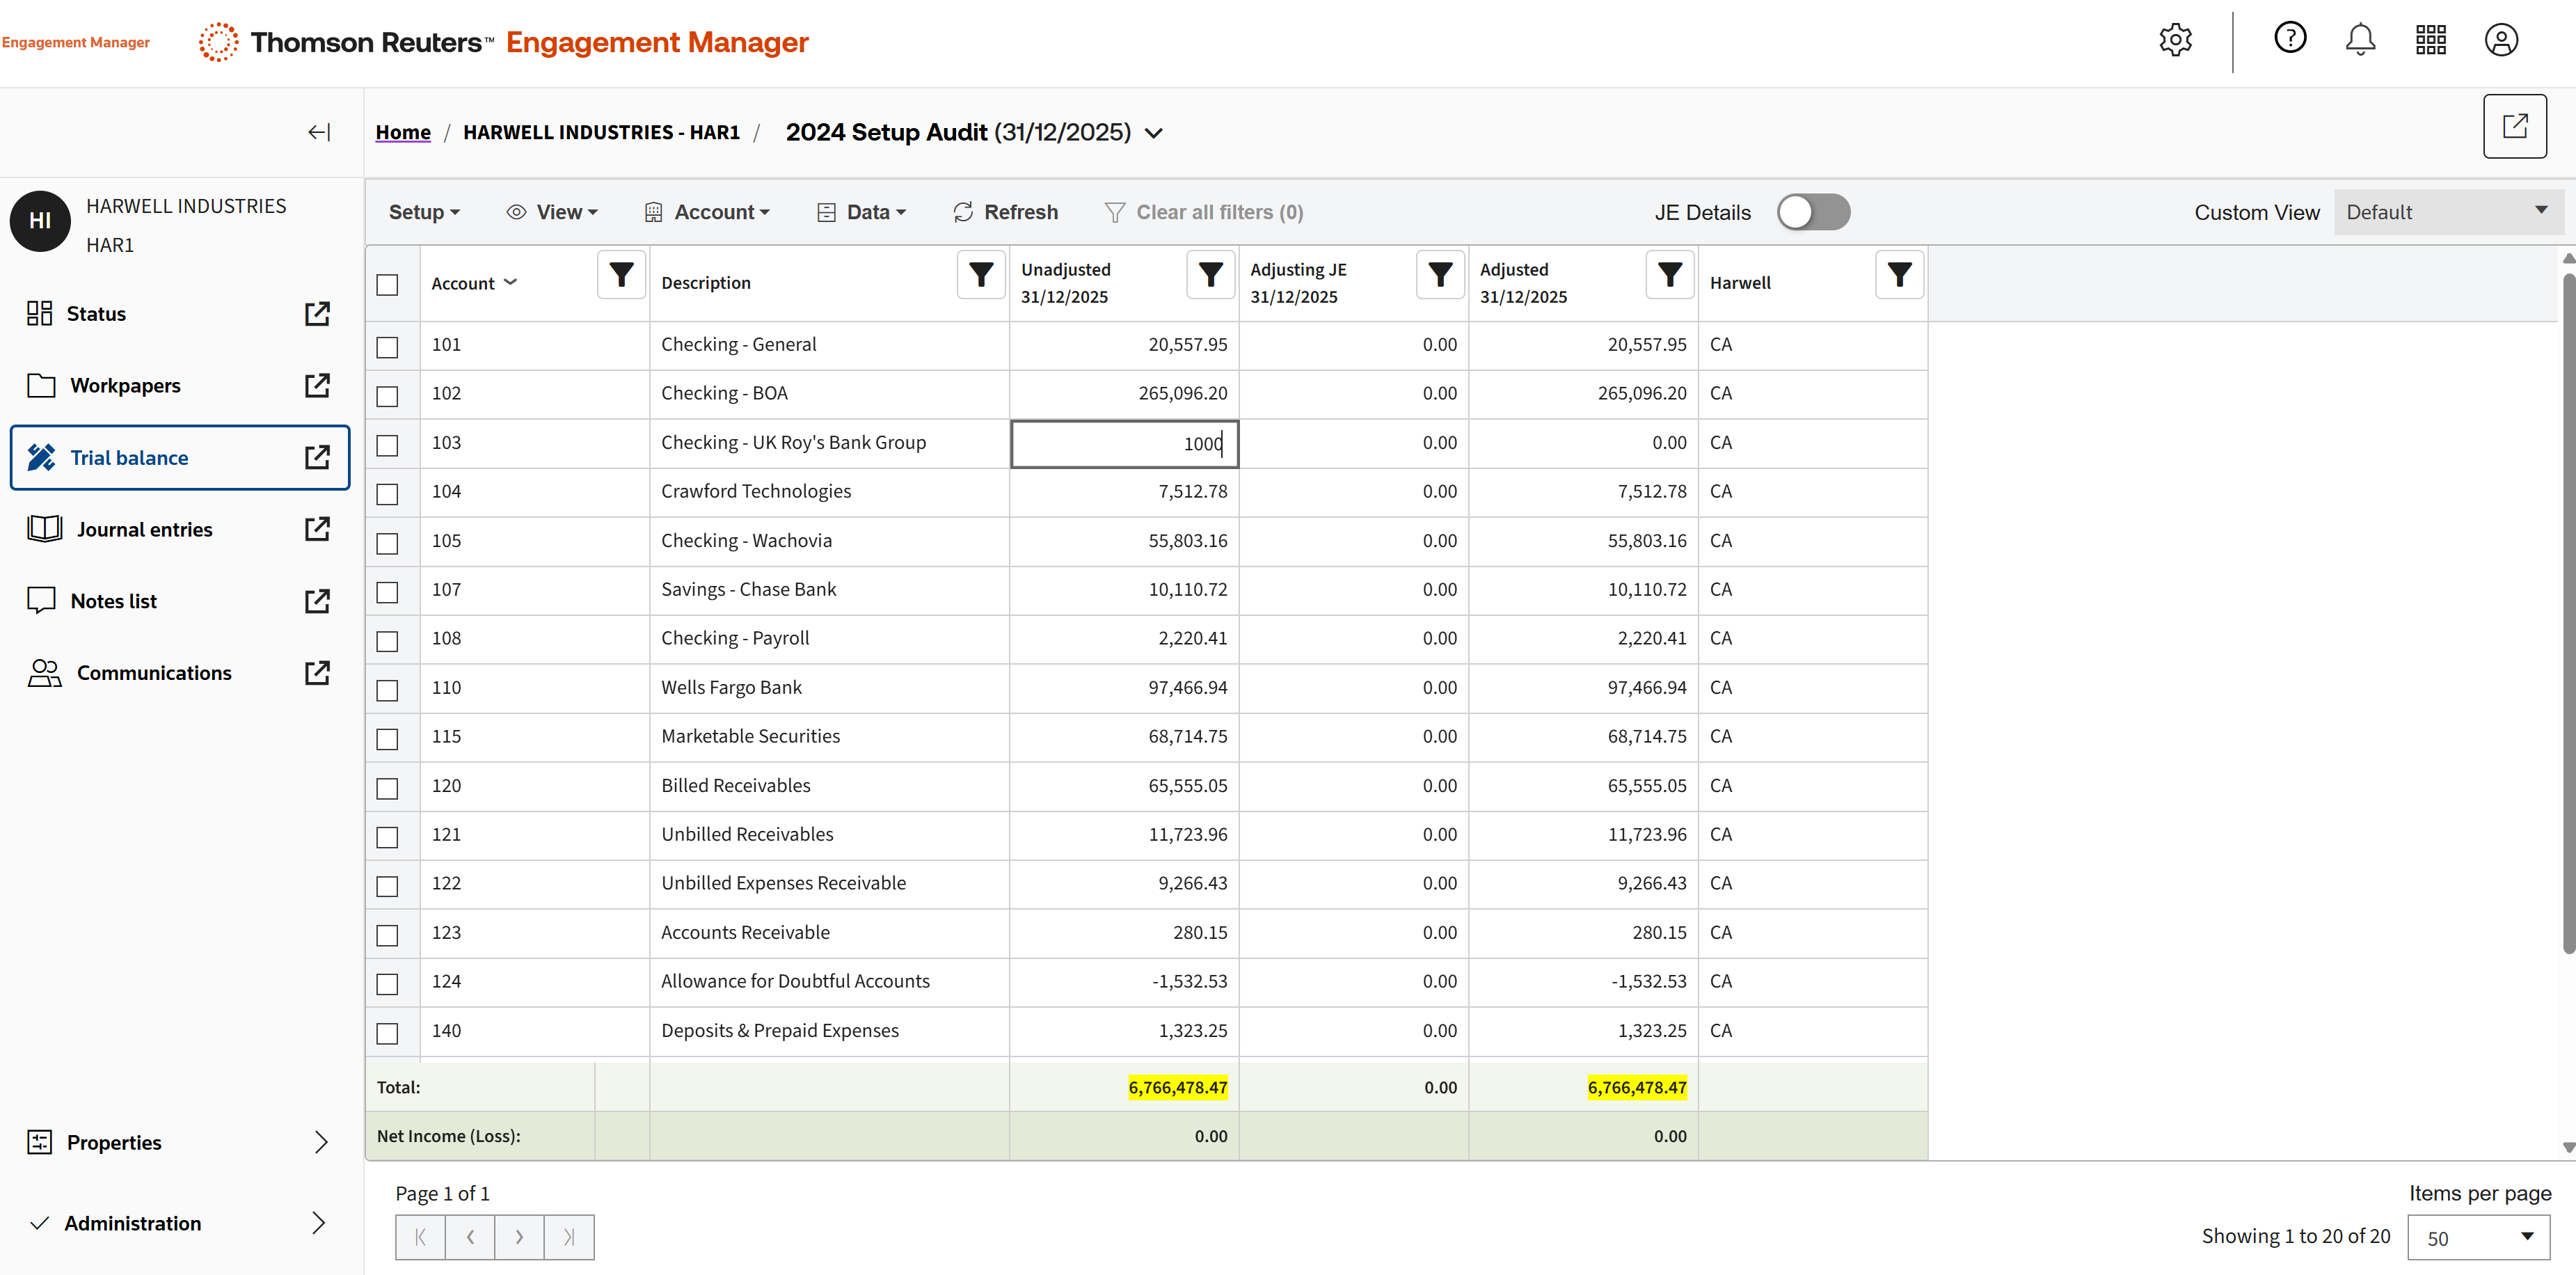
Once the account is added, you can enter balances.
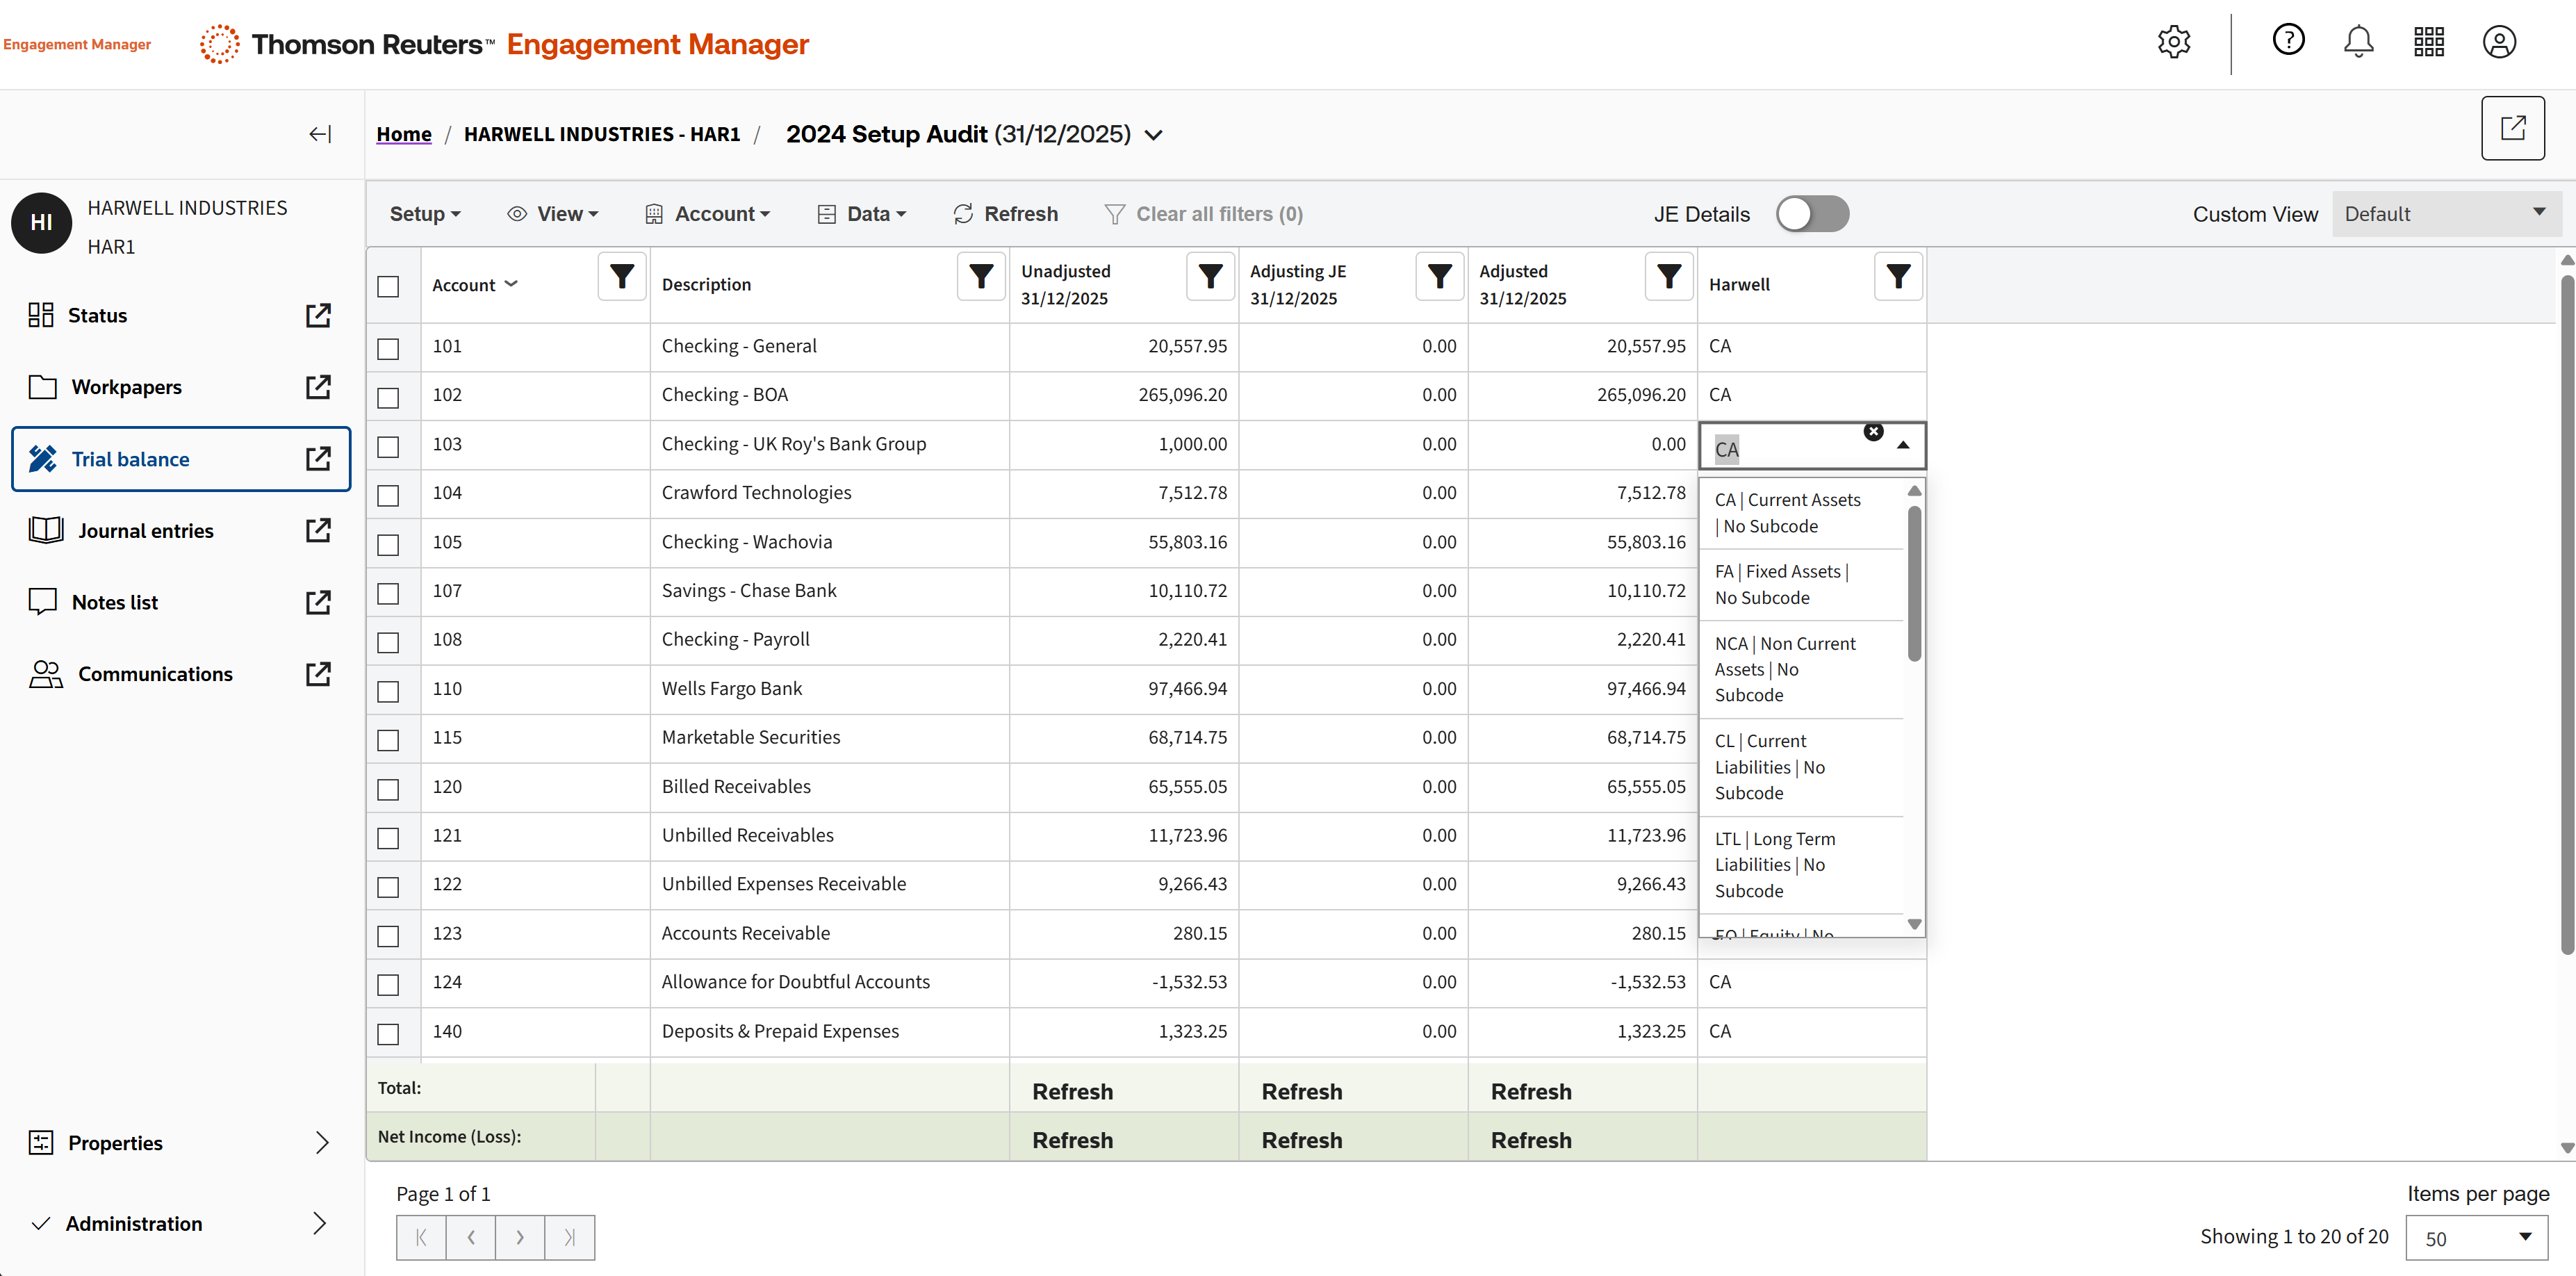
And enter or edit account classification codes, subcodes, and more.
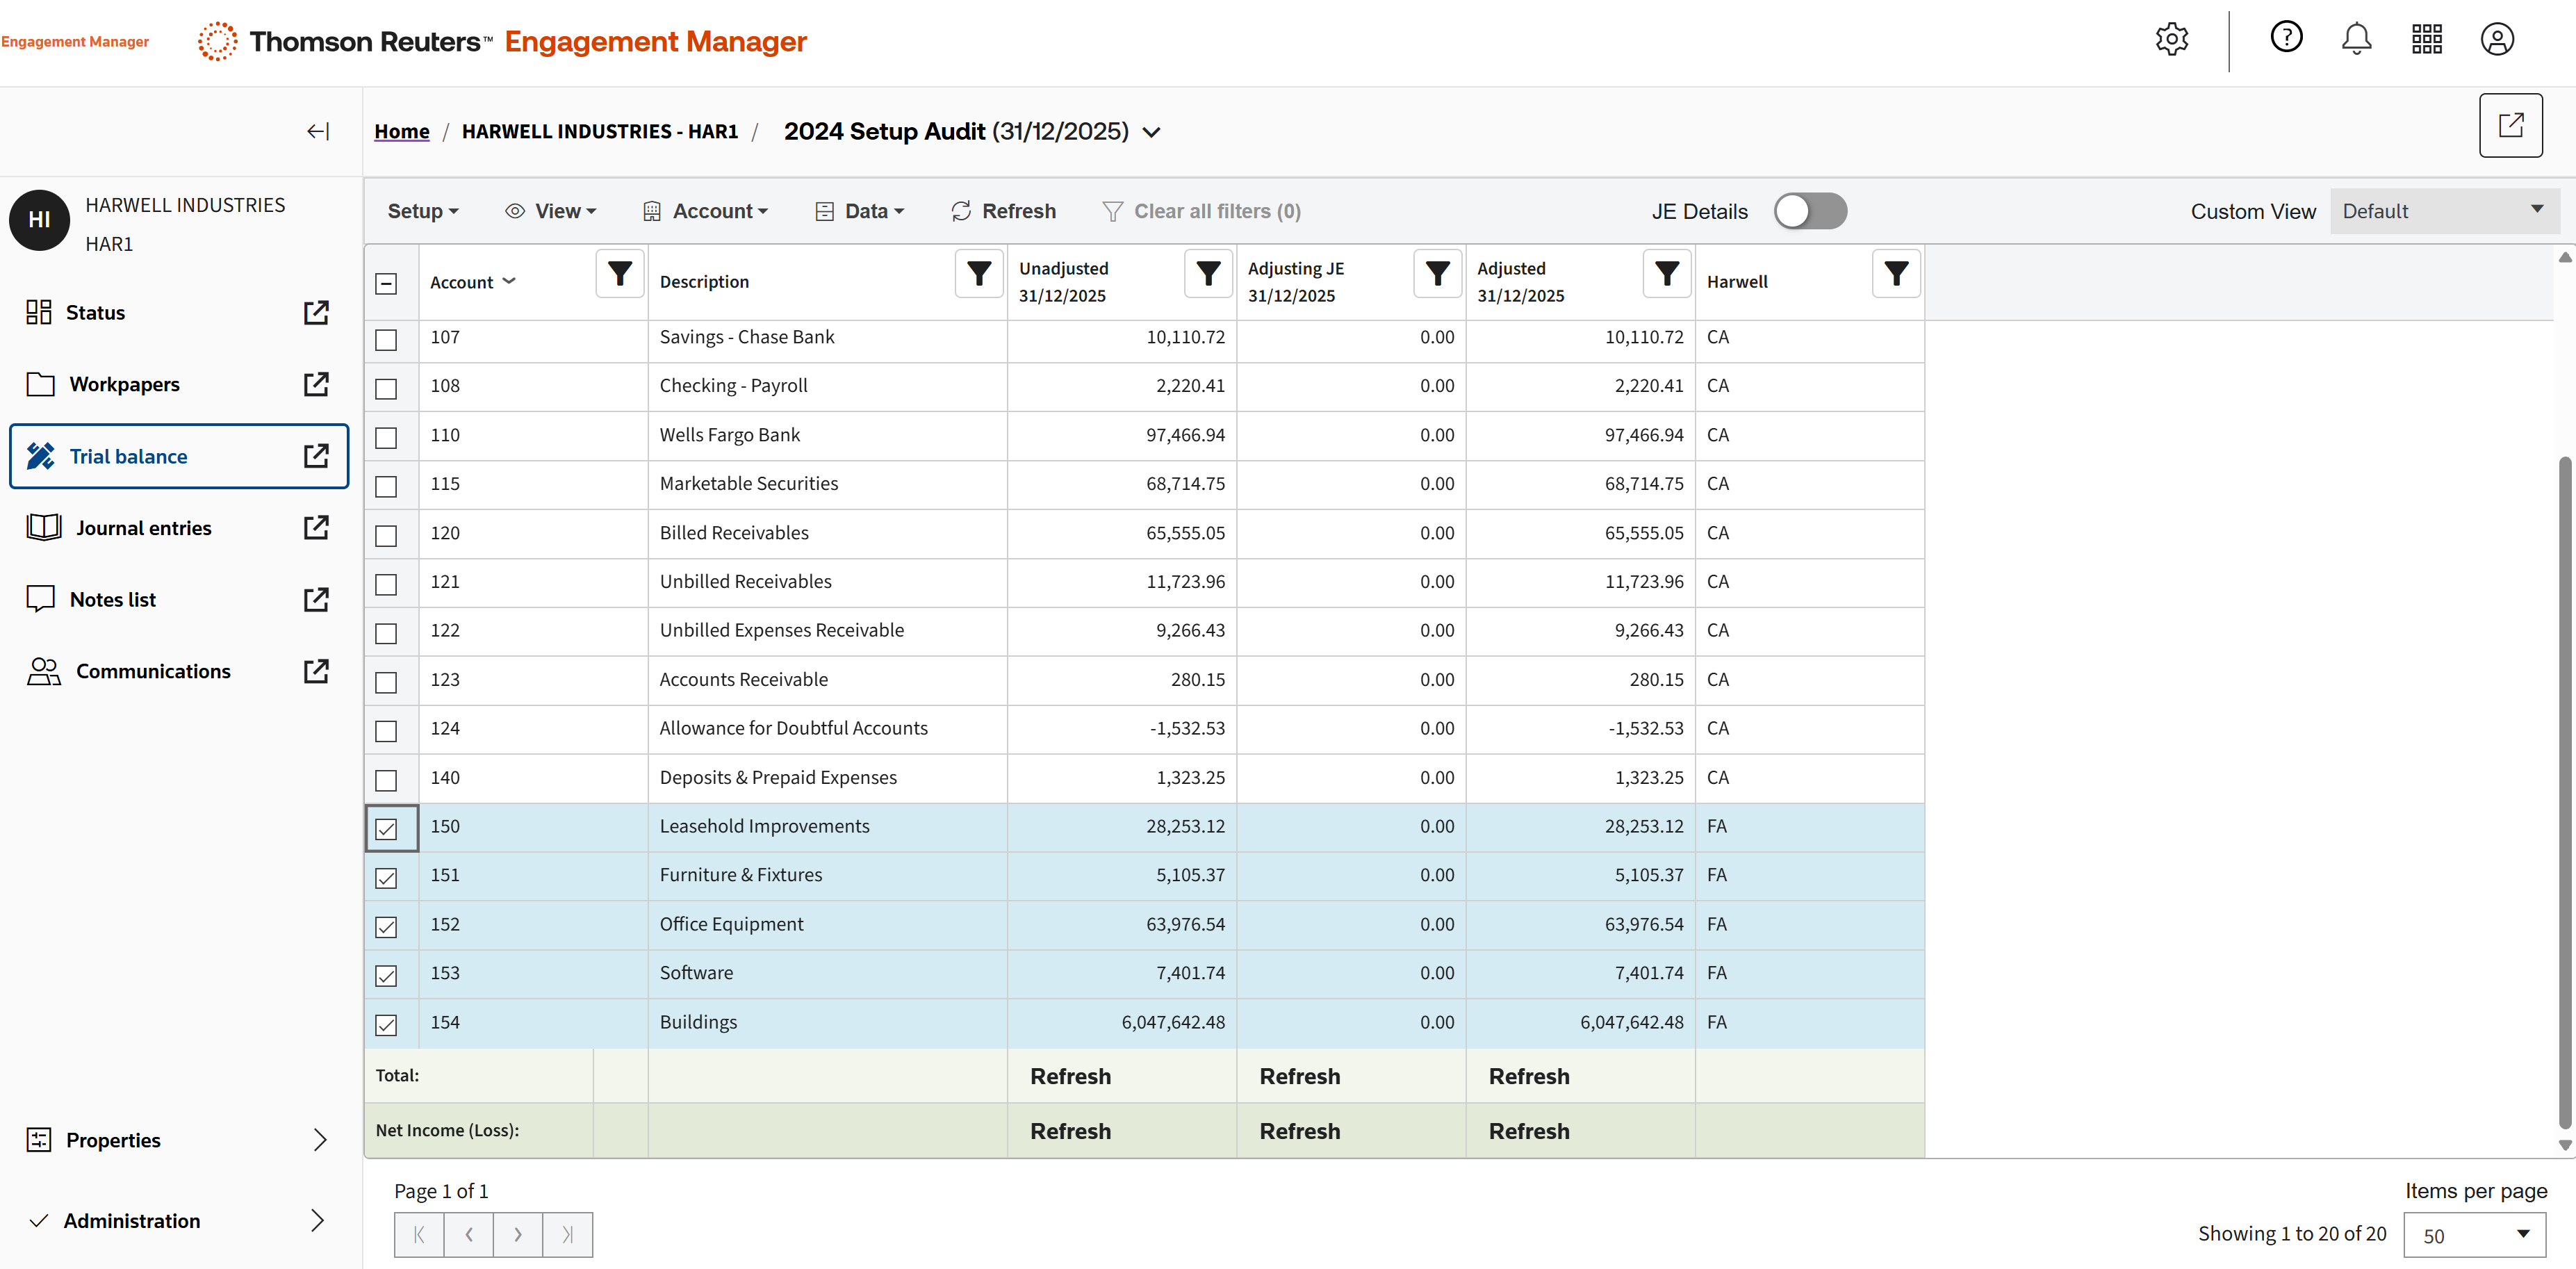
You can select multiple accounts and assign grouping codes and tax codes.
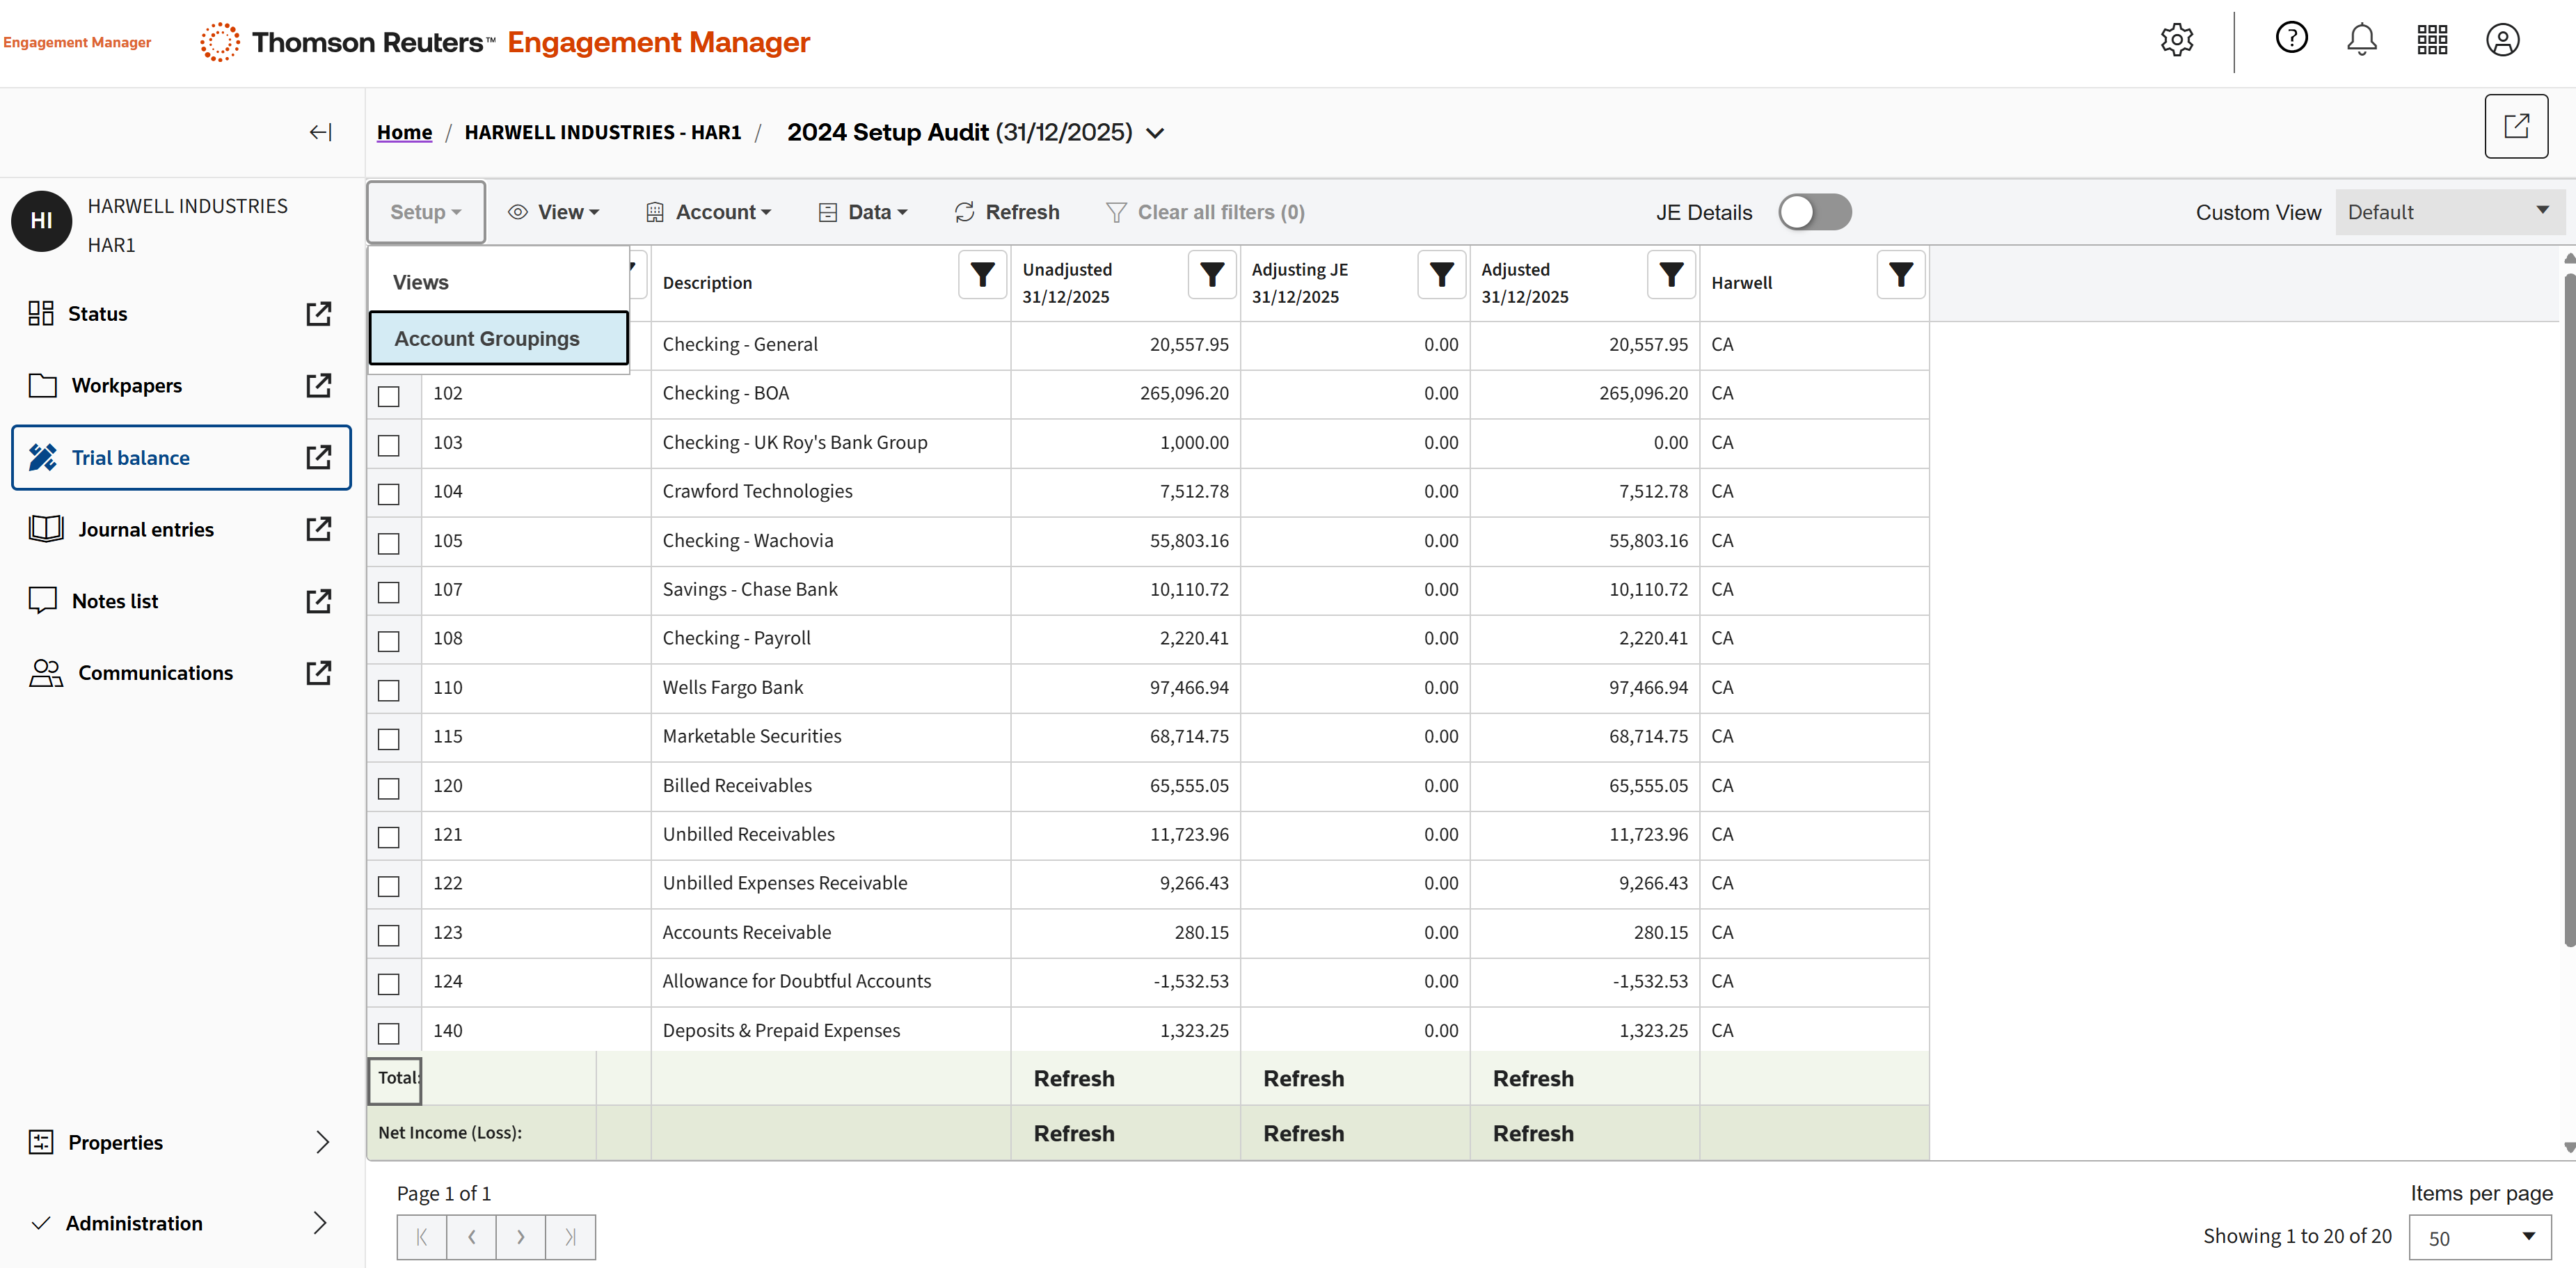
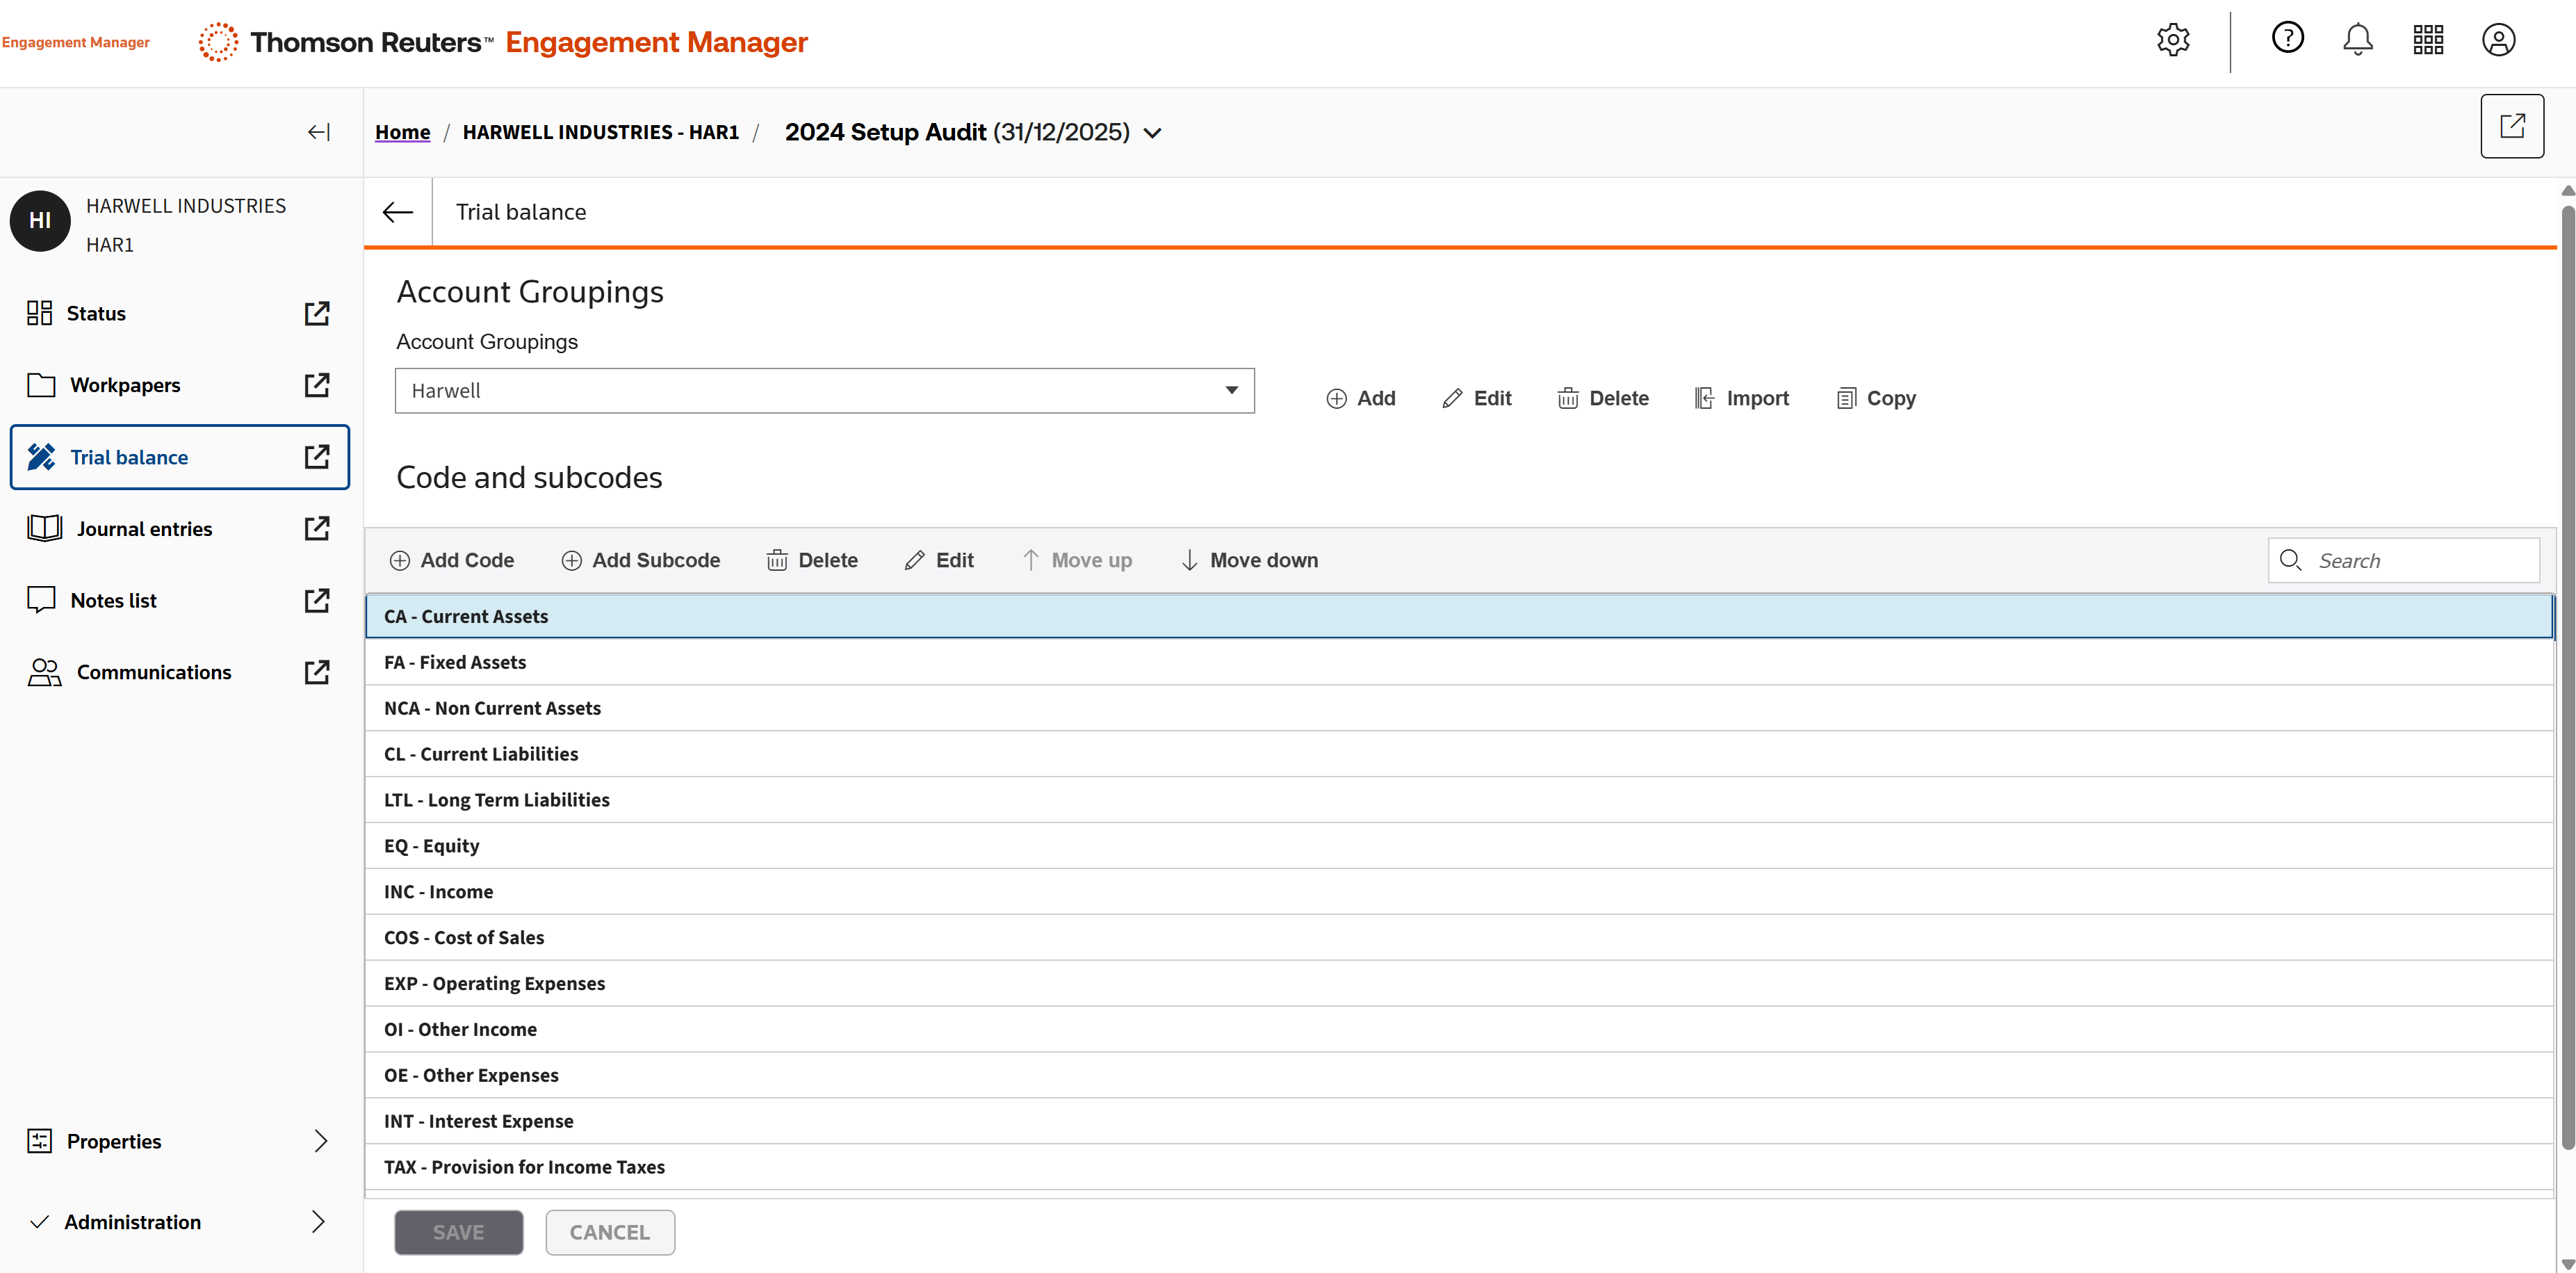
To view account groupings, go to Setup, then Account groupings.
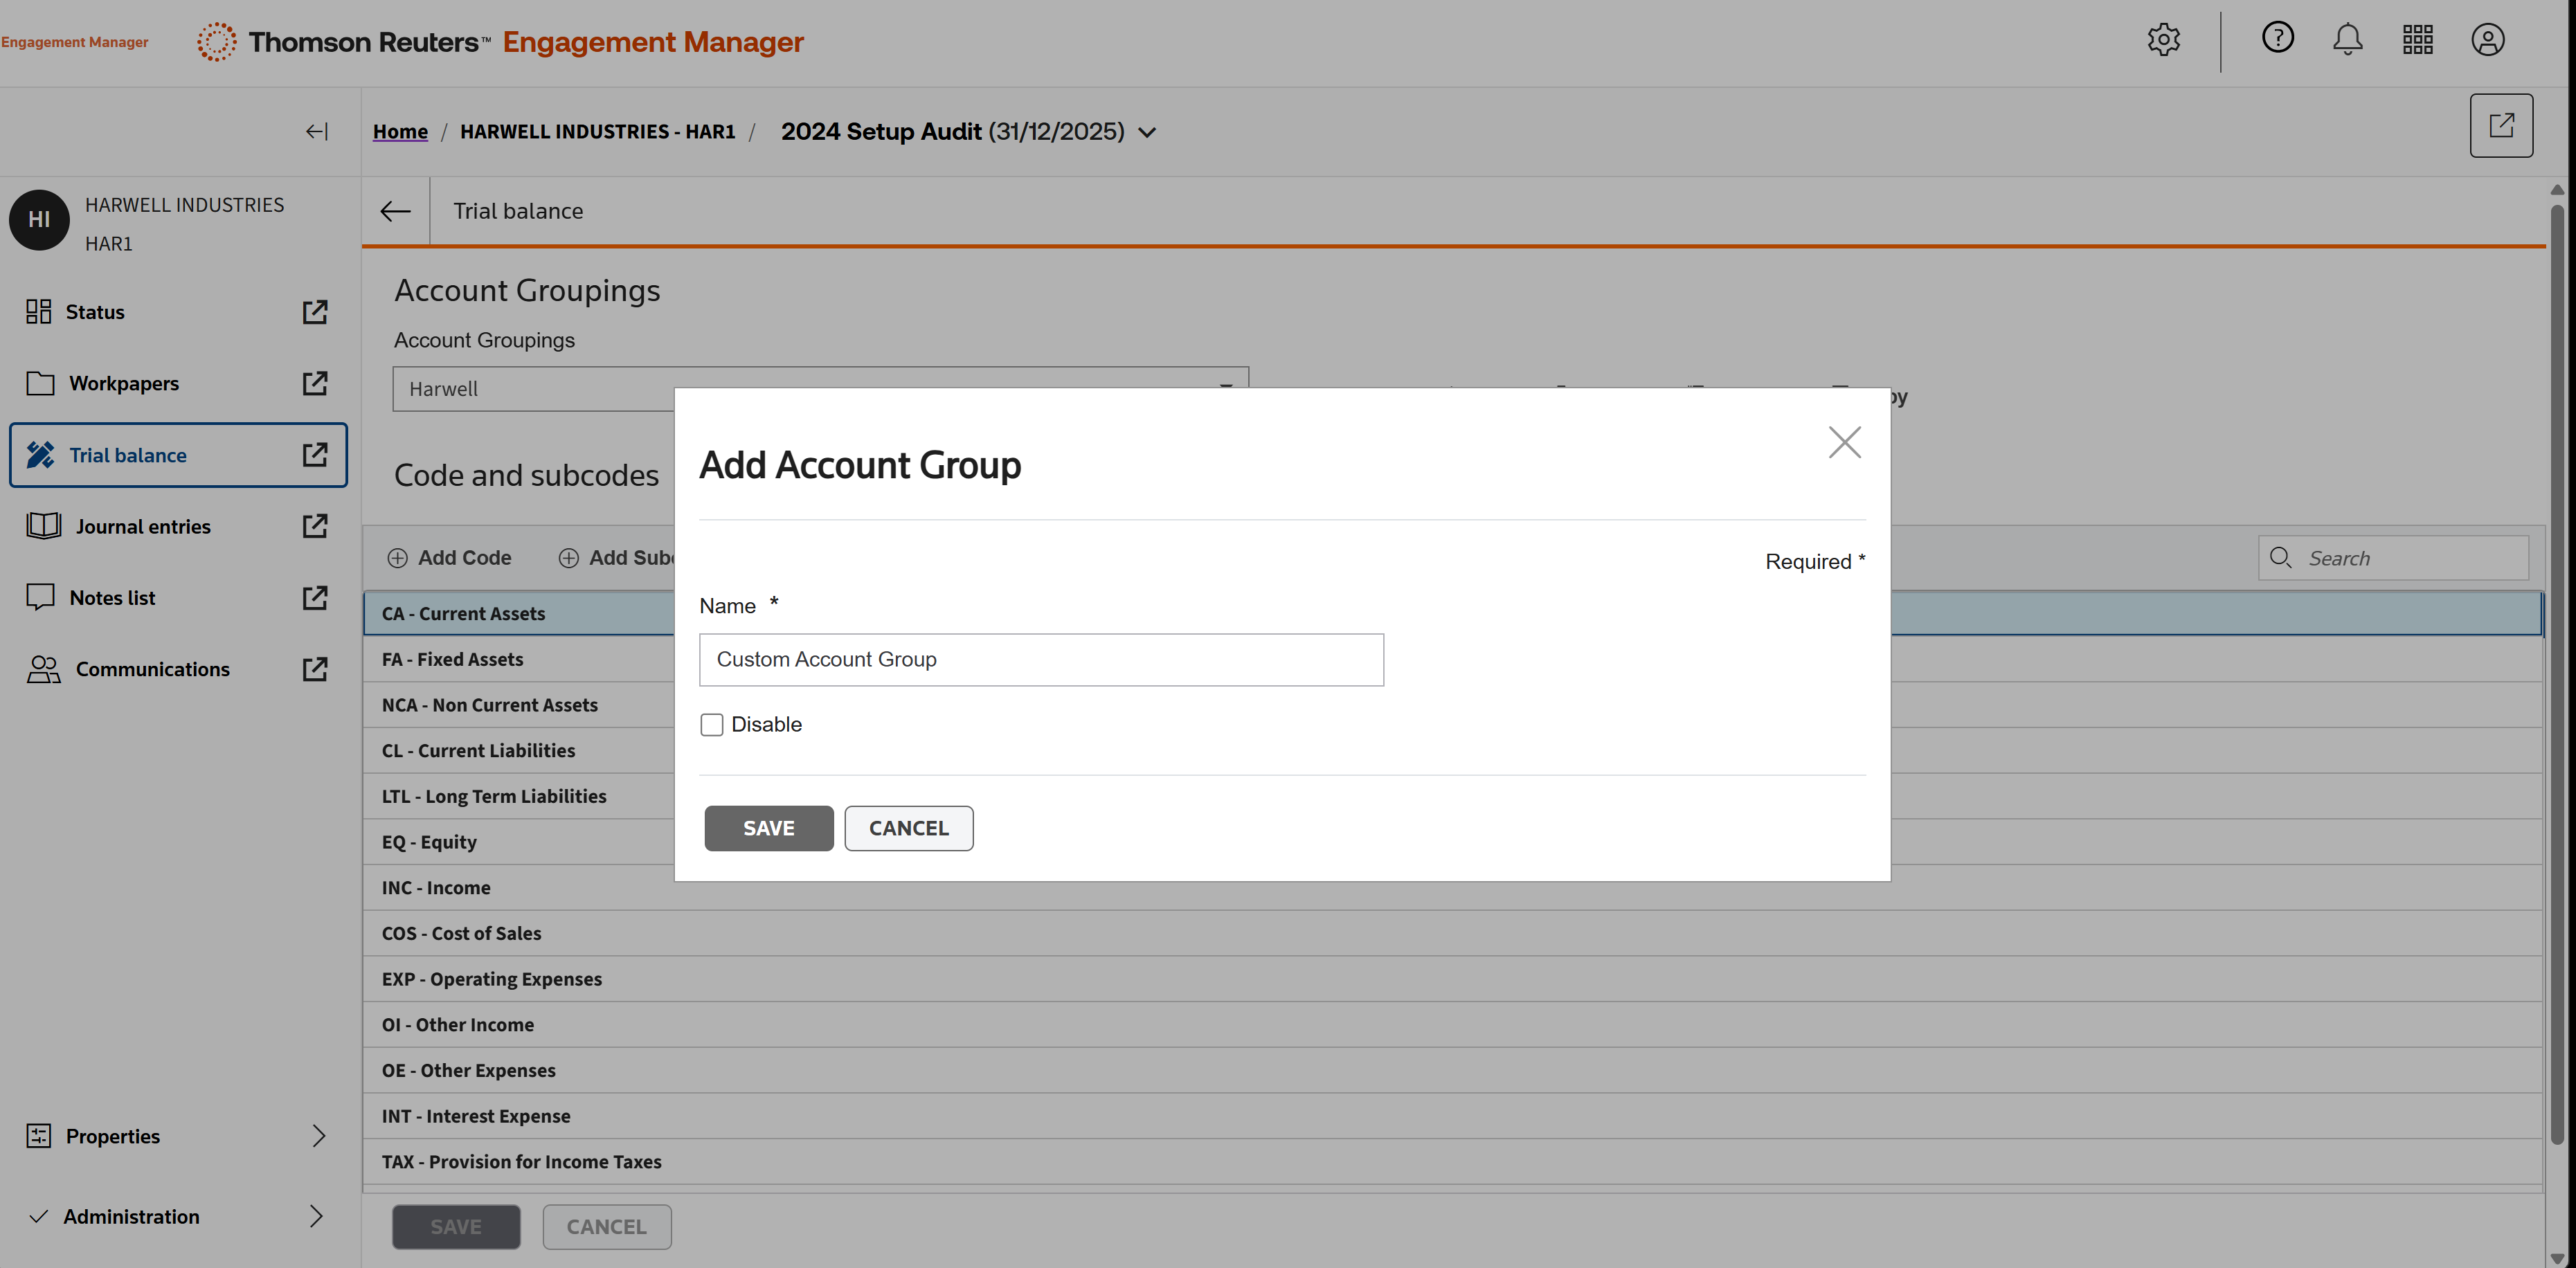
To add your own grouping, click Add.
Enter the grouping name, then Save. These can be used in custom excel reports with your own codes and descriptions.
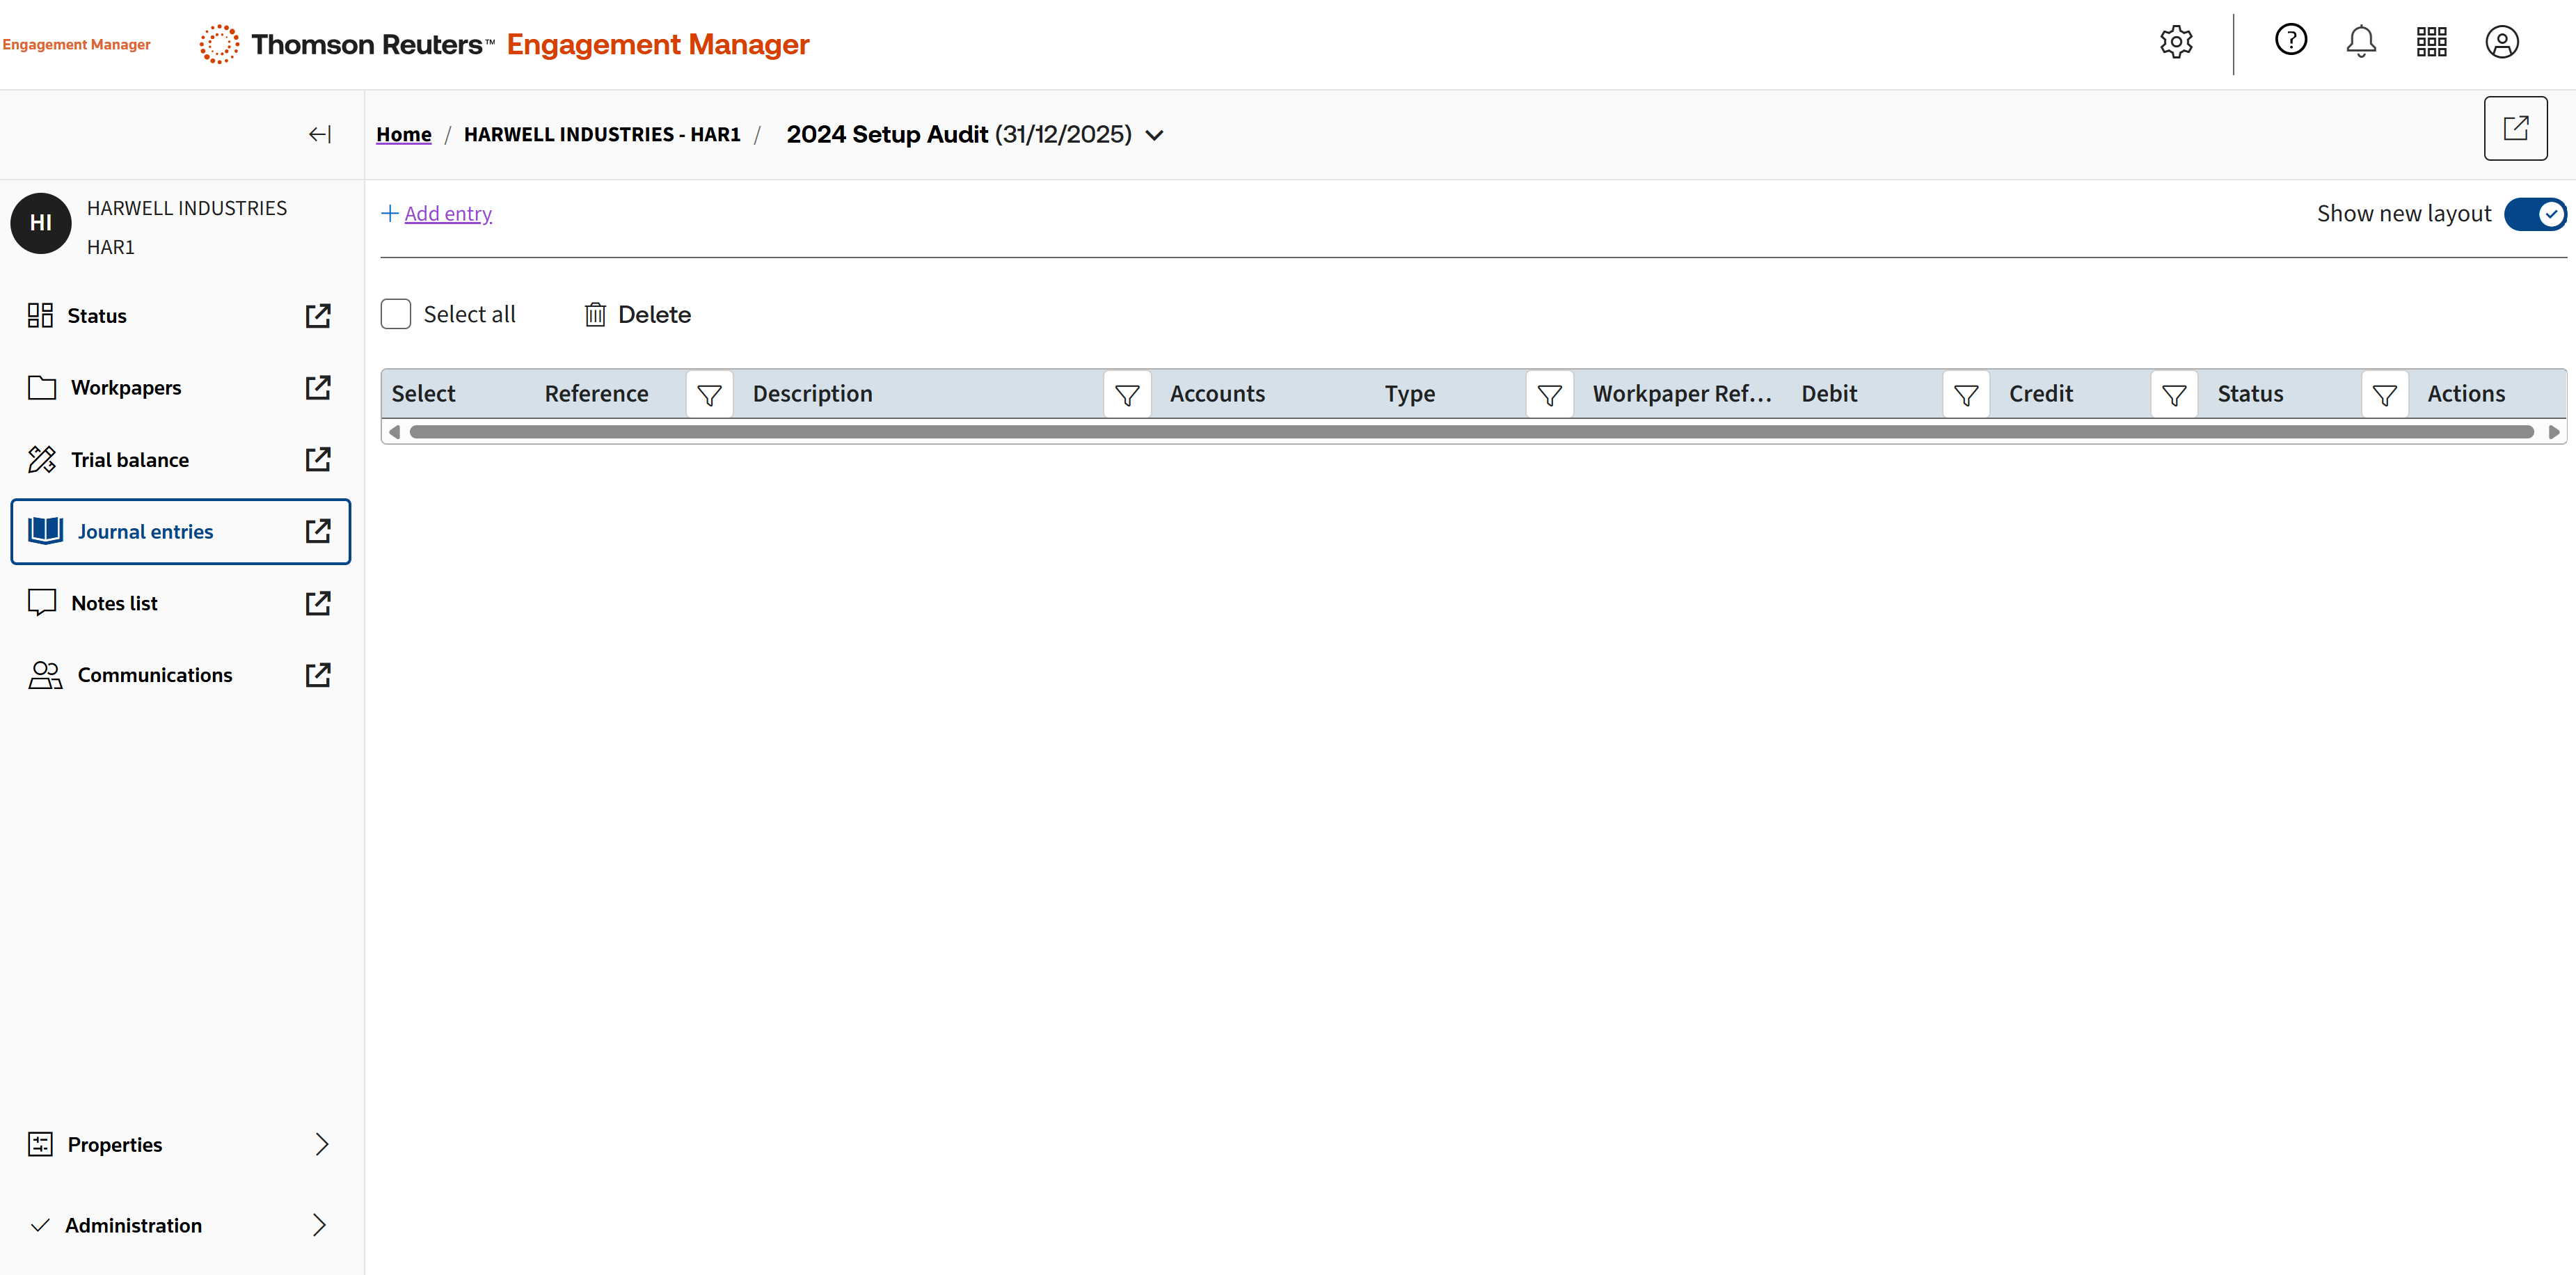
Click Journal entries to begin a journal entry.
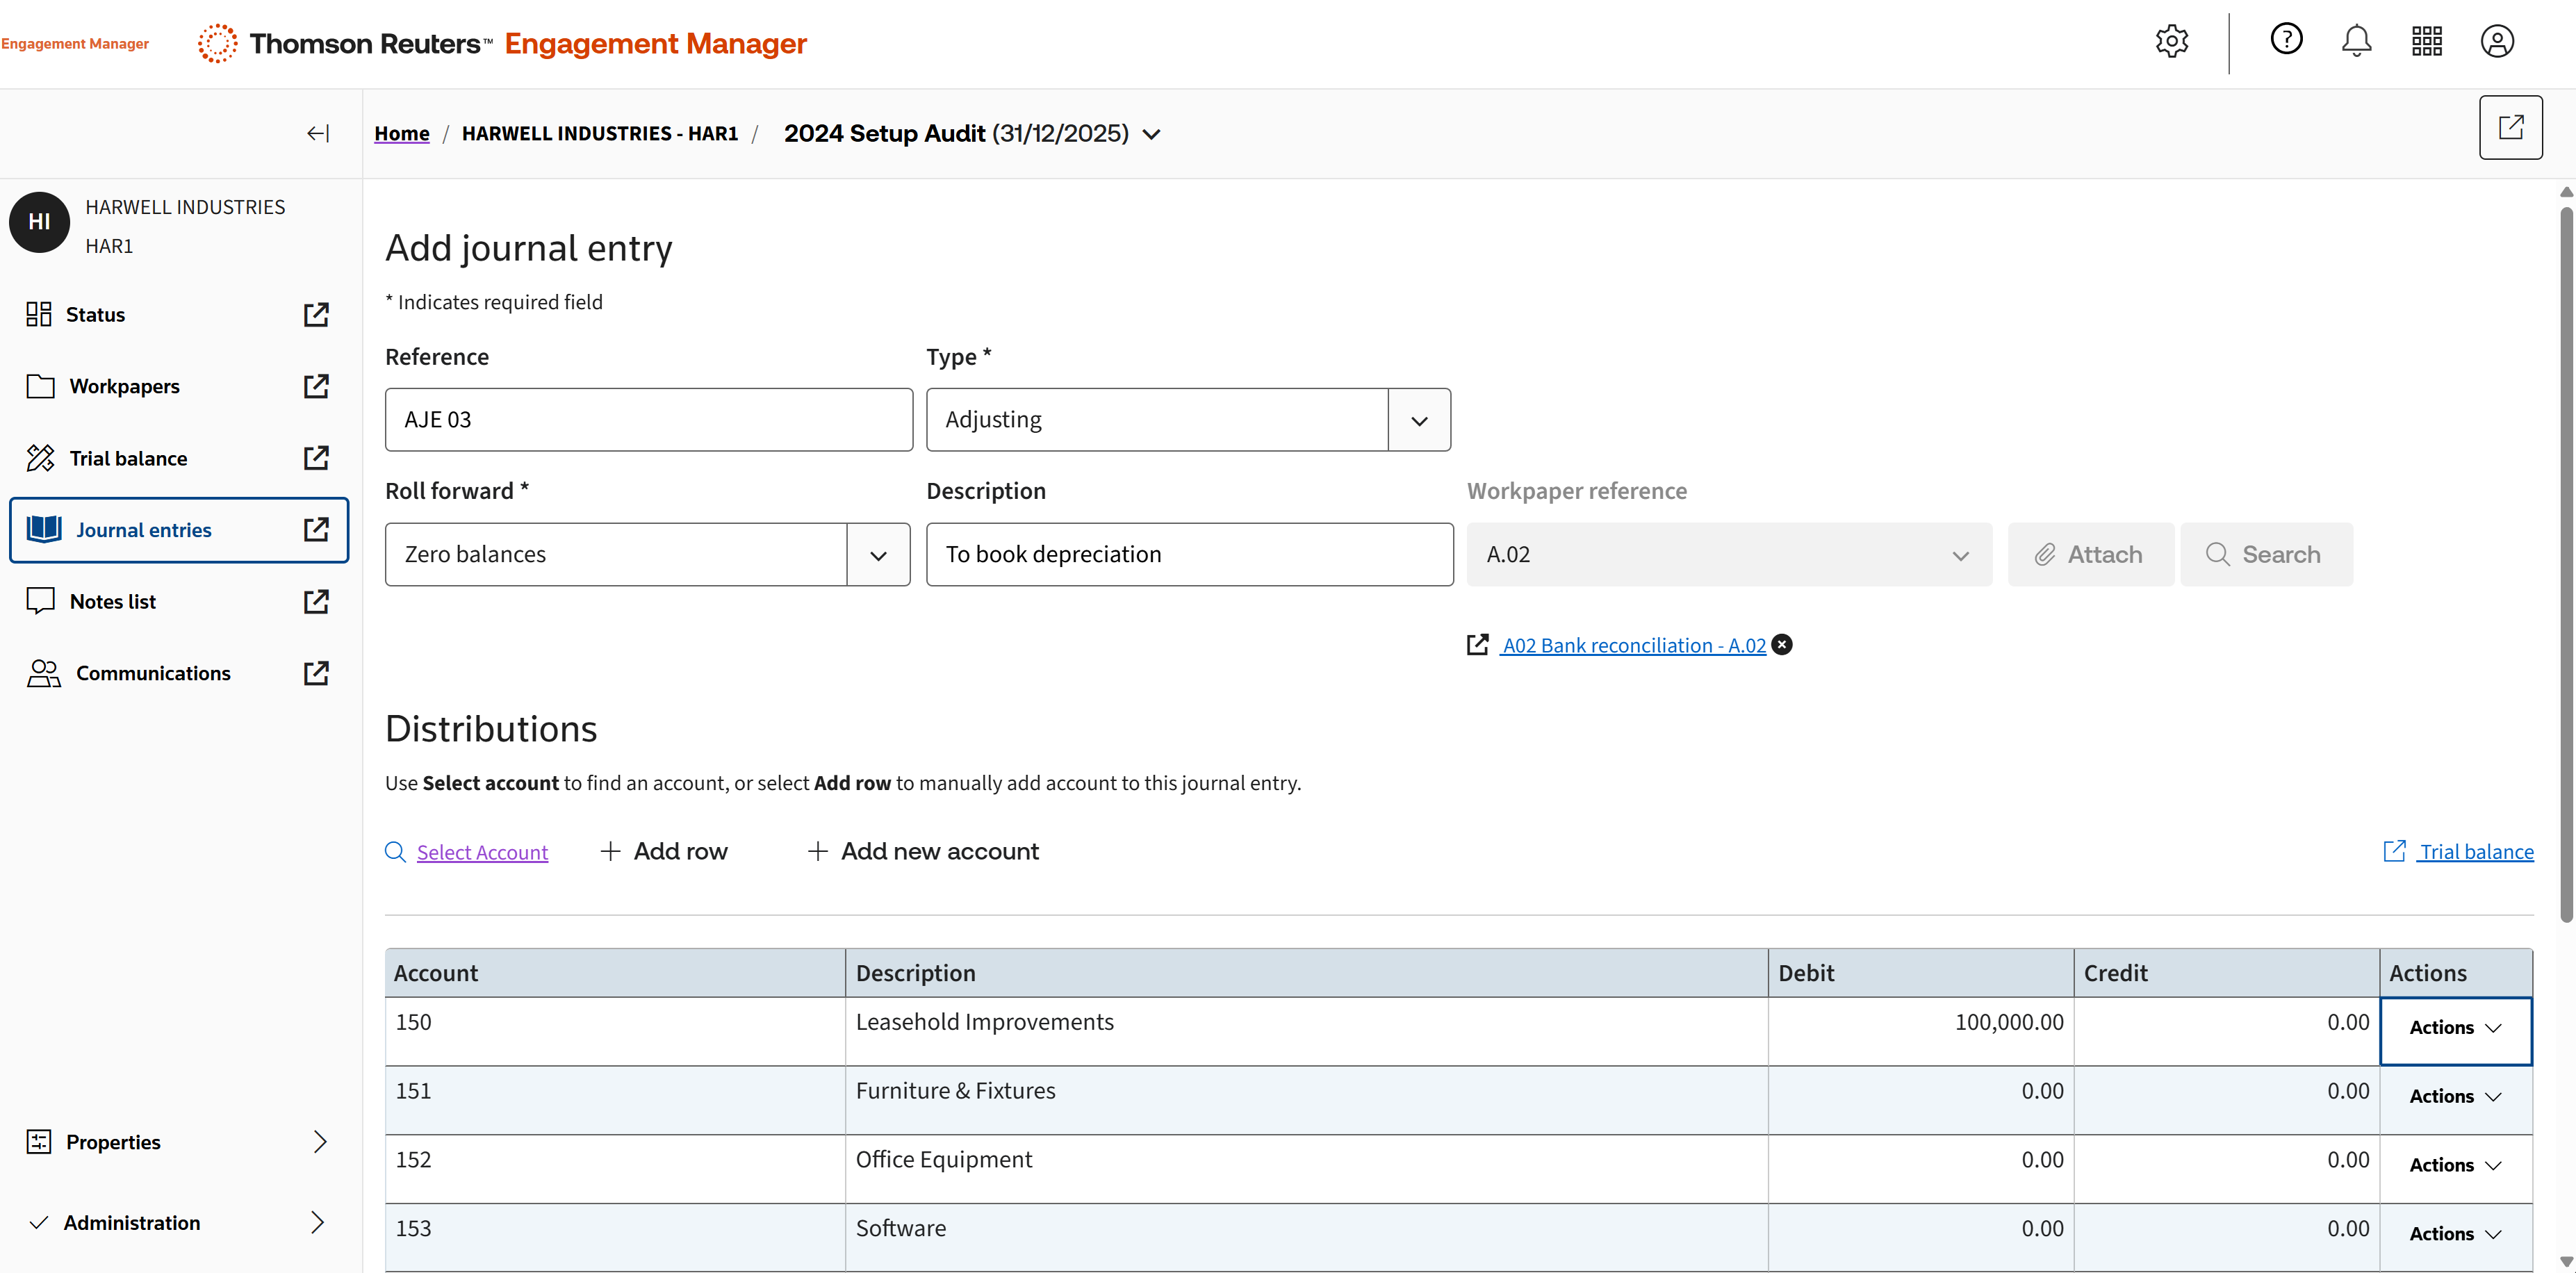
To add a journal entry, select the type.
Add your reference number.
Add a workpaper reference, which can be beneficial to peer reviewers.
And choose how to roll forward. This includes Exclude, Include, Reverse, and Zero balances.
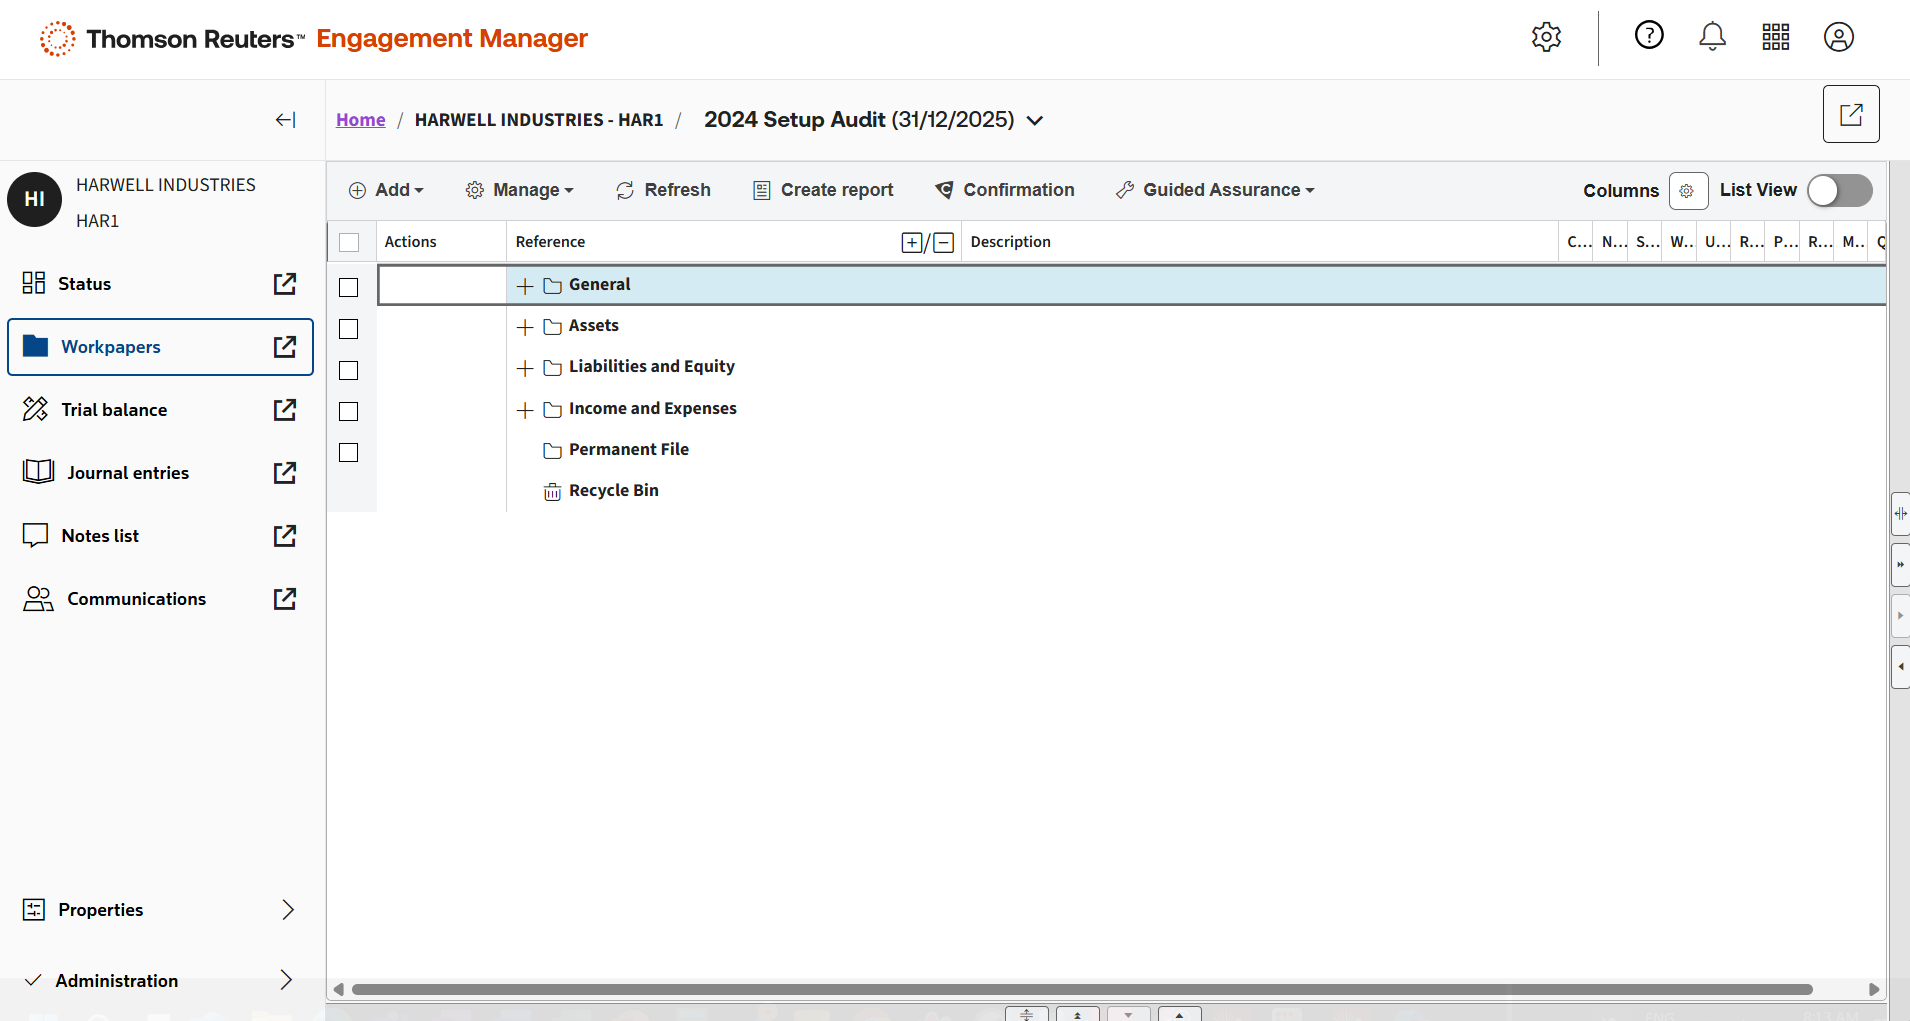
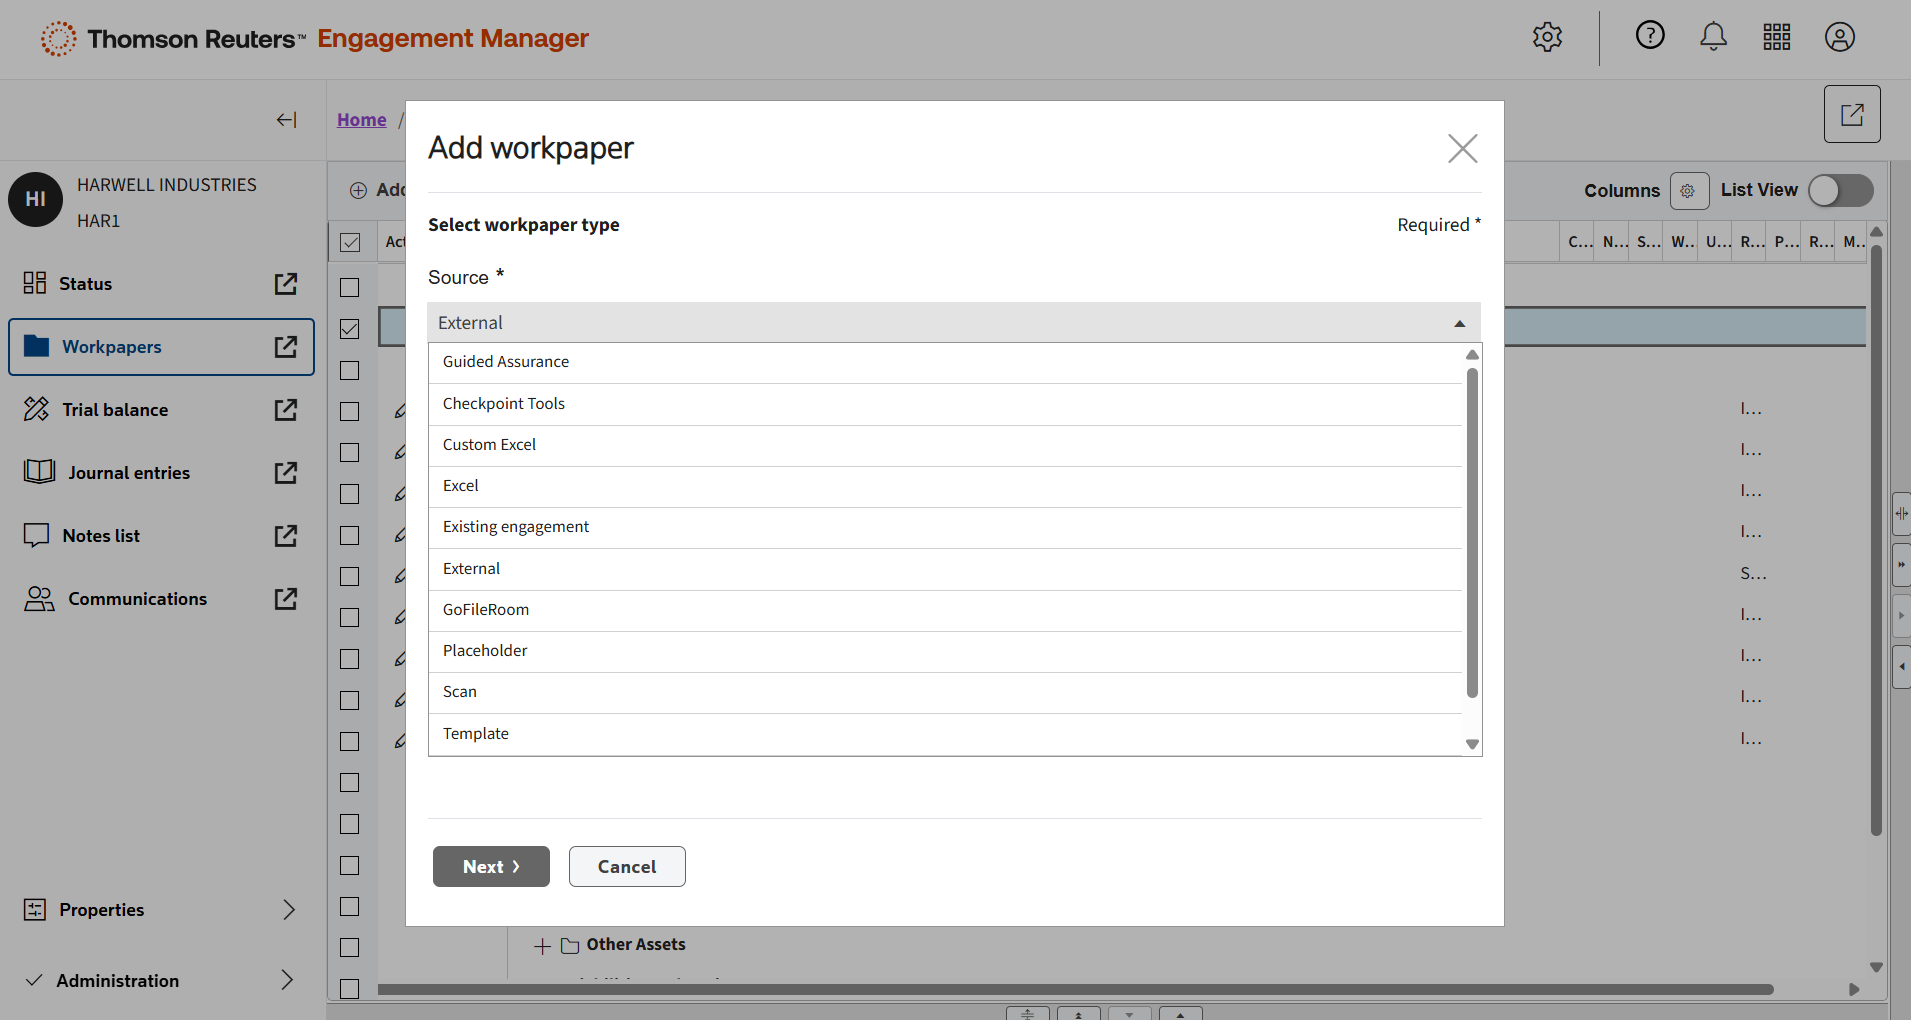
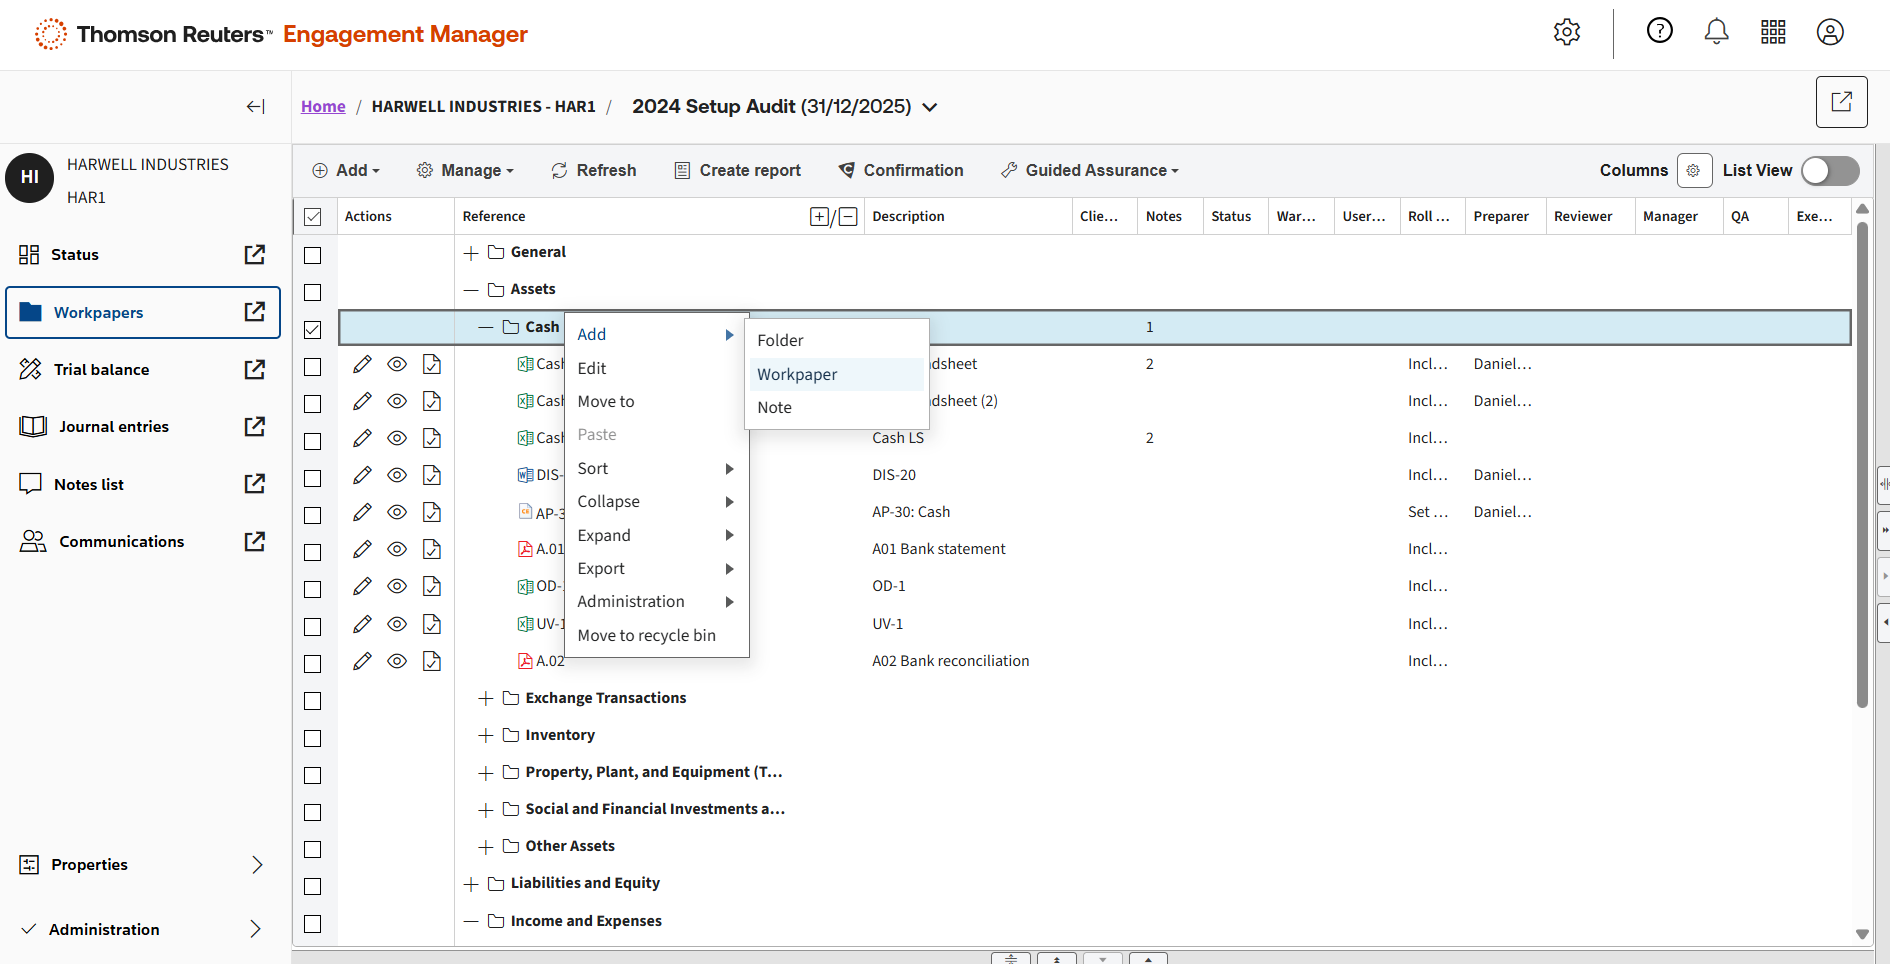
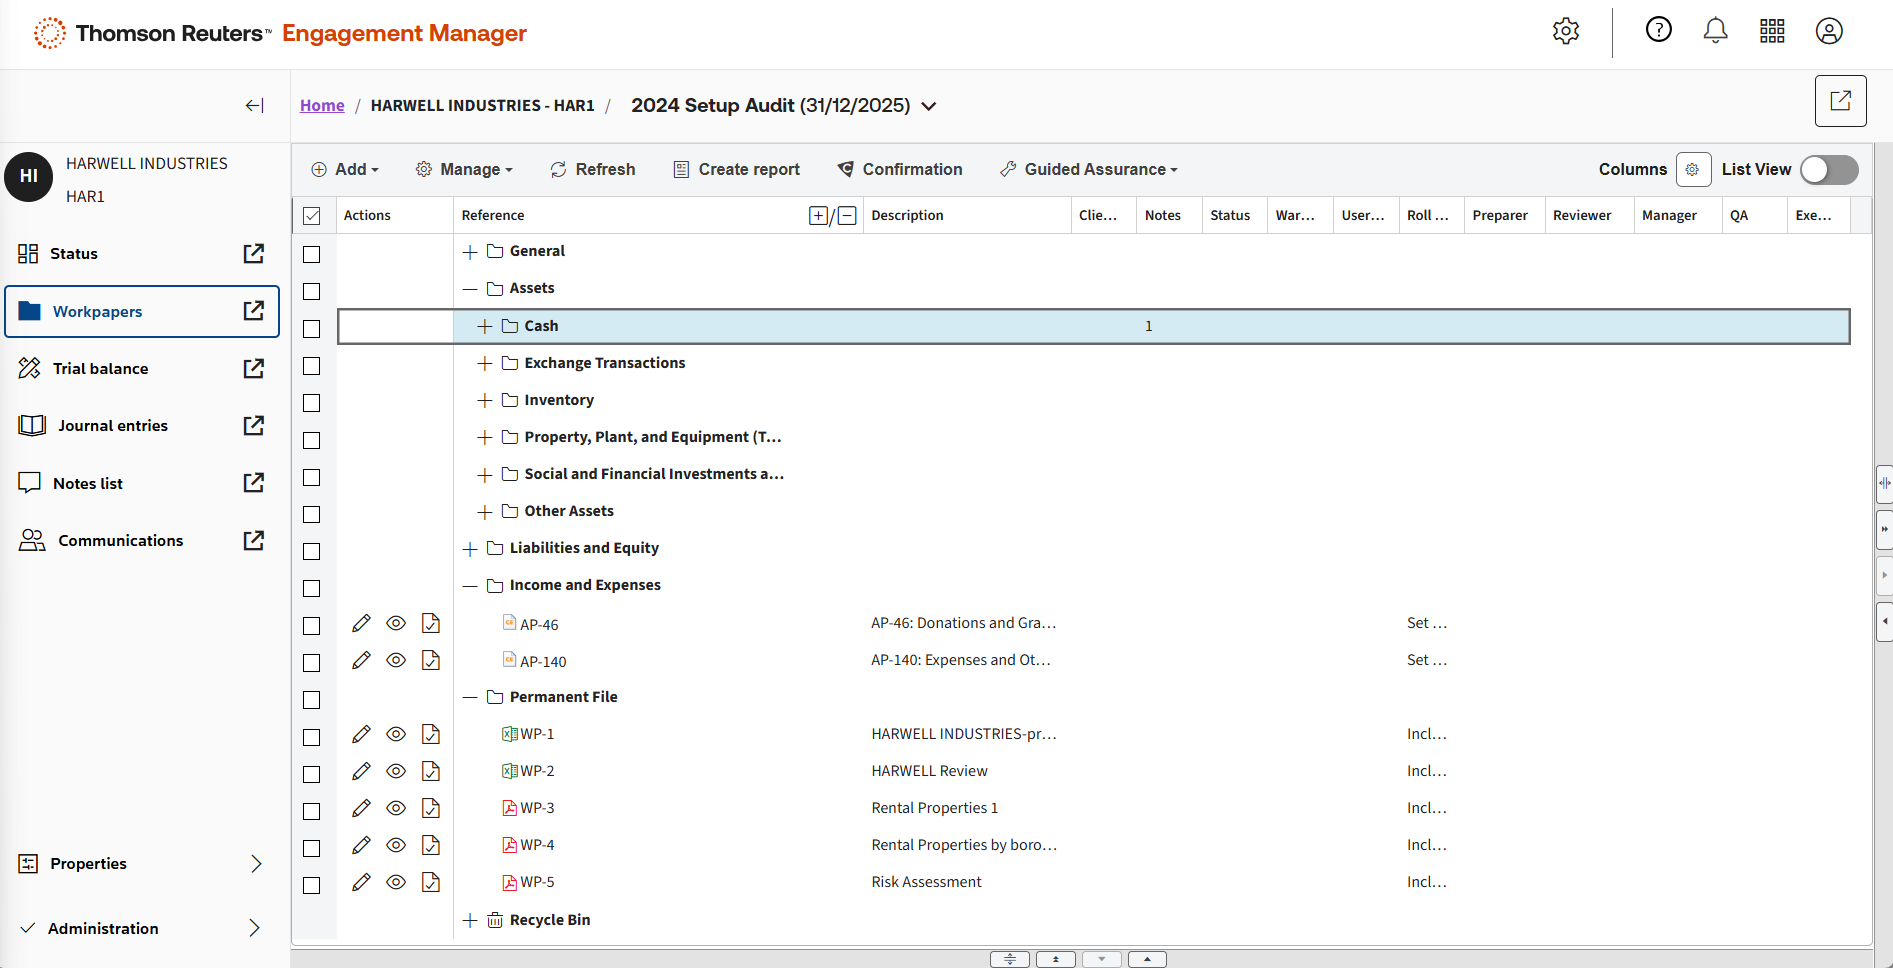
In Workpapers, you can add a variety of documents.
Custom Excel, blank Excel, Word, documents from an Existing engagement, and many more are available.
You can also drag and drop multiple documents directly from your local computer into the workpapers tab to add them at once.
Notes are available on all workpapers.
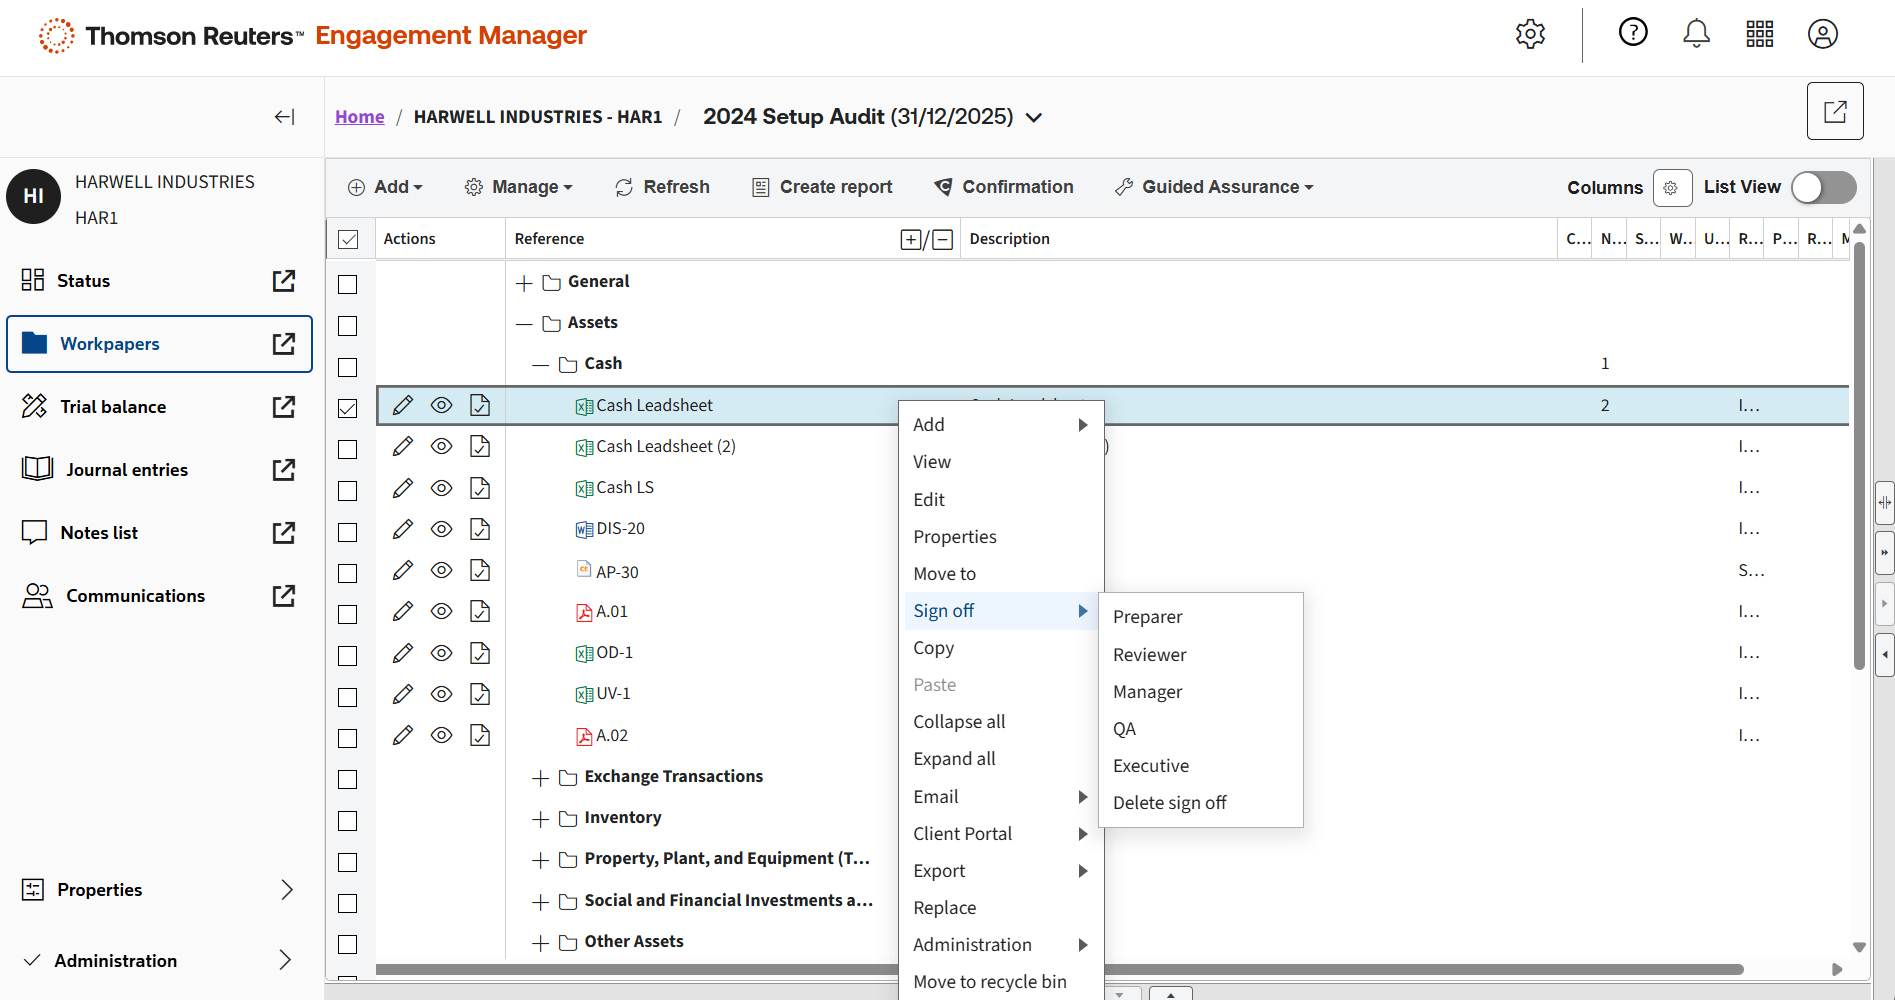
As are multi-level sign offs.
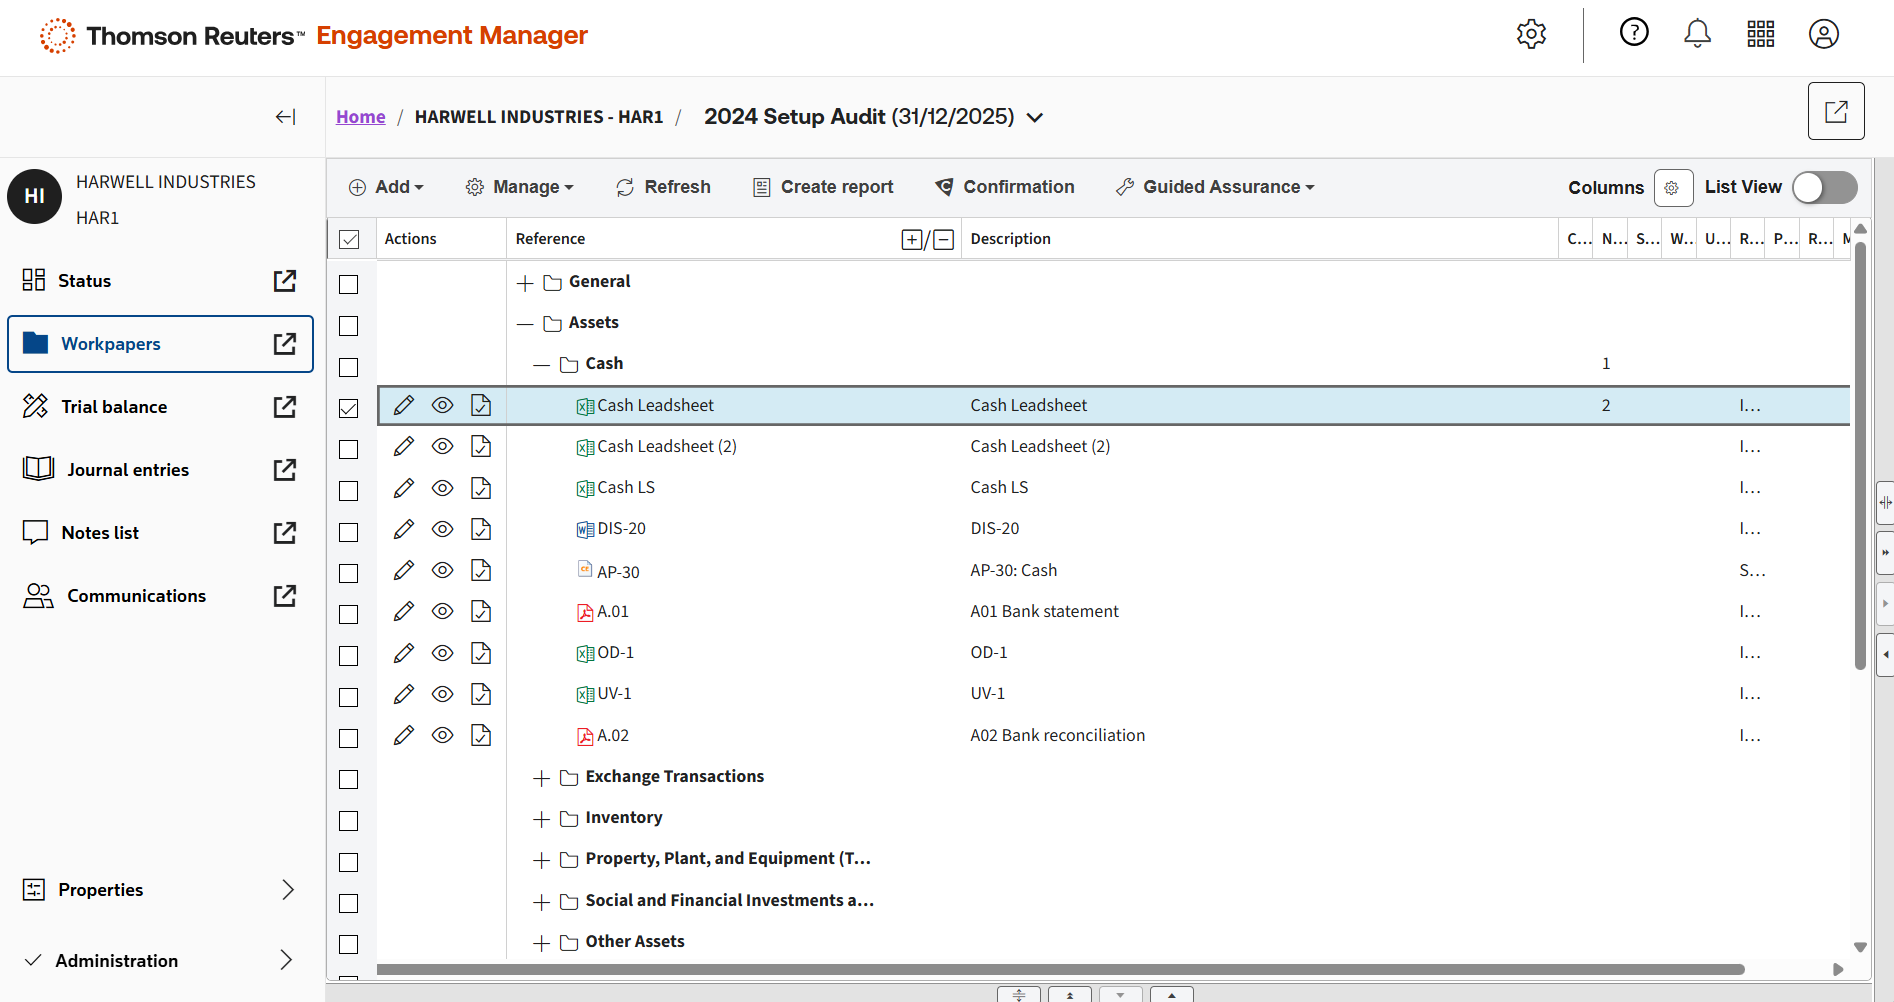
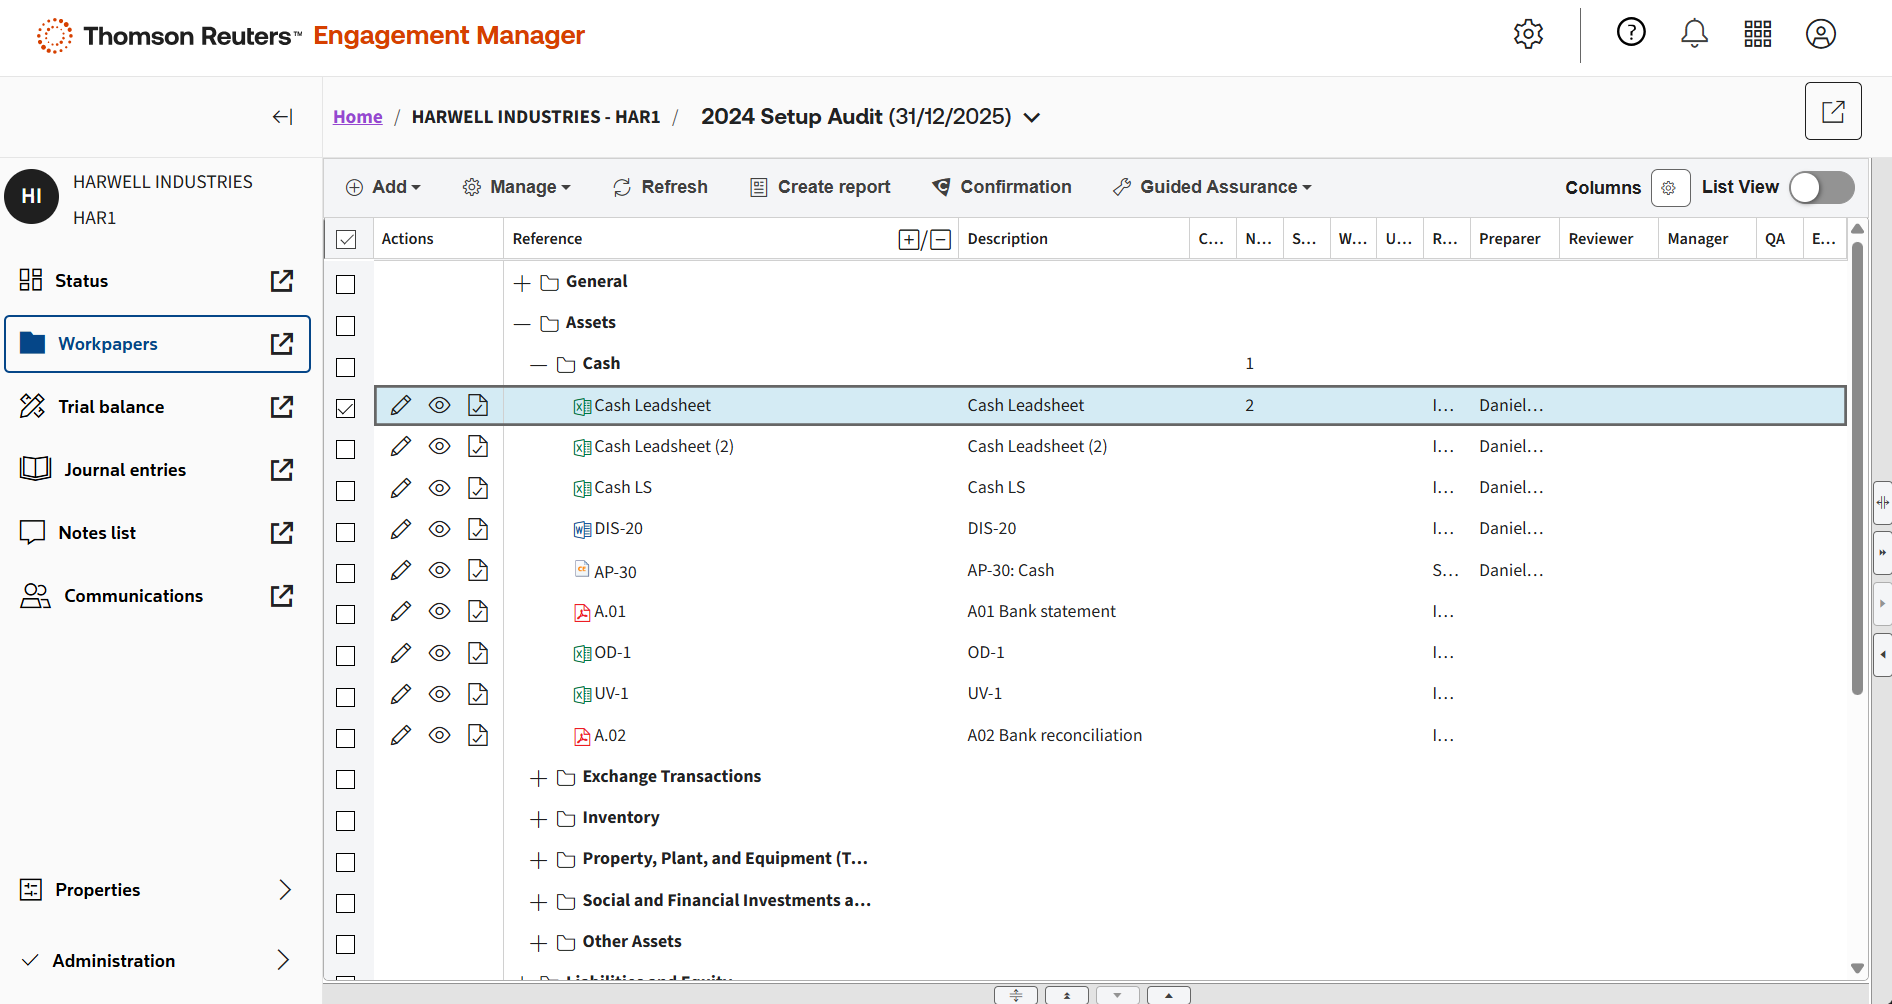
The count of notes on each workpaper is displayed in the Notes column.
The sign offs are displayed in the relevant columns by sign off level.
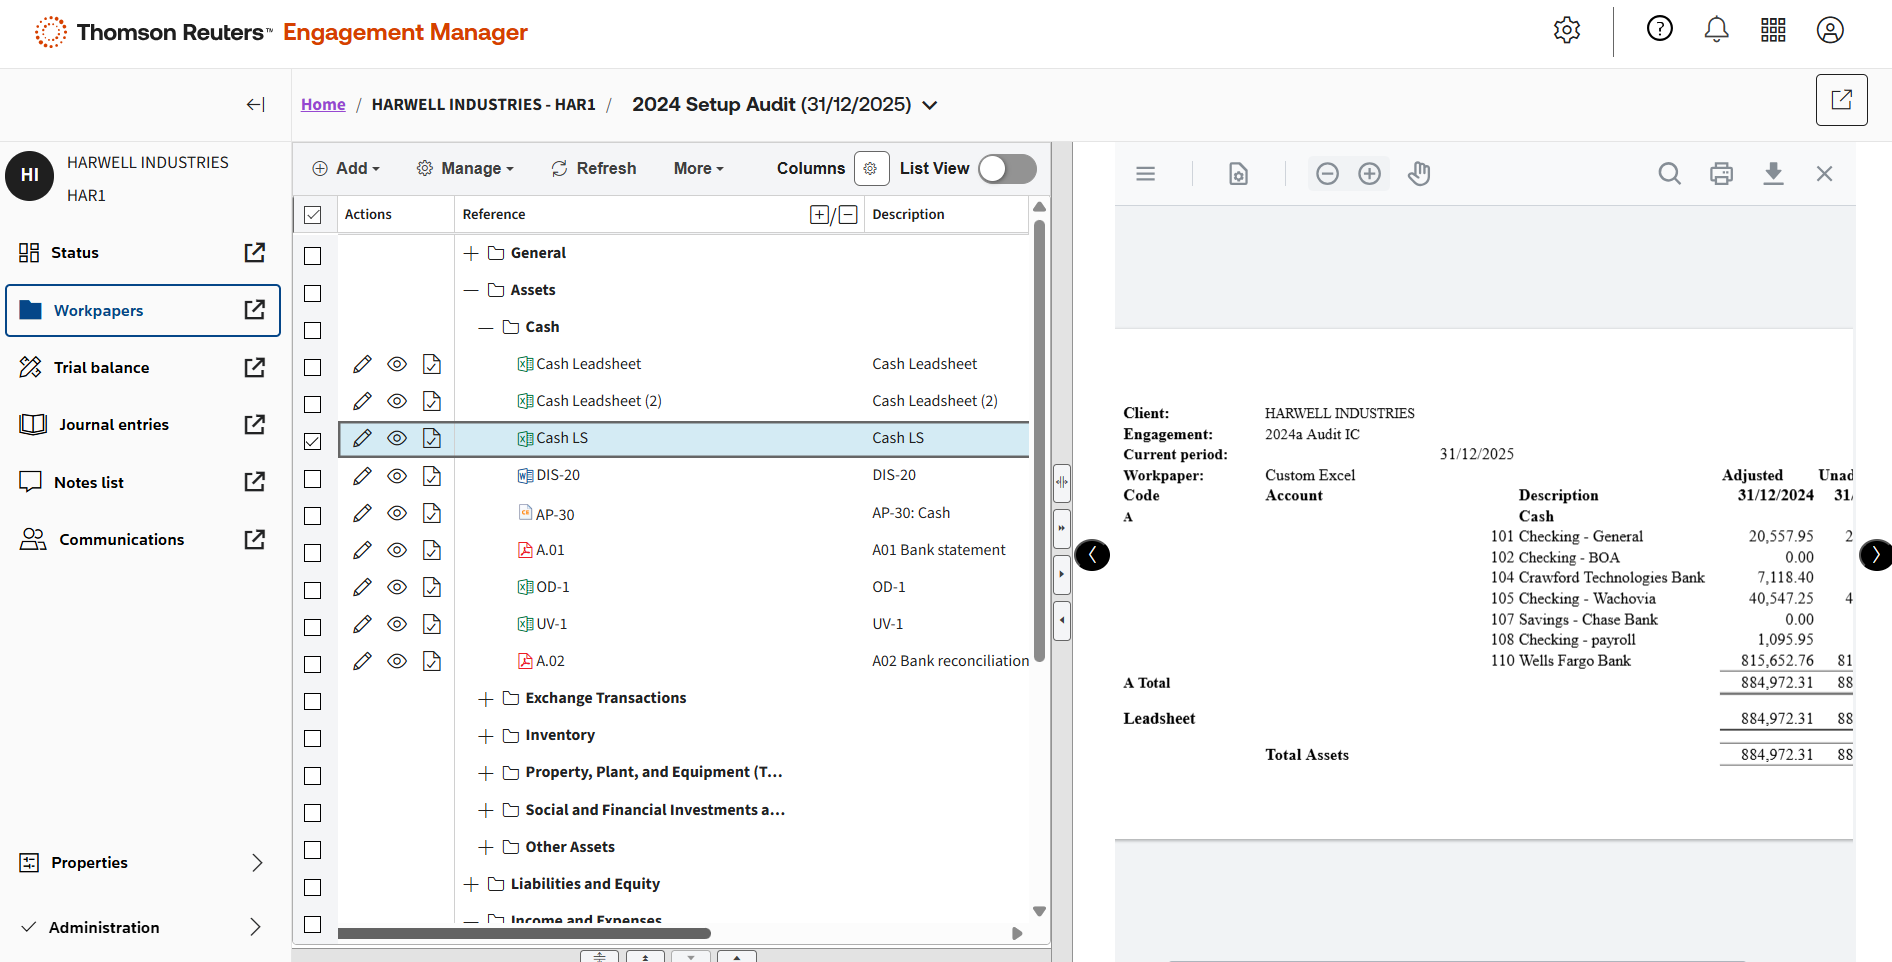
The workpaper preview panel lets you see the contents of a document directly in the browser while reviewing without having to open the document in its native application.
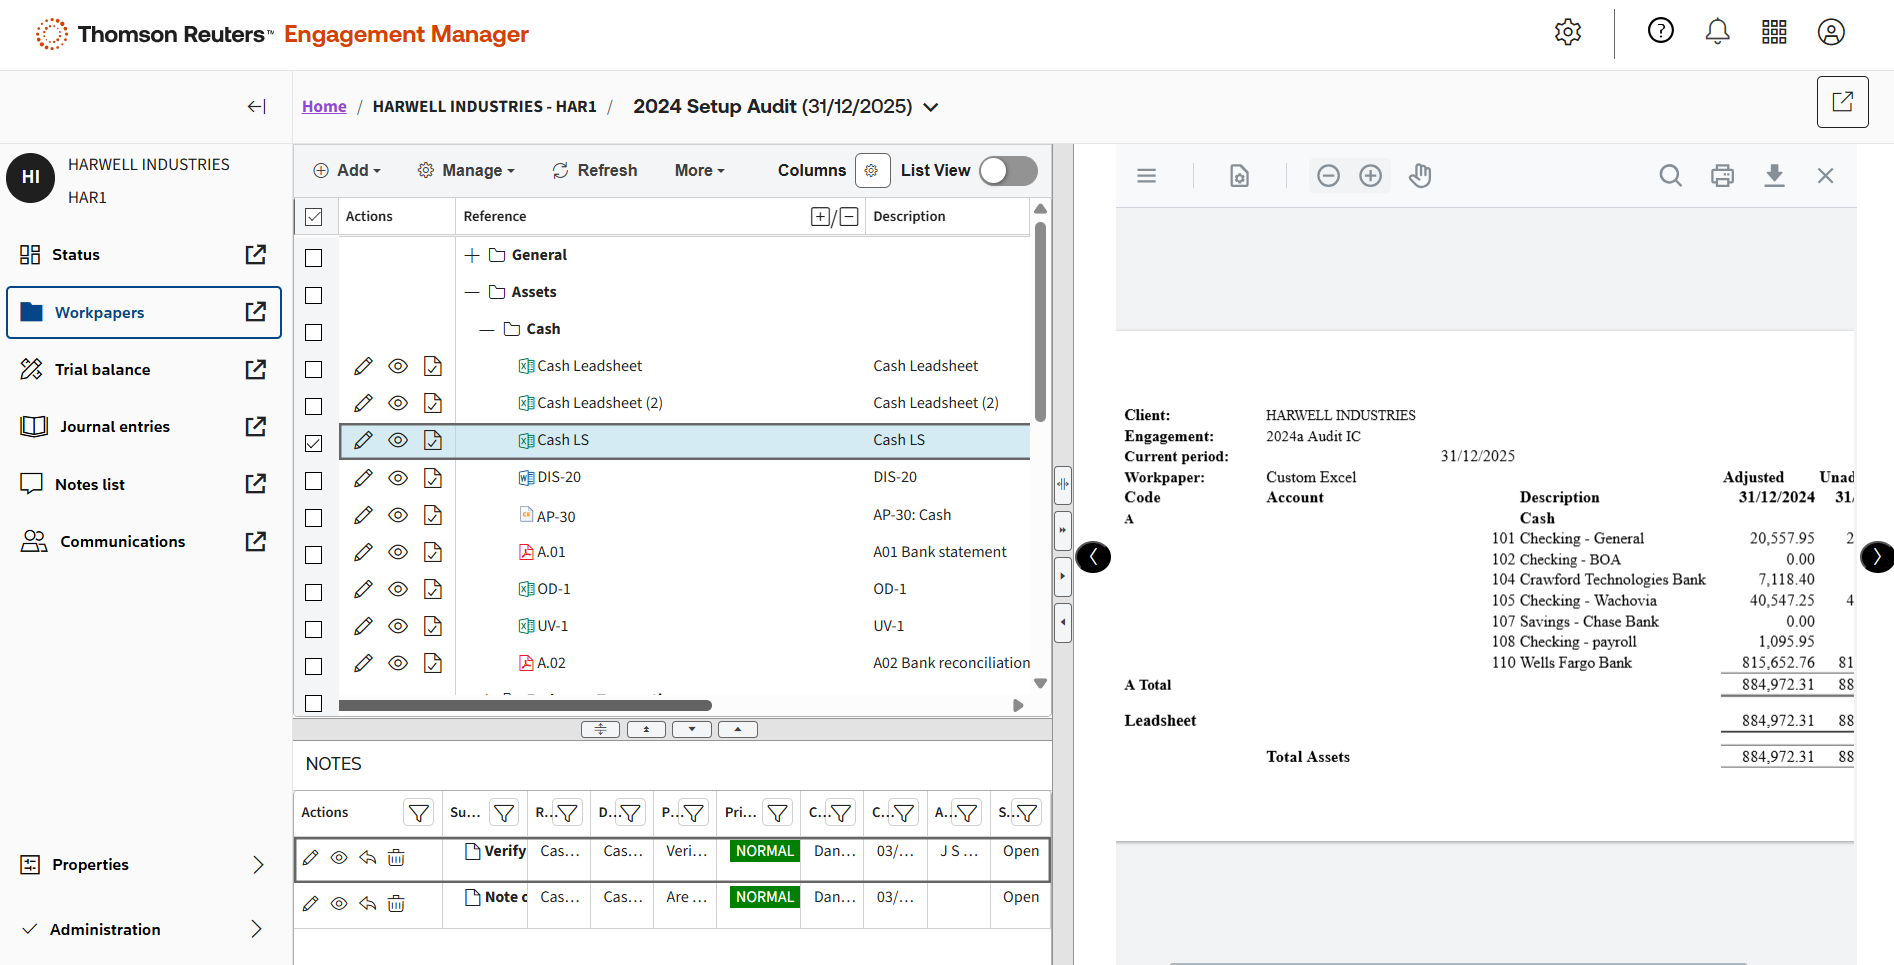
Highlighting a workpaper will also show you any open notes for the workpaper in the Notes panel.
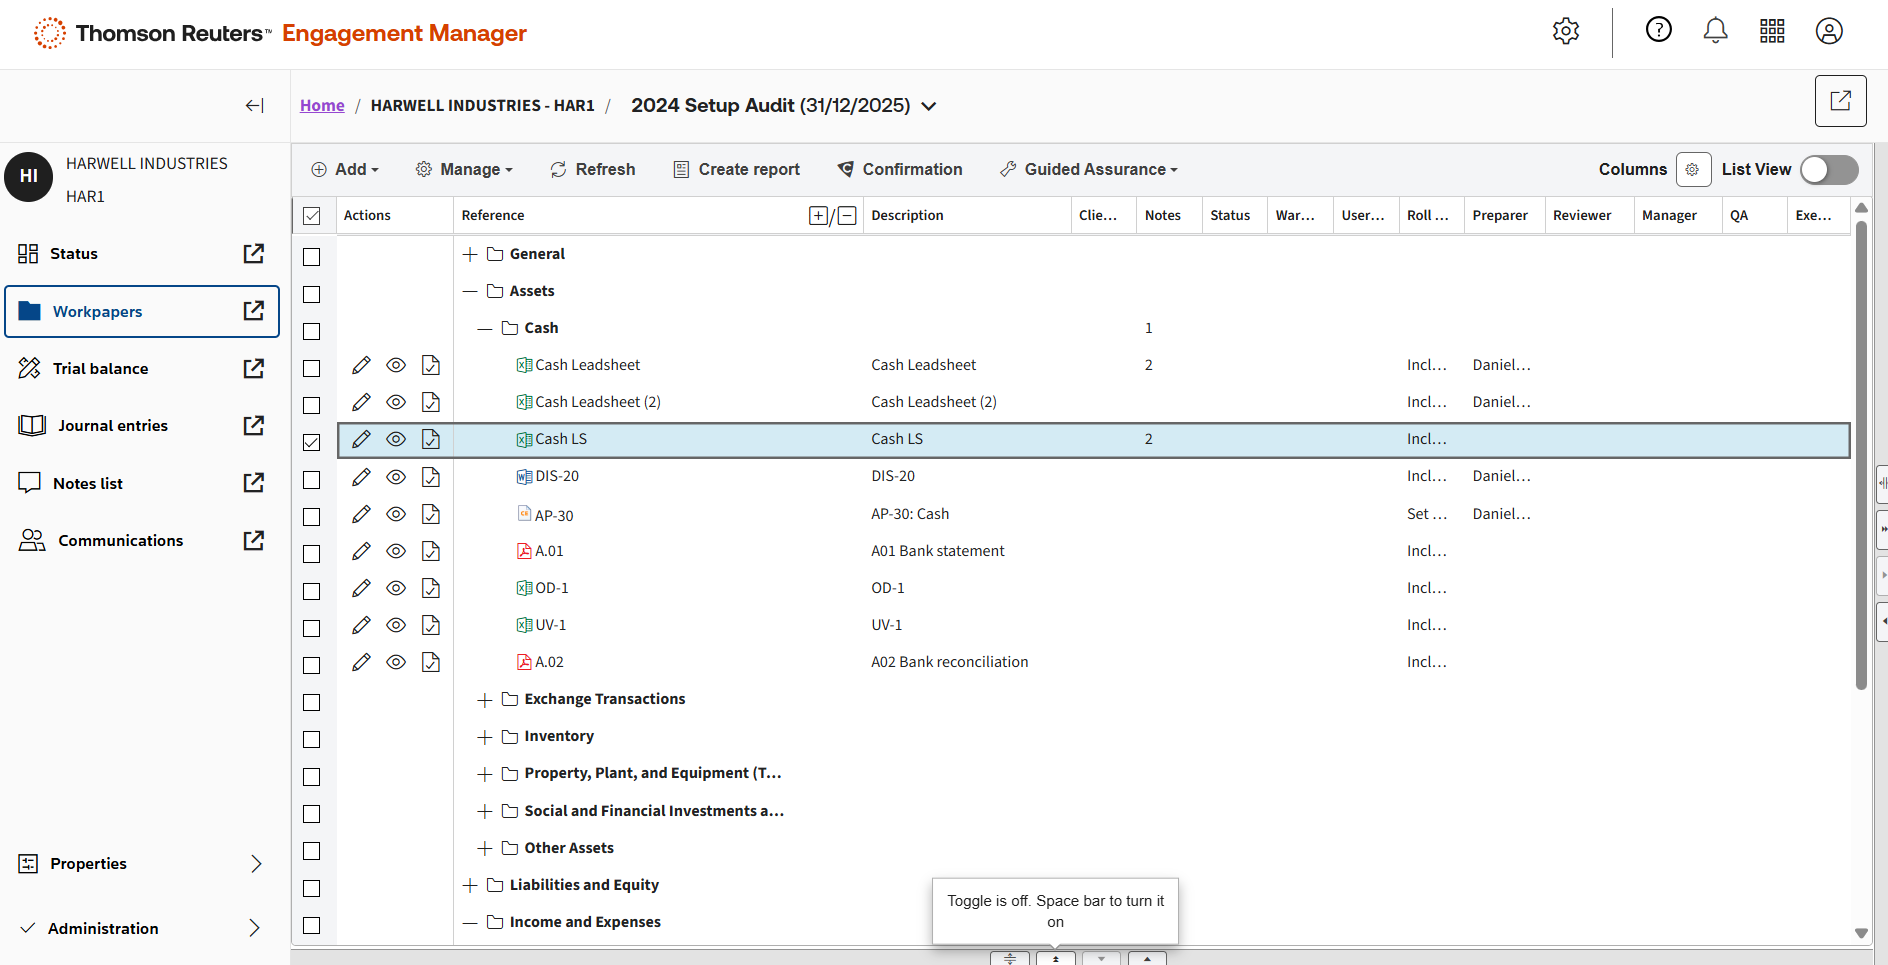
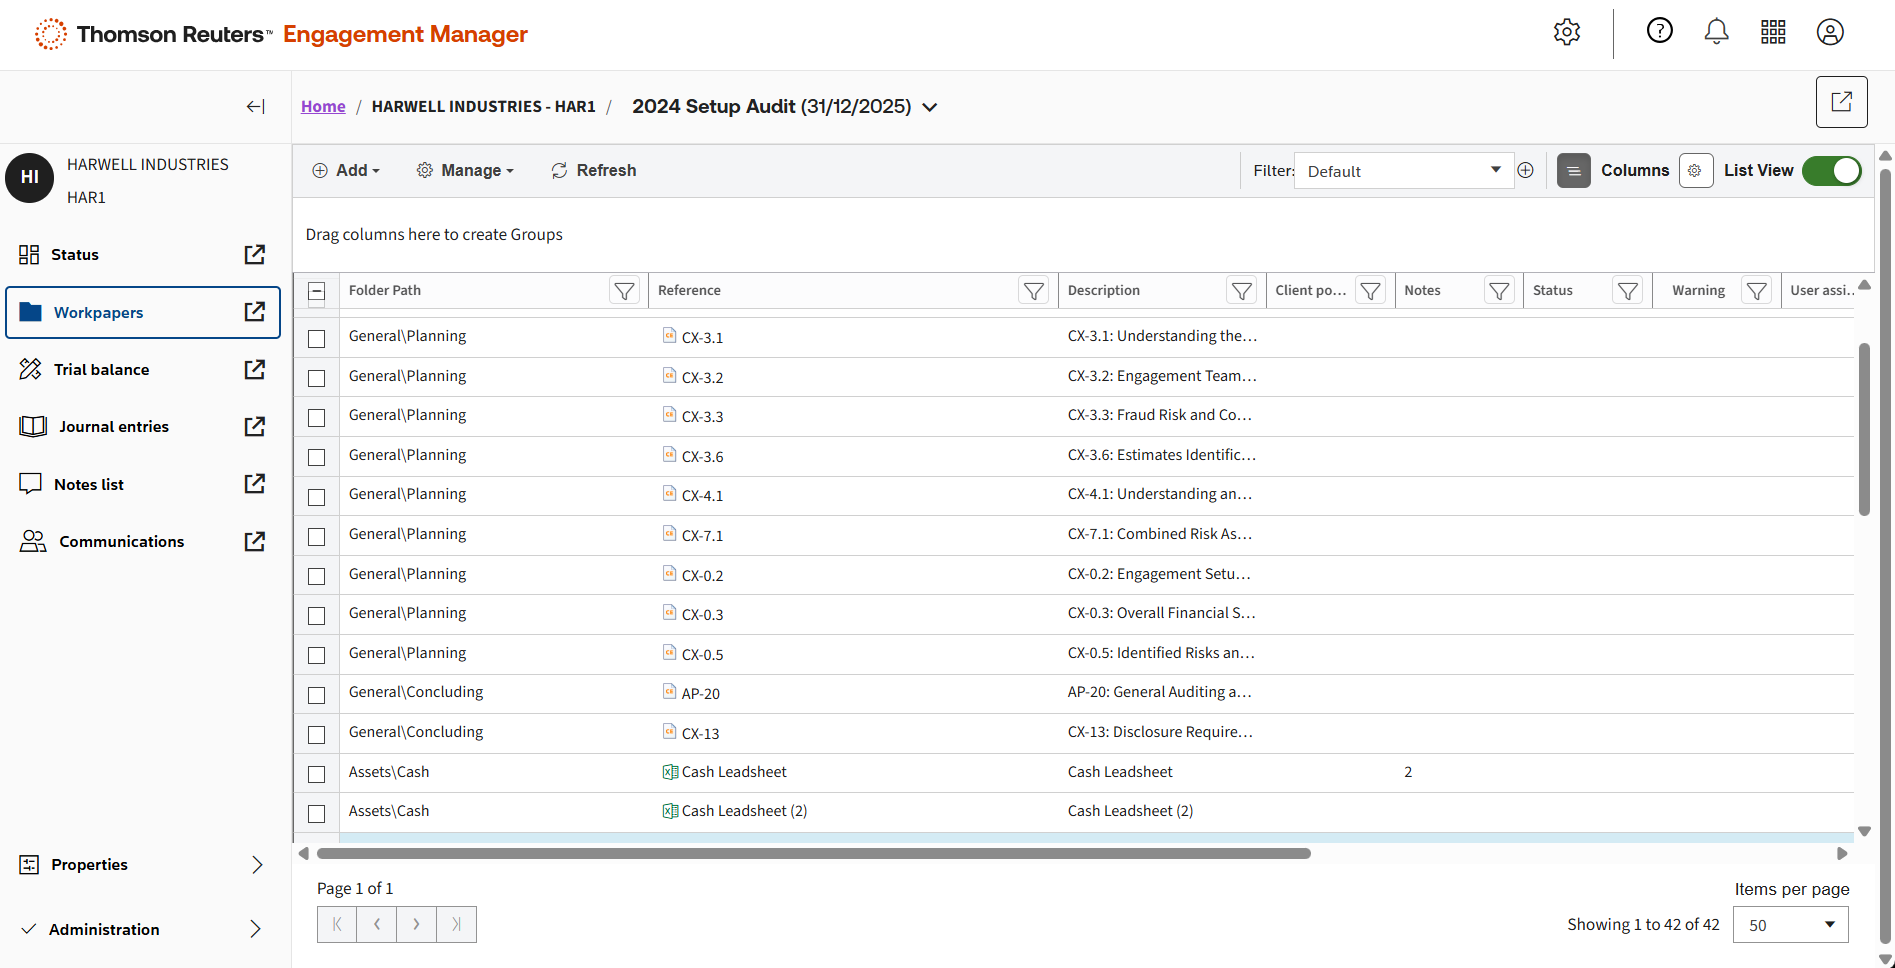
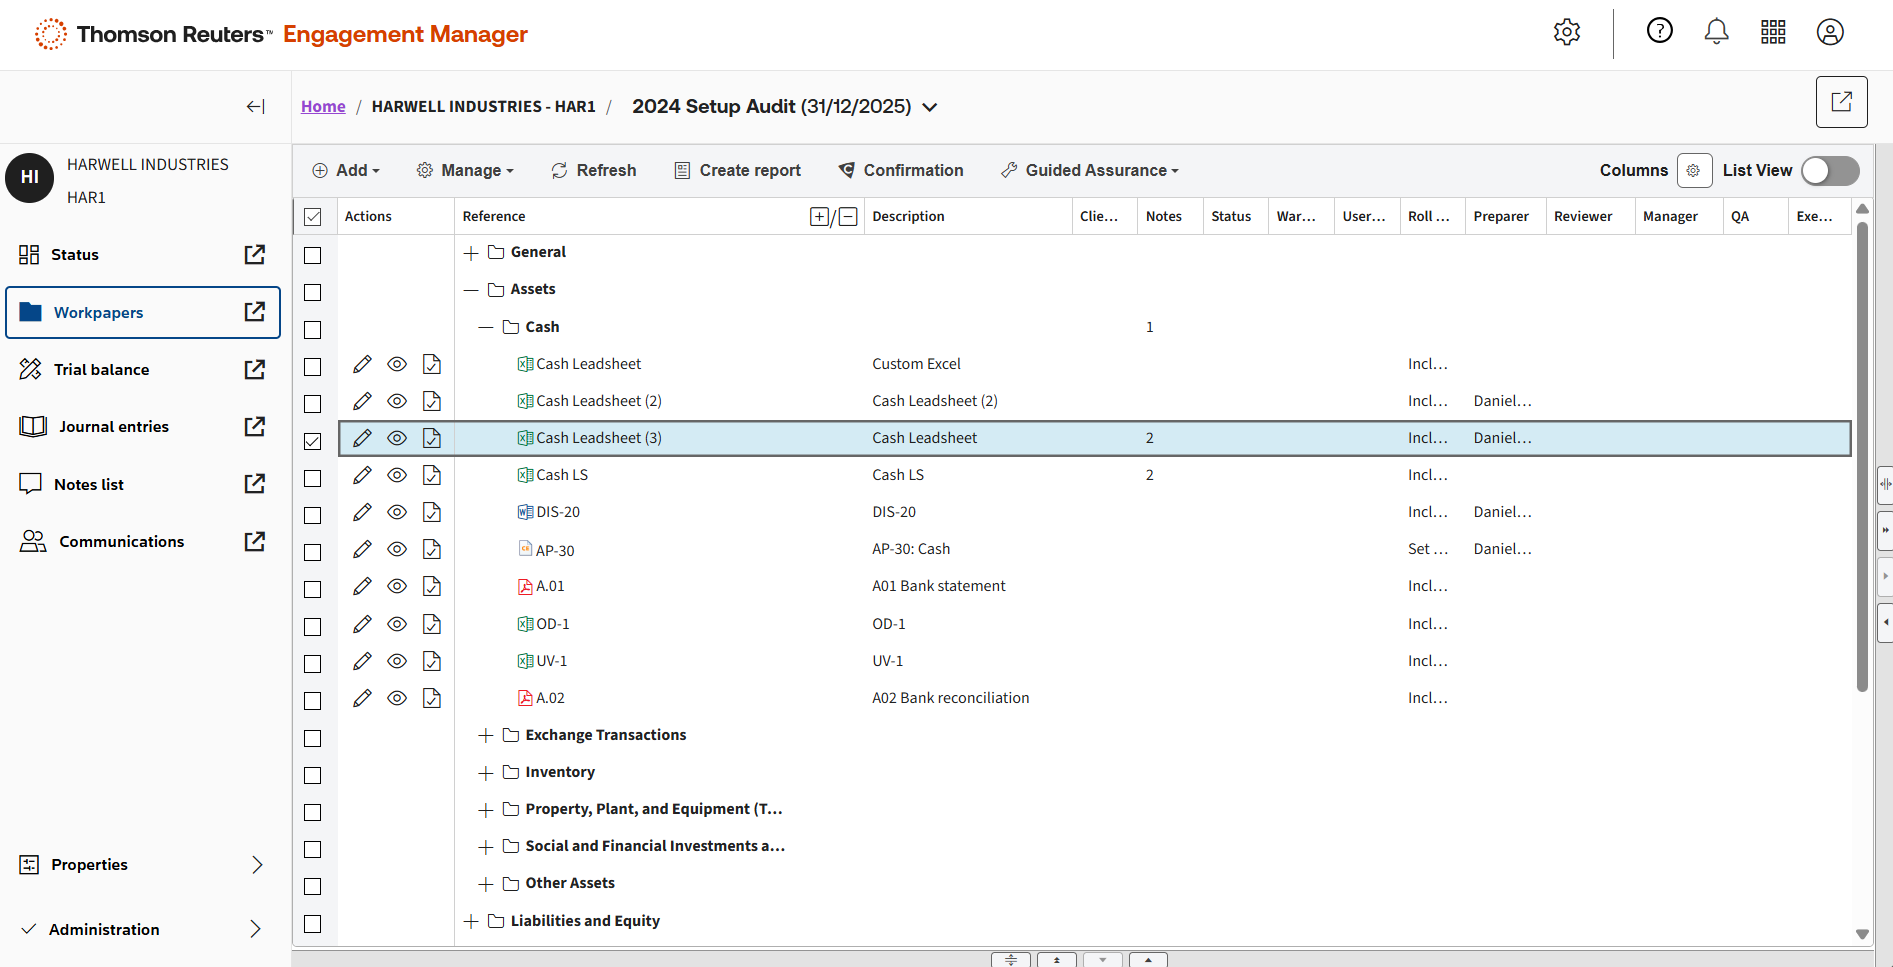
Click List View to switch to viewing workpapers by list.
This view allows you to search for a specific workpaper name using filters. Then, you can set sorting and filtering options on this list to help find your pending work.
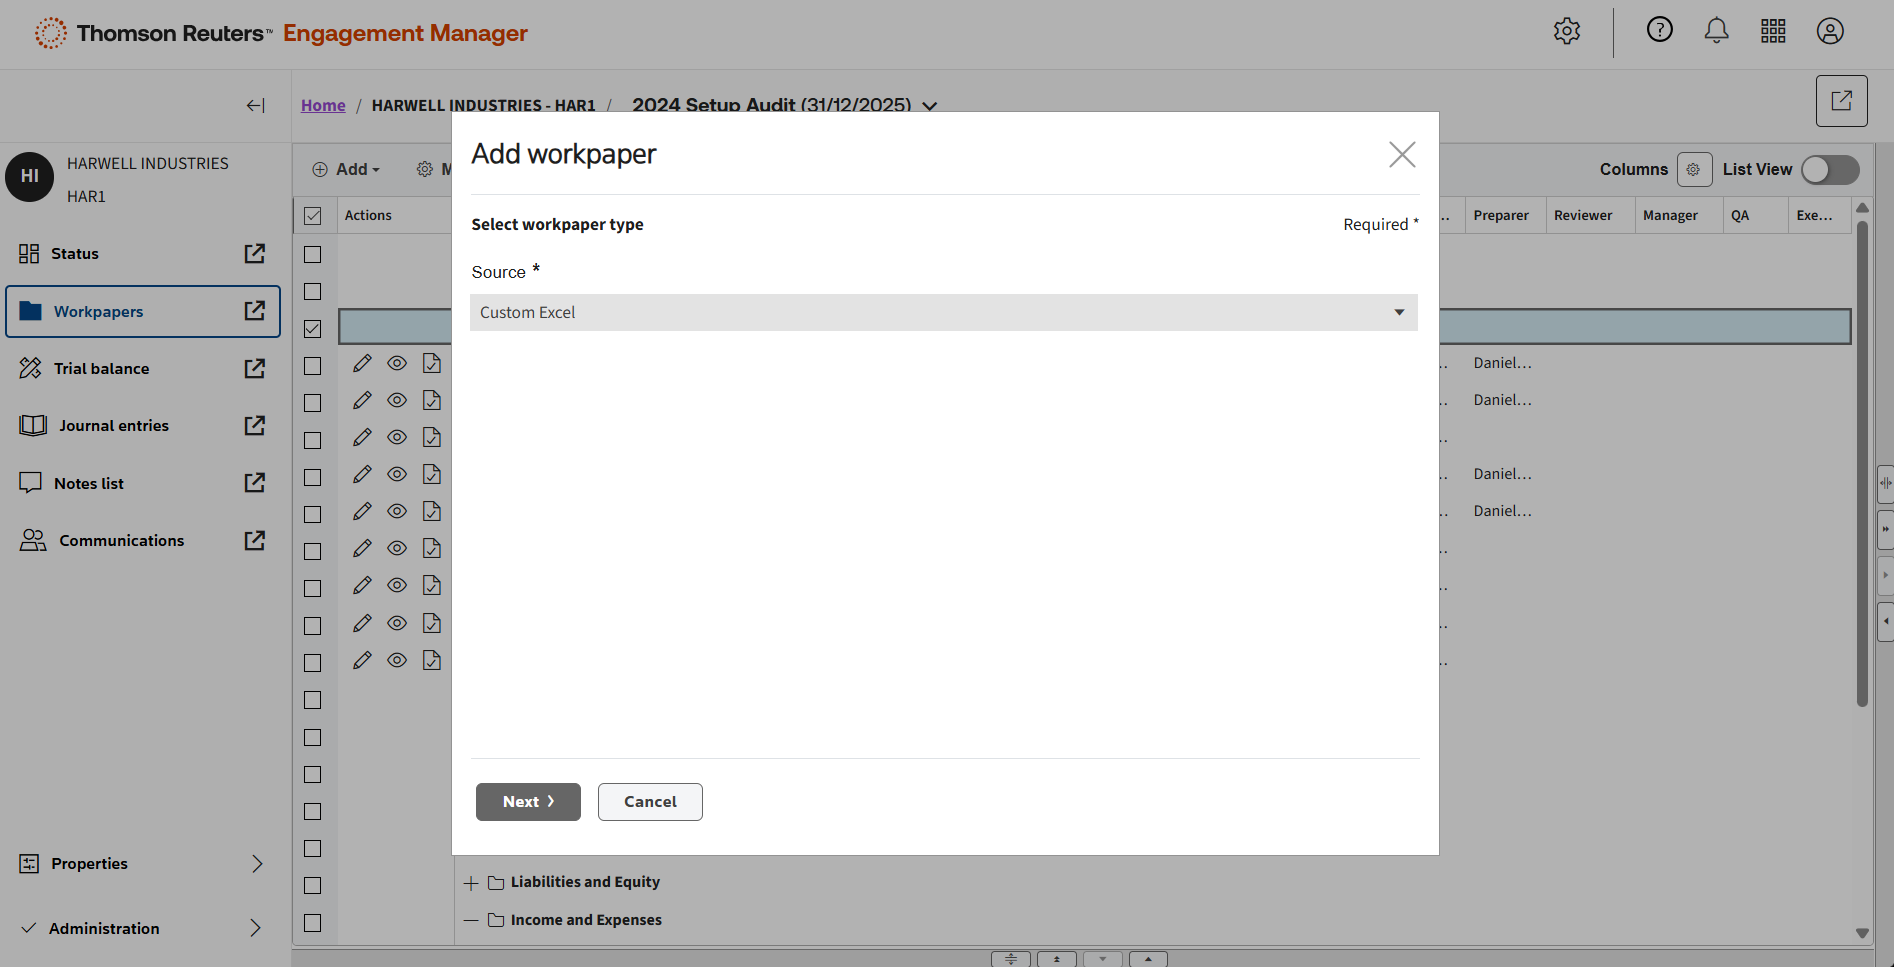
Let's create a custom Excel cash leadsheet.
The workpaper type will be Custom Excel.
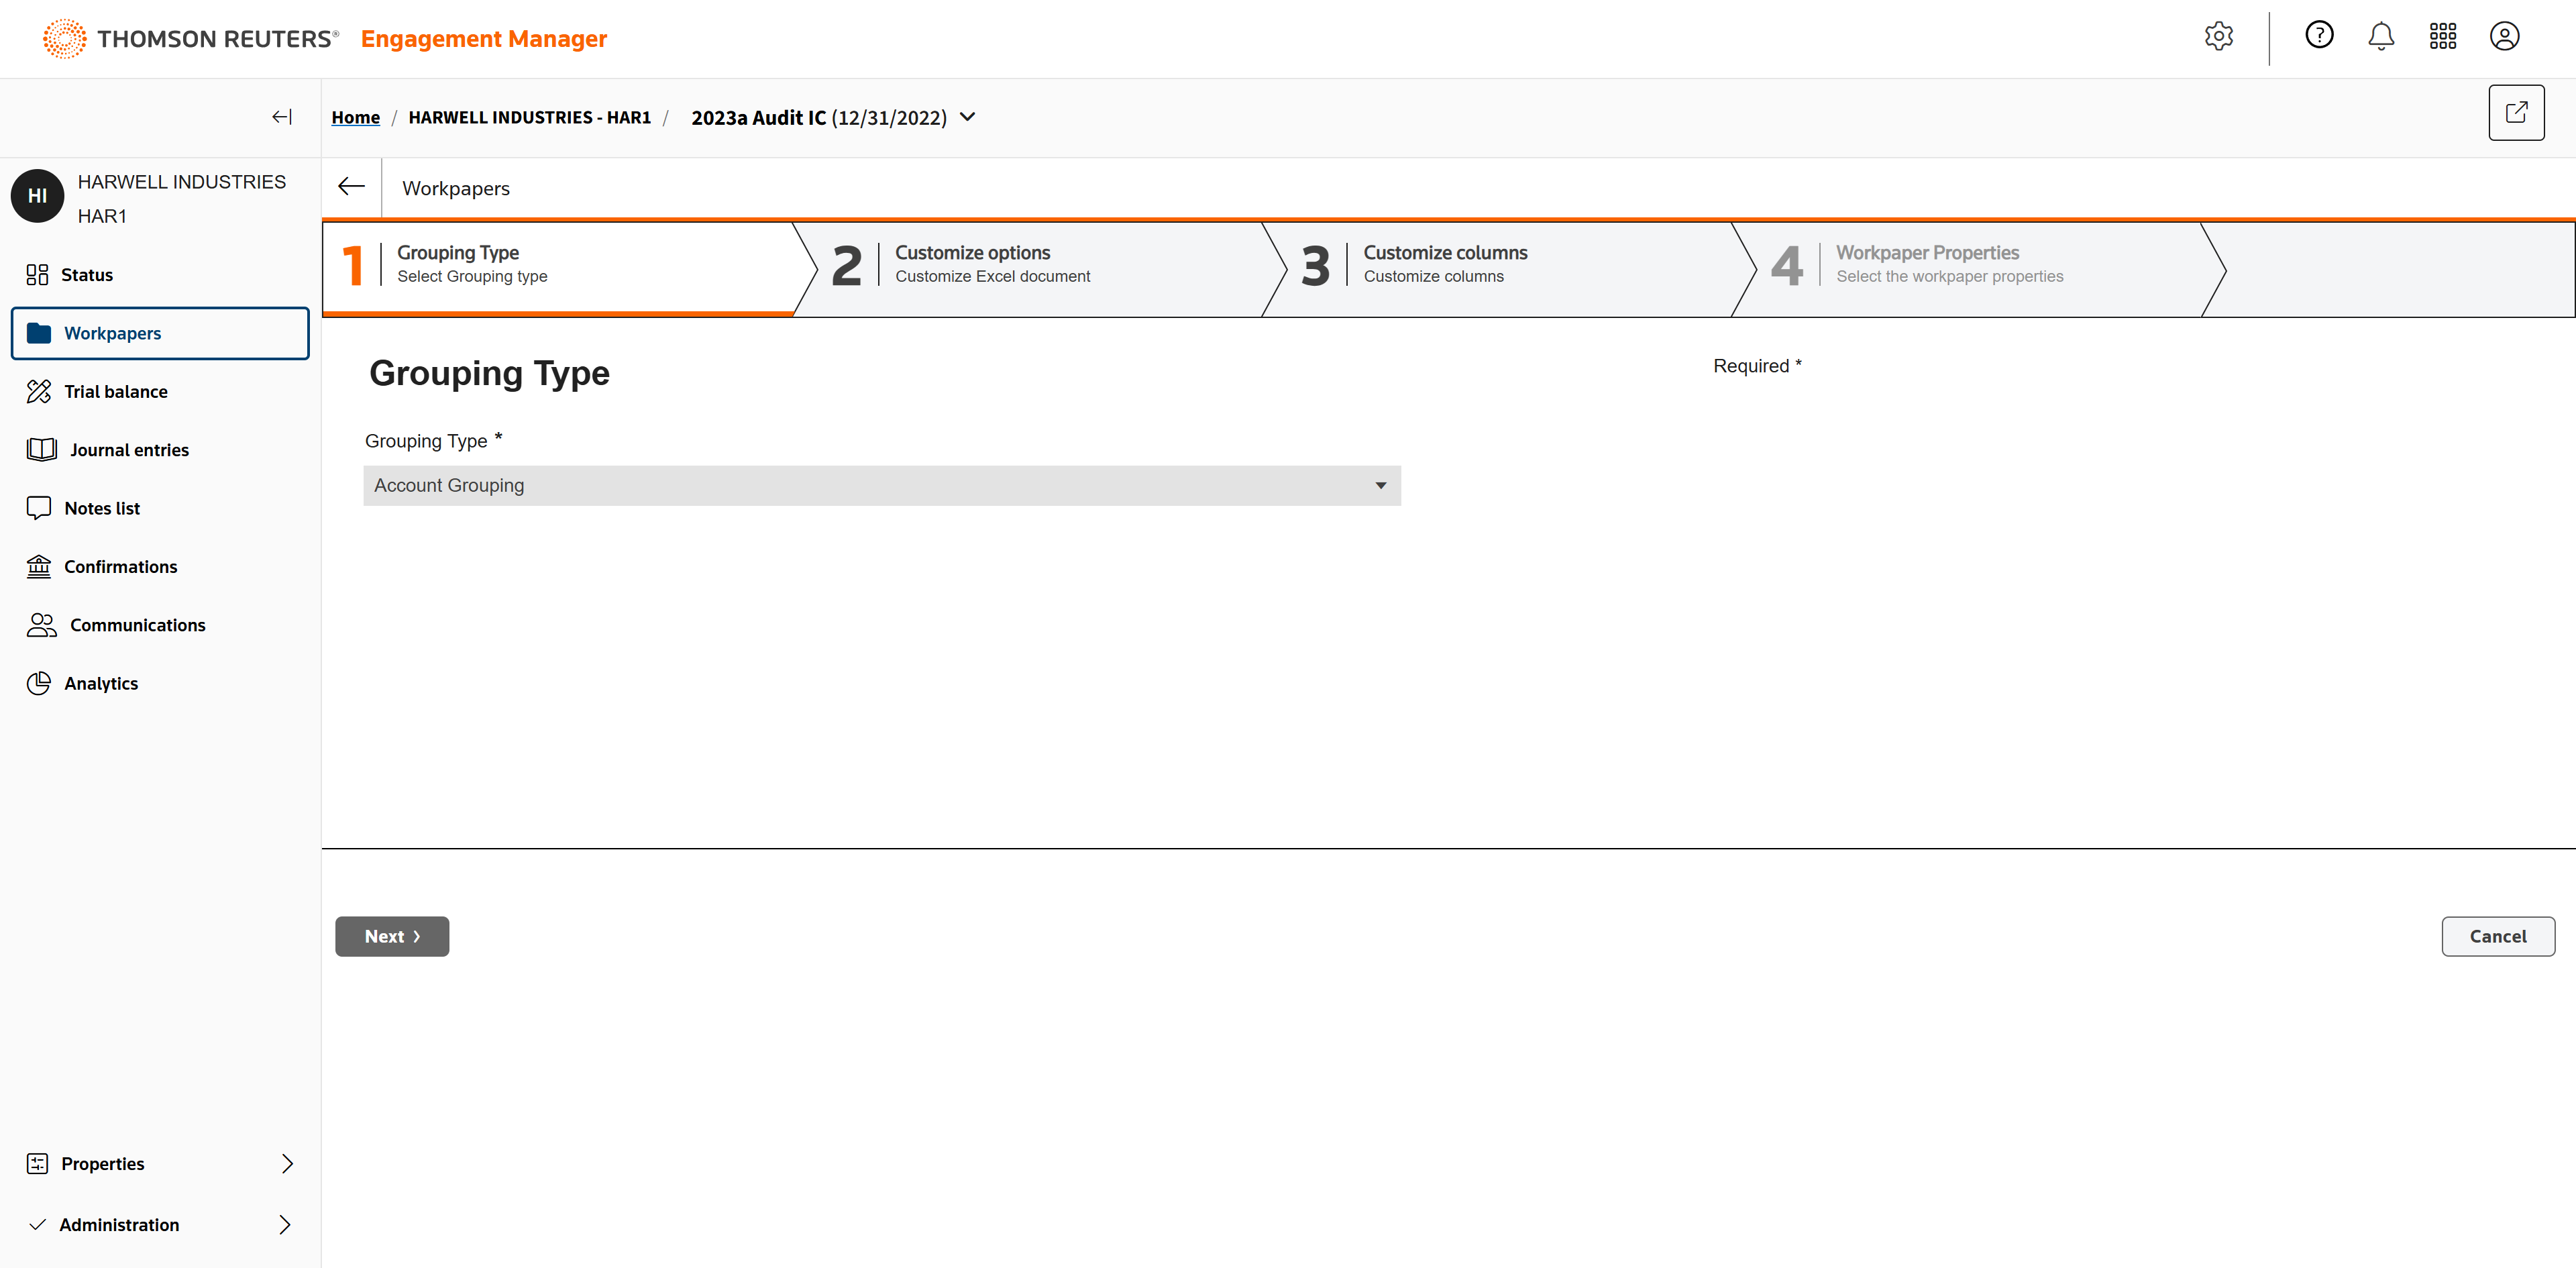
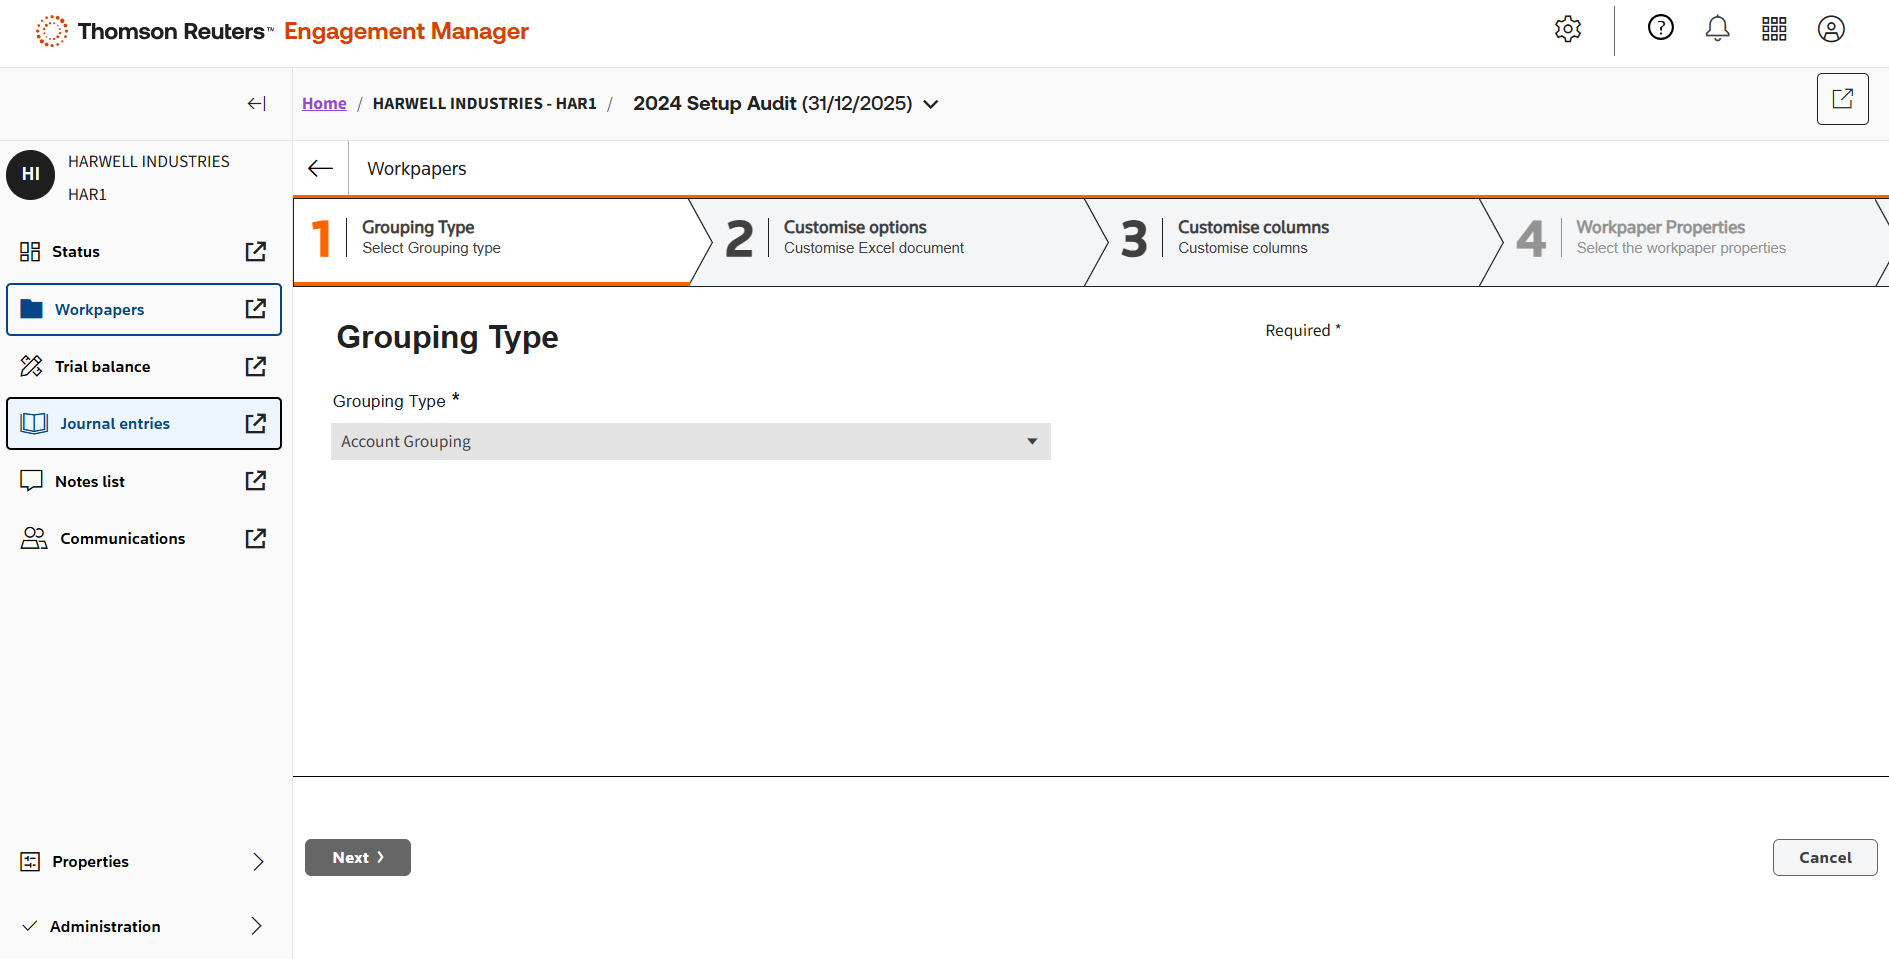
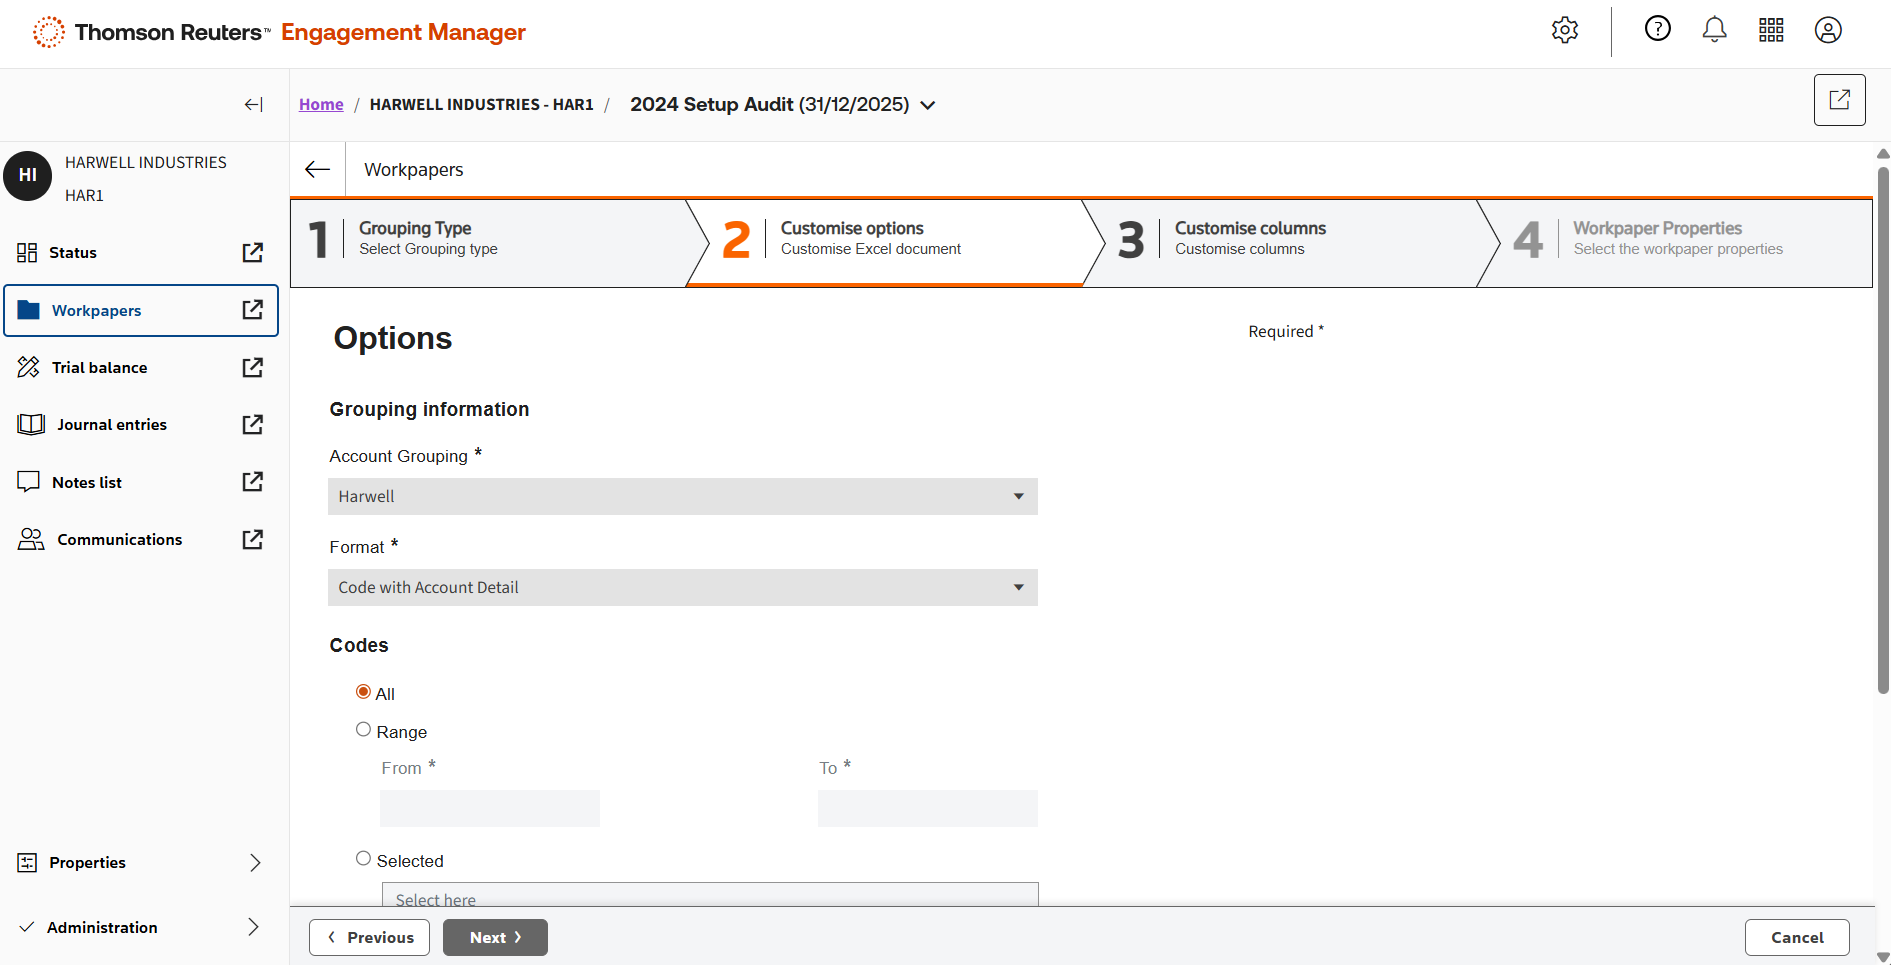
In step 1, select the grouping type.
In step 2, select your Account Grouping and Code with Account Detail in Format.
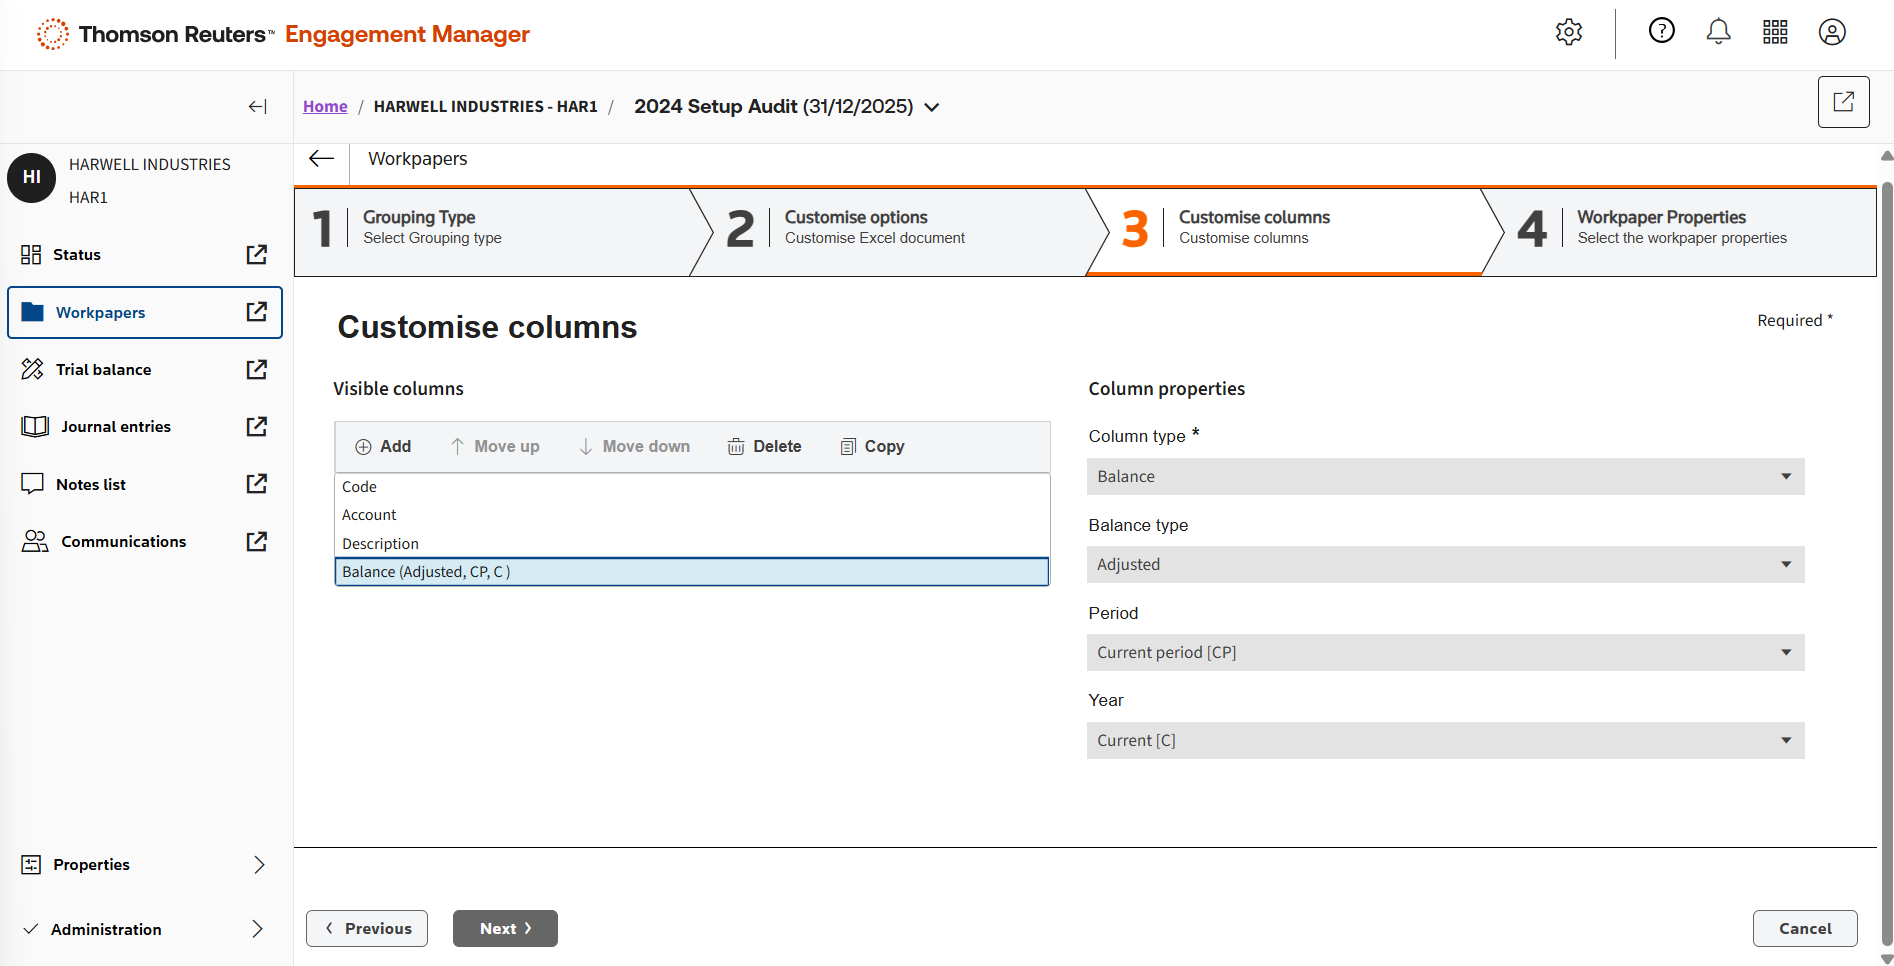
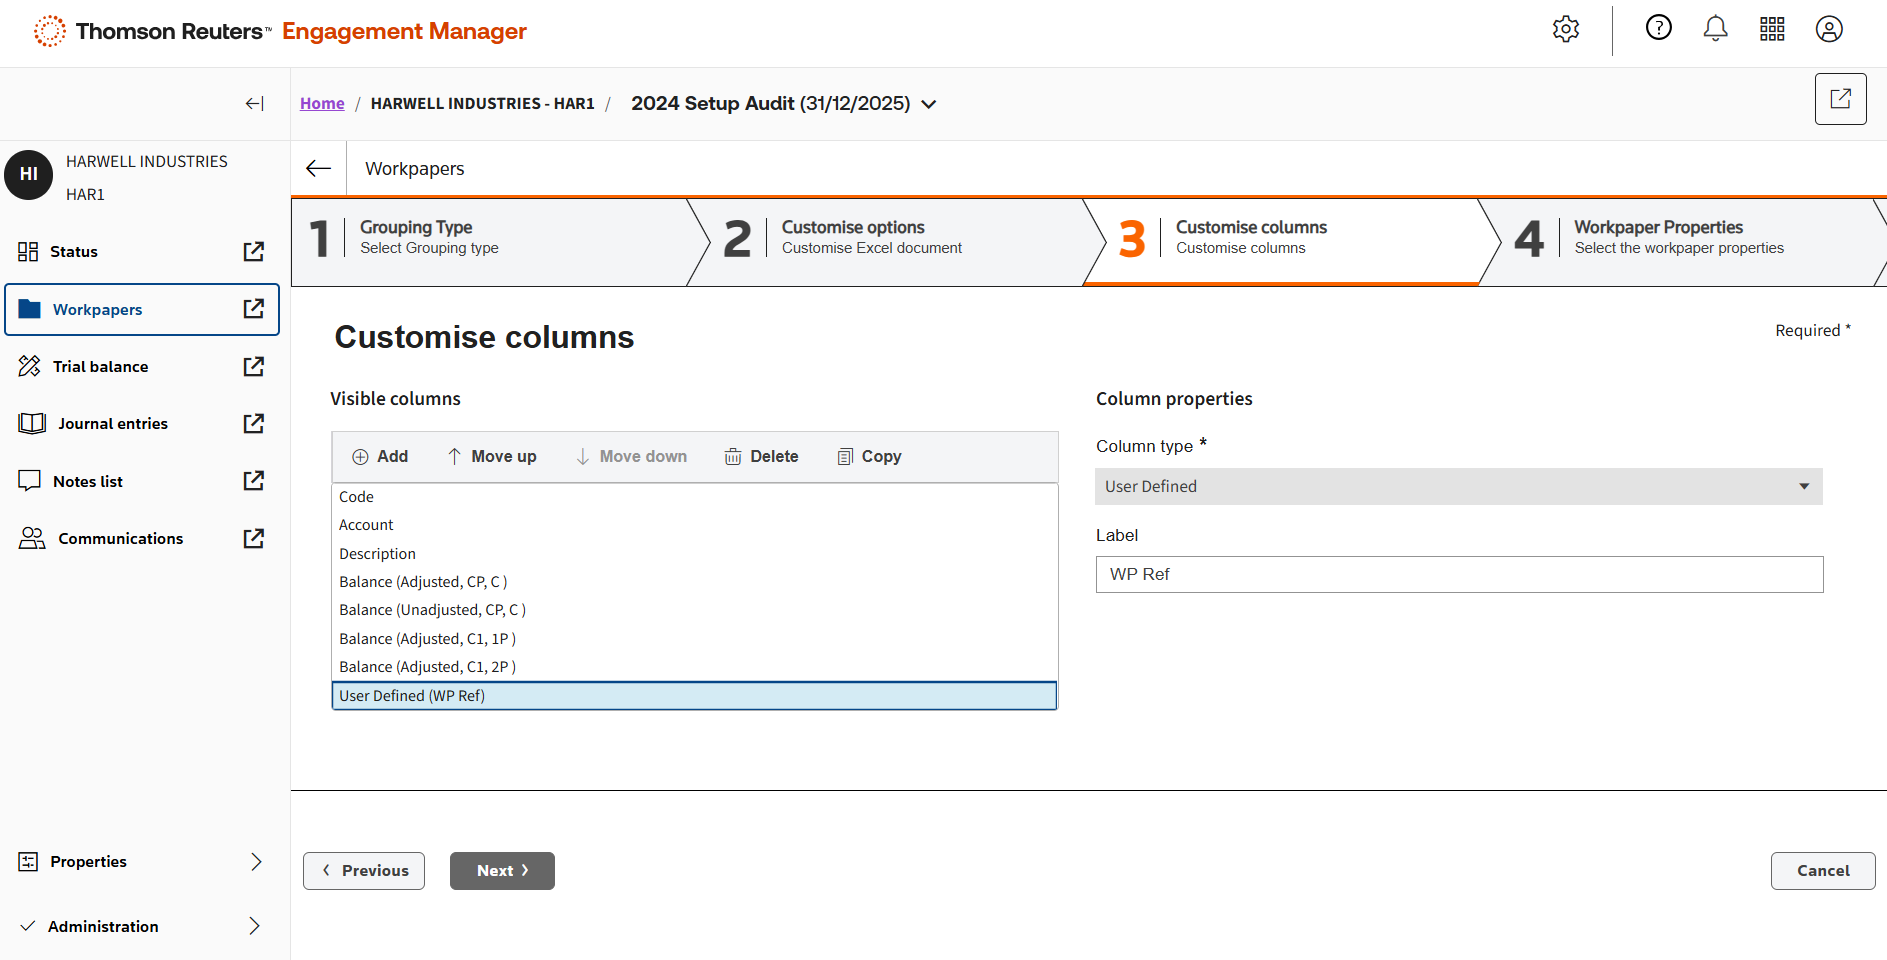
In step 3, click Add to add columns to the leadsheet. You can add as many as you need.
Once you've finished adding columns, click Next.
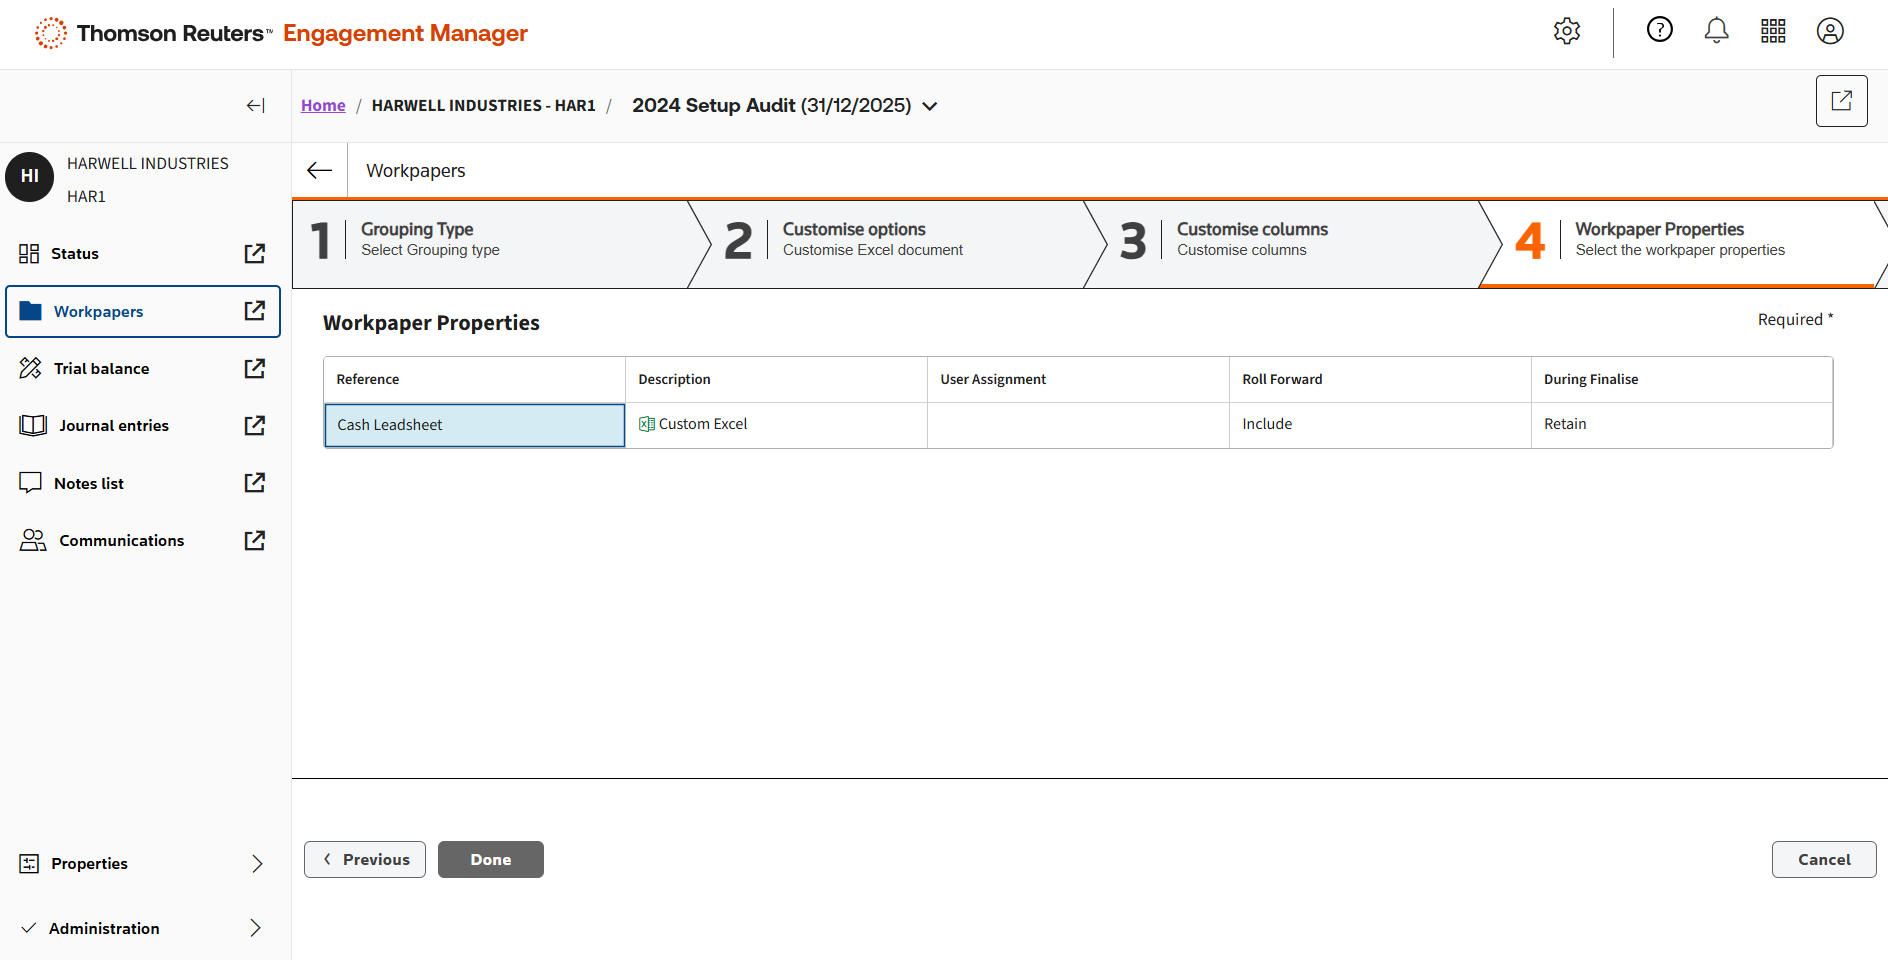
In step 4, finish by defining the last details of the leadsheet such as Reference and Description.
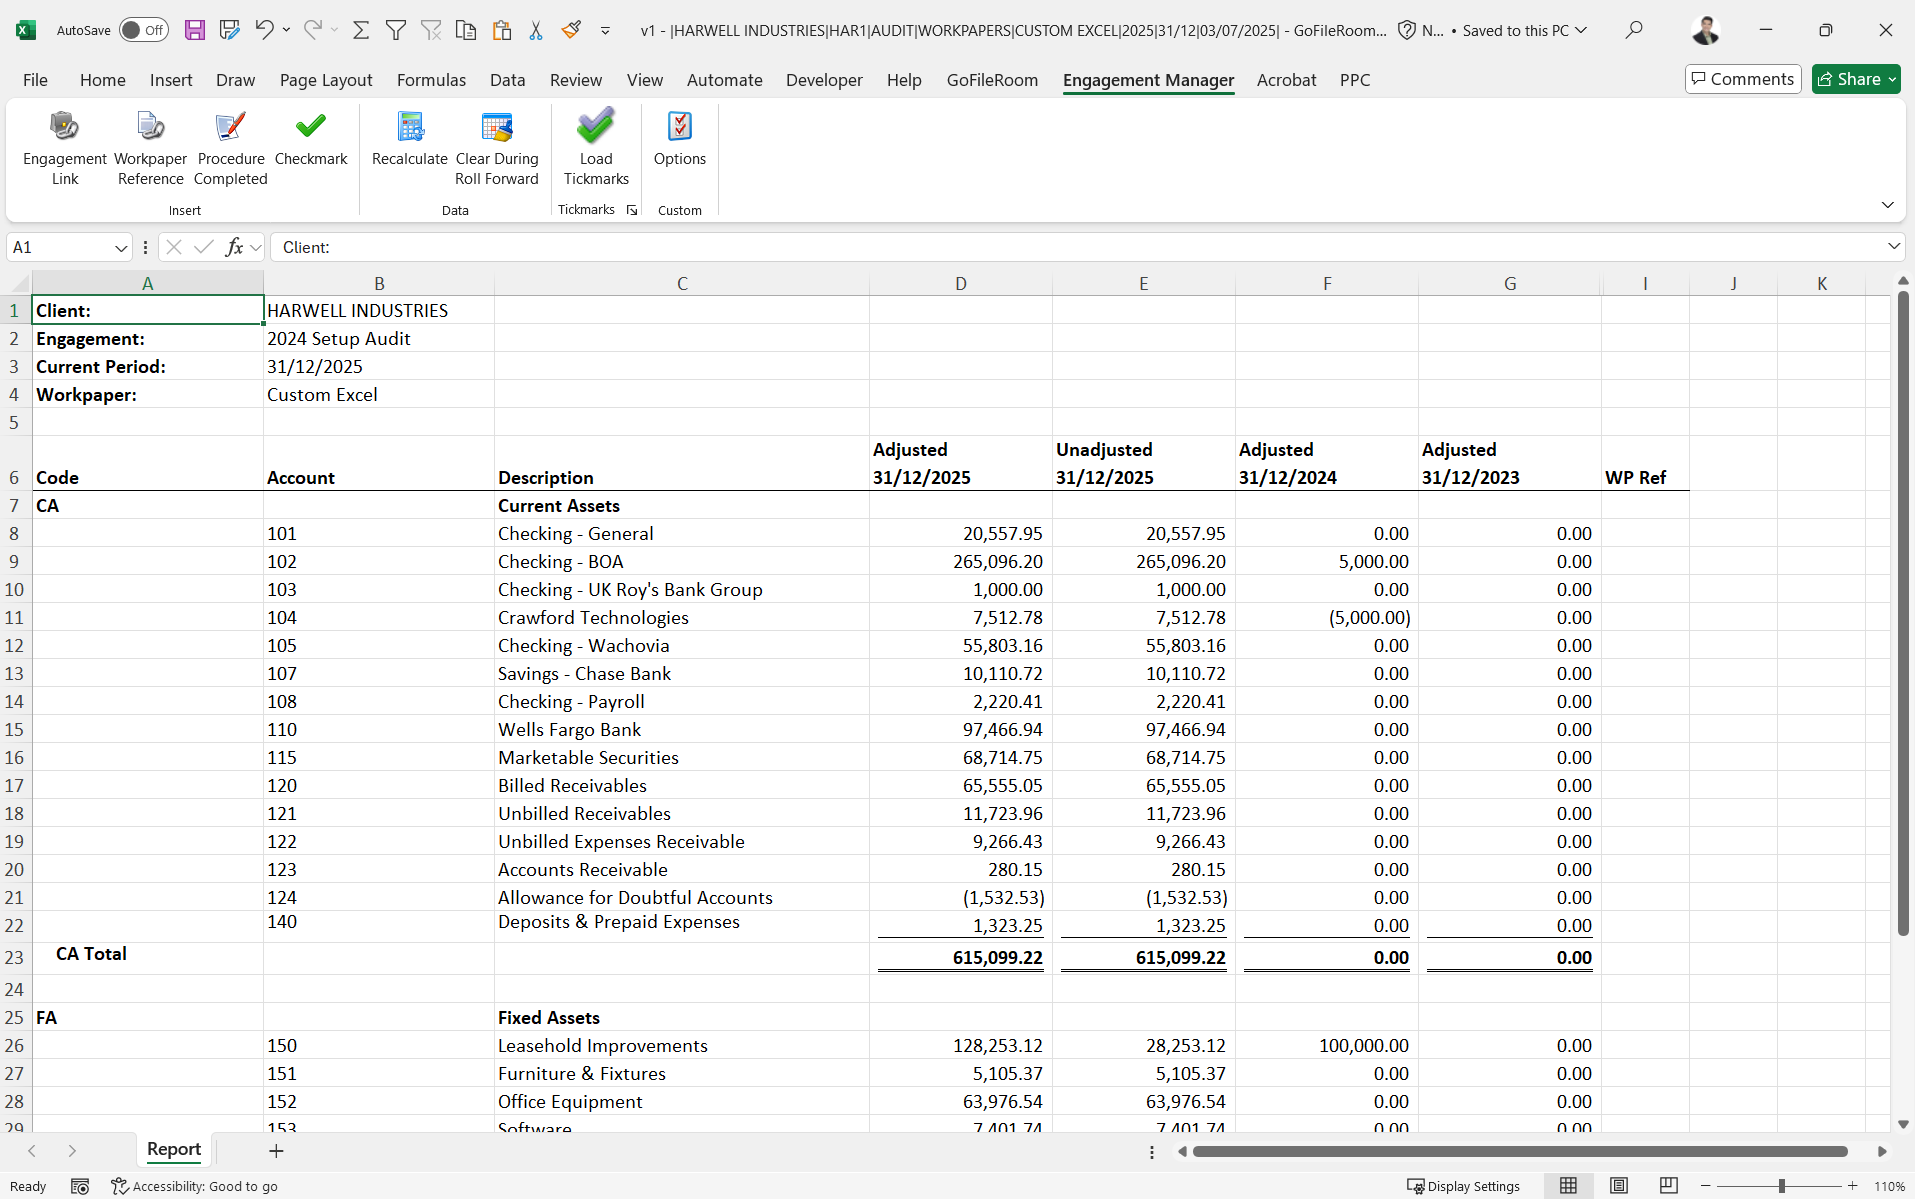
The new leadsheet has been saved successfully. Click to open it.
All numbers are linked directly to the trial balance. New numbers will display for this year and prior numbers from the previous year. You can use this leadsheet from engagement to engagement. It will roll forward year to year.
If you have new accounts next year, they will be added automatically — no need to add them manually.
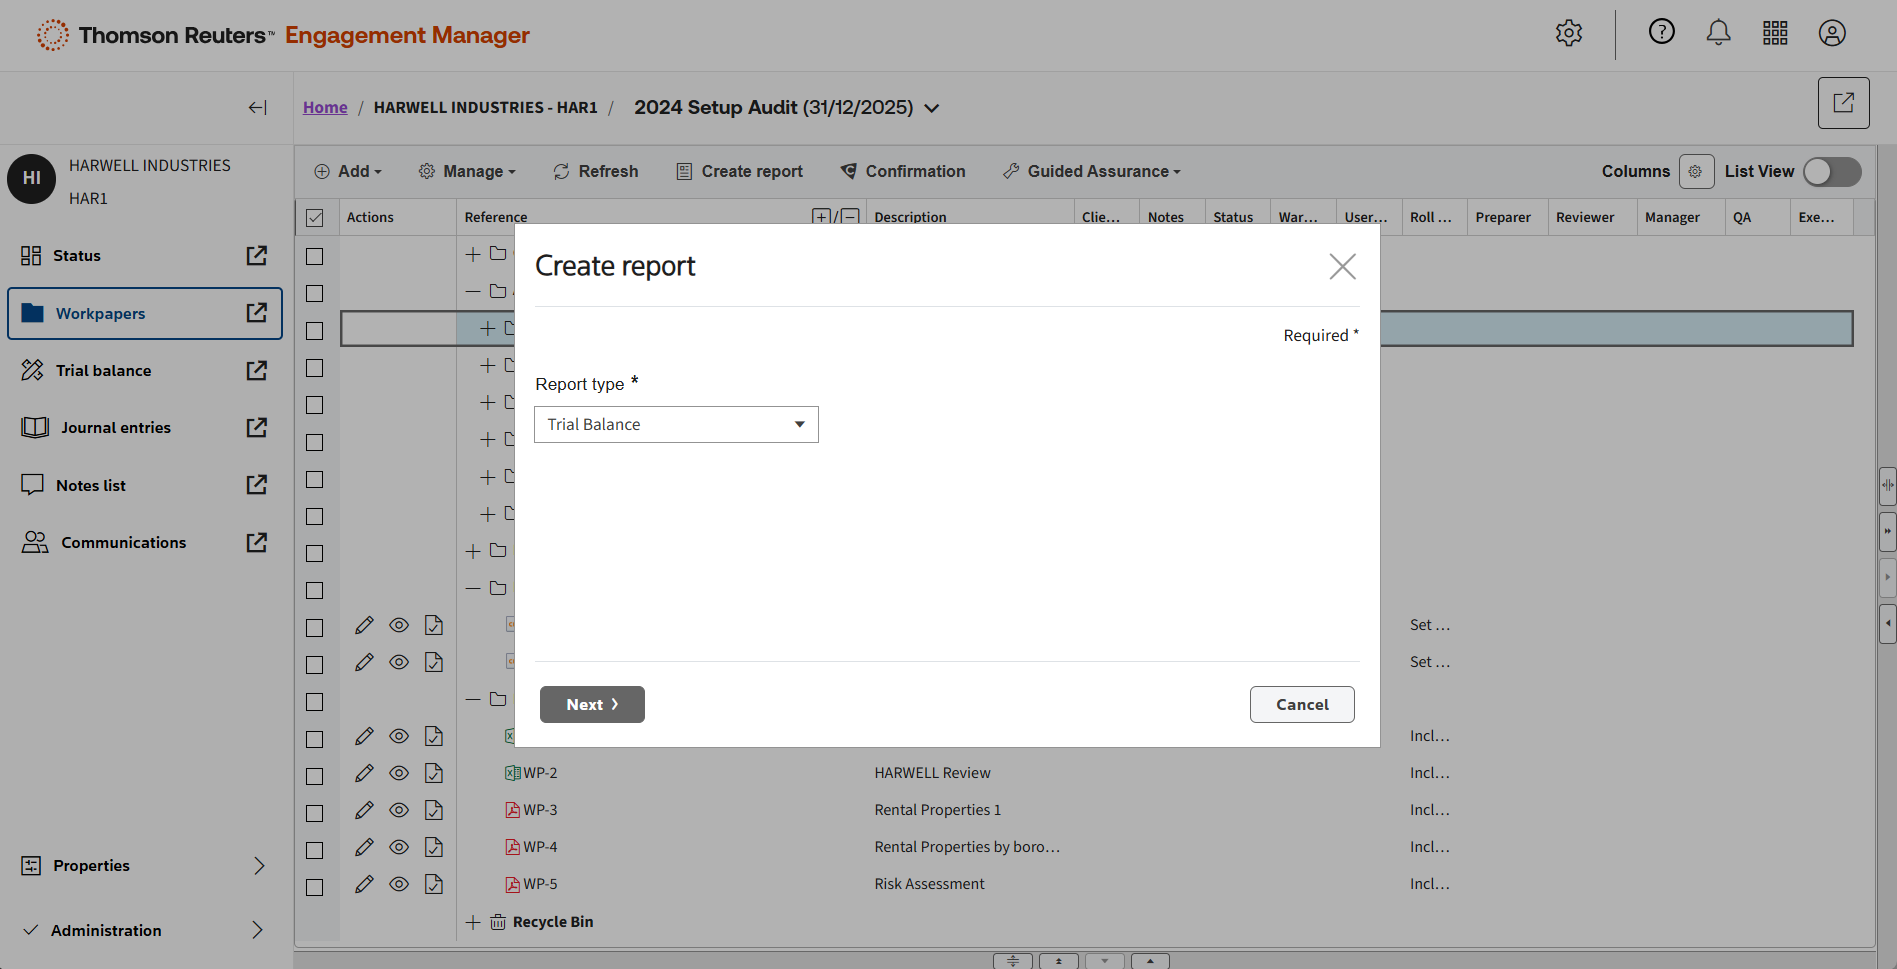
To create a report, click Create Report in Workpapers.
Select Trial Balance as the report type. In this case, you'll create a trial balance variance report.
In the same way you created the custom Excel leadsheet, you will add columns you'd like to include in the report.
Create the report.
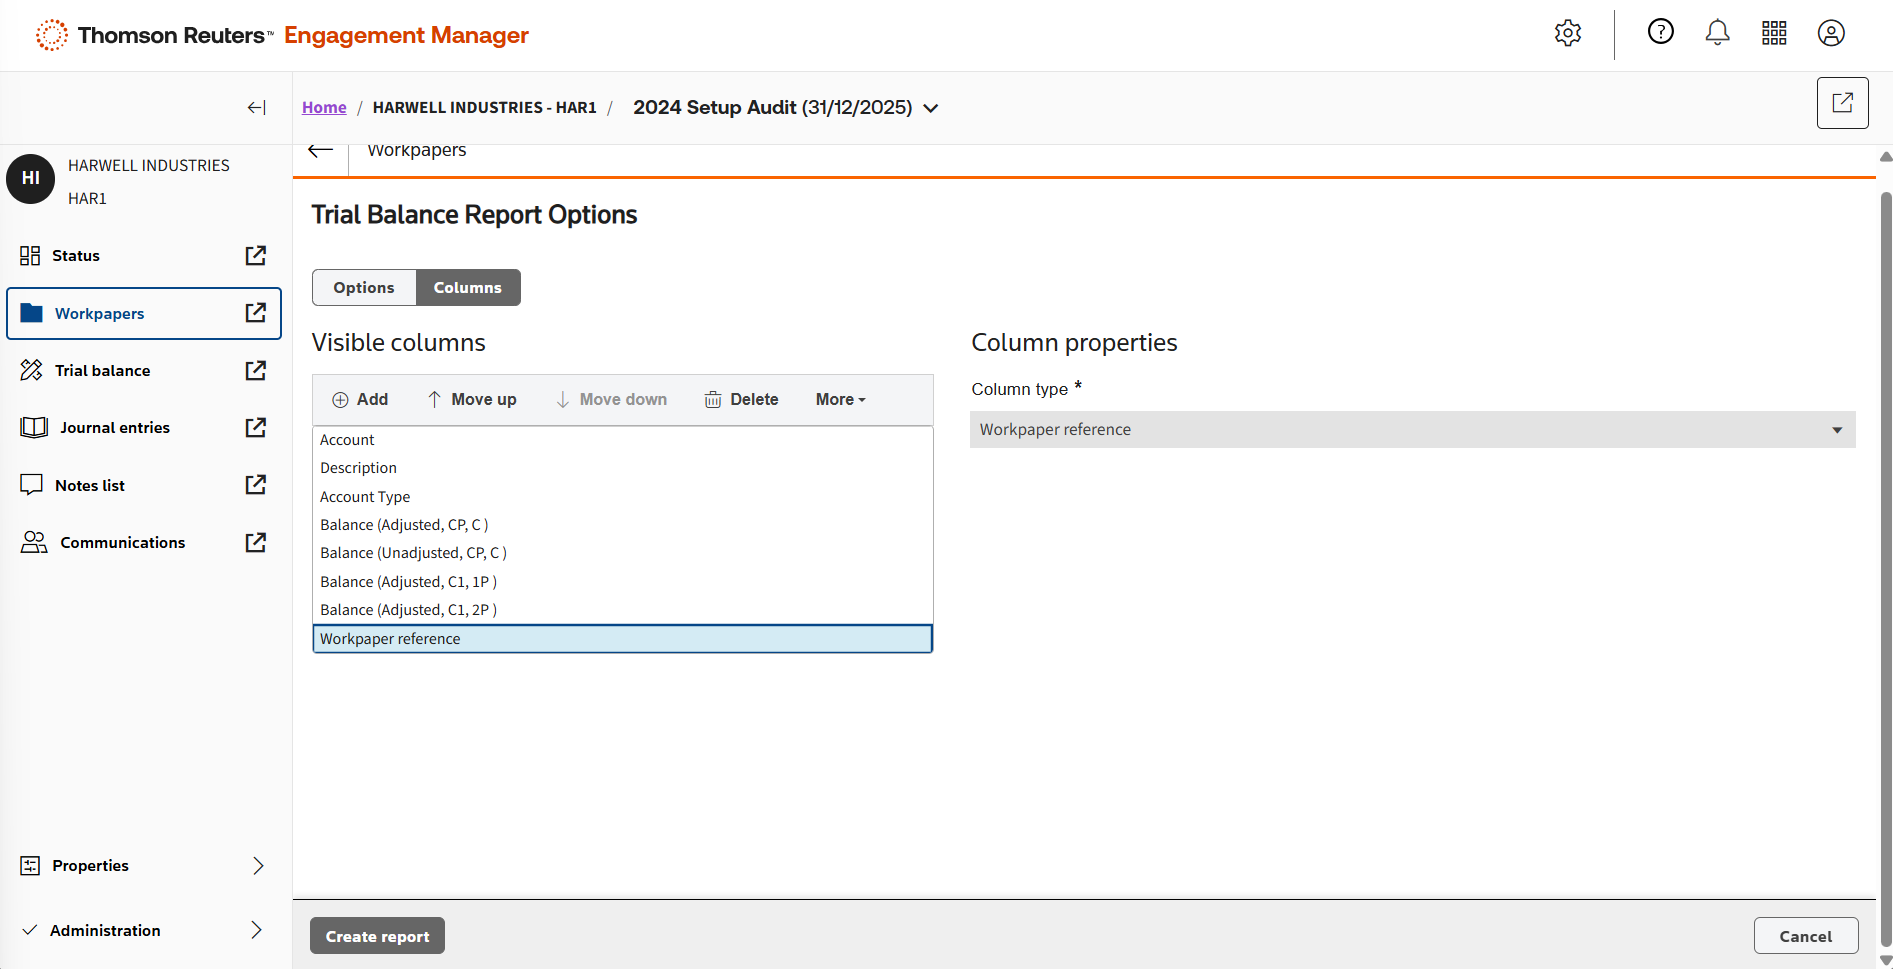
Preview and customise your report options. Click Save when you're ready.
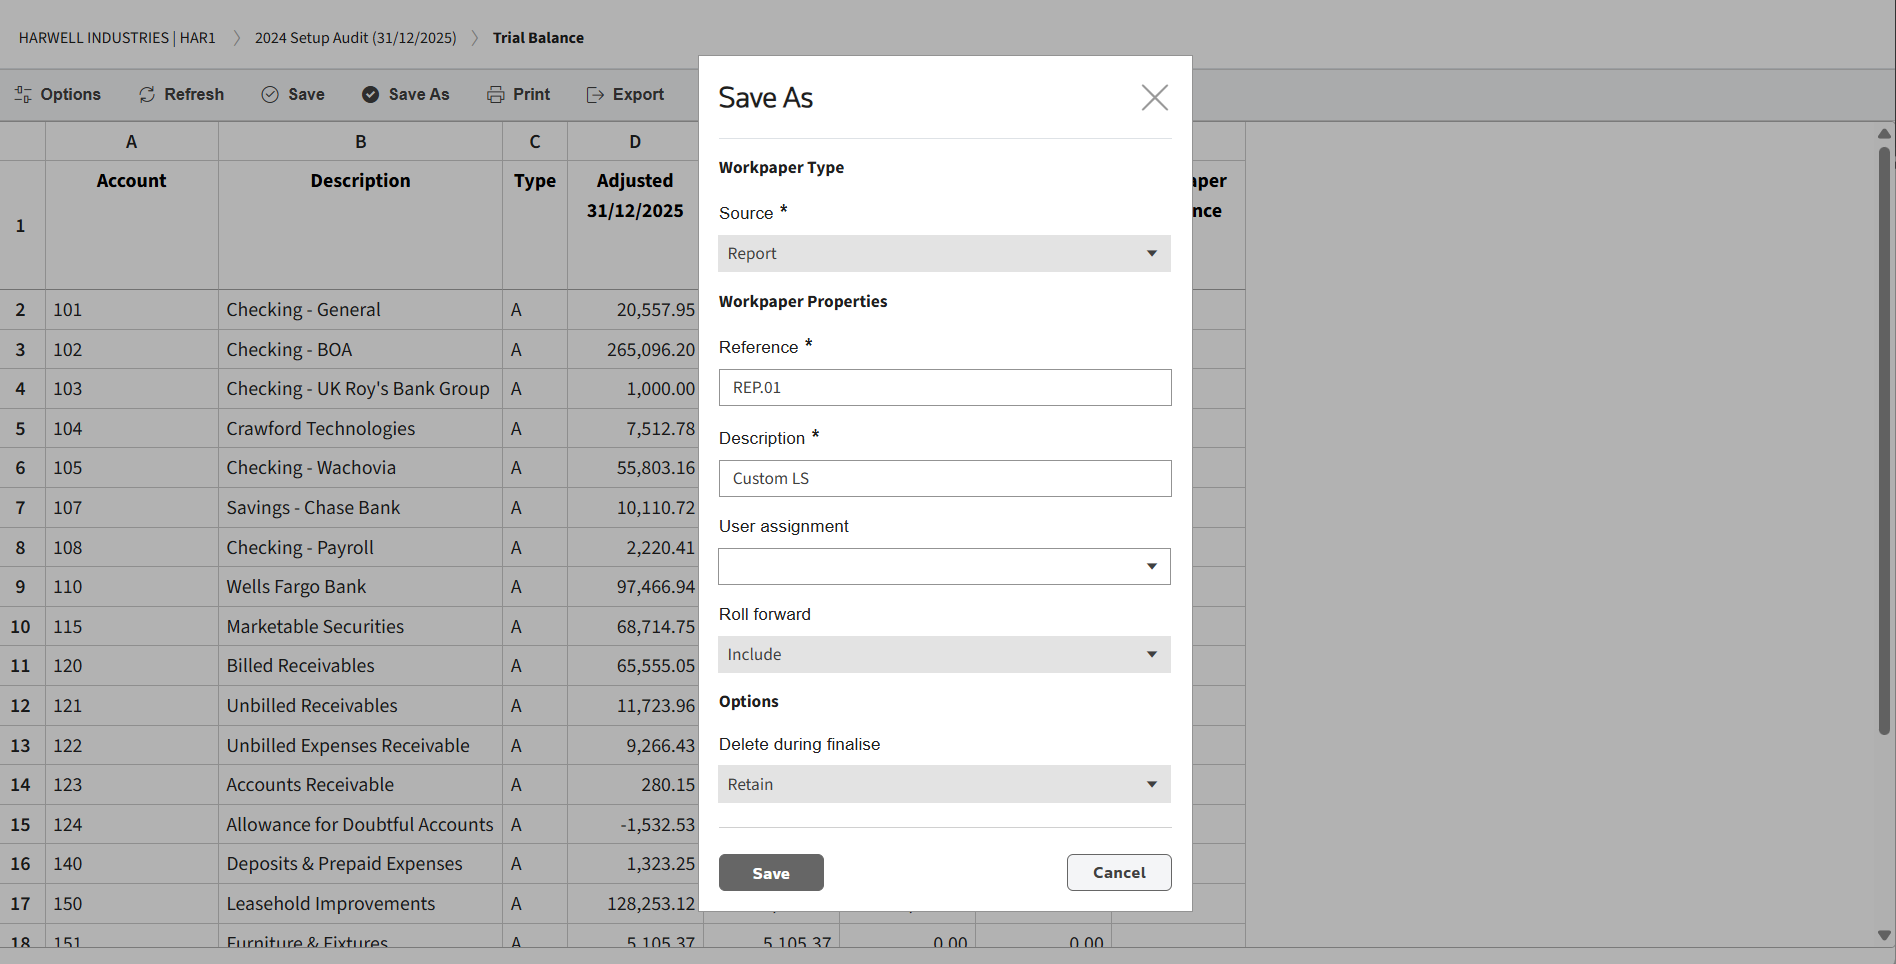
Enter the required information, then click Save.
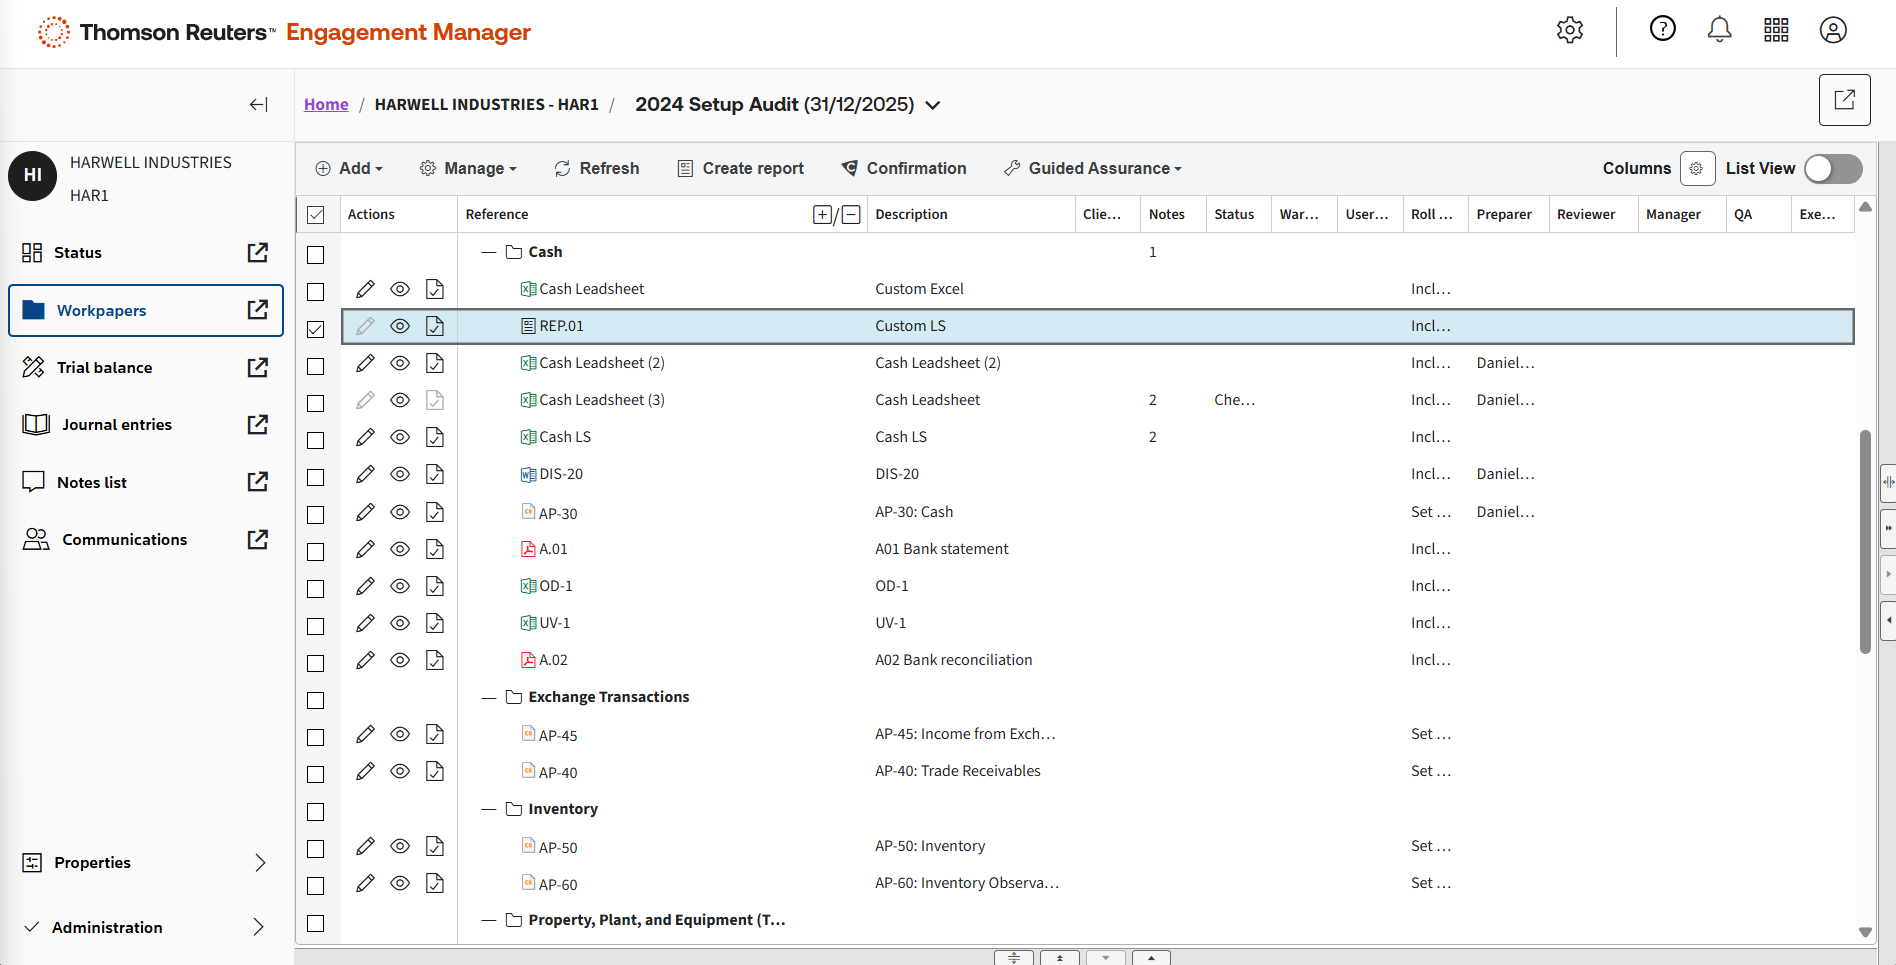
The report has been created.
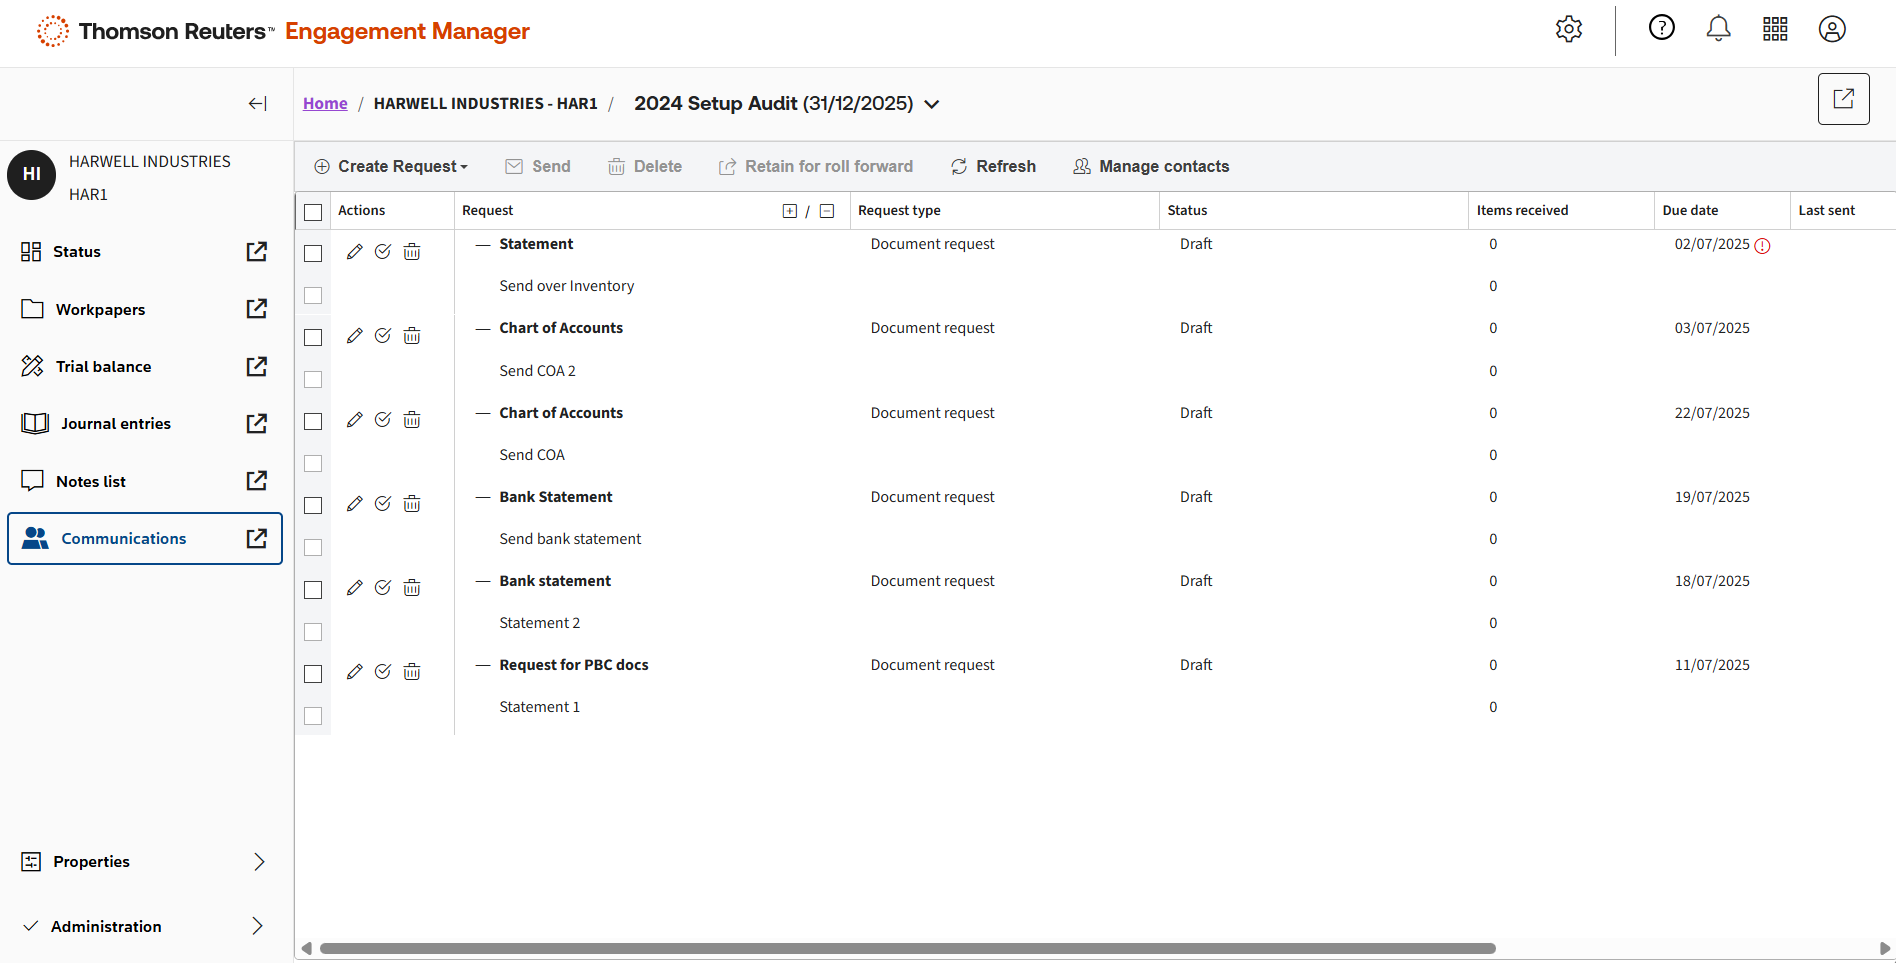
The Communications tabs allow you to request and track all client communications.
Click Create request to begin a client request.
Enter a title for the request, select a client, assign an individual to receive updates, and set a due date.
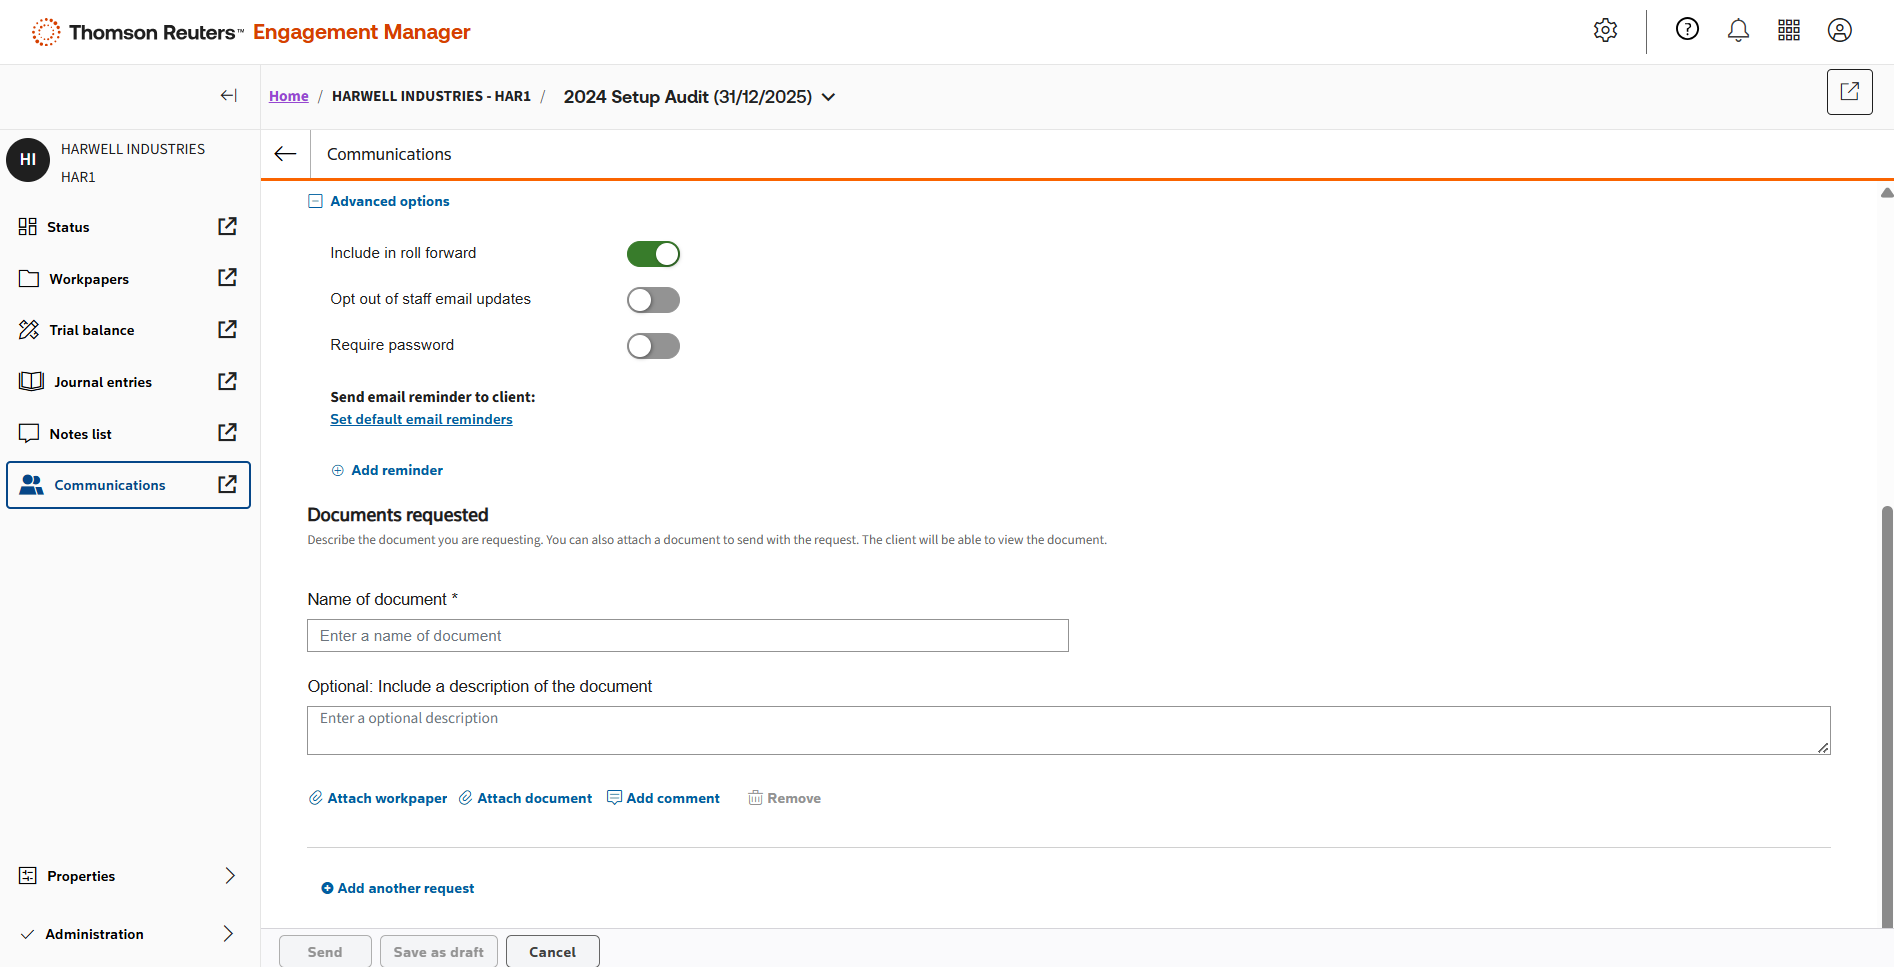
Toggle to include in roll forward.
Click Add reminder to set up email reminders for the client.
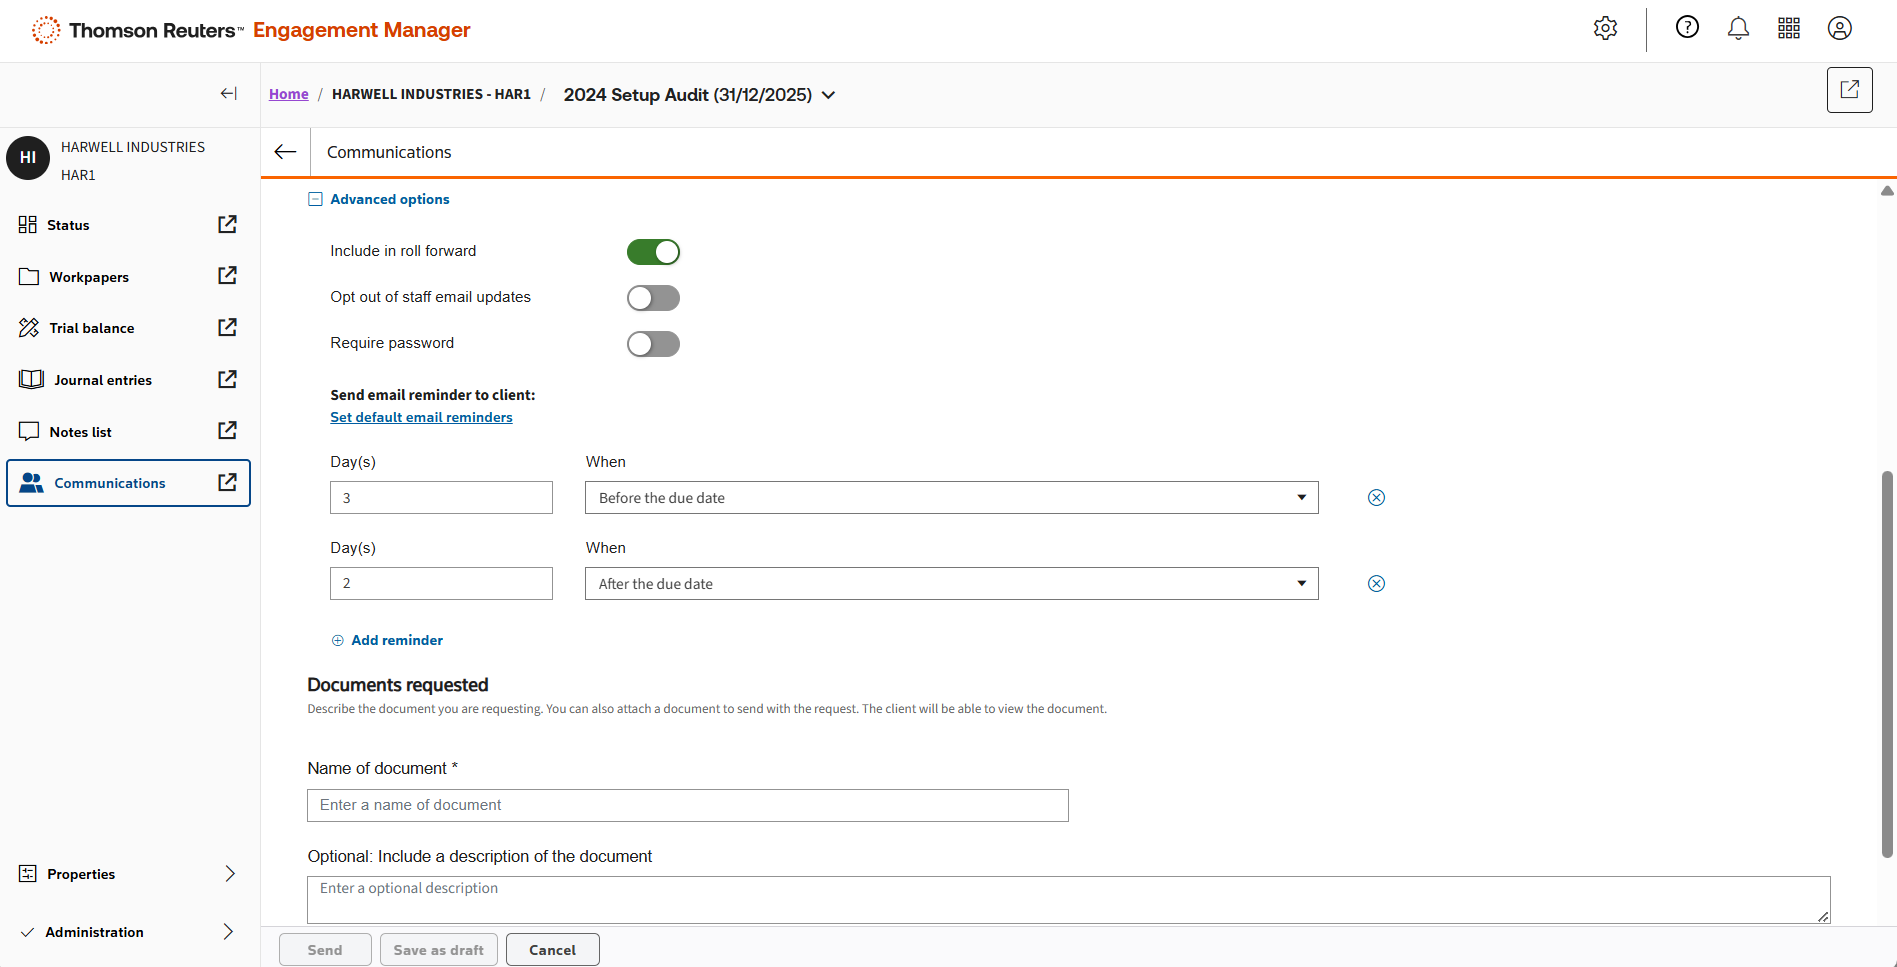
Add the reminders you need before, on, or after the due date.
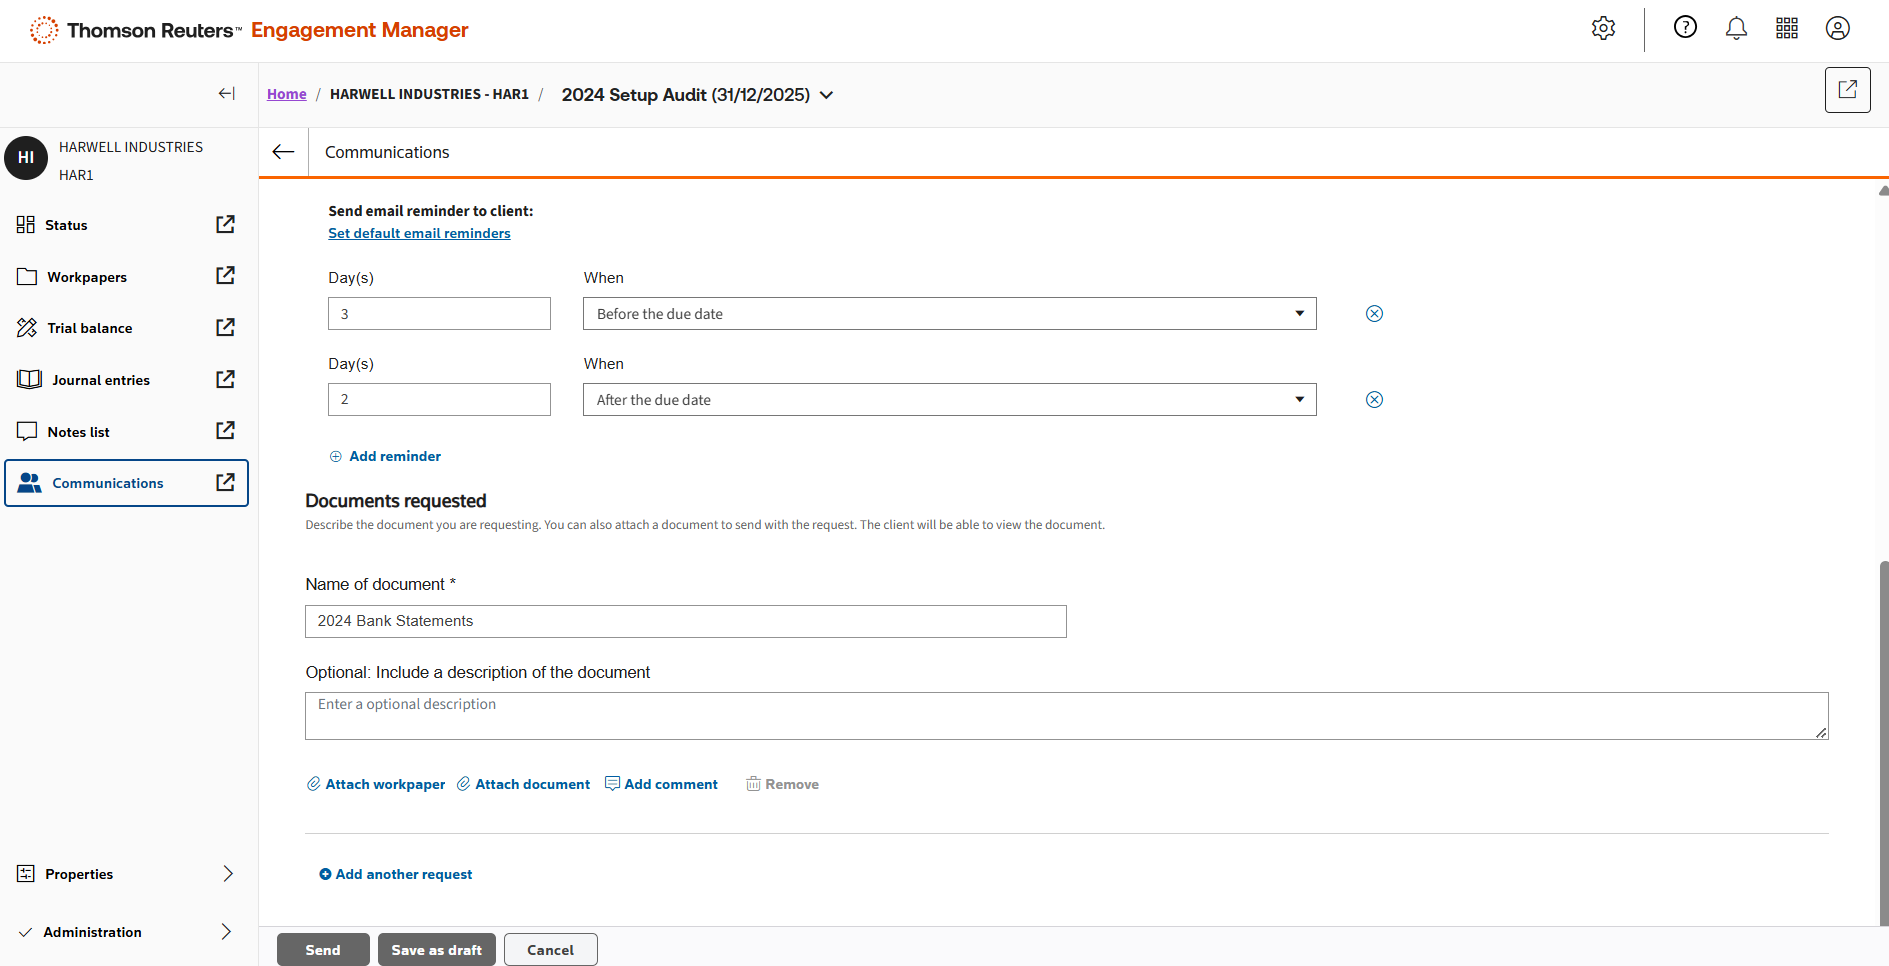
Enter the name of the document requested and, when finished, click Send.
Once received, documents will appear here and can be added to the engagement.
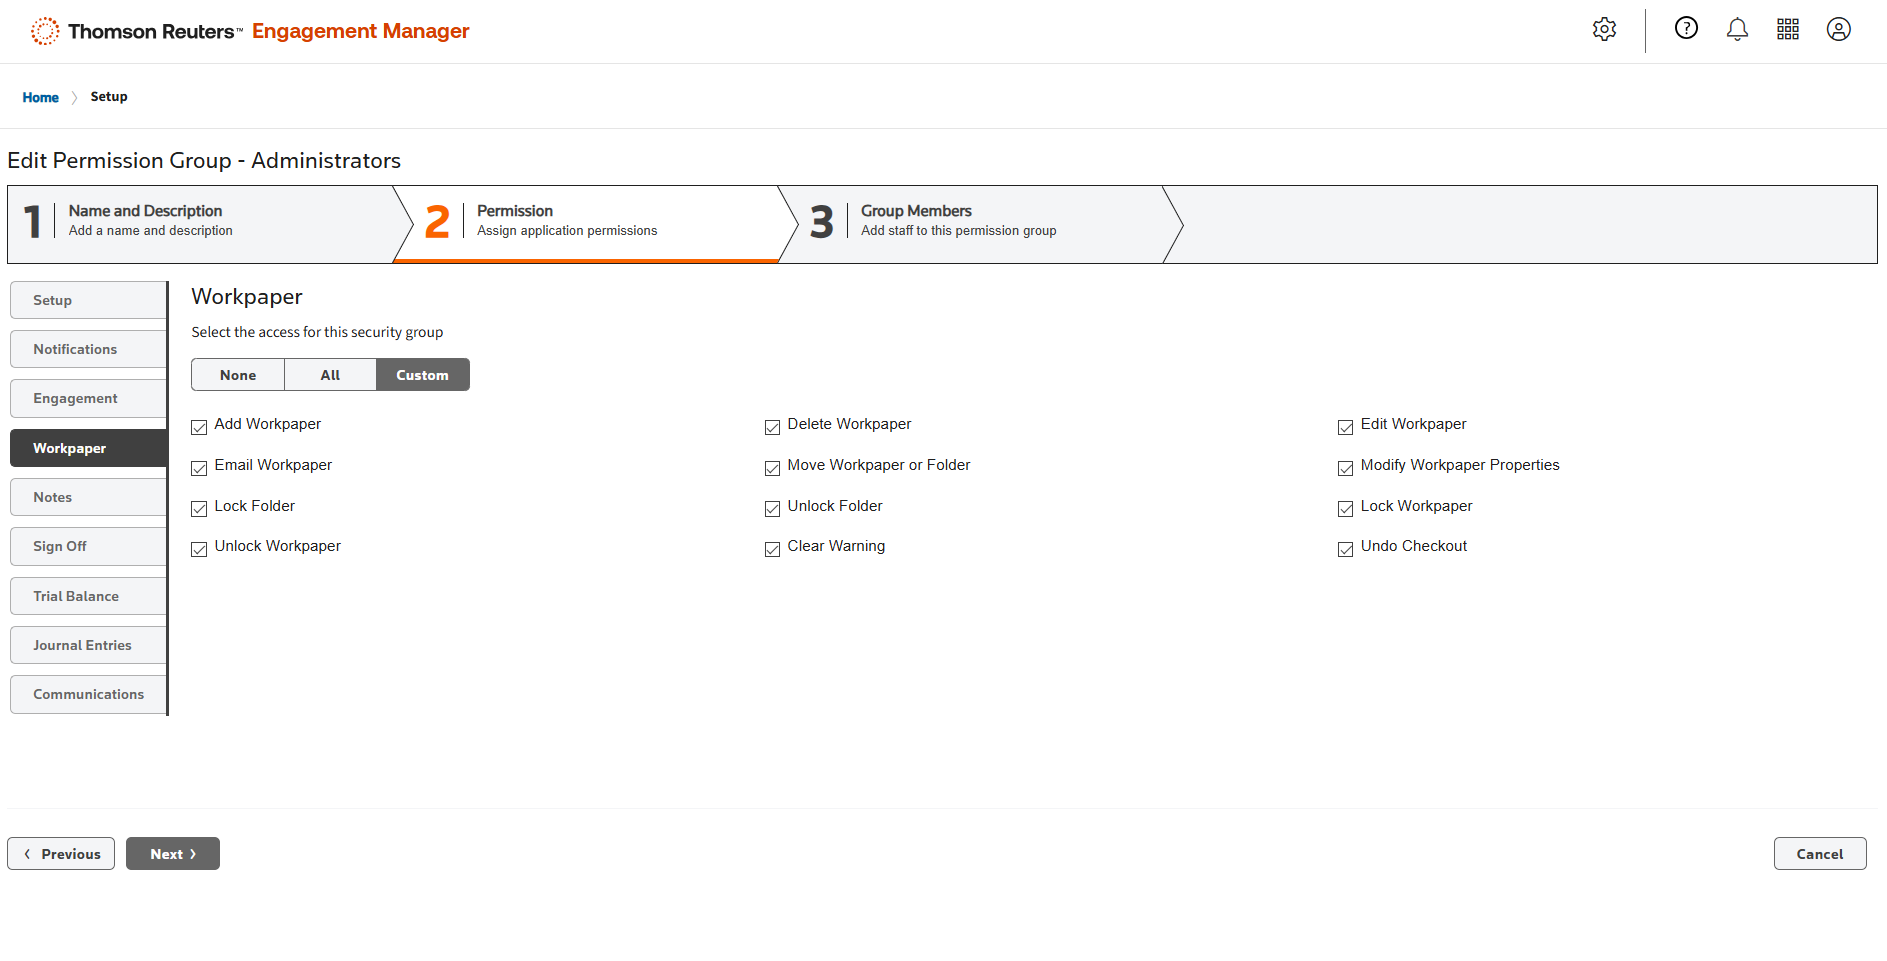
Permission groups All users can be assigned to and organised by permission groups.
Get a one-on-one demonstration If you'd like to see how our solutions can improve your practice, schedule a one-on-one consultation with a product expert.
Contact sales